Dragon 1/72 M-103A1 Heavy Tank
| KIT #: | 7519 |
| PRICE: | $32.00 SRP |
| DECALS: | Three options |
| REVIEWER: | Scott Van Aken |
| NOTES: | New tool kit |

The Heavy Tank M103 served the United States Army and the US Marines during the Cold War. Until the development of the M1 Abrams in the mid-1970s, it was the heaviest and most heavily armed tank in US service. The M103 was manufactured at the Detroit Arsenal Tank Plant and the first units were accepted in 1957. The last M103s were withdrawn from service in 1974. In Europe, the US Army fielded only one battalion of heavy tanks, from January 1958, originally assigned to the 899th Armor, later redesignated the 2d Battalion, 33d Armor. The US Army heavy armor battalion, in 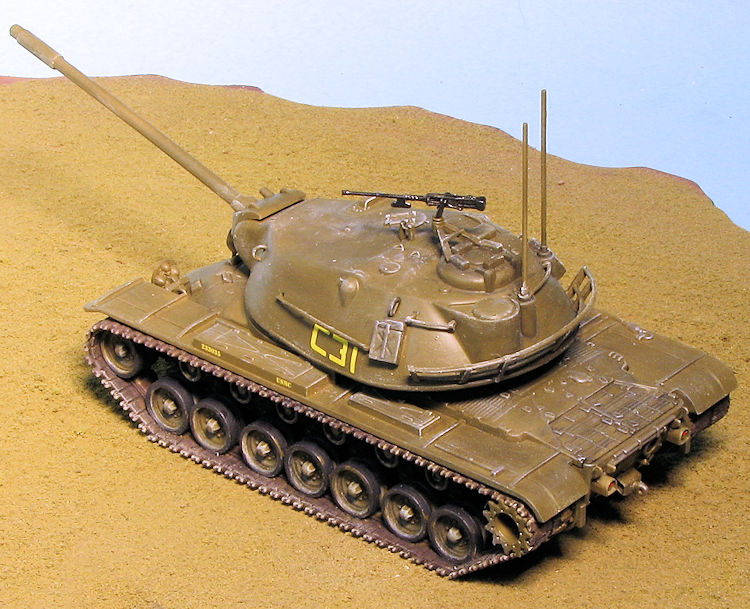 contrast to other armor units, was organized into four tank companies, composed of six platoons each, of which each platoon contained three M103's, for a total of 18 tanks per company. Standard US Army armor battalions at the time had three companies per battalion, each with three five-tank platoons, with 17 tanks per company (two tanks were in headquarters platoon). The US Marine Corps assigned one M103 company to each of its 3 Marine tank battalions, including its Marine reserve units. The M103 was never used in combat.
While the US Army deactivated its heavy armor units with the reception of the new M60 series main battle tanks in 1963, the remaining M103s stayed within the US Marine Corps inventory until they began receiving the M60 series main battle tank. With the disappearance of the heavy tank from US forces came the full acceptance of the main battle tank in 1960 for the US Army, and 1973 for the US Marine Corps. Although the 21st century's M1 Abrams main battle tank utilizes the same caliber of main gun, 120mm, the M103's cannon was a rifled gun firing a separate-loading round, in which the projectile was loaded into the breech, followed by a cartridge case consisting of a brass case, primer, and propellant in a fixed unit. This separate-loading system necessitated the use of two loaders. The only part of the cartridge case consumed during firing was the propellant and a plastic cap on the end of the brass cartridge case. The spent brass cartridege case was ejected after firing. The M1 tank's 120mm main gun is a smooth bore firing a semi-caseless round, ejecting only a back cap of the original loaded round; the bulk of the M1's 120mm shell casing is consumed during firing.
Those who like 1/72 armor have been awaiting this one since the 1/35 version was released nearly two years ago. One nice thing about Dragon is that they will produce many of the 1/35 kits in 1/72 scale, though it may well take a little time for that to happen. No sense letting all that CAD work go to waste!
The result of this is a kit that pretty much defines 'weekend edition'. There are four sprues in grey plastic and a definite dearth of the usual ma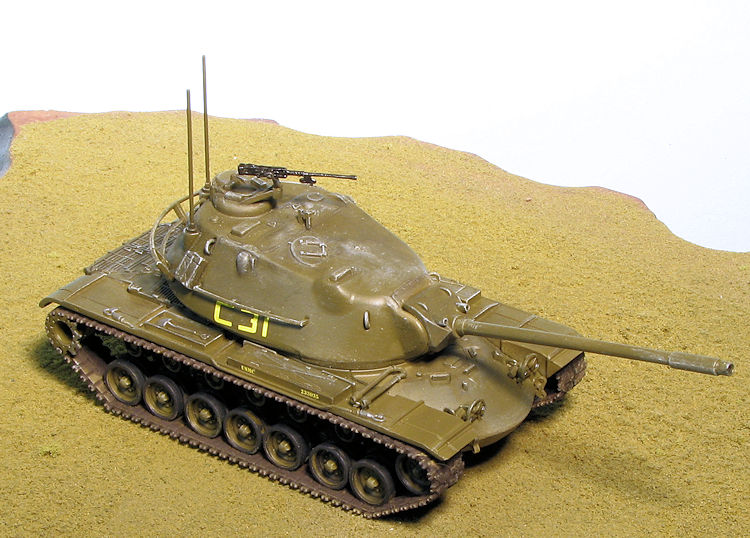 ss of fiddly bits we have all come to expect from Dragon. What few there are, Dragon has put on the turret with a few on the forward hull.
The suspension on each side is a single gang mold. Tracks include molded on return rollers, idler, and road wheels. Only the sprocket is separate. Each side consists of an inner and outer construct that when put together, form a natural seam down the middle of the track links. Though the instructions do not actually show you gluing the upper and lower hull pieces, that is, in fact, what you will do at the start of the build.
There is a full upper turret onto which the various baskets, hand holds vents and the 50 cal machine gun are located. The barrel slides through the mantlet and this is then trapped between upper and lower turret pieces. I imagine that most will glue this in place as that is a lot of plastic to be held up in the air. That's it. At a parts count of 40, it will tax few.
Instructions are simple compared to previous 1/72 armor kits in that there isn't the usual slick paper and color. With all three options being in OD and based in Germany during the late 1950s, there really isn't any need. These are, by the way, the same markings options as provided in the 1/35 kit. Decals are nicely done, all with a tad bit of color in them to help break up all that OD.
 This is actually a very easy kit to build. After gluing the upper and lower hull together I quickly managed to attach the various bits such as the lights, tow hooks and the vent piece. The lights took a bit of fiddling and the forward tow hooks were not the most secure items on the kit.
I then set sights on the turret and after trapping the gun barrel between the upper and lower pieces, went to work on the bits attached to it. This section had a number of ring brackets for lifting the turret as well as hand holds and a bit of a basket on the rear. I found the large side hand holds to have mounting holes that were larger than what is needed. Also attached were a pair of fuel tanks and at the very back, a pair of antenna. The .50 cal machine gun mount is a single piece and the gun itself slides right in.
Then there are the tracks and suspension. All the suspension pieces for each side are a single piece and this actually works out rather well. So does the two piece track/road wheel assembly. Where things get a bit tricky is when it comes to painting. Painting the tracks and road wheels took considerably more time than assembling the kit. Eventually I was able to get it all done. I had prepainted these pieces and later did the road wheels and roller parts with weathered black and the track itself with Trackbase's track color. 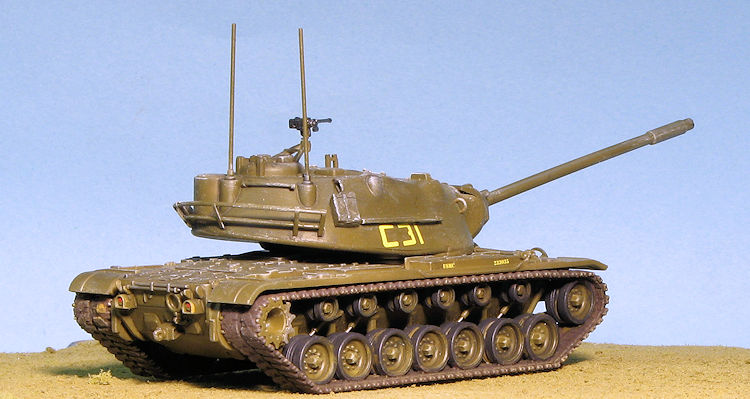 This is a rather thick acrylic paint that works great when brushed on. I've tried to air brush it but it just doesn't seem to like that, only being able to be sprayed when very thin, by which time it takes six or seven coats to get coverage. Trackbase requires a primer and will not stick to bare plastic with any real success.
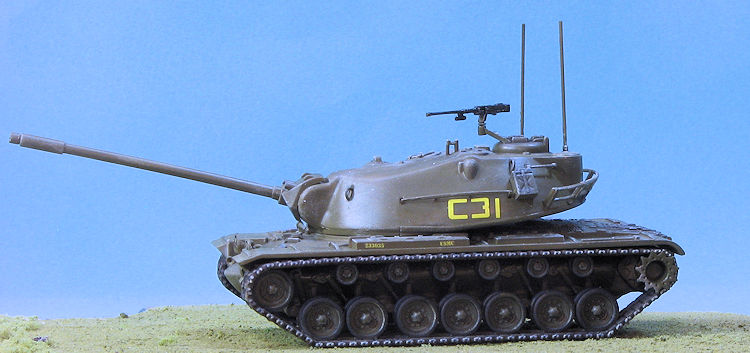
The rest of the tank was painted olive drab using Testors Model Master enamels. I installed the fenders prior to the tracks as it just worked out better that way. Getting the outer sprocket piece to properly mate with the inner section proved to be a bit of a pain, but eventually, everything came together. I had to open the area where the turret attached as it was an extremely tight fit otherwise. I then did a black wash and afterwards dry brushed the model with white and a bit of silver. For markings I used the third option, an 'unidentified unit in Germany; 1959'. This turned out to be a USMC tank. The decals are excellent with the carrier being extremely close to the decal itself. There is no carrier at all in the 'arms' of the C31 markings. I did not gloss coat the tank and just used a bit of decal setting solution on the decals. Aside from the time it took to paint the tracks and road wheels, this could have easily been a weekend build. The fit is fairly good and though there are some small parts and some that are pretty thin (hand holds and rear basket for instance), careful removal and clean-up will result in bits that look quite nice on the finished model. It is a very nice looking subject and a kit that I think you'll enjoy building, especially due to the interesting subject.
http://en.wikipedia.org/wiki/M103_heavy_tankDecember 2015
Copyright ModelingMadness.com
Thanks to www.dragonmodelsusa.com for the review kit. You can find yours at your local retailer.
If you would like your product reviewed fairly and fairly quickly, please contactthe editor or see other details in the Note toContributors.
Back to the Main Page
Back to the Review Index Page