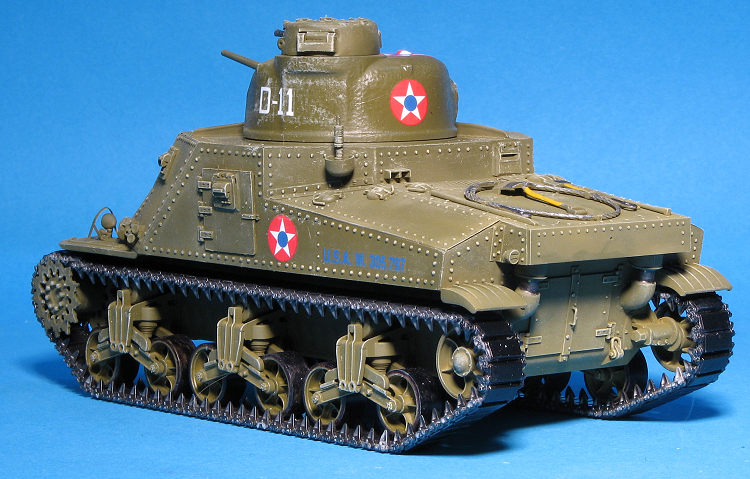
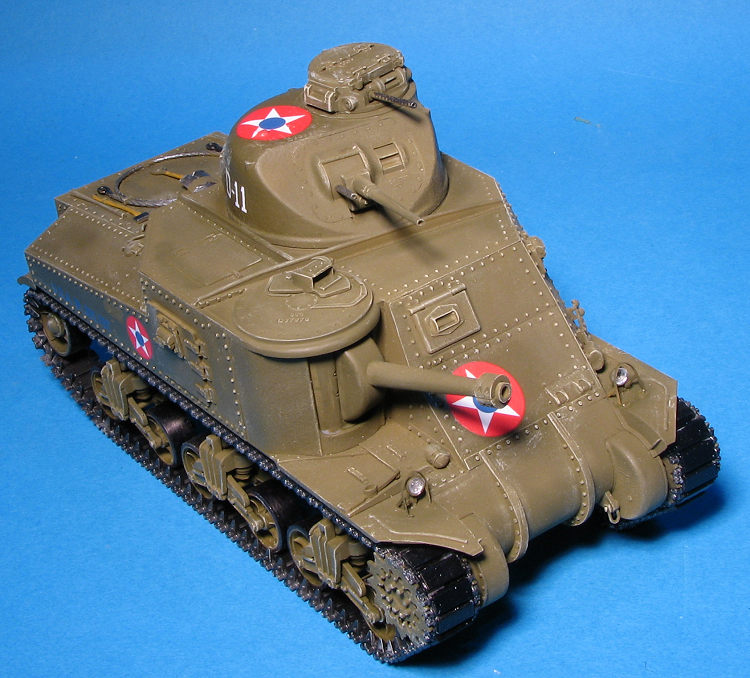
Takom 1/35 M3 Lee (early)
|
KIT #: |
2085 |
|
PRICE: |
$50.00 SRP |
|
DECALS: |
Four options |
|
REVIEWER: |
Scott Van Aken |
|
NOTES: |
2017 new tool kit. |
The M3 Lee, officially Medium Tank, M3, was an American medium tank used
during World War II. In Britain, the tank was called by two names based on the
turret configuration and crew size. Tanks employing US pattern turrets were
called the "Lee", named after Confederate general Robert E. Lee. Variants using
British pattern turrets were known as "Grant," named after Union general Ulysses
S. Grant.
 Design commenced in July 1940, and the first M3s were operational in late
1941. The U.S. Army needed a medium tank armed with a 75mm gun and, coupled with
the United Kingdom's immediate demand for 3,650 medium tanks, the Lee began
production by late 1940. The design was a compromise meant to produce a tank as
soon as possible. The M3 had considerable firepower and good armor, but had
serious drawbacks in its general design and shape, including a high silhouette,
an archaic sponson mounting of the main gun preventing the tank from taking
a hull-down position, riveted construction, and poor off-road performance. They
were extensively used in northern Africa.
Design commenced in July 1940, and the first M3s were operational in late
1941. The U.S. Army needed a medium tank armed with a 75mm gun and, coupled with
the United Kingdom's immediate demand for 3,650 medium tanks, the Lee began
production by late 1940. The design was a compromise meant to produce a tank as
soon as possible. The M3 had considerable firepower and good armor, but had
serious drawbacks in its general design and shape, including a high silhouette,
an archaic sponson mounting of the main gun preventing the tank from taking
a hull-down position, riveted construction, and poor off-road performance. They
were extensively used in northern Africa.
Its overall performance was not satisfactory and the tank was withdrawn from
combat in most theaters as soon as the M4 Sherman tank became available in
larger numbers. In spite of this, it was considered by Hans von Luck (an Oberst (Colonel)
in the Wehrmacht Heer and the author of Panzer Commander) to be superior to the
best German tank at the time of its introduction, the Panzer IV (at least until
the F1 variant).
Despite being replaced elsewhere, the British continued to use M3s in combat
against the Japanese in southeast Asia until 1945.
 I like armor kits. I really do. However, my purchase to completion rate is
about the same as it is for 1/48 multi-engine aircraft; pretty poor. I was
delighted to have won this kit in a raffle as one military kit I built and
really liked was by Takom.
I like armor kits. I really do. However, my purchase to completion rate is
about the same as it is for 1/48 multi-engine aircraft; pretty poor. I was
delighted to have won this kit in a raffle as one military kit I built and
really liked was by Takom.
The detailing is first rate and from the look
of things, they seem to have hit a nice spot between Tamiya and Dragon in
terms of the number of parts and the use of photo etch. There is a p.e.
fret, but it is relatively minimal . Itssems that most of the bits are for
an engine screen, some fasteners, light guards (and there is a form included
around which these are bent), and that seems to be it. I looked through the
instructions several times and have to guess the other bits are for other
kits.
The kit also provides link and length tracks, which I know many modelers
prefer as they are a good compromise between the single piece flexible
tracks and the individual link tracks. Takom has provided a build up form to
help you assemble these prior to installation on the kit. Both of the side
entrance doors and the turret hatch are separate and while there is no
interior, you could easily place figures in them. The 75 mm gun is designed
so it can be elevated and operate thorough its limited azimuth. The upper
turret is installed with the usual bayonet attachment.
 Takom's
instruction books are very well done and while I personally wish the
printing was darker, it isn't that great a detriment. On construction steps
where several subassemblies need to be brought together, each separate
little 'box' has an arrow on one edge to guide you in the proper sequence.
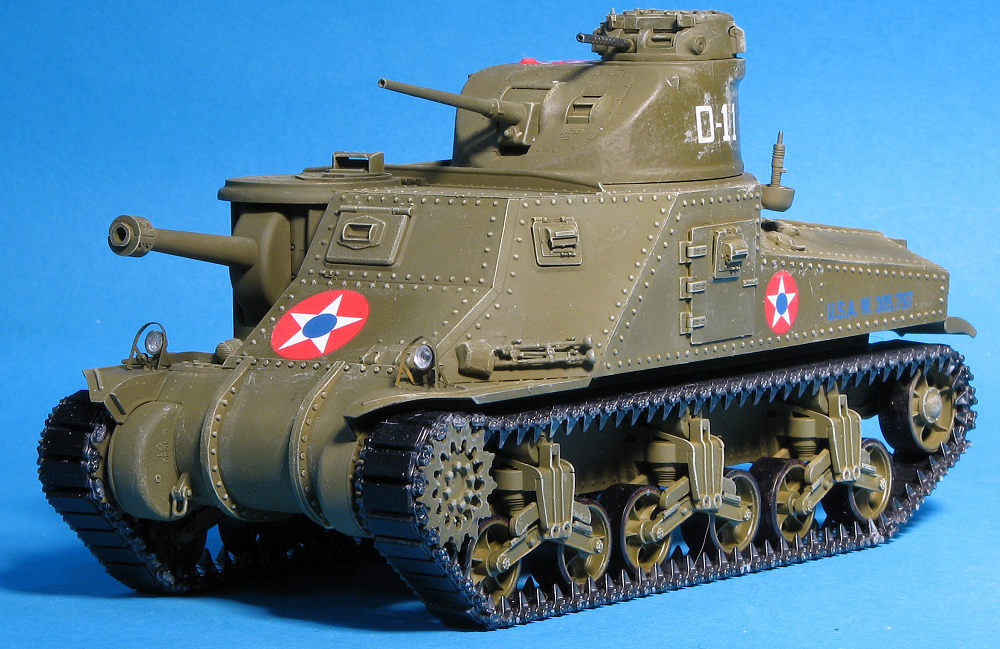
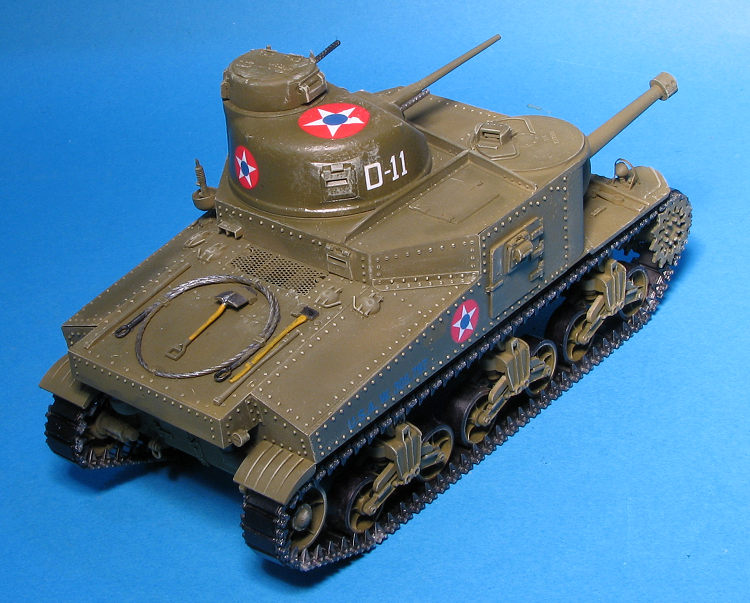
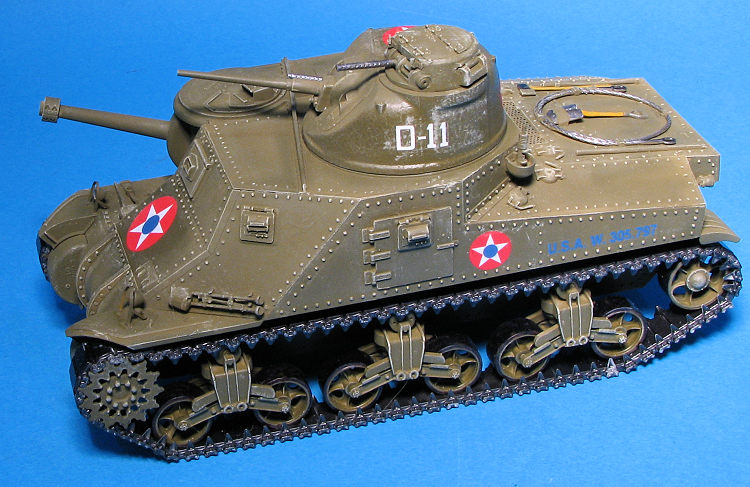
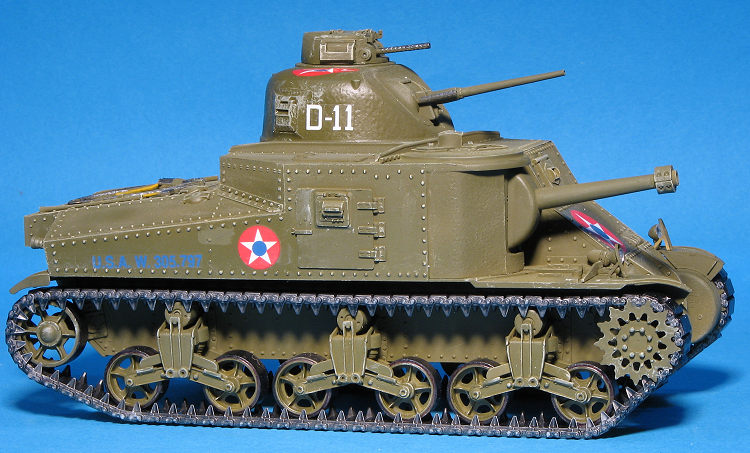
All four markings options are in olive drab (go figure). One is the Soviet
box art tank with all the slogans on it. The other three are US, but oddly,
none of them are markings used in combat. One with the interesting colored
insignia is from the 2 AD when based stateside in 1942. The other two
options are also from 1942 and based at the Desert Warfare Center. Decals
are nicely done and the instructions use Mig color references. Not very
convenient for most of us.
Takom's
instruction books are very well done and while I personally wish the
printing was darker, it isn't that great a detriment. On construction steps
where several subassemblies need to be brought together, each separate
little 'box' has an arrow on one edge to guide you in the proper sequence.
All four markings options are in olive drab (go figure). One is the Soviet
box art tank with all the slogans on it. The other three are US, but oddly,
none of them are markings used in combat. One with the interesting colored
insignia is from the 2 AD when based stateside in 1942. The other two
options are also from 1942 and based at the Desert Warfare Center. Decals
are nicely done and the instructions use Mig color references. Not very
convenient for most of us.
I knew that if I wanted to actually complete this one, I had to start right
away. So, recalling how nice their siege mortar was, I got to work. Not
surprising is that the first part of the build was the suspension and parts
of the hull. I found that the fit is quite close so one has to be sure to
remove all the sprue stubs as they will prevent a proper fit.
I also found that parts of the suspension pieces had some rather
inconvenient ejector towers on them that had to be removed. It
 is things like this that keep a
company out of the top tier. While these were on the inside of the
suspension housings, they will be visible to the flashlight crowd at
contests. Since I don't do contests any more, I simply removed them and
scraped the area down a bit. I continued to build up each suspension member
until it became time to attach the road wheels. Since I don't grunge up
kits, these had to be painted prior to installation. Same with the tracks.
is things like this that keep a
company out of the top tier. While these were on the inside of the
suspension housings, they will be visible to the flashlight crowd at
contests. Since I don't do contests any more, I simply removed them and
scraped the area down a bit. I continued to build up each suspension member
until it became time to attach the road wheels. Since I don't grunge up
kits, these had to be painted prior to installation. Same with the tracks.
Before applying the first paint, I built up more of the upper hull. I will
caution you to be sure to attach the inner sections to the front fenders the
right way around. I initially did not and wondered why it didn't fit. Once I
swapped them around, no problem. Once I had 'most' of the lower hull bits
painted, I prepainted the road wheels and their attachment areas. Now
painting the rubber bits is always a pain without masks. It was suggested
that I use Sharpie pens to do the rubber. So here is how that turned
 out.
First an ultrafine was used to get the area close to the rim. Then a wider
one was used to do the rest. Sharpies don't cover as well as paint so needed
not only a steady hand to get the rest of the sidewall, but a couple of
coats to keep the rubber from looking streaky. It is time consuming but has
the benefit of being more precise near the rim than most of us can do with a
brush. It also stinks.
out.
First an ultrafine was used to get the area close to the rim. Then a wider
one was used to do the rest. Sharpies don't cover as well as paint so needed
not only a steady hand to get the rest of the sidewall, but a couple of
coats to keep the rubber from looking streaky. It is time consuming but has
the benefit of being more precise near the rim than most of us can do with a
brush. It also stinks.
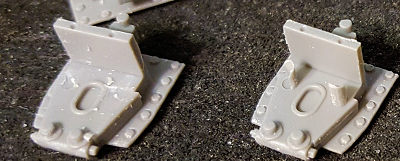
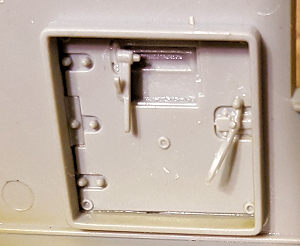
Meanwhile, I managed to break off the handles that fit above both doors so
scraped that smooth. The doors were then added. No need to do any of the
interior bits if you are going to keep the doors closed. I did one just to
see what it was like, and the pieces are very small and look to be easy to
lose. Same for the brackets for the shovel. An additional application of OD
was made after those items were installed. I also painted the idler and
sprocket.
Moving along, I went to the roof that holds the main gun. This has pieces
that need to be bent prior to attachment. You also need to do the hot knife
bit to get the main gun to move side to side along with the sight on the
other side. I chose to use the counter-weight on the gun as it seems to have
been used as much as not. I also drilled out the barrels of the machine gun
and smaller cannon.
 Eventually I got all the turret and roof pieces installed. I also installed
the front and rear fender pieces even though the instructions want you to
attach those later. I found out that this made attaching the track bits more
difficult. I also found that installing the head and tail lights was a bit
of a pain as the bits are so small and the attachment points are equally
tiny. Once I got all the various pieces attached to the hull and turret,
these items were painted.
Eventually I got all the turret and roof pieces installed. I also installed
the front and rear fender pieces even though the instructions want you to
attach those later. I found out that this made attaching the track bits more
difficult. I also found that installing the head and tail lights was a bit
of a pain as the bits are so small and the attachment points are equally
tiny. Once I got all the various pieces attached to the hull and turret,
these items were painted.
With everything painted (well, most of it), I put together the road wheel
assemblies. They can be simply snapped in place though a bit of bending is
required on the outer attachment areas to get them into place. These are
keyed to interlock in the middle so keep that in mind. Now that the road
wheels were installed it was time for the tracks.
I had hoped that link and length tracks would be pretty easy to install.
Well, they are not. Part of the issue is that all the suspension pieces
move. This makes things very difficult and when you think of it is a bit
silly as the lower track piece is not flexible to take advantage of a
moveable suspension. It was a bit of a fight to get everything in place.
This is the sort of thing where flexible tracks would have been preferred.
 With that
out of the way (and it won't win any awards as it causes the tank to rock),
I sprayed a few areas with gloss clear to attach the decals. These did not
work all that great with setting solutions and it took not only several
applications of the hot stuff (Solvaset and Mr Mark Softer), but I also had
to press some of them down over details as they did not 'suck down' on their
own. This was followed by another coat of matte clear.
With that
out of the way (and it won't win any awards as it causes the tank to rock),
I sprayed a few areas with gloss clear to attach the decals. These did not
work all that great with setting solutions and it took not only several
applications of the hot stuff (Solvaset and Mr Mark Softer), but I also had
to press some of them down over details as they did not 'suck down' on their
own. This was followed by another coat of matte clear.
Finally, the last bits were attached. This is basically the pioneer tools
along with the head light guards. I truly suck as bending photo etch and the
guide was only partially useful. I did paint the inside of the light housing
with liquid chrome before attaching the clear bits and the p.e. guards. The
rest of the pioneer tools were painted and attached or attached and painted.
I then dry brushed the entire model with sand to bring out details.
I am glad that I built it. Despite all the issues I had with the
tracks, it is probably due to a lack of experience with these sorts of
things. The general fit of the kit was very good even though I did find it a
bit on the fussy side to build. I don't know how this compares to the Tamiya
and other Lee kits, but then I don't build a lot of armor. I would think
that those with experience in the genre will be quite pleased with this one.
https://en.wikipedia.org/wiki/M3_Lee
2 February 2018
Thanks to Gateway IPMS for allowing me to win this in a
raffle.
If you would like your product reviewed fairly and fairly quickly, please
contact
the editor
or see other details in the
Note to
Contributors.
Back to the Main Page
Back to the Review Index Page
Back to the Previews Index Page