| KIT #: | 32507 |
| PRICE: | $23.98 MSRP |
| DECALS: | Three options |
| REVIEWER: | Scott Van Aken |
| NOTES: | Metal chassis |
| BACKGROUND |
Ya wanna know about the StuG III, then you have two options. One is to do an internet search, while the other is to check out the preview, which will also show you what comes in the box. What a deal!
 I should also mention that this is the first tracked vehicle kit I've built in nearly 20 years. The last one was back in 1986 when I built an Italeri M48 Patton tank. Since then, it has been either soft skins or artillery. This may seem a bit odd to many of you who know what an eclectic modeler I am. I also like NASCAR racers, but haven't built one of those in over a decade.
You see, both of these kit types have an inordinate amount of fussy work involved in their construction. For the NASCAR, it is cleaning up the roll cage. For tracked vehicles, it is cleaning up and painting road wheels and return rollers. To that you can add assembling tracks. I've never done anything other than the 'rubber band' type and that is something that is not included in this kit, which does sectional track.
| CONSTRUCTION |
Starting things off, I actually followed the instructions (for a while). This involved attaching various bits to the metal hull. Superglue is necessary for this to get a good fit. Once that was done, I sprayed the whole deal with Panzer Grey (all three options are this shade). Then I skipped several bits as Tamiya would have you assemble the running gear at this time. The reason I didn't do this right away is because it would make painting the hull quite difficult, having to mask all the running gear. By building the upper portion and not attaching it until the very end, one is able to paint both parts separately and not sweat masking.
So, I started removing bits from sprues and attaching them to the hull. Nothing really very difficult about it as the fit of the parts are superb, though you do have to spend time cleaning up everything. As I thought, the cleaning and painting of the rollers and road wheels was rather tedious. It also didn't help that the Gunze Tire Black I was using was nearly the same shade as the Humbrol Panzer Grey!
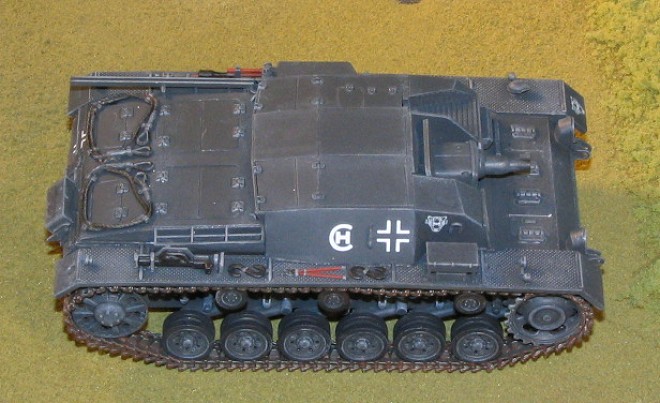 There are no parts that are designed to roll, swivel or tilt. You can, with great effort, move the barrel up or down, but then, only a tiny bit. I also left off two of the hatches. You see, the upper body is held to the hull with screws and these screw access holes are covered by hatches.
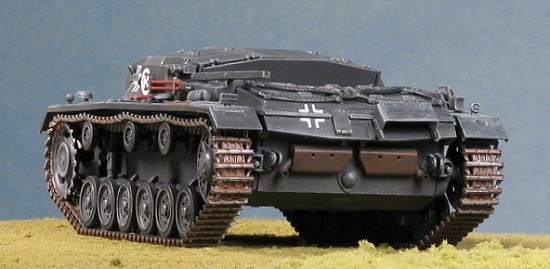
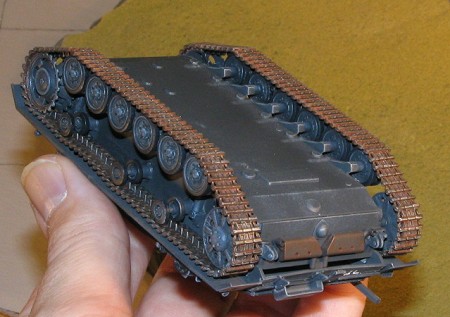
With all the upper bits in place, I turned my attention to the running gear. First of all, I glued all the wheel and roller halves. The rollers were then glued to the stubs on the metal hull. The drive sprockets were pushed on (these have little hold caps), and the idler wheel was carefully glued. This last took a bit to get properly lined up. I then pushed on all the road wheels. Yes, I didn't glue them as they held on to their mounting pegs quite well. Later, I may put a drop of super glue on them just to be sure, but they didn't really seem to need any help.
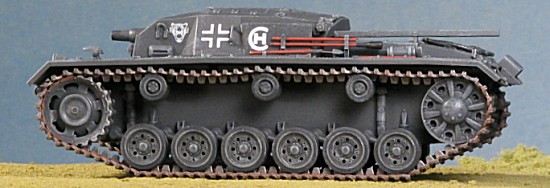
The last bits were the tracks. The upper section of each side has some sag already built into it, which is a great idea. I painted all the track pieces prior to assembly. Then I cut off the bits needed and glued them together. Fit is really super and while the glue was still viscous, I was able to move things around a bit to get a good fit. The tracks are glued to each other, but not to any of the running gear. This seems to work out ok at this time, though I'm sure that later I'll have to make things a bit more secure.
| COLORS & MARKINGS |
 The painting bit is easy. Everything except the tracks was painted Humbrol Panzer Grey. The rubber bits were painted Gunze Tire Black and the tracks with Alclad II Steel. I put a coat or two of Rustall over the exhaust.
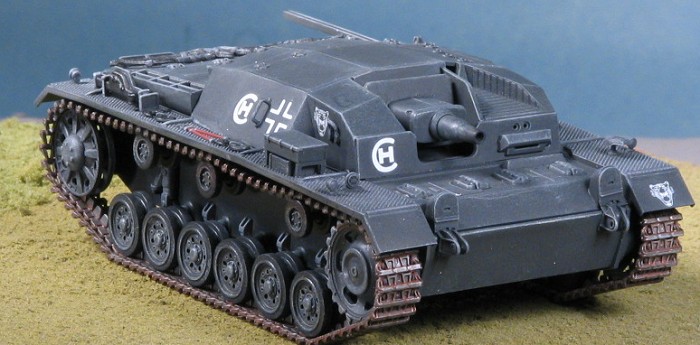
Then a clear coat was applied which darkened things up considerably. I picked the Crimea 1942 markings as I didn't want to festoon the vehicle with death's heads. Besides, the tigers are sort of cool. The Tamiya decals went on well and I had no trouble with the Champ decal setting solution I used. There were a number of markings for which I could find no reference on the instructions. I did have some cool kill markings on the barrel, but those went away when I accidentally touched the barrel at the wrong time. Such is life.
| FINAL CONSTRUCTION |
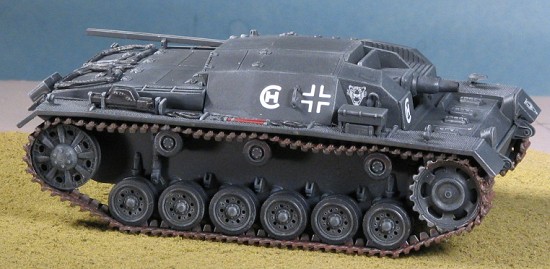 Really there is almost nothing in the final construction. I attached the body to the lower hull with the two screws, glued on the appropriate hatches and then started to do some weathering. Basically, what I did was to dry brush things with neutral grey to bring out details. Then I went over things a bit more using a silver pencil. Not so much as to do chipping and such, but I found it worked great in bringing out details even more. Various pieces were painted with Testors Gunmetal Metallizer and the wooden handles were painted with a Vallejo auburn shade as the instructions called for a red-brown on those. More Rustall was applied to the tracks as they looked just too clean with the bare steel. Several applications were given as I wanted something to show. I'm not really good at weathering things so instead of going for the mud-bogging look that I see so often, I went with light wear. I'm sure their crews washed these things from time to time. The last thing was some black pastels on the exhaust and around the front of the gun barrel. Overall, I like the way things turned out as all that monotone is gone. I again sprayed on a matte clear to seal things in place.
| CONCLUSIONS |
 Once again, Tamiya has shown that it has the best engineered kits around. I found this one to be fun to build and it didn't take an age to complete. Everything fit fairly well and I was quite impressed with how the tracks go together. If you recall, they are glued only to themselves. I like it so much, that I may just well do another in the near future. It was a great experience and I'm sure that if you try one, you'll like it as well.
This kit is thanks to me and my personal like for vehicles like this.
October 2005
#1382 in a series
Copyright ModelingMadness.com. All rights reserved.
If you would like your product reviewed fairly and fairly quickly, please contact the editor or see other details in the Note to Contributors.