| KIT #: | 504 |
| PRICE: | $18.45 from www.scale-model-kits.com |
| DECALS: | Five options |
| REVIEWER: | Scott Van Aken |
| NOTES: | Includes photo etch fret |
| HISTORY |
 In the summer of 1941, Soviet industry was disrupted by the rapid advance of the German army. This was as much due to moving the various industrial plants out of reach as it was to them being overrun. One of the main shortages caused by this was a lack of stamped steel to use on the then current production of the Ford Model AA truck. This truck, dating from the mid 1920s, had been upgraded by GAZ from the GAZ-AA to the current production GAZ-MM (basically more horsepower).
Anyway, this lack of stamped steel components resulted in many portions of the truck being made of wood, and this included the cab and fenders. It also saw the use of canvas in several applications for the roof and back of the cab. Some trucks were built without doors, something that made operation in winter something to be avoided. Of course, the shortage was soon overcome and the GAZ-MM continued in production until 1950, when it was felt that a 1920s truck might be a tad obsolete.
| THE KIT |
Nice to see UM bringing 1/48 Soviet subjects to us. Over the years, UM has greatly improved on the quality of its kits and this one is very nice. They are still to many, to be considered short run but if so, then they are at the upper edge of that description. The green plastic sprues are well done though not surprisingly, one will fine a tad of flash on a few parts, a bit of mold mis-alignment  on others, a sink area or two on the thicker parts, and perhaps some ejector pin marks that will need attention. I also found some parts on the sprues had a coating of mold release oil, so the prudent will wash the sprues prior to construction.
There are four green sprues, a bag that includes vinyl tires, the small etched fret and a sheet of acetate with the headlights and windows outlined on it (also not shown). The larger parts have a slightly pebbly finish to them. This is not carried over to the rest of the bits and pieces. Though not consisting of a lot of bits, there are some that are not required for this particular build. The kit comes with a complete engine and it is on this that quite a bit of the photo etch is used.
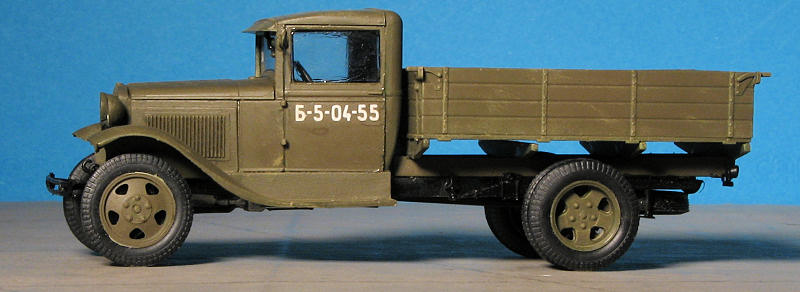
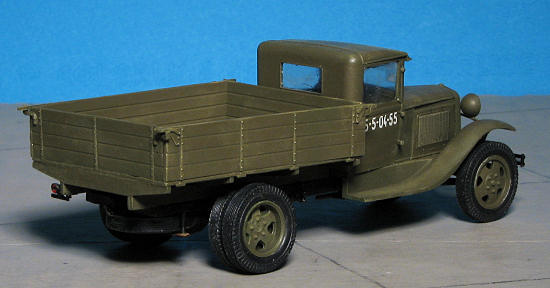
I personally appreciate the separate vinyl tires as it means no problems painting the wheels. The tires will just slip in place once that is done. Some carving and trimming will be needed during constructionand this is clearly shown in the instructions. One will also have to drill a couple of holes, but the location is clearly shown. The truck is basically a flat-bed with wooden slats for the side and rear. There is a tarp for the top of this. However, it is a one-piece top with no front or rear opening and no representation of the flaps that will fit in those openings, so most will probably build it without that part.
Instructions are very well done with nicely drawn instruction steps. Paint is Humbrol and generic references. There are decals for five vehicles, all in overall olive drab/green. With one exception, they are all simply different ID numbers on the sides of the door and tailgate. That one exception is a captured vehicle with a large white swastika on the roof. Decals appear to be well done and since they are on flat areas, should prove to be no problem.
| CONSTRUCTION |
The first thing I did was to put into my mind that this should be treated like a short run kit. A very nice short run kit, but one that would need attention paid to it during construction with lots of test fitting prior to doing any gluing. Then I started looking for subassemblies and found three of them. One was the chassis so I started assembling that. While it is somewhat complete, there 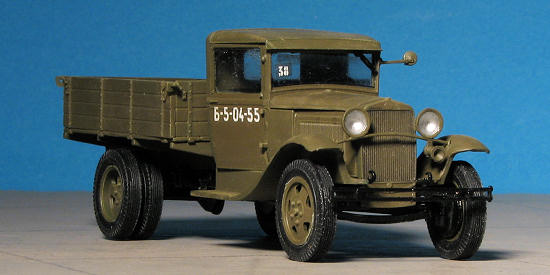 are a number of sprue gates that need to be cleaned up. There are two rear cross-members to add. One fits in between the rails and while the drawing shows a clear support area with notches in it, the kit part is smooth and square. This sort of sucks as that area with the notches is to locate the rear springs. Means that the mounting tabs on the rear leaf springs will have to be cut off and the springs fit as best as one can. At the very rear, the main assembly drawing for a cross brace shows it being butt fit to the very end of the chassis rail. This is incorrect, It should be installed inside the frame rails up against some tabs. Again, these tabs are non-existent so on just has to give it a good guess.
Much of the photo etch fret is expended on the chassis. There are two small rear braces, the braces for the front bumper and a box for which I have no clue as to its purpose. Thanks to the soft brass, these are easy to bend and the front bumper braces have a form you can use to get them properly bent.
Meanwhile, I built up the engine and the front suspension. I left off the wheels and tires on these as all the frame and suspension bits are to be painted black and I felt the additional weight of the tires would be detrimental to getting the parts together. The front wheels are supposed to be built so they can spin and turn. Thanks to the very small and fragile parts, I glued it all solid. The rear axle housing also contains many small parts and is supposed to be able to be built so the rear wheels turn. Again, glued solid. One thing I found is that there were times when the parts in the drawing did not match the parts on the sprues. The rear axle housing is one of these as it shows it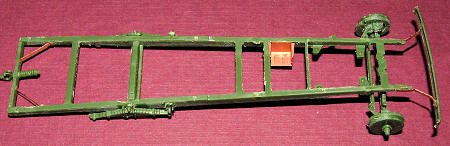 with but one drive shaft entry point, while the kit parts have two; one on each side.
With the front axle dry and the chassis done, I glued the front axle assembly to the chassis. Once that was finished, the chassis was painted black as was the rear end assembly. The motor was built up a bit more with the addition of the exhaust header and the belt section in the front. This was then glued to the chassis after removing a cross brace just behind the mounts. The instructions do not mention having to cut this away, though it is not shown in the instructions. The cargo box was then assembled. It fits fairly well, but it is by no means Tamiya quality fit. I then headed for the paint shop to pre-paint the various body pieces.
| COLORS & MARKINGS |
The entire body is to be painted an olive drab. I chose Polly Scale AN 613 OD as the basis for this. Though an acrylic, it sprays on well and when one has to touch it up with a brush, it blends in without any problems. I basically painted all the body parts while still on the sprue. This included the wheels and a few other smaller bits and pieces. When all that was dry, I returned to the building part of things.
| MORE CONSTRUCTION |
With the engine attached, I trimmed the forward fenders/floor section as shown in the instructions. Cut away more than what is shown as you'll never get it to fit over the exhaust header if you don't. With the fender/floor section glued in place, I continued adding bits to the engine as indicated in the instructions. Some of these are quite small and some don't fit particularly well. The exhaust and muffler piece is a butt join and the instructions are rather vague on precisely where this fits so take your best shot.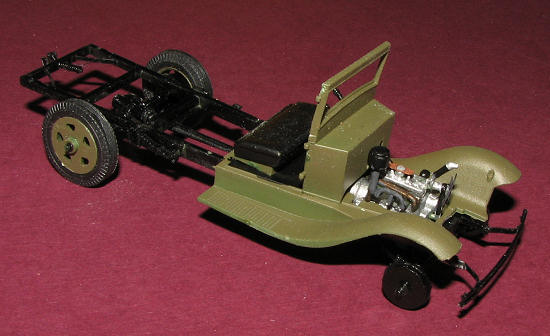 The V brace to the front axle was attached as was the rear axle housing and the drive shaft. The cut-out in the frame for the drive shaft had to be enlarged. Thanks to my poor location of the rear spring pieces, the rear axle housing attachment isn't as good as it could be, but since it is all black anyway, it won't be too visible.
With all the engine bits in place and a decent chassis fit, I went to work on the interior. The two piece seat was built up and painted. A hole has to be drilled for the hand brake. Two holes are shown needing to be done, but the one for the gear shift is already in place. The cowling section needs to have the instrument panel piece glued in as well as two tiny foot pedals. Gluing in the cowling piece was easy enough as was threading the steering column. I then cut out the acetate windscreen as I knew I'd not be able to get it installed later. At this time, I glued in the acetate for the doors and the rear window. This was held in place by clear gloss paint. I found that the acetate pieces were not precisely keyed to the openings. The front and rear pieces were too large and the doors too small. Thankfully, clear paint will do an admirable of covering the gaps for the latter.
Then came time to attach the roof and rear of the cab. As the forward piece was a bit bent, I glued the roof in place first and let it thoroughly dry. Then the upper rear section was attached and also left to dry. I then 'bent' the assembly into place on the back and it seems the whole thing squared up. I'll find out when I try to attach the doors.
 Moving to the front. I cemented the engine side panels and nose together. Fit is fair, but not tight. I noticed that the air cleaner piece wouldn't allow the right side panel to fit properly so cut it off. It was also at a height that would not allow the upper hood/cowl section to fit flat. That piece was too long so some sanding on the front and rear of it as well as a bit on the radiator section finally got it to fit tightly. I also sanded on the upper section of the side panels to ensure a proper fit.
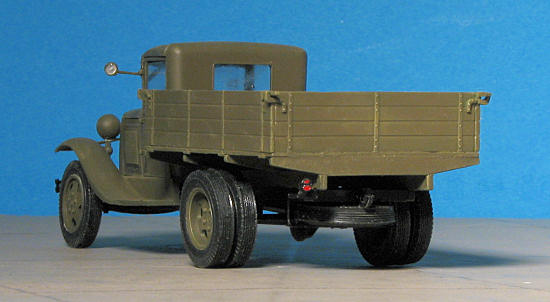
On the back, I glued on the two bed rails atop the frame as indicated in the instructions. On the front, the headlights butt fit onto a precariously thin cross member that also accepts the horn. I'm amazed that they actually stayed in place once glued. This assembly was fit onto the vehicle in front of the radiator. Now it was time for the doors. They are VERY tight at the rear and bottom, to the point that I couldn't get one all the way in. The forward section, however, left rather large gaps that had to be filled with clear paint then repainted. Thankfully, the Polly Scale acrylic I used is the same shade whether sprayed or brush painted.
Back at the rear, I installed the four bed cross members to the truck frame after attaching the near diaphanous license plate and rear light assembly. The instructions would have you glue these cross members to the bed first, but I felt I was inviting disaster if I did so. Fortun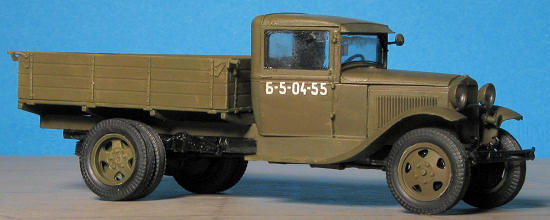 ately, it all worked out without any major trauma, though it is a close fit.
This left a number of other bits to attach such as the front wheels and additional rear ones. Super glue took care of it. There is a rear view mirror assembly which consists of a thin photo etch frame and a small mirror. Rather than cut out the headlight covers, I painted the inside of the headlight silver as well as the mirror. For the 'glass', I put some clear gloss paint on a tooth pick and 'swiped' it over the front of the lights, forming a clear film that soon dried. The front had the tow hooks glued in and that pretty well took care of the build. I chose the simple door serials and windshield markings of a truck on the southwestern front in 1942. The decals were not a problem, even over a matte finish as I put them in a puddle of Microsol. I did some rather minor dry brushing with Vallejo Green Ochre and that was it.
| CONCLUSIONS |
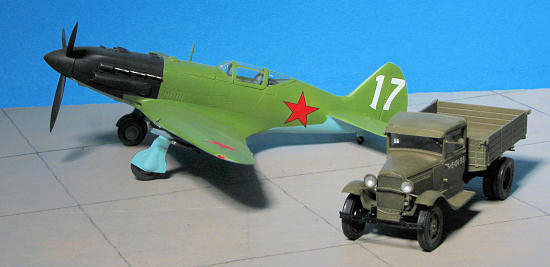
So, the truck is finally finished. Not a one week Tamiya build, that is for sure as this one took the better part of three months to complete. It is as one would expect from a rather fiddly multi-media kit and one that requires a lot of test fitting. However, I have to say that I'm pleased with the outcome, despite the acetate windows, as it really looks nice and adds to my small, but growing 1/48 vehicle collection.
| REFERENCES |
 Kit Instructions
August 2010
Copyright ModelingMadness.com. All rights reserved.
Thanks to www.scale-model-kits.com for the review kit. If you would like your product reviewed fairly and fairly quickly, please contact the editor or see other details in the Note to Contributors.