Ace 1/72 52-K Soviet 85mm Heavy AA Gun
| KIT #: | 72276 |
| PRICE: | $11.95 http://www.scale-model-kits.com |
| DECALS: | None |
| REVIEWER: | Scott Van Aken |
| NOTES: |
| HISTORY |
The 85 mm air defense gun M1939 (52-K) (Russian:85-мм зенитная пушка обр. 1939 г. (52-К)) was an 85-mm Soviet air defense gun, developed under guidance of leading Soviet designers M. N. Loginov and G. D. Dorokhin. This gun was successfully used throughout the Great Patriotic War against level bombers and other high- and medium-altitude targets. In emergencies they were utilized as powerful anti-tank weapons. The barrel of 52-K was the base for the family of 85-mm Soviet tank guns. Crews of 85-mm AD guns shot down 4,047 Axis aircraft. The mean quantity of 85-mm ammunition required to shoot down one enemy plane was 598 rounds. After the war some 52-Ks were refitted for peaceful purposes as anti-avalanche guns in a mountainous terrain.
Virtually every country behind the Iron Curtain received this gun after World War II for their air defense.
| THE KIT |
 Ace has done a nice job on this one. The molding for the pieces is actually quite good with nice detailing and a lack of any visible molding glitches. There are four flash-free sprues, with one major sprue provided twice. Not surprisingly, most of the parts are what are needed to build up the gun mount. One can build this either in the travel mode, or set up for action. The major difference being the deployment of the side mounts. Another option is to have the early suspension which has leaf springs vice coil shocks. One also can pose the gun either elevated or flat. There doesn't seem to be any intermediate position available.
Instructions are pretty basic, but more than adequate to build the kit. There are several small subassembly steps that are then shown being incorporated into the two major construction steps. The drawings are actually quite good and clearly show where everything fits. No color guide is provided either in the instructions or on the box. However, there are several descriptions in the painting and markings guide. Either overall Khaki-Green, a white-washed version, or one captured by the Germans and painted Panzer Grey. One can also use the box art to help in this area as well. No decals are provided or needed.
| CONSTRUCTION |
Let me preface this by saying that I have started, but never finished an Ace kit. Something seems to take me away from it before it is finished and I have several in the 'unfinished kit' pile. Generally it is a fit issue.
Well, I was determined not to let that stand in my way on this one. There are a plethora of small parts on this kit and though the instructions are quite good, there were times when I wasn't 100% on just how a part was to fit in place. This was particularly true when attaching the gun barrel assembly to the forked mount.
But I'm getting ahead of myself. The first thing I did was to assemble the basic gun mount. I found that every piece needed to be carefully cut away from the sprue and then trimmed of all mold seams in order to properly fit in place. Test fitting is a requirement 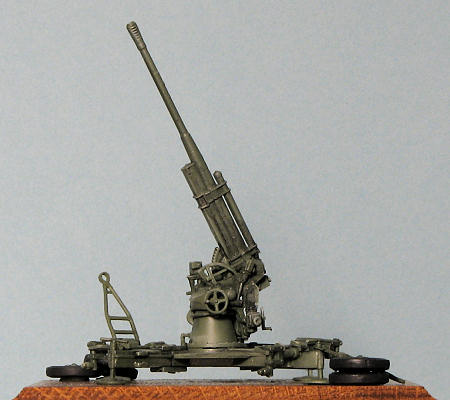 and like I, you'll find that without it, fit will be a problem. You have to decide early in the build if this will be done in travel mode or in action mode as the two side arms and part of the plate assembly around the gun will be positioned differently in each one. I chose the 'in action' setting so built the kit accordingly.
There are also some parts that won't be used depending on the suspension you choose. I picked the early suspension as it looked to be an interesting choice. It meant more bits to attach in one regard, but careful assembly proved to be no real problem. When I built this, I did just a few parts a day, letting each bit dry thoroughly before moving on. It worked quite well and I had few major hurdles. One hurdle was the attaching the gun barrel assembly to the mount. According to the instructions, one attaches a bunch of small and somewhat fragile pieces to each fork half before trapping the gun barrel between them and gluing the forks. This is going to cause many of these pieces to be broken away as the fit of the fork halves is such that you need three hands to glue it. Not to mention the filler and sanding needed to get something reasonable out of it.
I recommend leaving off all these fragile bits until after you have the main barrel assembly trapped and the fork assembly cleaned up. Even then, wait until you have the elevation pistons and their bits glued in place as this area will cause the air to turn blue around you trying to get these to fit well. I found that drilling out some of the mounting indentations helped a great deal.
Another area where I ran into trouble was attaching the small half circle bits to the side arms of the overall gun mount. These were difficult to cut off the sprue and glue into position. The result is that I lost a few. Might want to replace those with wire. I also did not, apparently, get the pad arms low enough to be able to have them touch the ground with the wheels on the chassis. While looking at them with the wheels tacked on makes me think they wouldn't touch anyway, I'll never know. The instructions make no mention or indication that these need to be mounted lower than what is shown in the drawings if one is to do the 'in action' version. For that reason, I've left the wheels off, thinking that perhaps, it would be normal for them to do so if situated in the same place for any long period of time. At least that is my story and I'm sticking to it.
| COLORS & MARKINGS |
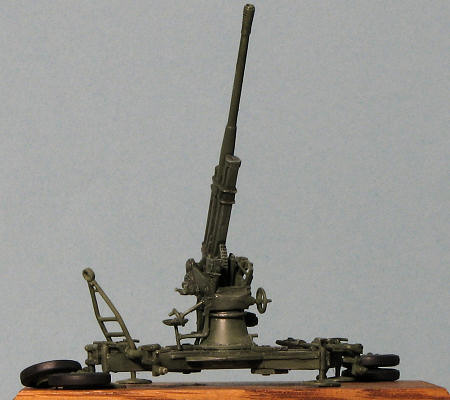 This is one of those kits that one paints when all is assembled. I pulled out the Testors Soviet Armor Green and gave it a good couple of coats. Frankly, it looked too green and too dark for my tastes, so I repainted it using SAC Bomber Green. Now this was a lot more like what was on the box art so I kept it. I then gave the entire model a wash using black enamel paint. When it was dry, it was drybrushed with Vallejo matte white. Actually, it turned out better than I'd thought.
| FINAL CONSTRUCTION |
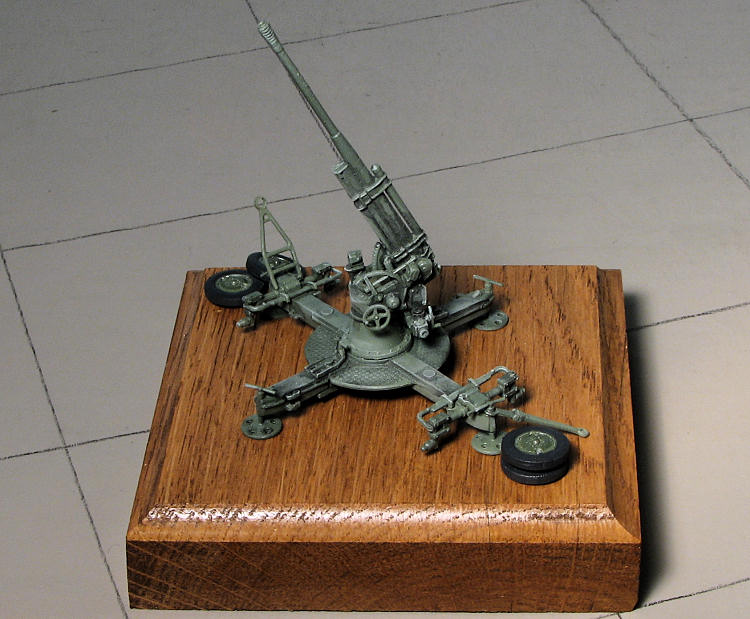
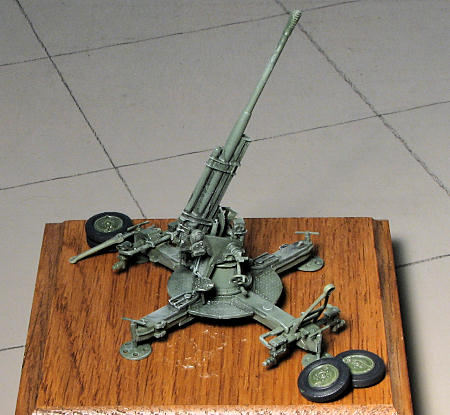
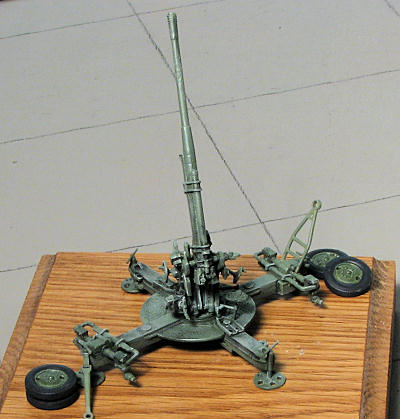
That consisted of gluing the model to a wooden base and then replacing all the bits I knocked off while dry-brushing. The wheels were glued near their axles as if it was normal ops for them to be taken off prior to using the gun. Hey, it may be the case, I don't know. No clear matte was sprayed on as it didn't look like it needed it.
| CONCLUSIONS |
I have to say that for me, it was a relatively quick build. There were not any major malfunctions except for the one mentioned regarding the gun mount fork. Now I know and on similar kits I'll be more wary. The result is a very nice model that takes up very little space. If you have a prime mover, you can do a mini-diorama with it. I guess it will take a ZIS truck or perhaps a US Studebaker that was provided on Lend-Lease. As a final note, my thanks to IPMS EH Miller for giving us such nice awards that can be used as bases for these small scale projects.
| REFERENCES |
http://en.wikipedia.org/wiki/85_mm_air_defense_gun_M1939_(52-K
 August 2009
Copyright ModelingMadness.com. All rights reserved. Thanks to www.scale-model-kits.com for the review kit. Get yours today at a discount.
If you would like your product reviewed fairly and fairly quickly, please contact the editor or see other details in the Note to Contributors.