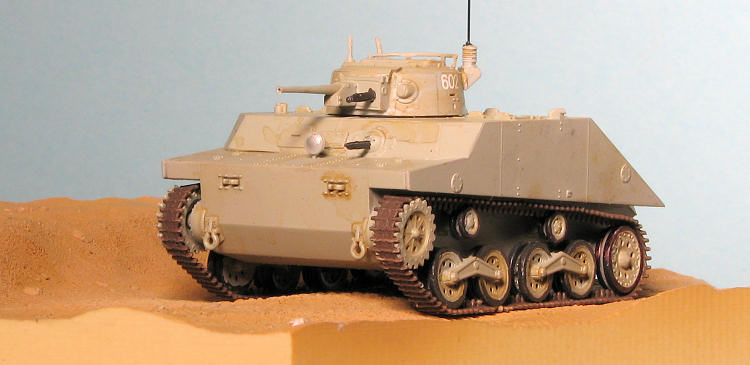
Dragon 1/72 IJN Type 2 (Ka-Mi) Amphibious Tank
| KIT #: | 7435 |
| PRICE: | $21.00 SRP |
| DECALS: | Two options |
| REVIEWER: | Scott Van Aken |
| NOTES: | New tool kit |

| HISTORY |
Like most nations, the Japanese developed an amphibious tank, specifically the “Ka-Mi” amphibious tank. This vehicle was the first amphibious tank used by the Imperial Japanese Navy (IJN), and it was closely based on the Type 95 “Ha-Go” light tank. It was designed for Japanese landing forces performing amphibious invasions of Pacific islands that didn’t have regular port facilities. Production commenced in 1942 and a total of 184 Type 2 amphibious tanks were made, although the design was really too late to participate in Japan’s island-hopping campaign. When used in water, large pontoons were attached to the glacis plate and rear deck to give it a top speed of 10km/h. These pontoons could be shed as soon as it reached land. The turret featured a 3.7cm Type 1 gun and a coaxial Type 97 machine gun.
| THE KIT |
Many were hoping that Dragon would produce this kit in 1/72 scale and it has come to pass. This is, by my count, the third Japanese tank kit Dragon has produced in this scale. This one also has a pretty low parts count with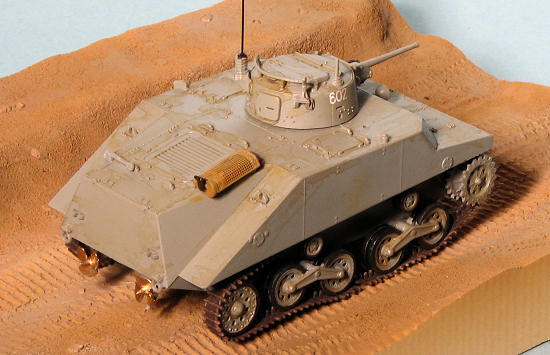 only about 45 pieces to complete the build, making it a nice change from some of the more parts intensive kits, even in this scale.
This is a completely new tool and the molding is everything we have come to expect from Dragon with crisp, clean detail. Dragon has limited photo etch to a muffler guard screen, so those who are not fond of p.e. will not have to be overly concerned in this area. A set of their excellent DS tracks is included so no worries about having to piece together individual track links.
The kit Is a curbside, but has a number of fittings for the inside of the hull as well as a very nicely detailed main gun and machine gun. Options are non-existent so I have to assume this is a later model. Even the hatch is molded shut, though the adventurous modeler could cut it open if they wanted. As is usual with Dragon kits, color information is provided by Gunze and Model Master paint references. There are markings for two vehicles, both in an overall grey. One is from the 5th Naval Ground Base Guard on Saipan in June 1944. This is the box art tank with the flag on the turret. The other is #801 with the 27th Naval Special Ground Base Guard in Aitape during July 1944.
| CONSTRUCTION |
The reason I tackled this one is that it looked to be pretty easy. Of course, these are somewhat famous last words for modelers. The general construction of the kit went quite well. I found that the rail along the back of the turret did not match the placement posts on the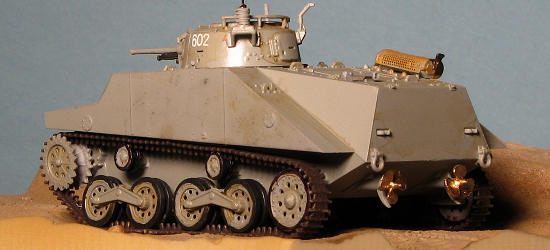 turret itself. Not only that, but it is quite fragile and I broke it. I also found that the indentation for the main gun is not deep enough so I had to sand down the mating post on the gun itself. To get the machine guns to fit through the openings in the hull and the turret, the orifice either has to be enlarged or drilled out as one was completely closed off.
I assembled the hull with all its bits, including the photo etch muffler guard and painted it in its entirety. I did the same for the turret. The various suspension bits were also painted separately. I found that assembling these pieces to be rather fiddly as all the various wheels and gears are two pieces that need to be cemented together. The attachment points are rather minimal, thanks to the scale.
| COLORS & MARKINGS |
Painting is like many armor subjects in that it is a solid color. In this case it is Light Sea Grey. This is the Model Master name for it as the shade given in the instructions is Gunze paint and not available locally. A few coats were applied as that was all that was ne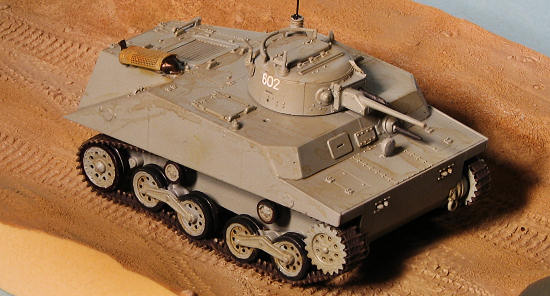 eded. Now I have a nearly full bottle of a paint I will probably not use again!
For the tracks, I used Trackbase's Track Color acrylic. I first tried to airbrush this shade, but for whatever reason, neither water, alcohol nor lacquer thinner will thin this stuff and all it did was clog my airbrush. It is marked as a water based acrylic. I ended up brushing on several coats to the DS tracks and it worked out just fine. For the road wheels, I needed to paint the tires black. I totally suck at doing this on kits of this scale. The demarcations on the wheels between tire and wheel are so slight that even thinned paint will not follow the demarcation line. I even tried a Sharpie fine point, but that was little better. So a plea to manufacturers to make the distinction between tire and wheel greater; a raised lip would be just super.
| FINAL CONSTRUCTION |
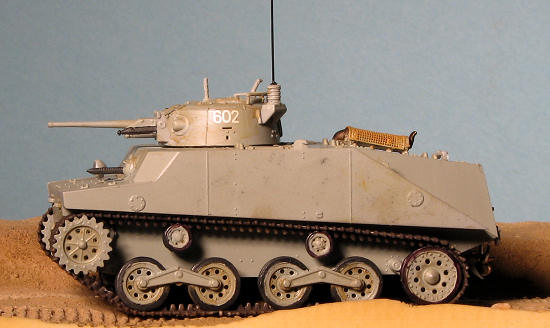 Now time to put it all together. The turret is an EXTREMELY tight fit into the hull and I gave up on any hope of posing it in more than one position. Not only does the ring not lock in place, but the sprue gates invade the area and require some tedious cleaning out. Bending the photo etch muffler screen was fun as well for the muffler is not circular, but it eventually got glued in place.
Remember my fussing about small contact patches for gluing on parts? This is especially true of the attachment points for the bogies and idler. The sprocket is fairly well taken care of. This means that often, when attaching the tracks, the glue joint failed and the idler or bogies fell off. Eventually, I got them all sort of lined up. Unlike earlier 1/72 Japanese tank kits reviewed here, there was no major misalignment between bogies and sprocket. The DS tracks had to be stretched to fully fit. Be careful as this may well cause the track to snap. I eventually got those on and glued on the props in the back. The radio antenna was made from some .0125 inch wire. Decals are minimal at best and I picked one of the numbered tanks. They give you three tank numbers, but only show placement of the two on the turret. I then gave it a dark brown wash and that was about it.
| CONCLUSIONS |
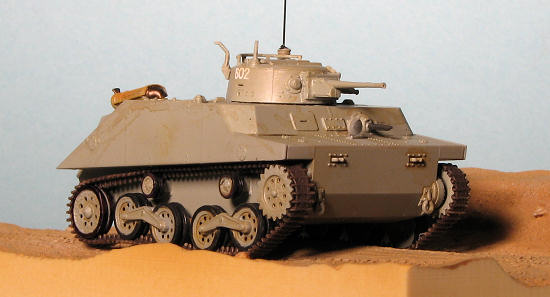 I am glad I built this despite the issues I had with it. There are times when I think that a kit may be a bit over-engineered and that simplicity could be a better way to go (such as one piece bogies). The end result, however, it a rather unique armored vehicle and one that will catch one's eye in amongst the usual Shermans and Germans.
April 2012
Thanks to www.dragonmodelsusa.com for the preview kit. This one should still be available at your local retailer.
If you would like your product reviewed fairly and fairly quickly, please contact the editor or see other details in the