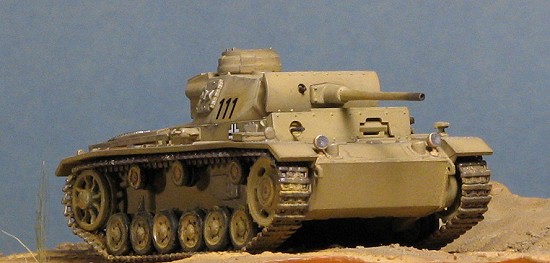
Revell AG 1/72 Panzer III Ausf L
| KIT #: | 30133 |
| PRICE: | $11.98 MSRP |
| DECALS: | two options |
| REVIEWER: | Scott Van Aken |
| NOTES: |
| HISTORY |
 The original Panzer III was designed in 1935 and the type served throughout the war. By the time the L was developed in mid 1942, the tank was getting to be a tad long in the tooth, but was still effective as it was being constantly upgraded. Production of the Ausf L ran from June to December of 1942, allowing the tank to be used in the closing stages of the North African Campaign as well as in Italy and Russia. The Panzer III itself was in front line operation until late 1943 when it was replaced by the Panzer IV. Even then older Panzer III chassis were being used for a variety of SPGs including the StuG III versions and as tank recovery vehicles, among other uses.
| THE KIT |
 Revell AG has been on a campaign of producing some quality 1/72 armor kits. Perhaps not to the extent of Dragon, but these are still excellent building kits by all accounts. The detailing is crisp, and though I found a few sink areas on this one, it is superbly molded. I like this type of track structure that uses individual links around the curvy parts and long straight sections for the rest. It may be a bit more work than the rubber band type of track, but it looks better in the end (assuming you don't spill glue all over it!). While the decals with the kit are not exactly inspiring, tanks were not exactly flashy vehicles.
| CONSTRUCTION |
It seems that the standard way to build tanks is to start with the hull and suspension and tracks then add the upper stuff. While this probably works quite well, it doesn't take into consideration that if you are going to spray paint things, then you have to leave off things like road wheels and tracks until all the painting is done. With this in mind, the first thing I did was to 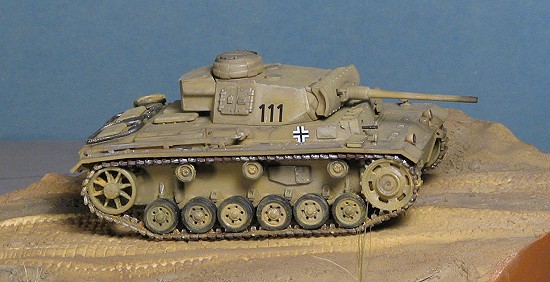 glue together a few sub assemblies like the base turret, the base hull and the bustle (or whatever that thing on the back of the turret is called). Then I spent quality time scraping the seams off road wheels. When this was done, I sprayed the wheels black so that the tires would be done well. Then, using a circle template, I sprayed all of the road wheels. This entire sequence of events was quite time consuming and took several hours over several days to complete. The results were mixed as some turned out well and others didn't. I ended up hand painting the fixes. I also had to drill out the holes that filled with paint during these evolutions.
Back at the rest of the kit. I went about methodically removing, cleaning, and attaching parts. The turret went together well, though the fit of the bustle in the back could have been a bit tighter. I drilled out the gun barrel, but gave up on any attempt at the machine guns as even a #80 drill bit looked too large.
On the hull, I glued on the the outer bulkhead parts on the forward front section. Apparently these will either be different on the different 'ausfs' or it was easier to mold these separately. I had a touch of trouble with the bolt on forward armor, or more specifically, the  bit that went on the upper rear. A similar part is on the turret and the fit here was good, but not superlative as it took some fudging.
The rest of the 'stuff' like hatches, jacks and lights went on without too much fuss. I methodically glued on everything but the tow cable and the forward lights, leaving these off until after the first coat of paint. As fewer and fewer parts remained in the box, I glued the upper and lower hull sections together and then started thinking about paint.
| COLORS & MARKINGS |
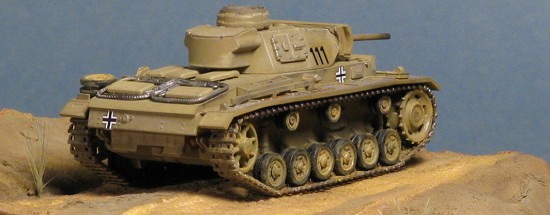
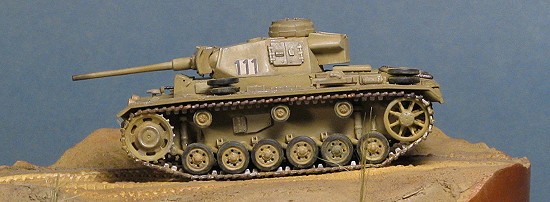
I decided that this one would be overall panzer yellow. I mixed up the remains of my old tinlet of Humbrol Panzer Yellow (you know, from the days when what the color inside the tinlet was marked on the outside). This was then sprayed on the entire tank body. The tracks were sprayed with Alclad II Steel as they were made of the stuff. Unfortunately, I ran out of paint just as this was nearing the end, so went and got a tinlet of its replacement to do the small sections where I held the parts. This new color is a bit darker, though not immediately apparent because so little is actually used. When that had dried, all the tracks got several coats of Rustall, while the rest of the tank was given some thinned black acrylic wash. This was then drybrushed with a couple of shades of tan/buff using some Vallejo acrylics.
 Once that was done, the tracks and wheels were installed. What works in 1/48 does not always work in 1/72 and I came to realize that installing the tracks later when the body/fenders are on was an error. It wasn't impossible, but it was more difficult. I also realized that I'm not very good at doing tracks in this scale as I was constantly fussing with alignment and getting the tracks into proper position. I can see why some modelers prefer the single piece tracks. Eventually all was installed, though not exactly as nicely as I'd hoped.
Time for the decals. I chose little more than numbers and the insignia for this one. The areas to receive the decals were given a gloss clear. Then the decals were applied. They silvered. I put on setting solution. It helped a small bit. Face it. The Revell AG decals were not going to co-operate, even with a strong setting solution. I matte coated them and moved on.
| FINAL CONSTRUCTION |
Last things were the addition of the head lights and the tow cable. A bit more detail painting, and for all intents and purposes, the kit was now a model. But that isn't all.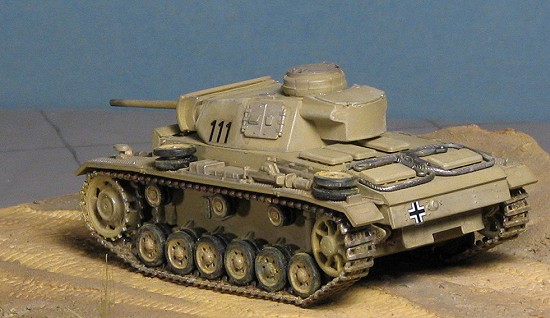
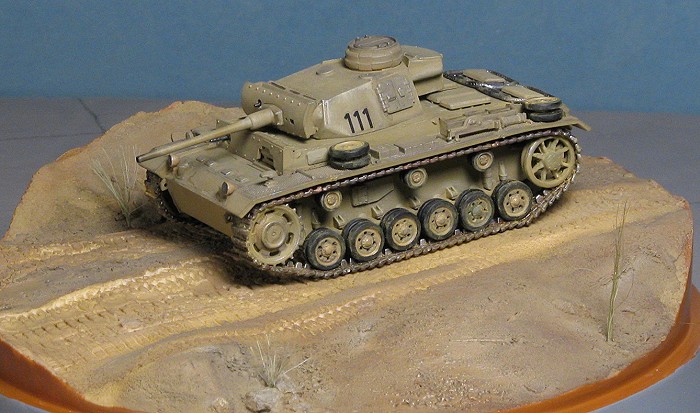
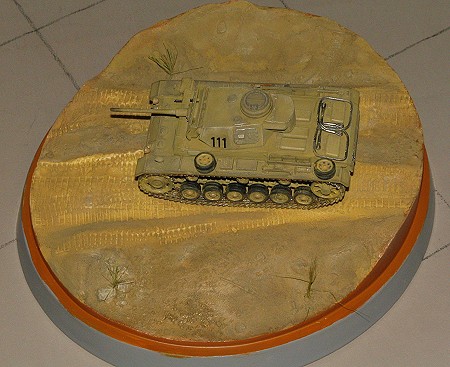
I decided to use one of theMasterpiece Models resin bases. For this one I chose a hill side road scene on a nearly circular base. Using browns and tans, I painted the base, adding a wash when it was dry and doing some drybrushing with Vallejo acrylics as I thought would look nice. I also drilled a few holes and stuck in some thin grasses. I stupidly used diluted white glue which wicked into the grass and held them together. Next time, I used superglue, which didn't do this wicking thing. Once the grass was in there, it was trimmed down and then made to look more ragged. Then the tank was put onto the base and that was that. A real diorama person would have added a bunch of dust and stuff to it, but I'm not really that good at dirtying up armor, though I did use some yellow pastel on the running gear and a bit on the top just to keep things from looking so stark.
| CONCLUSIONS |
 I have to say that all those who rave about the RoG Panzer III Ausf L are correct in their commentary. I found it to be a superb fit and despite my lack of skill at tracks, it wasn't that bad a build. Not a one week wonder, as it took the better part of three weeks to complete, but it sure is a sweet kit.
January 2006
#1396 in a series
Copyright ModelingMadness.com. All rights reserved.
Thanks to me for buying the kit and to Masterpiece Models for providing the base.
If you would like your product reviewed fairly and fairly quickly, please contact the editor or see other details in the Note to Contributors.
Back to the Review Index Page 2018