| KIT #: | 32587 |
| PRICE: | 1600 yen SRP |
| DECALS: | Two options |
| REVIEWER: | Scott Van Aken |
| NOTES: | 2016 tooling |
| HISTORY |
The The Humber Armoured Car was one of the most widely produced Britisharmoured cars of the Second World War. It supplemented theHumber Light Reconnaissance Car and remained in service until the end of the war.
 Made by the Rootes Group, the Humber was essentially a combination of the Karrier KT 4 artillery tractor chassis and the armoured body of the Guy Armoured Car. The KT4 was already in production for the Indian Army, and Guy were having problems with the production levels required. The Karrier name was dropped to avoid confusion.
The first order for 500 was placed in 1940. The first Humbers were more or less identical to the Guy down to the faults in the armour, but this was later rectified. Production started in 1941.
The Mark III improved upon the Mark II by providing a three-man turret. Mark III production ended in 1942 after 1,650 had been built. With a possible replacement, the 2-pounder armed Coventry armoured car, on its way, the Mark IV was designed. This put the US 37 mm gun in the turret but at the cost of one crewman. The Coventry was not ordered as a replacement and so production of Mark IV continued, for a total of 2,000, despite its flaws.
| THE KIT |
In a move to circumvent any licensing requirements, Tamiya has produced the Humber Mk.IV armored car by simply stating its weight. I applaud Tamiya for taking this step where it is feasible as it helps to reduce the overall cost of the kit to consumers.
The kit is produced on three sprues, two of them identical. As usual, the molding is first class. There is an upper and lower hull section with two side pieces. The springs for the suspension are molded onto the lower piece. One then attaches the front and rear c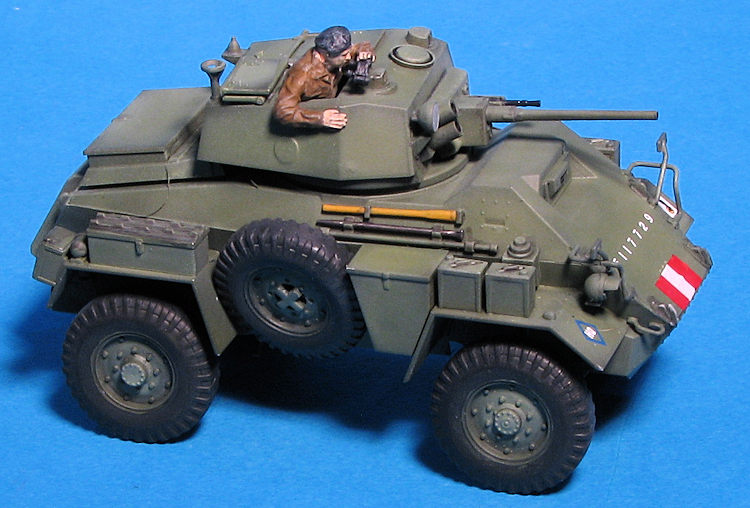 over plates as well as the four wheel drive drivetrain. Each of the differential/axle housing pieces is a single piece as is the drive shaft/transfer case piece. One then attaches the venders and upper suspension arms (for the front axle). Wheels are typical of what I have seen in Tamiya's 1/48 kits with an outer section that includes the outer wheel part and most of the tire. A rear insert contains the rest of the sidewall and wheel. These simply glue onto the axles. No poly caps with this one.
The rest of the hull builds up with the rather large variety of containers and boxes that these vehicles carried. While not exactly the proper term, the turret is a 'curbside' with no interior detail. The commander's hatch can be posed open as a figure is provided to insert into this space. There are also a number of accessories for the turret. No optional parts are provided, but then they really are not needed.
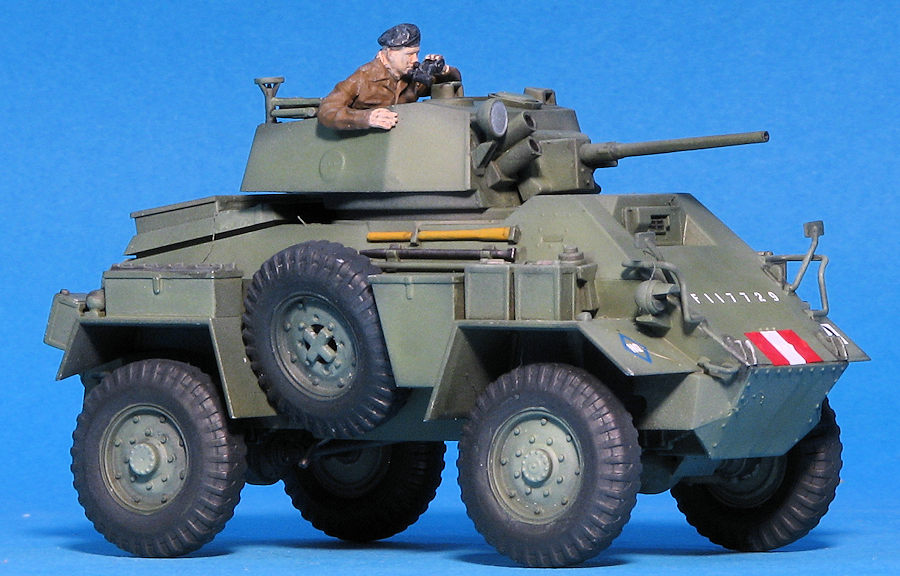
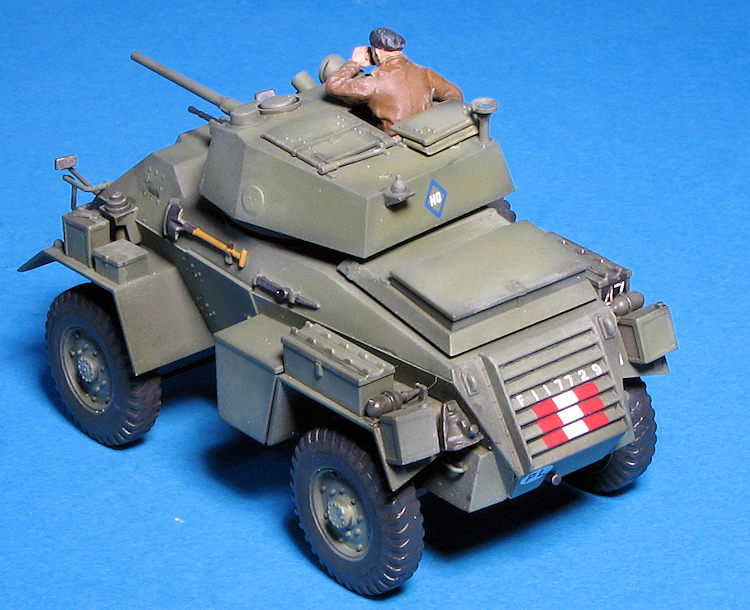
Instructions are well drawn using Tamiya paint references. A separate painting and markings sheet is provided for a single vehicle in overall British green. This is with the Polish 1st Armored Division, though no date is provided. The small decal sheet is well printed.
| CONSTRUCTION |
It is almost difficult to describe the construction process. Unlike when I do airplanes, This one was a breeze to put together. I found no issues with fit and if there was an area that could have used filler, it would have been the upper and lower hull seam. However, I felt it was so minor as to be pretty much inconsequential. 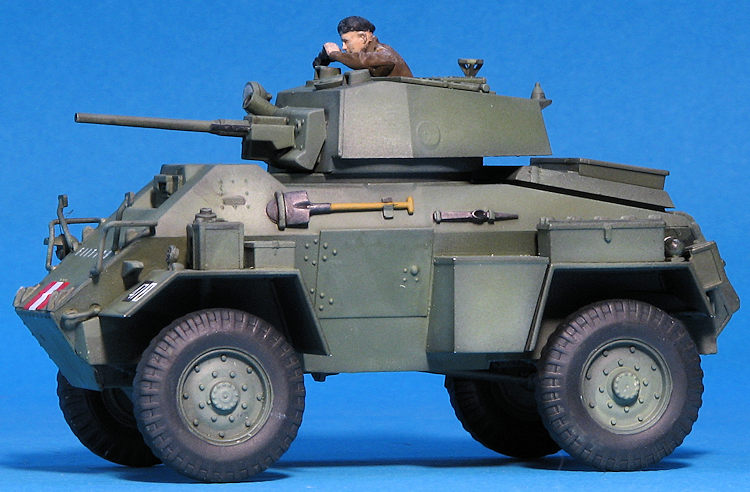 The most visible is the one on the very front, but filling that would have meant removing the detail right next to the edge of the plastic when sanding down whatever one used for filler.
There are some rather finely molded parts and I found that things like the light guards and the tow hooks were best cleaned up of the sprue attachment point once they were glued on. Putting a number of pieces around the fenders prior to attaching these seemed to work out pretty well. Same with some of the small bits that fit on the fenders themselves. For instance, I did not attach the jack to the left rear until after the fender was in place and it was a bit tricky to get it properly in place. I also attached all the pioneer tools prior to painting, though I know that others would probably prefer to wait until the overall scheme was done. At this point I had not attached the wheels, turret, or the commander's hatch as I was still debating whether or not to embarrass myself by trying to paint the figure.
| COLORS & MARKINGS |
I used the kit markings on this one as there wasn't any other viable option for me. This vehicle is in an overall bronze green, which is typical for WWII British stuff. For this build, I decided to try out one of Vallejo's AFV painting sets. This was reviewed earlier this week, but to recap, it comes with four small 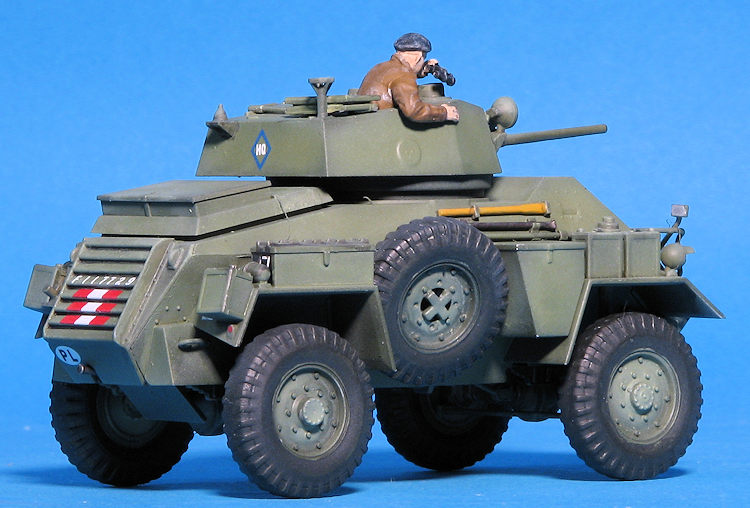 bottles of paint. Four are various shades of green, one is a primer and one is a semi-matte clear. Frankly, I've very little faith in acrylic primers so used my standby, Tamiya grey in a rattle can to primer everything. This even extended to the yet unassembled wheels.
I then started with the black green and sprayed everything with it. Next came a slightly lighter green shade and all the upper surface areas got this. Then a lighter green in the center of the various planes, followed by a rather light green in the center of that. Now I'm not a real fan of water based acrylics as I find them difficult to properly mix and then they tend to clog the tip of my airbrush. These were no exception. I mixed the paints in the cup of my airbrush and it turned out fairly well. The sequence mentioned above turned out to be too stark with obvious transitions between the colors. The folks on the Forum assisted in critiquing this and verified my fears. I then went over all the brightest greens with the next darkest colors and this turned out a lot better.
Then followed a bit of washing with gloss black and some dry brushing, this time using the lightest green for this purpose. Normally I use white, but the effect with this method turned out OK.
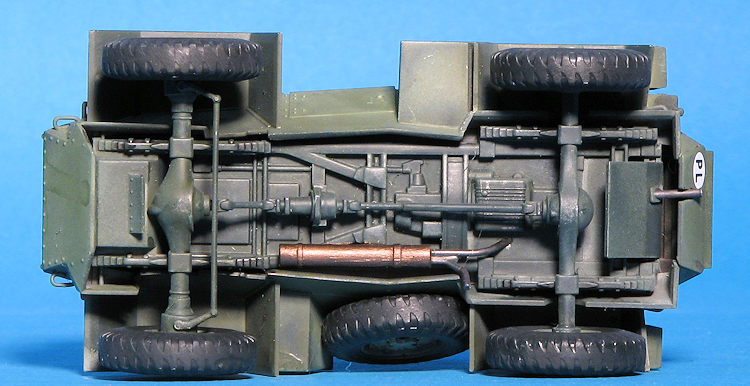 Back at the assembly bit, I first assembled the rear wheels, painted the tires using NATO black and glued them in place. I had thought that I'd have trouble getting them mixed as the hubs on the front and rear wheels are a bit different. However, Tamiya already had that covered by having the axle mounts a bit different so you can't get them mixed up. While the paint was drying on the tires, I used various other paints to pick out some of the items that needed a different paint. I used Vallejo's Acrylic Metal colors for this. While I'm not all that jazzed about their airbrushing, they make excellent paint for brush painting.
Once all the wheels were in place, I gave things an overall gloss coat to ready it for decals. Decals worked well though took a long time to come free of the backing paper with cold water. I used Mr. Mark Softer to help them stay in place. Then, carrying the car to the basement to apply the clear, I fell down the stairs and the car hit the concrete floor, breaking a number of pieces. Once those were repaired and repainted, I used the clear semi-matte provided in the Vallejo set. This is actually a lot closer to matte than semi. Once that was dry, that was it. No dirt, mud or muzzle stains on this one.
| CONCLUSIONS |
Aside from its crash to the concrete, no real issues in building the kit. There are some areas that are tight and some fine moldings that one needs to be careful removing from the sprue and cleaning up, but none turned out to be a problem. I have to say I'm pleased not only with the kit but also with the painting. Though it is obvious that I need more skill on this sort of thing, the result is pleasing enough.
| REFERENCES |
https://en.wikipedia.org/wiki/Humber_Armoured_Car
30 September 2016
Copyright ModelingMadness.com. All rights reserved. Thanks to me for the review kit and the paint set. If you would like your product reviewed fairly and fairly quickly, please contactthe editor or see other details in the