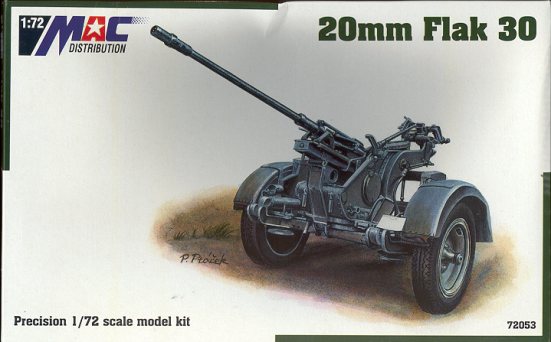
MAC 1/72 20mm Flak 30
|
KIT: |
MAC 1/72 20mm Flak 30 |
|
KIT # |
72053 |
|
PRICE: |
$18,98 |
|
DECALS: |
None |
|
REVIEWER: |
|
|
NOTES: |
|
BACKGROUND |
For a look at what's in the box and a brief historical section, please visit the preview.
|
CONSTRUCTION |
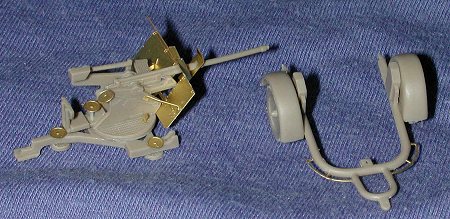
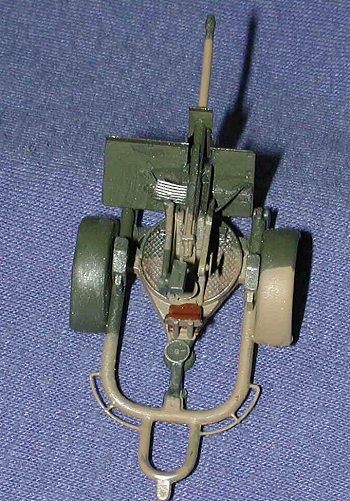
 Construction begins with the cockpit......No.....Wait.....I've
been doing too many aircraft. Construction begins with the gun mount. The parts
on this kit are not large and as I mentioned in the preview, all of them need to
have the edges cleaned up. Break out the Opti-Visor! This is not a kit that will
take a long time to build. The plastic bits go together rather quickly. However,
the application of the etched metal bits will require some care to get just
right.
Construction begins with the cockpit......No.....Wait.....I've
been doing too many aircraft. Construction begins with the gun mount. The parts
on this kit are not large and as I mentioned in the preview, all of them need to
have the edges cleaned up. Break out the Opti-Visor! This is not a kit that will
take a long time to build. The plastic bits go together rather quickly. However,
the application of the etched metal bits will require some care to get just
right.
I did run into a few areas of concern. One is that there really isn't enough room between the gun mount plates for the gun. I glued the gun mount panels on the lines shown on the platform, but when it came to attach the gun (not an easy task as there is not any positive locators), the upper part was farther apart than the base. I'd suggest mounting the gun barrel assembly to the side plates before gluing them to the base. Not easy, but one way to ensure proper alignment.
 It is during this and other construction stages where the very
detailed drawings came in handy. Thanks to them, I was sorta able to figure out where
parts should go and be sure that things were properly aligned or not. The
actual construction of the plastic pieces was easily accomplished in just a few
hours of cleaning and gluing.
It is during this and other construction stages where the very
detailed drawings came in handy. Thanks to them, I was sorta able to figure out where
parts should go and be sure that things were properly aligned or not. The
actual construction of the plastic pieces was easily accomplished in just a few
hours of cleaning and gluing.
The kit actually
is done is two stages. The first one is the assembly of the plastic bits. The
rest is the attachment of all the etched brass parts. I had no trouble cutting
the brass (I use scissors) and with the help of an Opti-visor and tweezers, was
able to attach things pretty well. You have to make a short section of stretched
sprue for the manual azimuth wheel in front of the gunner, but it isn't a
problem for most of us. It was the gun shields that caused me a problem. Though
I thought that I had things properly
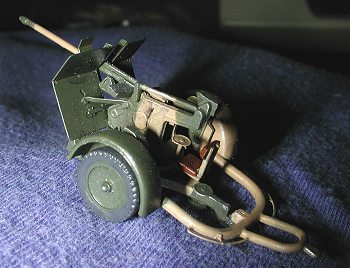 built, I was unable to get the lower shield
to mate to the lower gun frame as shown in the instructions and drawings. The
upper mount kept it too far forward. As a result, I had to glue the shield
braces lower than I'd have liked. It also meant that the small barrel shield was
too far forward.
built, I was unable to get the lower shield
to mate to the lower gun frame as shown in the instructions and drawings. The
upper mount kept it too far forward. As a result, I had to glue the shield
braces lower than I'd have liked. It also meant that the small barrel shield was
too far forward.
In hindsight, you need to think ahead to the etched brass bits before you start gluing anything. This basically means paying attention to the gun shield. I found that on my kit, I had the gun mounted a bit too far back and the upper gun mount was too far forward to get the proper alignment for the gun shield and braces. I highly recommend on your kit that you assemble the gun shield and then do lots of dry fitting of the plastic parts prior to any gluing to make sure that all will fit as advertised. If you don't, you'll have the problems that I did late in construction.
|
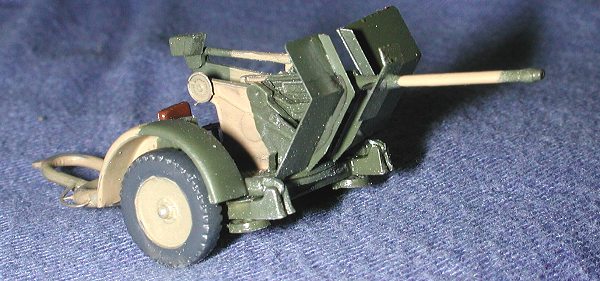
CAMOUFLAGE |
 Well, one has three choices: overall Panzer Grey, overall Afrika Korps Desert
Sand, or a combo of Light Green and Sand. I chose the latter. I painted the gun
and the trailer separately. It was a simple job of first painting on the Sand
and then the Light Green. I used Humbrol Colors suggested by a local armor
expert as I'm rather clueless when it comes to crawly things. The paints worked
beautifully as is the norm with Humbrol. When it was dried, a wash was put on it
and I drybrushed it to bring out some detail (and because it seems to be the
thing to do with military subjects).
T
Well, one has three choices: overall Panzer Grey, overall Afrika Korps Desert
Sand, or a combo of Light Green and Sand. I chose the latter. I painted the gun
and the trailer separately. It was a simple job of first painting on the Sand
and then the Light Green. I used Humbrol Colors suggested by a local armor
expert as I'm rather clueless when it comes to crawly things. The paints worked
beautifully as is the norm with Humbrol. When it was dried, a wash was put on it
and I drybrushed it to bring out some detail (and because it seems to be the
thing to do with military subjects).
T
|
FINAL CONSTRUCTION |
Acutally this consists of two things. One was gluing the wheels onto the trailer. The other was attaching the gun to the trailer. In order to make it easy to load and unload, the gun attached to the bottom of the trailer. I had to thin the attachment arms at the very end to enable them to fit into the slots on the end of the trailer. I also had to remove a small wedge of plastic from the back of the gun mount so it would properly fit to the underside of the trailer. And that was it.
|
CONCLUSIONS |
That was really a pretty painless kit. It took me less than a
week to build (greased lightning for me), was easy to paint and was something
that I'd not built in a LONG time. It was fun. With all that brass in the
shield, it is nose-heavy so you do need to be careful to display it
either glued to a base of some sort or attached to a hauler. Without the
trailer, it will stand on its own, but barely. It is a kit that I can recommend to
all who are not real fearful of etched brass and can handle the somewhat small
parts. December 2002 If you would like your product reviewed fairly and quickly by a
site that has well over 175,000 visitors a month, please contact
me or see other details in the Note to
Contributors.
#1254 in a series