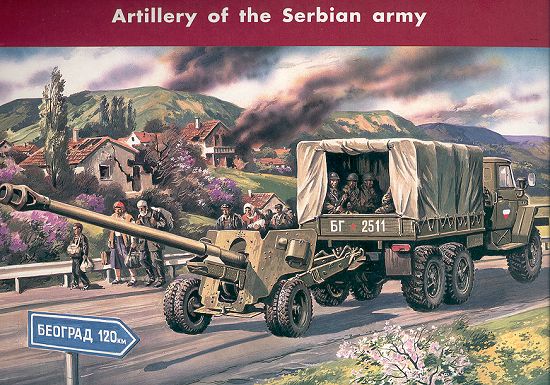
ICM 1/35 Artillery of the Serbian Army*
KIT # | 35142 |
PRICE: | $32.98 |
DECALS: | For Russian and old Warpac countries |
REVIEW : | |
NOTES: | '20th Century Local Conflicts' Series |
HISTORY |
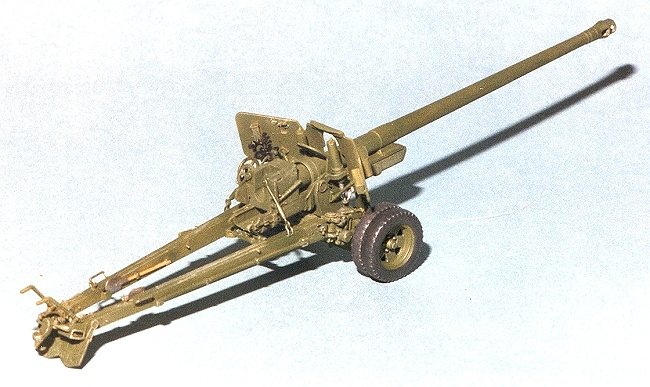
Jugoslavia has always been well known for its eclectic array of various types of equipment in its army. There have been everything from WW 2 vintage equipment (both German and Russian) to the most modern Soviet then Russian gear. This kit takes advantage of that by providing a bit of each. The artillery piece in this kit is a Soviet MS-3 100mm field gun. It entered Soviet service in the latter part of 1944, taking part in the last push to Berlin. This weapon also has been used in virtually every conflict that Russia or its former states have been involved in since that time. Typical of Soviet equipment, it is rugged, accurate, and able to be easily maintained in the field. It has a similar look of the US 155mm Long Tom, but is scaled down in size to match its 100mm barrel.
THE KIT |
This review is only on the Field Gun. The truck will be reviewed separately once it is built. The gun is molded in semi-soft light grey plastic on two large sprues with superb detail. Even closer inspection of the parts than was given in the preview notes that there is some flash on a few pieces. Those ejector pin marks that are visible are in locations where it is normally hidden after construction. A study of the parts show only a few sink marks, again in hidden locations, but the kit does need to be washed in warm, soapy water to remove the mold release agent otherwise paint won't stick to it. The instructions for this kit are eight pages: The first giving a brief history with the next four giving a nine-step construction sequence.
There are a lot of small pieces in this kit (actually 159 total), but it looks like it will build quite well. Areas not to be glued include the wheels and the bearing for the long support arms. The next two pages show diagrams of the gun in firing and towing position. These last two pages are a real help as the instructions are not always very clear on exactly where some of the smaller parts fit. Finally the last page gives a parts breakdown and a color guide with both Humbrol and Testors colors. I don't show the sprues on this one as I had already started on the kit before I realized I hadn't scanned them.
For those of you wishing to get just the Field gun, it is available separately as item 35141, and retails for $8.98.
CONSTRUCTION |
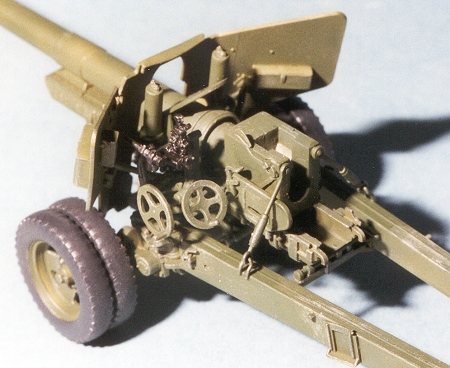
The first thing I did was scan over the instructions, after washing the kit to remove the mold release agent. I then determined that the kit could be started by doing subassemblies. The first bits glued together were the shell casings and the wheels. Then the gun assembly was started as one subassembly and the carriage as the other. Once underway, one notices that there are a LOT of very small pieces. In fact, if not for tweezers, a fine-toothed razor saw, and an Opti-visor, I don't know how I would have been able to build this kit. I guess that lots of teeny bits equals a more detailed model when doing ground military stuff. Thanks to the minimal mold seams, building this thing was simply a manner of sawing off the pieces, cleaning them up a bit with a sanding stick and gluing them down.
ICM doesn't provide any indicators on their bigger pieces where the smaller bits should go, so constant checking back and forth between the breakdown and the three-views are a necessity. By doing this, I made very few errors and soon go into building this kit. So much so, that other projects were put on the slow-build track while this one took priority. Just a note here; the kit instructions are designed for the gun to be in the towing position so some adjustment needs to be made if using it in a diorama.
Without going into any huge detail, here are some things to watch out for in the first six steps. First of all, be careful not to put things on backward. I did that with the large spade-things at the back of the carriage that keep the gun from recoiling back about 100 feet when firing. The bulges on these things go to the back. Secondly, this gun can be finished either in the towing or the firing position. It is possible to make it convertible from one setting to another, but that requires use of non-permanent glue on some parts. These parts are mostly pins and possible moving bits. Part B13 is the pin that holds the carriage arms together when being towed. It was glued with white glue. So were parts A24 and A26. Parts B19 and B20 were not glued down as they would normally be permanently welded to the carriage arms. Without gluing these bits, it is possible to repose the arms. One thing I noticed on all these moveable bits is that either the holes needed to be enlarged, or the attachment points had to be thinned down. This was particularly noticeable on parts B33/34 and B27/28 where they attached to the axle assembly. Part B23 also needs thinned if it isn't going to be permanently attached.
After finishing step six I noticed that it was a good time to stop construction and start with some painting.
PAINT & DECALS |
|
|
If you haven't figured it out by now, I am pretty ignorant when it comes to things army. The kit instructions are blissfully void of such things as overall color. Contacting several of my modeling compatriots with color questions, the majority of them helpfully suggested that I paint it green. OK, green it is. Looking at the paint that I had already mixed for other projects, I settled on a nice dark green acrylic. Actually it is Aeromaster Nakajima Navy Green that fit the bill. Since the carriage was basically done, I carefully sprayed everything in sight a lovely dark green, including the wheels.
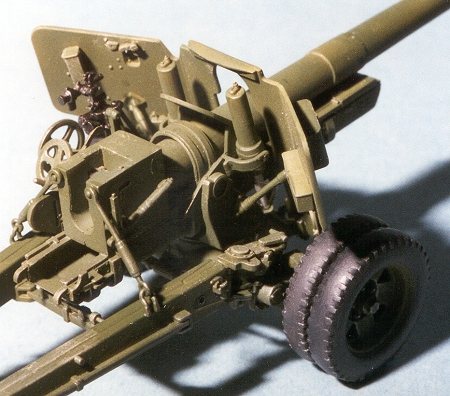
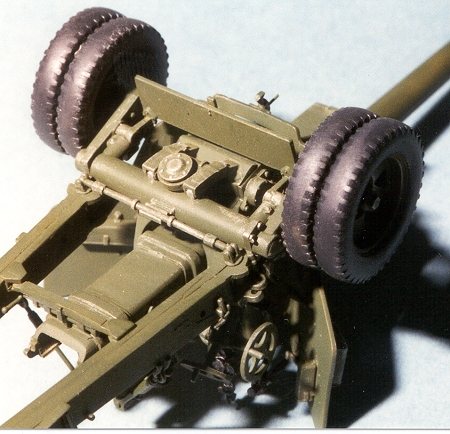
After this preliminary painting, it was back to more gluing of teeny pieces onto the gun assembly. Once all the bits were glued onto the gun assembly (minus the shield) the gun was then painted green like the carriage assembly. While drying, the wheels were attached onto the carriage. ICM has an interesting method of fixing the wheels onto the axle. Since there are two wheels, one simply slides on the inner wheel, glues a spacer to the axle and then glues the outer wheel to the inner one. The spacer (hopefully) keeps the wheels from sliding around too much. What is really interesting is that it works! Typical of all the items with holes that had to be fit over shafts, the spacer had to have the center enlarged and the outside shaved down to fit into the wheel hub.
Once that was done, it was back to attaching more bits and pieces. I wasn't sure how well the pistons that elevate the barrel would work, but they were one of the few operating features that I didn't have to trim! Attaching the barrel assembly to the chassis was a bit of a treat. Don't forget to install the elevating bit under the barrel section before gluing the barrel assembly to the chassis.
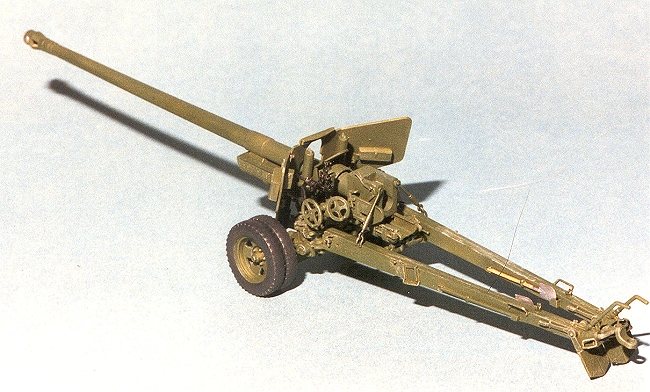
Final assembly consists of installing the optical assembly (very fussy and delicate), the barrel hold-down clamps, and the shield (not very easy, but not impossible). It was during the installation of the shield that I noticed that one of the major lower shield attachment points had been short shot. Not a catastrophe, but it does require some attention to getting everything aligned properly. Then those areas not painted had to be painted and any over-spray touched up. Once done, the kit was given some very careful drybrushing with a greygreen and a bit of steel. Once it was all finished, I started having second thoughts on my choice of colors. I think the next piece will be done with a browner shade of green that what I chose.
CONCLUSIONS |
Overall, I am very impressed with this kit. It was great fun to build (maybe because for me it was so different), I spent most of the time gluing pieces together rather than waiting for painted subassemblies to dry as I do with aircraft kits. I also have zero knowledge of the subject area so cannot nit-pick the kit to death!
Looking back on the experience, for me, probably the biggest area of concern regarding this kit is also one of its strengths. That is the instruction sheet. It was very well done and the three-views were of immense help, but frankly my lack of knowledge hurt my ability when it came to placing some of the parts and subassemblies. This was particularly true of the sighting mechanism and the placement of the inner shield attachment points. A drawing of the parts in place would have been a real asset.
Really, that is the only area I could see that needs any improvement. It was a very enjoyable build and at only $9.00, a real bargain to boot! The end result is a very detailed-looking kit that anyone can be proud of. Now on to the truck to pull it!!
Copyright ModelingMadness.com. All rights reserved.
Thanks to the nice folks at ICM USA for the review sample.
Back to Reviews Page 2018