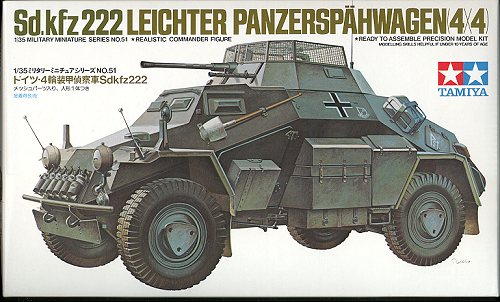
Tamiya 1/35 Sd.kfz 222 Panzerspähwagen
| KIT # | 35051 |
| PRICE: | $8.25 MSRP |
| DECALS: | See text |
| REVIEW : | |
| NOTES: |
|
| HISTORY |
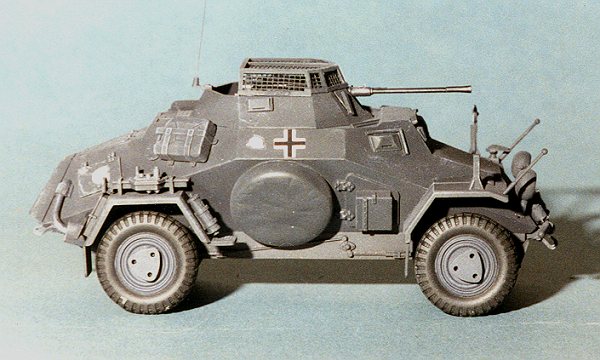
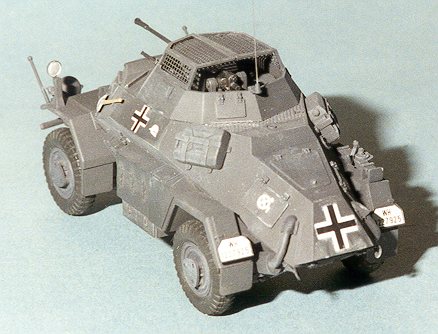
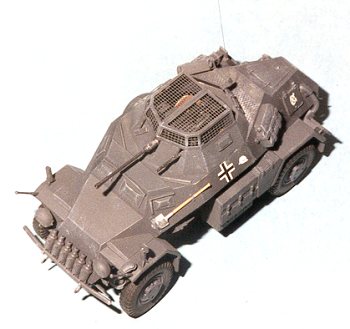
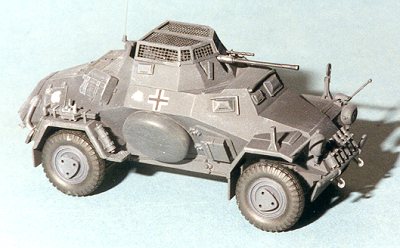
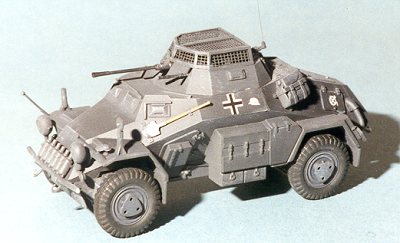
The Sd.kfz 222 is part of a family of light armored cars that started with the 221. Prototypes of this series were initially developed around1937 and were produced until 1942. However these useful vehicles were used until the end of the war. The main difference between the 221 and the 222 was in the weapon carried. The 221 had a a seven sided open topped turret with a single7.92mm machine gun. Later in the war, a 2.3 cm anti-tank rifle replaced the machine gun. The 222 (and subject of this kit) had a ten sided open topped turret with a 20mm anti-tank gun in addition to the machine gun.
All of these vehicles were based on a Horch/Auto Union chassis which had either a 3.5 liter, 75 hp engine (Ausf A) or later production had a3.8 liter 81 hp engine (Ausf B). Both had the engine in the rear. The chassis had a four wheel drive, fully independent suspension. Initially, they also had four wheel steering, but this was removed later as it proved to be unnecessary.The differentials were full locking ensuring that all four wheels were able to provide traction.
The hull was welded steel plate with a door on either side. The open top was covered by a framework with steel mesh (obviously to prevent the odd hand grenade from being dropped inside). Elevation and azimuth of the turret were manually controlled via small hand wheels.
| THE KIT |
 This kit is a bit different for me. I bought this one for
a ridiculously low price as the previous owner had already started it. In fact
the basic chassis had already been finished. Of the 10 steps in the construction
sheet, most of the first three had been done for me. While all the pieces were
there, this person obviously didn't believe in parts preparation as none of the
mold seams had been removed from the assembled parts. Neither had any ejector
pin holes been filled in the assembled bits.
This kit is a bit different for me. I bought this one for
a ridiculously low price as the previous owner had already started it. In fact
the basic chassis had already been finished. Of the 10 steps in the construction
sheet, most of the first three had been done for me. While all the pieces were
there, this person obviously didn't believe in parts preparation as none of the
mold seams had been removed from the assembled parts. Neither had any ejector
pin holes been filled in the assembled bits.
The parts themselves were in dark grey plastic. There is a length of string for the towing cable and a sheet of mesh that needs to be cut for the steel screening. The instructions are first rate as one expects from Tamiya. There is a pattern in there so you can cut the mesh to the right size. There is also a small decal sheet for a couple of different cars; one in European one in North Africa.
| CONSTRUCTION |
First step for me was to clean up what had already been built. This involved much scraping and some filling. Once this was done, I needed to find a similar paint, as the lower chassis had been painted as well. Following the advice of a store owner, I got a tin of Humbrol paint. It was not panzer grey, but uniform grey that the fellow had given me, as it was too green. Another trip to the store got a tin of something more dark and more blue that pretty well matched what was already there.
 Rather than respray for a second time, I decided to do
some construction. The fit of the parts is very good, though there are some mold
release pin holes that do need filler. One needs to remember that this is not anew kit and the mold was developed at least 20 years ago. However the
parts remaining were nice a crisp, though the mold lines were more pronounced than on a brand new mold.
Rather than respray for a second time, I decided to do
some construction. The fit of the parts is very good, though there are some mold
release pin holes that do need filler. One needs to remember that this is not anew kit and the mold was developed at least 20 years ago. However the
parts remaining were nice a crisp, though the mold lines were more pronounced than on a brand new mold.
I had decided not to install the wheels until the last step so didn't install them or the tie rods to them at this time. The wheels do turn and the mechanism by which they do this is rather well thought out. Once the wheels were assembled, they were painted panzer grey and then the tires painted with Aeromaster tire grey.
The gun mount and seats were next. Again, a simple job of gluing with no real problems. This assembly was painted panzer grey except the seats which were painted RLM 79 sand, as the instructions suggested khaki and that was the closest I had to it. This assembly was drybrushed with steel and then set aside. What to paint the interior was a real quandary. Really not much is inhere kit-wise, except the gun. I knew that enclosed vehicles were painted white or light beige, but knew nothing about open topped armored cars. I decided to paint it panzer grey since there is no real interior and nothing else to see.
 Once that was done, the gun was installed and the top glued
in place. You cannot insert the gun mount after the top of the hull is in place.
The top of the hull was preprinted before gluing as was the low turret. Once the
hull was complete, the other bits and pieces such as spare tire, fenders and
such were glued in place. I left off most of the small bits until final
construction. I knew that if I didn't, I'd break something off!
Once that was done, the gun was installed and the top glued
in place. You cannot insert the gun mount after the top of the hull is in place.
The top of the hull was preprinted before gluing as was the low turret. Once the
hull was complete, the other bits and pieces such as spare tire, fenders and
such were glued in place. I left off most of the small bits until final
construction. I knew that if I didn't, I'd break something off!
After the hull was basically complete, I went to work on the turret and the mesh screen. This was not as difficult as first envisioned. I used the kit diagrams and set the provided plastic mesh over it. Using a curved blade, it was easy enough to rock the blade over the plastic mesh and cut it. Less than half the mesh was used to make the initial bits so there is plenty for mistakes. Once all the bits were cut, they were attached using superglue. After they were painted, they were glued in the closed position (mostly to hide the nearly empty interior). Some of the final additions were the exhaust pipes,the rest of the steering gear (minus wheels), some canister thingies on the front and a few other odds and ends on the turret sides.
| PAINT & DECALS |
 To paraphrase Henry Ford, you can have it any color you want
as long as it is dark grey or desert tan. This one was painted dark grey. The
only color in it other than decals are the wood handle for the shovel and the
khaki seats inside. I know nearly zilch about the markings on these things so
chose one of the several options that was given in the instruction sheet.
To paraphrase Henry Ford, you can have it any color you want
as long as it is dark grey or desert tan. This one was painted dark grey. The
only color in it other than decals are the wood handle for the shovel and the
khaki seats inside. I know nearly zilch about the markings on these things so
chose one of the several options that was given in the instruction sheet.
This kit was painted quite frequently as things were added on to it. Once the wheels were painted, they were left off until the final stage to prevent overspray from marring the tire paint. An antenna was made from stretched sprue and that was it for construction. Once the decals had dried, the kit was sprayed with a matte clear to seal them in.
| CONCLUSIONS |
Really, a very nice little kit. Probably perfect for the beginner into semi-detailed military vehicles, and a nice change of pace for me. It is also nice that it isn't $40 dollars and doesn't have ten thousand pieces to it. While the armor experts probably can tell me a dozen things wrong with the kit, I liked it and can recommend it without hesitation. The only tricky part is the screening.
Copyright ModelingMadness.com. All rights reserved.
Review copy courtesy of me and my wallet!! If you would like your product reviewed fairly and fairly quickly, please contact the editor or see other details in the Note to Contributors.
Back to Reviews Page 2018