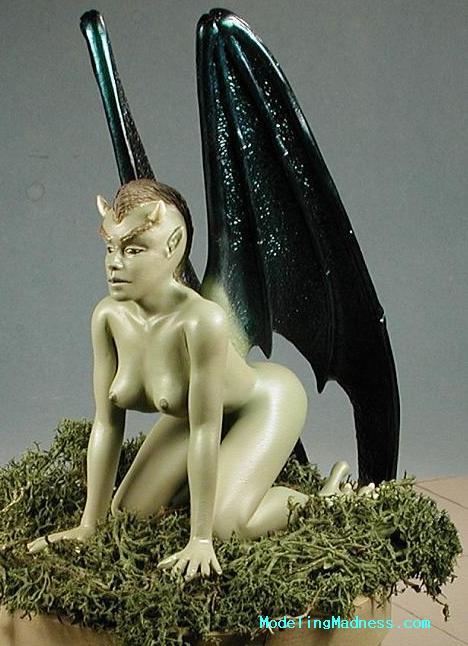
Dream Master Creations 'Harpy'
|
KIT # |
` |
|
PRICE: |
$25.00 + $4.00 shipping |
|
DECALS: |
N/A |
|
REVIEW : |
|
|
NOTES: |
Resin |
|
CONSTRUCTION |
All resin kits should be washed prior to any construction or other work. This gets rid of any mold release agent that will prevent paint or glue from sticking. Once the parts have been washed in warm, soapy water and dried, it is time to prep the pieces. This usually involves removing resin casting blocks, filling any air bubbles that are found and sanding off mold seams.
 This kit had no
casting blocks, no air bubbles and only very small seams and places where the
casting blocks were attached. In short, it was a breeze. That is the kind of
quality casting that I know I appreciate. I really hate spending weeks prepping
a poorly cast kit just to fix all the numerous glitches in it. It should be
right from the start and that is what you get with a Dream Master Creations kit.
This kit had no
casting blocks, no air bubbles and only very small seams and places where the
casting blocks were attached. In short, it was a breeze. That is the kind of
quality casting that I know I appreciate. I really hate spending weeks prepping
a poorly cast kit just to fix all the numerous glitches in it. It should be
right from the start and that is what you get with a Dream Master Creations kit.
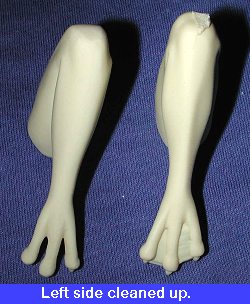
Once the kit was ready to go, the first thing I did was to remove the webbing from the feet. This was done by frequent scribing of the webbing until it was easy to remove. Then the feet were cleaned up using 320, 400, and 600 grit sandpaper. This and removing the resin webbing was the most difficult and time consuming prep part of the kit. Took about 10 minutes. See the image to the left.
Now I was ready to start gluing. I began with one of the legs.
These seemed to be the most difficult parts to sand so were done first. The leg
was glued on using super glue, though you could just as easily use 5 minute
epoxy. You'll probably have a gap, but don't freak out. These can be easily
filled. Don't use regular filler as they will shrink and may react adversely to
paint (as in shrink even more). I used A + B epoxy putty. Milliput is the same
stuff. You 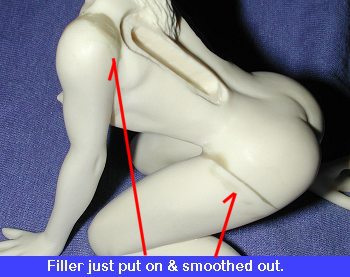 want a very fine
grained putty. A very small amount of this putty. About as much as a Tic-Tac.
You don't need a ton of this stuff as it dries quite hard and you want to have
as little to sand off as possible. It is imperative that you properly mix the
two parts thoroughly or it won't dry. I know. If you think it is mixed enough,
go for another few minutes to be sure. You have at least an hour or two to work
with it. Make sure you get it down into the seam and then you can mold it with a
wet finger. Remove any excess before it dries.
want a very fine
grained putty. A very small amount of this putty. About as much as a Tic-Tac.
You don't need a ton of this stuff as it dries quite hard and you want to have
as little to sand off as possible. It is imperative that you properly mix the
two parts thoroughly or it won't dry. I know. If you think it is mixed enough,
go for another few minutes to be sure. You have at least an hour or two to work
with it. Make sure you get it down into the seam and then you can mold it with a
wet finger. Remove any excess before it dries.
Once it is dry, take your 320 grit sandpaper and get it down to where it is close to fully smooth. Then use the 400 to get it to the final shape and the 600 to feather everything out. Any spots missed can then be fixed with superglue or with regular filler if they are thin or shallow. You can also use Mr. Surfacer or thickened lacquer primer. When that is done, do the next leg and then the arms. As you can see from the image to the right, the amount used is really minimal.
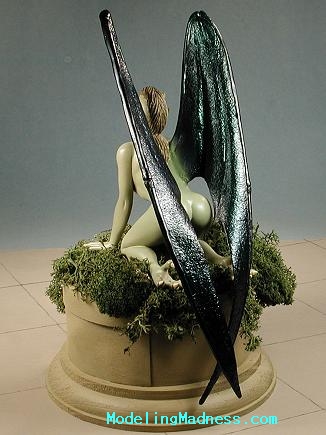
After you have a complete body, the next is the wings. These are just a superbly molded as the rest of the kit. There are nice slots cut into the back to accept the wings. These were installed one at a time to make it a bit easier to smooth out the putty. The right one is the one that needed the most filler of the two so it was installed first. It was a simple superglue job and then the epoxy putty was applied. It turned out so well that little actual sanding was needed to smooth out the area. Once the other wing was glued in and puttied, the complete figure was taken to have a coat of primer put on it. Because of the wings, you have to be rather resourceful figuring out how to set it down as you can't set it on its feet/arms as the wings hang down rather far below figure level.
|
PAINT |
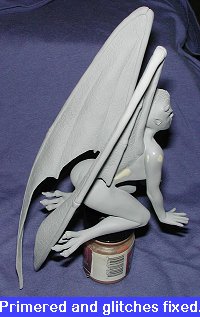 The figure was now
ready for the first primer coat. It is imperative that you get primer in all the
nooks and crannies. While it is normal for figures to be painted with a light
colored primer, using a white would have made it very difficult to see what had
been missed. After that was sprayed on and had dried, any flaws spotted were
taken care of. This was mostly areas where I hadn't gotten the putty properly
smoothed out.
The figure was now
ready for the first primer coat. It is imperative that you get primer in all the
nooks and crannies. While it is normal for figures to be painted with a light
colored primer, using a white would have made it very difficult to see what had
been missed. After that was sprayed on and had dried, any flaws spotted were
taken care of. This was mostly areas where I hadn't gotten the putty properly
smoothed out.
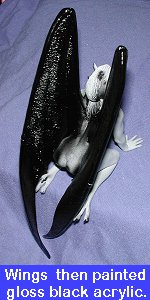 Now for the first
color coat. This was gloss black using Tamiya Acrylic. The main reason for using
this is that I wanted to use a specific metallic paint for the wings. The
instructions stated that the paint had to be undercoated with gloss black
acrylic, so that is what I used. Everyone has their ideas of what a harpy should
look like. Well harpies are mythical beasts and as such are open to all sorts of
interpretations of coloring. Not generally following accepted policies when it
comes to the fantasy world, I thought it might be fun to experiment with a few
more unusual colors for this beast.
Now for the first
color coat. This was gloss black using Tamiya Acrylic. The main reason for using
this is that I wanted to use a specific metallic paint for the wings. The
instructions stated that the paint had to be undercoated with gloss black
acrylic, so that is what I used. Everyone has their ideas of what a harpy should
look like. Well harpies are mythical beasts and as such are open to all sorts of
interpretations of coloring. Not generally following accepted policies when it
comes to the fantasy world, I thought it might be fun to experiment with a few
more unusual colors for this beast.
After drying for several days to be sure the paint was properly
cured, I sprayed the wings with a greenish metallic color from Alclad II called
Scarabeus. It gives a sheen very much like a scarab beetle and is quite a lovely
color. I 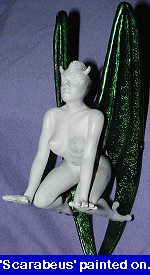 simply sprayed on a
relatively light coat and let it dry. One doesn't want to overdo this color or
it can turn very dull and sort of a whiteish green (I found this out through
testing).
simply sprayed on a
relatively light coat and let it dry. One doesn't want to overdo this color or
it can turn very dull and sort of a whiteish green (I found this out through
testing).
I didn't worry about the overspray as I knew that the skin color
would be covering this 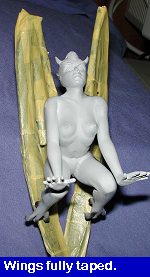 up. I had
not planned on using a light skin tone on this as it wouldn't have matched the
wings. But before that could happen, the wings needed to be completely masked.
Not exactly a simple task thanks to the way the wings fit. They are quite close
to the body in several places so care is definitely needed. Tamiya masking tape
was used because of its sticking qualities and lack of residue when removing it.
The Scarabeus paint was left to dry for a couple of days to make sure it was
fully cured.
up. I had
not planned on using a light skin tone on this as it wouldn't have matched the
wings. But before that could happen, the wings needed to be completely masked.
Not exactly a simple task thanks to the way the wings fit. They are quite close
to the body in several places so care is definitely needed. Tamiya masking tape
was used because of its sticking qualities and lack of residue when removing it.
The Scarabeus paint was left to dry for a couple of days to make sure it was
fully cured.
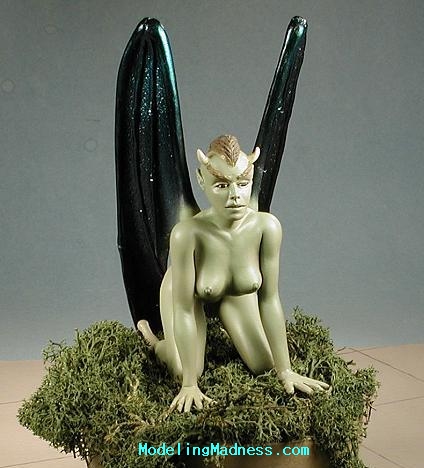
Once the wings were totally masked, I applied the skin tone. I was looking for something dark and with a green tint to match the wings. Using Badger Accu-flex suntaned flesh, I added some Italian AF dark green. What I got was a color close to RAF Dark Earth but with a slight greenish tint to it. Pretty close to what I was seeking, but it needed more green.
I wasn't really sure exactly how to do that. Didn't want to mix another batch of paint as it would have been too much. The idea came to me to take a lighter green and mist it over the existing color. That is just what happened. The color chosen was Israeli AF light green, FS 36227 (or is it 277?). This was misted on by holding the figure about two feet away from the airbrush and letting the color build up to the level that I though was satisfactory. The end result is a sort of moldy brown color that I was seeking.
 With the main colors on the wings and body, the next step was to
blend them in at the wing root. This wasn't as easy as I had thought, but I did
manage to get something that was acceptable, though it took several tries!
Shortly after this, the model managed to fall onto the floor, landing on its
fingers and breaking one of them off. As much as I looked, I was unable to find
the missing digit so a new one had to be fashioned. This was done by drilling
out the base of the finger, installing a section of paper clip (one of the
handiest repair things to have around), and then molding some A+B epoxy putty
around it. After some trimming and molding I left it to dry. Once dry,
sandpaper was used to smooth things out and it was repainted. The end result is
that you can't tell it was broken off.
With the main colors on the wings and body, the next step was to
blend them in at the wing root. This wasn't as easy as I had thought, but I did
manage to get something that was acceptable, though it took several tries!
Shortly after this, the model managed to fall onto the floor, landing on its
fingers and breaking one of them off. As much as I looked, I was unable to find
the missing digit so a new one had to be fashioned. This was done by drilling
out the base of the finger, installing a section of paper clip (one of the
handiest repair things to have around), and then molding some A+B epoxy putty
around it. After some trimming and molding I left it to dry. Once dry,
sandpaper was used to smooth things out and it was repainted. The end result is
that you can't tell it was broken off.
Now that it was mostly painted, it was time for the detail stuff. I used Gunze Khaki for the hair and eyebrows. The horns, claws and eyes were painted with Humbrol 108, a light ivory color. The eyes were outlined using a Rapidograph pen and that was also used for the eyeballs. I had thought about red, but felt that would be too harsh a difference from all the other colors used.
The model was given a light wash and then sprayed with clear matte to cut down on the sheen of the skin. For the kit, I was finished.
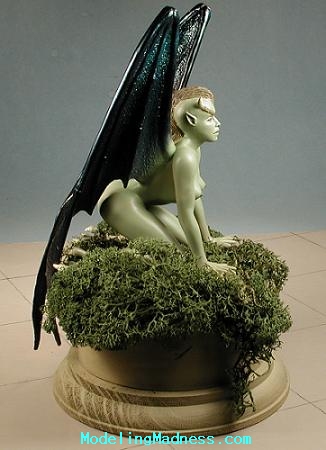
However, this needs a base. I mean it has to have one. That is because the back of the wings jut about 3-4 inches lower than the body. A pedestal type of base is what would look good, but just having it sit on a chunk of wood wasn't what I had in mind. Besides, finding a piece that size would be expensive. So I headed for the crafts shop. $3.00 later, I had a cheap pine circular base and a thin circular box to go on top of it.
 The box was glued to the base using regular white glue. When
dry, the entire base was given a couple of coats of future using a large brush
as the wood really soaks that stuff in. It was then sprayed with an earth brown
color. Next, the top of the base was liberally coated with white glue and
sections of reindeer moss were set on the top of it and allowed to drape over
the edge. I figured that if a Harpy was part bird, then a nest would be a
logical place for it to be! The end result is not bad at all, especially as the
base doesn't clash with the greens and browns of the figure.
The box was glued to the base using regular white glue. When
dry, the entire base was given a couple of coats of future using a large brush
as the wood really soaks that stuff in. It was then sprayed with an earth brown
color. Next, the top of the base was liberally coated with white glue and
sections of reindeer moss were set on the top of it and allowed to drape over
the edge. I figured that if a Harpy was part bird, then a nest would be a
logical place for it to be! The end result is not bad at all, especially as the
base doesn't clash with the greens and browns of the figure.
|
CONCLUSIONS |
This has to be the best resin figure I have ever built. The kit itself was totally free of any flaws, which in itself is a real bonus. I didn't have to spend days filling air bubbles or reshaping parts as with most figures. The bits fit very well and needed only the smallest amount of filler. Best of all, it was a subject that can be played around with when it comes to painting!
I can highly recommend this kit as a first time resin figure kit to anyone interested in the genre. You'll love the way it fits and be totally spoiled when it comes to most other figure kits!
July 2001
Review kit courtesy of Sue at CRM. If you want more information on obtaining this figure or any others visit the website for Dream Master Creations. (Note: figure may no longer be available [2007])
If you would like your product reviewed fairly and quickly by a site that averages thousands of visits a day, please contact me or see other details in the Note to Contributors.