 E-2046 1/4 Short Sword Ninja
E-2046 1/4 Short Sword Ninja
| KIT #: | FG 4174 |
| PRICE: | $53.12, including shipping from Hong Kong |
| DECALS: | none |
| REVIEWER: | Scott Van Aken |
| NOTES: | Resin kit |
| BACKGROUND |
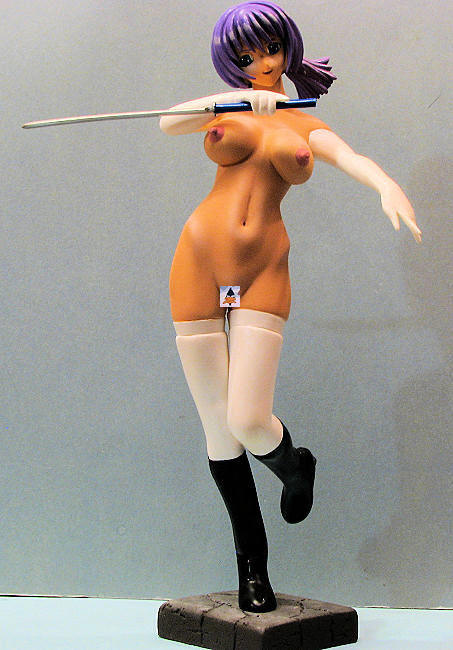
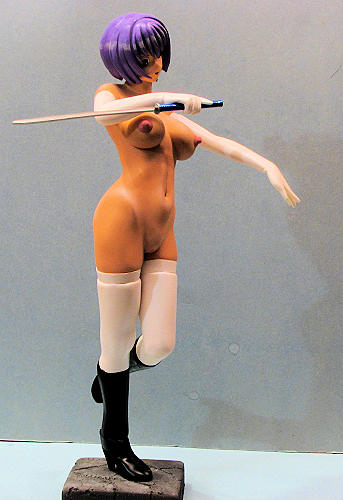
OK, call me what you will, but I like anime figures of all sorts. They are sort of a cartoon rendition of people and as such have an appeal. There are many who don't understand the attraction and those who do. This particular figure caught my attention as much to the pose as to the lack of clothing. It is also a pretty good size and that increases the ease of construction and painting. There is no story behind this one as it is not a character in a comic or show. It is just a naked woman with a sword, a rather irresistible combination for me.
| THE KIT |
As with all the figure kits I get from E-2046, this one is superbly cast with no air bubbles and no voids. You can sand the snot out of this resin without running afoul of these nasty glitches, something that happens too frequently with aircraft kits. However, this kit has problems at the seam line caused by a mis-aligned mold. Thanks to the casting, it is easy enough to sand away most of the problems, As usual, the parts are large and will make for a heavy model.
You get a torso, legs, arms, head and several pieces of 'hair'. The right hand comes in two parts so that the sword can be installed. Test fitting shows that this will be the most difficult part of the build. The kit comes with a parts layout and a photo of an unpainted test model. Period.
| CONSTRUCTION |
 The
initial part of building one of these is to take care of the surface glitches.
This is somewhat time consuming as all the seams have to be either removed or
filled. This one took both with some of the areas needing work being difficult
to access. This was particularly the case under the arm stubs but with
perseverance, one can get them cleaned up well.
The
initial part of building one of these is to take care of the surface glitches.
This is somewhat time consuming as all the seams have to be either removed or
filled. This one took both with some of the areas needing work being difficult
to access. This was particularly the case under the arm stubs but with
perseverance, one can get them cleaned up well.
Once that is done, the parts can be readied for mating. I have to tell you that you will need a low speed motor tool of some sort for this. Most of the kits have excess resin on these surfaces and you need to remove it to get a decent fit. This means several sessions of grind and fit. During this time, a dust filter is best worn to keep from breathing in the resin dust. Its sharp edges can cause respiratory problems. Better safe than sorry. Normally wet sanding cuts down on dust, but you can't wet grind. Again, this is quite time consuming as one doesn't want to overdo it.
 When
building up the kit, I start by attaching the parts that will be the easiest and
not get in the way of other parts of construction. This means attaching the legs
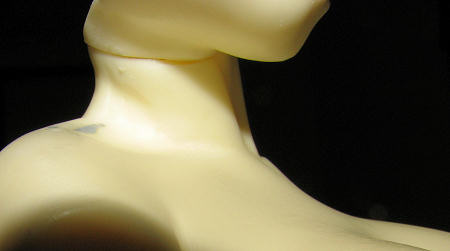
first. Once those are in place, the
head was glued on. This has a large seam that needs to be corrected and with the
arms on they would be in
When
building up the kit, I start by attaching the parts that will be the easiest and
not get in the way of other parts of construction. This means attaching the legs
first. Once those are in place, the
head was glued on. This has a large seam that needs to be corrected and with the
arms on they would be in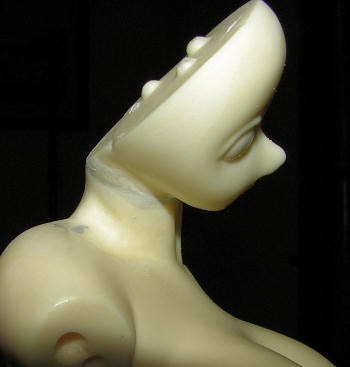 the way. To fix this, I followed some advice on a CD I
recently reviewed. I used Apoxie-Sculpt, an epoxy filler for the gap. While
still 'moist', I took a wet Q-tip and began smoothing out the join area. After
going through a number of these, I had things pretty well smoothed out. Not
perfect like on the CD, but one where there would not be a ton of sanding needed
to get it smooth.
the way. To fix this, I followed some advice on a CD I
recently reviewed. I used Apoxie-Sculpt, an epoxy filler for the gap. While
still 'moist', I took a wet Q-tip and began smoothing out the join area. After
going through a number of these, I had things pretty well smoothed out. Not
perfect like on the CD, but one where there would not be a ton of sanding needed
to get it smooth.
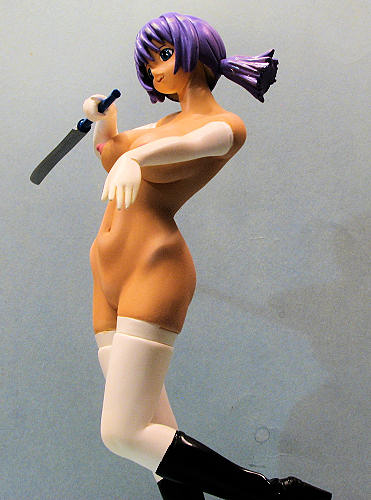
 Once that
was taken care of, the left arm was glued in place. During this evolution, I
cemented the upper hand on the right arm. This will be holding the sword. I saw
that there was going to be gap problems with it no matter what I did so glued it
in place where it fit the best. Once it was dry, I took a drill bit the same
size of the handle of the sword and ran it up the inside of the hand. It will
cut a groove in the area below the thumb, but when the sword is in place, this
will be invisible. It is a tight fit, but it still makes it easier to paint the
sword and install it when the rest of the figure is done. With that filled and
smoothed out, the one leg had a pair of holes drilled in the bottom of the shoe.
Into those holes went a couple of sections of paper clip. This is what will hold
the figure on the stand. Using an old award plaque, I drilled a pair of holes to
match up with the clips and used this for a painting stand. The figure was not
glued in place.
Once that
was taken care of, the left arm was glued in place. During this evolution, I
cemented the upper hand on the right arm. This will be holding the sword. I saw
that there was going to be gap problems with it no matter what I did so glued it
in place where it fit the best. Once it was dry, I took a drill bit the same
size of the handle of the sword and ran it up the inside of the hand. It will
cut a groove in the area below the thumb, but when the sword is in place, this
will be invisible. It is a tight fit, but it still makes it easier to paint the
sword and install it when the rest of the figure is done. With that filled and
smoothed out, the one leg had a pair of holes drilled in the bottom of the shoe.
Into those holes went a couple of sections of paper clip. This is what will hold
the figure on the stand. Using an old award plaque, I drilled a pair of holes to
match up with the clips and used this for a painting stand. The figure was not
glued in place.
 When I do figures, I like to prime them with Tamiya
Extra Fine White Primer. It is pricey, but seems to stick well to resin. It is
also pretty smooth and provides a good base for light colors and flesh tones.
Down side is that it really stinks and the smell lingers for many, many hours
until the paint is fully cured. Once it had cured, I masked off the stocking and
glove sections as those were going to remain white. As you might believe it
takes a considerable amount of tape. I then painted the boots in a semi-gloss
black.
When I do figures, I like to prime them with Tamiya
Extra Fine White Primer. It is pricey, but seems to stick well to resin. It is
also pretty smooth and provides a good base for light colors and flesh tones.
Down side is that it really stinks and the smell lingers for many, many hours
until the paint is fully cured. Once it had cured, I masked off the stocking and
glove sections as those were going to remain white. As you might believe it
takes a considerable amount of tape. I then painted the boots in a semi-gloss
black.
Moving to the torso and head, those were painted with
Badger pale flesh, a pre-mixed acrylic that I really like, though it does need a
somewhat matte primer to stick well, the Tamiya white working just fine. I then
did some highlights with white, but put on very lightly.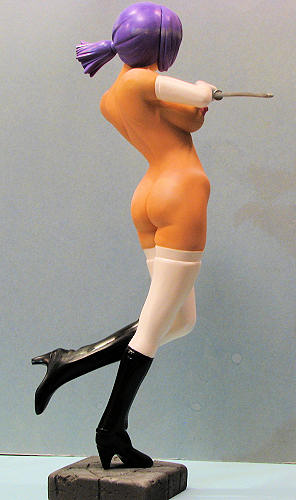
Then, as sometimes happens, the kit sat on the shelf, untouched for about two years. No real reason, just lost interest in it as I went on to other subjects.
Fast forward and I decided to finish up a bunch of near-done projects, including this one. Breaking out the brush, I did some very light accentuating with Badger tanned flesh. Pulling up all the masking, I also touched up what had been done and went to work on the eyes. These are areas where I am not very good, but after several tries, I finally got something that didn't look horrid.
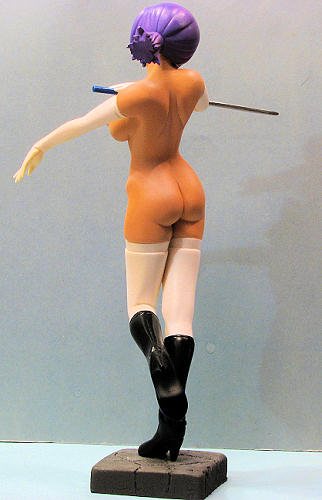 The hair was
painted purple and I used some light grey to give it that sort of band you see
in the mangas. The sword was painted with Alclad II airframe aluminum which has
some shine to it, but not as much as chrome. The handle was painted French Blue.
I had to drill out the hand even more than it already was to allow the sword to
slip in there cleanly so as not to scratch the paint. Nipples were painted with
Vallejo old rose, which is a lighter shade than the similar color by Badger and
just looks better to my eyes.
The hair was
painted purple and I used some light grey to give it that sort of band you see
in the mangas. The sword was painted with Alclad II airframe aluminum which has
some shine to it, but not as much as chrome. The handle was painted French Blue.
I had to drill out the hand even more than it already was to allow the sword to
slip in there cleanly so as not to scratch the paint. Nipples were painted with
Vallejo old rose, which is a lighter shade than the similar color by Badger and
just looks better to my eyes.
For a base, I had a resin one that had been sitting around for several years. It was painted Vallejo track color, then dry brushed with Vallejo light grey to add some texture on the top. I drilled out holes in the base to match the paper clips already attached the bottom of one foot. Super glue was then used to attach the foot to the base. It wobbles a bit, but seems sturdy enough. Finally, I glued on the two pieces of 'hair' and the model was done.
| CONCLUSIONS |
 Thanks
to the very high quality of the resin E2046 uses in its kits, this is something
that goes together fairly well. Those with any resin building experience will
have no trouble with this particular kit. Speedy builders can have it done in a
week, I'm sure, but I'm not speedy and all the prep and seam removal takes me
more time than it will do for others. This is one of the larger kits I've done
over the years and it did turn out well. Be sure to leave room for it in the
display case!
Thanks
to the very high quality of the resin E2046 uses in its kits, this is something
that goes together fairly well. Those with any resin building experience will
have no trouble with this particular kit. Speedy builders can have it done in a
week, I'm sure, but I'm not speedy and all the prep and seam removal takes me
more time than it will do for others. This is one of the larger kits I've done
over the years and it did turn out well. Be sure to leave room for it in the
display case!
November 2012
If you would like your product reviewed fairly and fairly quickly, please contact the editor or see other details in the Note to Contributors on the main page.