E 2046 1/4 Nadia Bust
|
KIT #: |
FG 5002 |
|
PRICE: |
$59.62 including registered airmail shipping from Hong Kong to the US |
|
DECALS: |
None |
|
REVIEWER: |
Scott Van Aken |
|
NOTES: |
Resin figure kit |
 Nadia: The Secret of Blue Water
(ふしぎの海のナディア,
Fushigi no Umi no Nadia?, lit.
Nadia of the Mysterious Seas) is a Japanese animated television series inspired by the works of Jules Verne, particularly
Twenty Thousand Leagues Under the Sea and the exploits of Captain Nemo. The series was created by Toho, from a concept of Hayao Miyazaki, and directed by Hideaki Anno of Gainax.
Nadia: The Secret of Blue Water
(ふしぎの海のナディア,
Fushigi no Umi no Nadia?, lit.
Nadia of the Mysterious Seas) is a Japanese animated television series inspired by the works of Jules Verne, particularly
Twenty Thousand Leagues Under the Sea and the exploits of Captain Nemo. The series was created by Toho, from a concept of Hayao Miyazaki, and directed by Hideaki Anno of Gainax.
In its original Japanese broadcast, it aired from 1990 to 1991 and ran for 39 episodes. The complete television series is available in the United States from ADV Films on DVD. ADV's Anime Network has broadcast the series in the United States. Reportedly, the series was to have been screened on TV in the United Kingdom in the mid-1990s, but the UK distributor balked because of the amount of violence in the series.
The series centers around Nadia, a young girl of unknown origins, and Jean, a young French inventor. Early in the story, the two protagonists are chased by Grandis Granva, Sanson, and Hanson, a group of jewel thieves who pursue Nadia for the blue jeweled pendant she possesses. After being rescued by Captain Nemo and his submarine, the Super Sea Cruiser
Nautilus, the jewel thieves and the young protagonists join forces and participate in the struggle against the Neo-Atlantean forces, who seek to dominate the world.
In the process, Nadia and Jean save the world from violent domination by the Neo-Atlantean forces led by Gargoyle, explore worldly mysteries and the powers of the blue pendant, uncover Nadia's hidden family ties, and ultimately discover the secret origins of Nadia.
Like all of the resin figure kits I've bought from E 2046, the resin is superbly cast and totally free of molding glitches like air pockets and short shot areas. There are a few spots where the seams are mis-matched, and there are some resin pour stub remnants that have to be removed, but that is about it.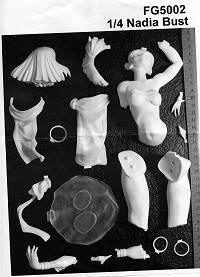 Most of these kits arrive with the major seams and pour stubs already removed and the areas smoothed down. Also typical of these kits, your instructions
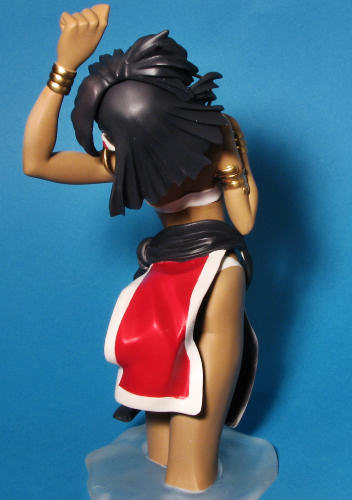 are little more than an photo or drawing of the parts and an image of a completed kit. All the rest is up to the builder. Fortunately, these kits do not have parts that number in the hundreds so they are generally not all that difficult to assemble.
First order of business is to remove all the small pour tabs. Unlike many of the kits I've built like this, the designers of this one had no trouble placing these things where they have to be carefully ground away with a motor tool instead of simply cut off and sanded down. They decided it was best to have these stubs on both the outer surface of a part and on the mating surface as well. If one doesn't have a nice, low speed motor tool with fine bits, then the preparation needed may well be so time consuming as to prevent the kit from being built. During this operation, I wore a filter mask to keep from inhaling the resin dust. During sanding, I wet sanded so that precaution wasn't necessary.
Once all the parts were prepped it was time to test fit. This is by far, the worst fitting anime kit I have ever attempted. No two parts fit at all well and all of them needed additional work with the grinding bit on my motor tool to get a somewhat acceptable fit. Particularly bad was the fit of the leg to the lower torso and the fit of the upper torso into the lower torso piece. In these cases, there were huge gaps and I had to resort to a-poxie sculpt to fill these in. A side effect of this was that the legs would no longer fit into the prescribed holes molded in the clear resin base. More on that problem later.
 With the legs and the upper torso were together, I worked on the hand and the other arm. At this time, I just wanted them to fit prior to time to actually glue them in place. A note on attaching these rather large pieces. Those who are smart, will drill holes and install pins to help hold the bits together. Not falling into that category on this one, I simply used superglue to hold parts together. In several cases, I used too
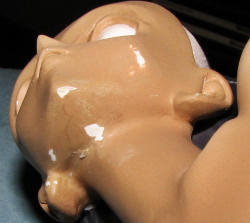 much and it leaked out, marring areas, some of which had been painted already. You can see the additional sanding I needed to do to remove it all from the face. Since I NEVER build a kit without it having some sort of disaster, that was one of them for this kit.
With the torso finally filled and smoothed down with sandpaper and files, I decided to apply paint. Now with a figure, it is in pretty much a constant paint mode with bits not painted as a whole, painted then later attached. For Nadia, I used Testors Colors By Boyd enamel for the white, Tamiya red acrylic for the red, and I mixed some red and black Mr.Color lacquer for the very dark purple areas. On the torso itself, I first used Tamiya fine white primer for a base coat in order to find any glitches. There were a few. Once those were fixed and re-primed, I sprayed the white on her pants, top, eyes, and on the edges of the split dress she wears. This paint is gloss and that is what I wanted for these.
When dry, they were masked off, as were her bracelets, and the rest of her body was sprayed with Badger Suntanned Flesh, an acrylic. I used normal Flesh for some of the highlights, also sprayed on and a little bit of burnt umber for some shadow areas. I personally don't like what I consider the overdone effects of most painted figures. I can understand why it is done, but they end up looking like caricatures to me. I'd much rather have these colors understated and let room lighting take care of the highlights and shadows. Probably why none of my figures have ever even placed at a show.
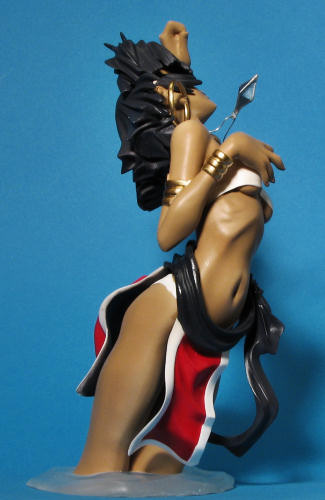 With the torso done, I set it aside for a bit, then concentrated on her dress. It has a dark purple sash that is the same color as her hair. The lower section is red, outlined in white. I had already painted the white so that was masked off and the red areas painted. When dry, this was masked off and the rest was painted deep purple. I also did much of the back side of the dress and her hair sections in this color. She wears two hair tie-backs that are small insert pieces. These were painted white, masked then the hair bits painted deep purple. The 'gems' were painted with a brush using Vallejo colors.
Next bit to be glued on was the back section of hair. This piece is too large for the attachment section on the back of her head. I did not sand it down, hoping the front hair section would hide this glitch. It mostly does, but again, more on that later. With the back hair section installed, I worked on the eyes. Using a method I picked up on the internet, I painted in the eyes with light blue, highl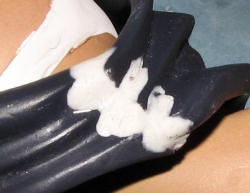 ighting them with black and adding in life lights using white. Nothing fancy, but effective. Once those were done, the eyes were given a protective coat of clear gloss.
At this time, I went to attach the three pieces for the skirt. Oh my, the fit was almost non-existent. While the side with the sash knot could be made acceptable, it was as if one of the other side attachment pieces had been short shot and rather badly. For this, I glued it in place as best I could, then used a considerable amount of a-poxie sculpt to fill in the gaps and provide some continuity, eventually getting something that looks acceptable. A lot of grinding was done to match up the folds after which some sanding was done. The area was brush painted several times to provide a constant color but in the end, it worked out OK as you can see of the finished product. All this work had to be done on what was pretty much a completed figure, so great care was taken and air-brushing these shades was pretty much out of the question. At this time, I also g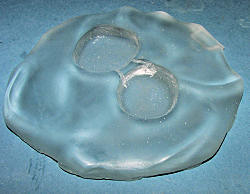 round away the base where the legs would fit as their previous holes were not how the legs ended up being positioned. You can see in the image where I had to remove a chunk. The figure was then super glued to the base to facilitate completion of the model.
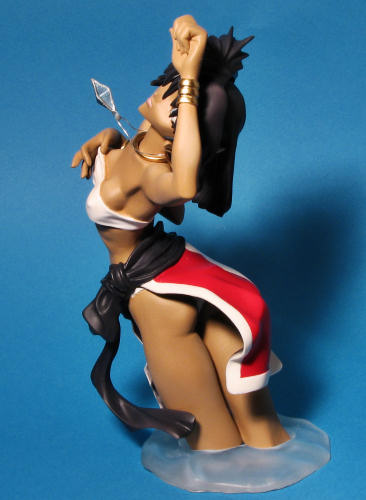
I next masked the hand and remaining arm in preparation for painting the bracelets. These were painted gold using Testors enamels. I also painted the necklace and earrings this color. Once they'd had a chance to fully dry, the necklace and earrings were cut in preparation for attachment. I then glued on the arm, adjusting it to match the photo provided. The necklace was stretched open a considerable amount but I managed to get it around the neck of the figure without breaking it. The earrings are grossly oversize, but those were glued on as well. I then attached the two pieces that had the white and red hair ba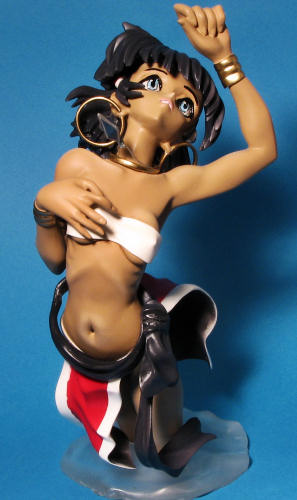 nds. The fit of these was atrocious and more grinding was needed to get them in place. Next was the forward part of the hair, again, after a lot of grinding was required. I'd have to say this the a Mach 2 style resin figure kit. The hand was then glued in place completing most of the kit.
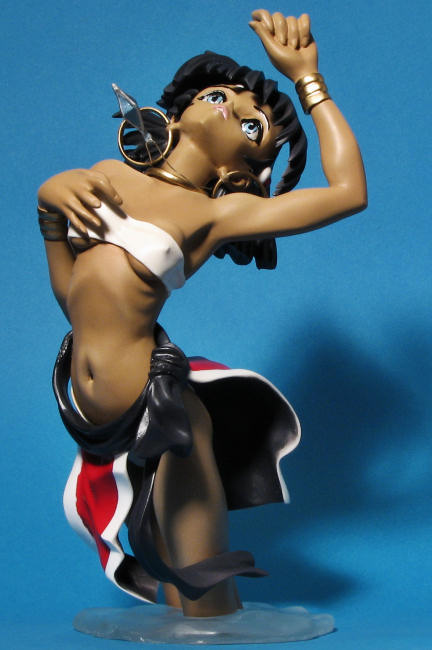
The last thing I had to do was to mount the Blue Water crystal. Once painted, I used a section of 15 amp fuse wire (and my thanks to the kind individual who sent this to me) mounted through a hole I drilled and then attached around her neck. I bent the wire to show it being blown upwards by a strong wind or Nadia's rapid emergence from water as her hair and pose seemed to indicate one or the other. I tried to paint her top in a way that looked like it was wet and semi-transparent, but all my attempts looked terrible so I just left it opaque.
In the end, the finished result belies all the work and effort that went into its construction. I guess that is pretty much what we strive for when building a kit, so I was pleased with the result. However, I cannot recommend this to most modelers unless you enjoy the stresses required to get these parts to fit. I learned a few things, exercised a lot of modeling skills, and have a figure of a character I've enjoyed watching in videos.
http://en.wikipedia.org/wiki/Nadia:_The_Secret_of_Blue_Water
September 2009
Copyright ModelingMadness.com. All rights reserved.
Gotta thank me for this one. Maybe I'm too old to be enjoying these sorts of things, but well, there it is!
If you would like your product reviewed fairly and fairly quickly, please contact the editor or see other details in the Note to Contributors.
Back to the Main Page
Back to the Review Index Page