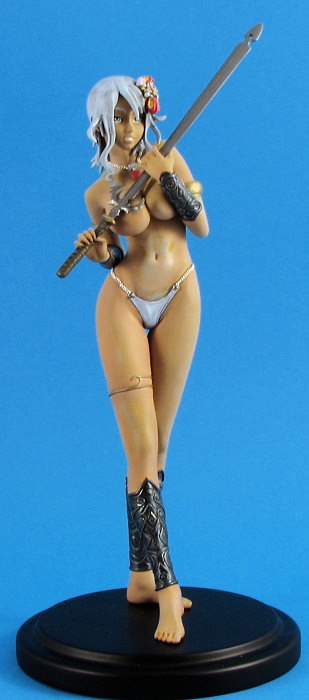
1/6 Shion
| KIT #: | FG 3937 |
| PRICE: | $41.40 including s&h |
| DECALS: | None |
| REVIEWER: | Scott Van Aken |
| NOTES: | Resin figure |
| THE KIT |
This is one of many repro garage kits that are available from many places in the world. By far the best come from Hong Kong and are often better than the original Japanese casting. Those from Thailand are to be avoided at all costs for they are generally quite brittle and full of molding defects.
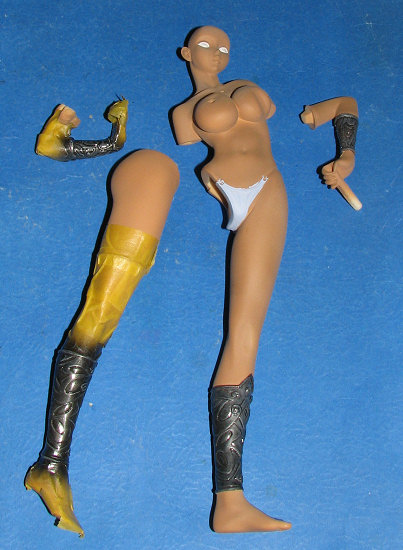
Unlike aircraft kits from Hong Kong, these anime' figure kits almost never have any molding glitches. No air pockets, no pinholes, no broken off pieces and often have most of the mold casting seams already removed. This leaves only tiny sprue attachment points to clean up. Something that is generally done within an hour or less with a sanding stick and paper. The kits are packaged with most parts in bubble bags; the large pieces getting a bag of their own. They then are packaged in more bubble wrap inside a hard plastic container. In over 200 kits, only once have I had a part arrive broken.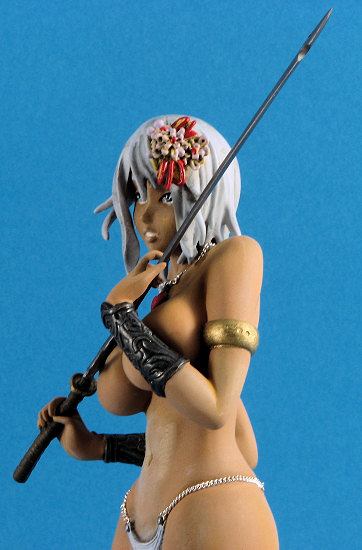
Also included in each kit is a parts breakdown and perhaps an exploded construction view. This kit is so simple that no construction information is really required. A full color photo of the completed model is also included, as much to help with painting as parts placement.
The engineering on this particular kit is quite good. Often companies will provide a multitude of parts. For the most part these are not really needed and many of us appreciate when bits are incorporated together. The kit also includes some fine silver chain and metal pins for attaching it to pre-drilled holes in the figure. Probably the only part that will need work is getting the thin, resin sword blade to straighten out. It is imperative that one take the time to do this as it looks darn odd if not done. Near boiling water will do the job, though it may take several attempts as resin has a memory and likes to return to its original state.
| CONSTRUCTION, PAINTING AND EVERYTHING |
Once the parts are removed from their protective bags, the first thing to do is to remove any pour stubs. It is important to remove these without flattening out the surrounding area. I have found that the best way to do this is to use coarse sanding material at first, then go to the least coarse material that will do the job. Resin is soft and it is easier to sand off than it is to build back up areas that one has botched. Be sure to either wear a dust mask or wet sand as the particles are not good to breathe in. One has to be quite careful to clean up fine areas like fingers and the tips of hair. I often use an inexpensive set of very fine files to do this as they work well in tight places. They are also good for removing mold seams as there will be some that you will need to attend to. Since skin is not 20,000 grit sandpaper smooth and it is nice to have something for the paint to stick to, you don't really need to get too carried away with the fine grades of sandpaper. 400 grit is about as fine as I use on these.
 I then gave the all the parts a coat of Future to seal in the resin and keep any oils from leaching out to mess up the paint. It seemed to work well on a previous resin kit so I figured why not. I then painted everything with Floquil Reefer White thinned with lacquer thinner. This seems to provide an excellent base for flesh, especially since many of my figures have an abundance of it.
 I then painted everything with Badger Suntan Flesh acrylic. Normally, I use a very lightened Light Flesh, but for this somewhat fantasy figure, I wanted dark skin, and I got it using the Badger paint. I then masked off around the shin and forearm guards, using a considerable amount of tape, I might add. Those areas were painted Testors Model Master Anthracite metalflake. When it was dry they were drybrushed wit
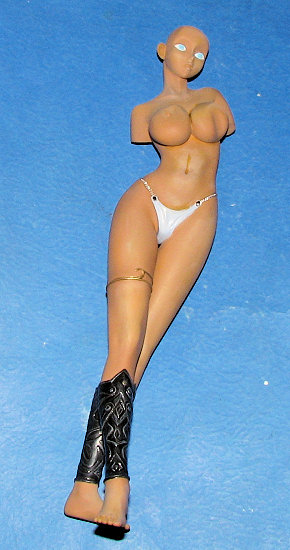 h a medium grey and then with white to bring out details. I painted the armband and leg band with Brass. The hair was painted Light Gull Grey then given a wash and later drybrushed with Vallejo Ice Blue. Flowers were painted in yellow, lavender and red.
I then drybrushed most of the flesh areas with lighter skin tones from the Vallejo line. Normally I don't do this allowing the ambient light to provide highlights and shadows, but thought I'd give it a go. The thong was painted with Vallejo Ice Blue and drybrushed white. I also painted the eyes with gloss white and then used a light blue for the iris. All was allowed to dry.
Meanwhile the sword had several treatments of near boiling water to try to straighten out the wavy lines in the blade. I was mostly successful. It was then painted Alclad II Steen and the handle was given some Roof Brown from the Floquil line.
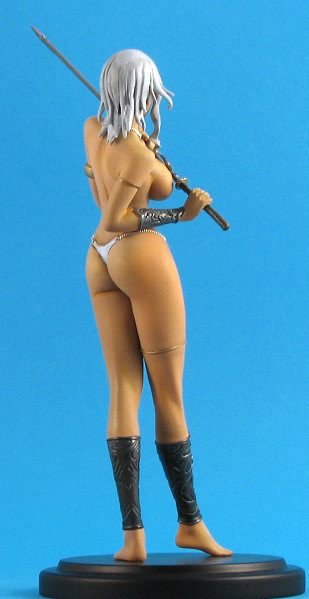
Back at the body, I glued on the right leg and then was going to start attaching the arms when I realized that if I did so, I wouldn't be able to fix on the chain holding the thong. These chains are cut to length then attached with super glue. There are pins provided to represent the attachment points. Th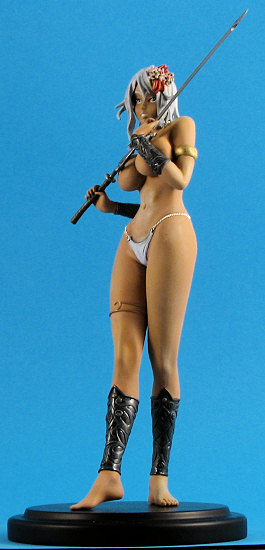 e pins are too thick to fit through the chain links. Holes were already drilled in the figure, but the pins are far too long to fit. Two options. One is cut the pins and the other to drill the holes deeper. I chose the second. I attached the chains first and that provided me with the opportunity to trim back the chains if needed. Then I simply added some super glue to the tips of the pins and slid them in place.
With those glued in place, I then attached the left arm. It was a struggle to get it locked in, but once in place, it was so tight that no cement was required. I then attached the sword and before it dried, I glued on the left arm so it would be properly positioned in regards to the blade.
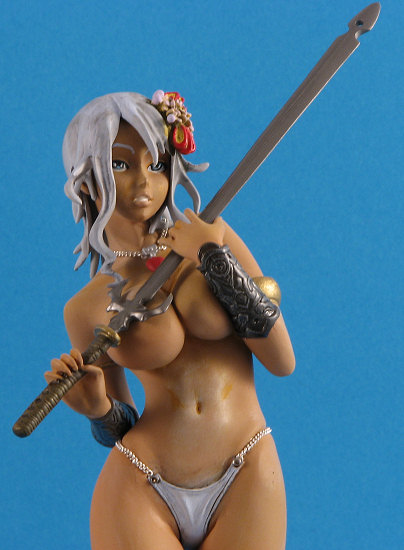 I then did some work on the face. Man, I screwed up so many times you'd think I worked for the White House. After many attempts to fix stuff, I finally got it to looking at least somewhat decent. I always seem to have trouble with faces and this one was no exception. Biggest hurdle was that the eyes were already molded in place. Usually it is a blank and we put on what we think works best. This way it was MUCH harder.
I then trapped the head between the two pieces of hair and cemented that in place. I had to do considerable touch up on it as well to help decrease the size of the seam and to paint over some areas I missed when scraping seams.
At this time, I figured it might be a good idea to put it on a base. I drilled holes in the bottom of the feet and inserted bits of sewing needle. I then made marks on the base where the feet would go, drilled holes there and using a bit of super glue, attached the figure to the base. It doesn't seem like a very sturdy way to do things, but it works very well.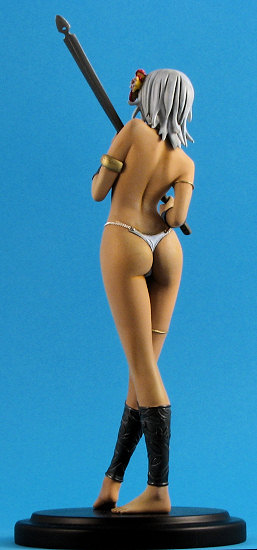
It also allowed me to handle the figure without worrying about getting stuff from my hands on it. The last item to be added was the pendant. After painting it, I attached one side of the chain to it and then glued the pendant into the slot provided. I then realized that it would have been much smarter to attach this piece before attaching the hair as there was not room for the pendant chain to fit under it. Fortunately, after much threading and muttering, I was able to get the vast majority of it in place. That was basically it.
| CONCLUSIONS |
I very much enjoyed putting this one together. The general fit of the kit is quite good so there is minimal need for any sort of filler, in fact, this kit used none, something I can rarely say about resin kits in general. Since I happen to like women with swords, this made the figure even more appealing. It is one that I think would be a great starter kit for someone looking to get into the genre and it looks fine on my figure shelf.
October 2007
Copyright ModelingMadness.com. All rights reserved. I bought this so you can see what these kits are like. Warning, they can be addictive. If you would like your product reviewed fairly and fairly quickly, please contact the editor or see other details in the Note to Contributors.