| KIT: | 1/7 Multi: Sitting |
| KIT #: | FG-2778 |
| PRICE: | $29.00 |
| DECALS: | None |
| REVIEWER: | Scott Van Aken |
| NOTES: | Resin anime' figure kit. |
| HISTORY |
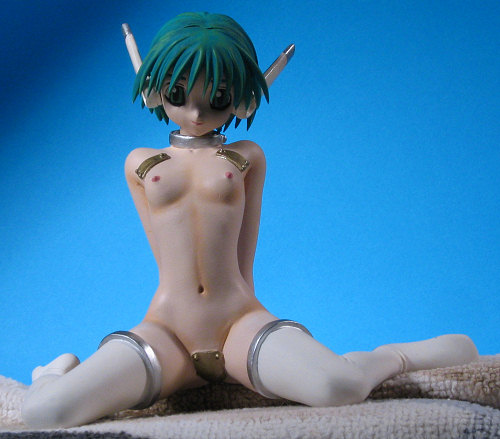
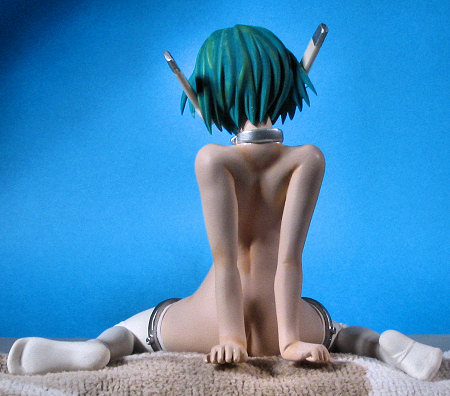 This is another figure from the 'To Heart' anime series, and is the younger 'sister' to Serio. Both are robots or androids. Apparently these androids are supposed to be learning how to properly interface with people so to best serve humanity. As such, they are programmed not only to be house and store servants, but they also attend school, social events, and so on. This android could be a year old or a hundred. There is no way to tell as, in the world of sci-fi and fantasy, they could well be timeless.
| THE KIT |
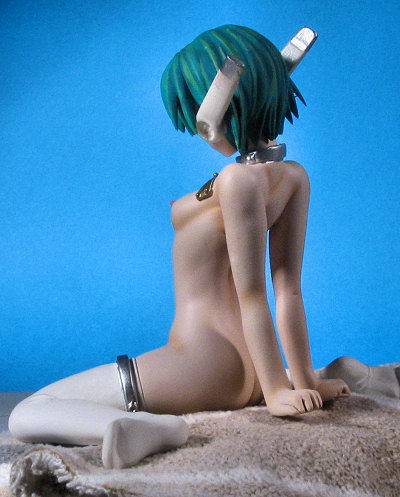
I very much enjoyed building an earlier, larger, standing figure. This one is smaller so takes up less room in my display case and is sitting, though in a rather provocative pose. The number of parts to this one is actually quite small. There is a torso, separate arms and legs as well as a separate head and two sections of 'hair'. All of the resin casting is superbly done without a trace of flash or any pinholes. Only some small sprue attachment stubs and a bit of mold shift to clean up.
| CONSTRUCTION |
All resin kits need to have each of their parts cleaned up to some degree or another. In this case, it was mainly removing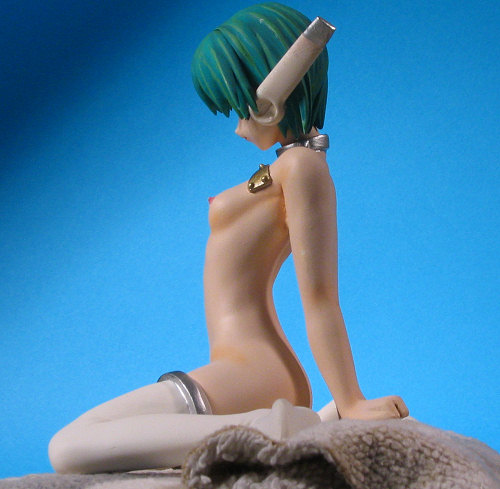 what was left of the pour stubs and removing the mold lines. For this, I basically used 400 and 600 grit sandpaper, though to get the chunks of pour stub down, I did use a coarse sanding stick (haven't a clue as to what grade these things are as they are never labeled by grit). The biggest concern is to not make any flat spots, so one has to keep moving either the sandpaper/sanding stick in a curved motion or move the part underneath. I do both and it seems to work well. I also install mounting pins. This is a simple enough job. A #66 or so drill bit is about the same size as a standard paper clip. Most of these kits have holes in both parts to be joined so it is a simple matter to drill a hole, install a short section of paper clip and use that to help align the parts. Once you like how they are formed, put on the super glue and put into final position.
Naturally, I messed things up a tiny bit. When done, with the torso, the arms are about 1/8 inch too high and they don't touch the ground in the back. Means I installed the legs at the wrong angle. We learn. I built up all of the body, leaving the head and hair and antenna separate. This just makes it easier to paint. Not too much filler was needed, though the joins all got at least a coat of Mr. Surfacer 500, sometimes two.
| COLORS & MARKINGS |
Since this kit has a lot of flesh, it is important to be sure that you have all the mold glitches. I use a matte white paint as a primer. In this case, Floquil Reefer White thinned with lacquer thinner. The matte white not only shows any glitches that need fixed, but also 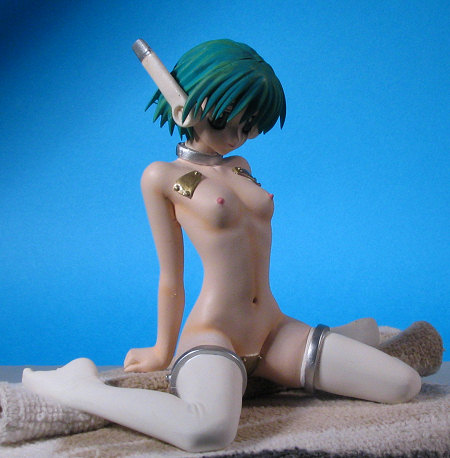 provides an excellent base for the flesh tones. Thanks to the very light resin, one doesn't need multiple applications of the white, but I always put on several thin coats for good coverage. This also worked well when it came to the stockings as they were to be white anyway. Once I had sufficient coverage, I put on several coats of clear acrylic gloss to the stockings and set the figure aside for a while to dry. Then I taped off the stockings using Tamiya tape.
The next was the flesh tones. I used Badger acrylic without thinning it. I find that the Badger paints are about a shade too dark in each category, so when I want a standard tone, I generally mix in white with the lightest flesh color. This is applied to the entire figure and the head. Then some even lighter tones are sprayed on some of the upper areas like shoulders and upper legs. This is tedious as I don't spray much and the acrylic clogs the tip of my airbrush after only a very short spray. It is like spray for 10 seconds, clean the tip, spray, clean and so on. For some of the darker areas, I used the standard 'Light Flesh'. Generally I don't doe all that heavy shading that many do. It is un-realistic and I'd rather let the ambient light provide most of my shading for me.
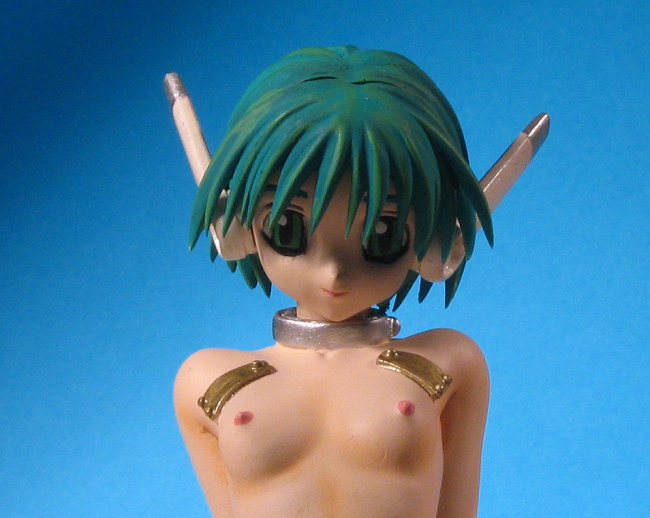 The most difficult part for me are the eyes, but I've learned over the years to first apply a white base to the eye. Then I make a 'U' with the color of the iris. Then on the inside I paint the black. A white dot or two for a 'life light' is then placed in the same spot on each eye. Finally, the outline is done with a technical pen. I use rose flesh for the lips and some other bits. The hair was painted with a couple of green shades from the Vallejo range. For the metallic electronics access panels and the rings, I use the paint that comes from paint pens. I simply dab some on a piece of cardboard or glean it from the paint pen tip itself, using a regular brush to apply it. If it is put on relatively thick, it tends to keep its sheen better. One does have to be careful not to let it flow into corner areas.
| FINAL CONSTRUCTION |
 Once all the initial painting is done, then the rest of the kit is assembled. Again, pins are used to help hold the head in place and the hair sections glued on. I goofed and should have installed the antennas before the hair. Not doing that meant that some green paint rubbed off and removing that paint isn't as easy as you'd think. With everything assembled, touch-up painting was done to take care of some areas missed and the figure placed on a base.
| CONCLUSIONS |
Though this figure is definitely not for everyone, the range of anime' figures is quite broad, and actually a bit overwhelming. Some popular series' have literally hundreds of figures of every size and style available, the key is just to pick what pleases you and have at it.
Purchased by me for you.
February 2007
If you would like your product reviewed fairly and quickly by asite that has over 350,000 visitors a month, please contactme or see other details in the