| KIT #: | FG 7865 |
| PRICE: | $67.99 SRP (on sale for $54.39) |
| DECALS: | yes |
| REVIEWER: | Scott Van Aken |
| NOTES: | Resin figure kit |
| BACKGROUND |
 Over the last 20 years or so, one of the growing
segments of the hobby has been in the subject of anime. Anime is Japanese
animation and it has a certain style that sets it aside from Western cartoons.
The biggest differences are the large eyes and longer legs of the characters and
a certain buxom quality of many of the female characters. This is an art form
that you either like or you do not as, to my knowledge, there are few anime
artists in the US, though you will find some in Europe and quite a lot more in
Eastern Asia.
Over the last 20 years or so, one of the growing
segments of the hobby has been in the subject of anime. Anime is Japanese
animation and it has a certain style that sets it aside from Western cartoons.
The biggest differences are the large eyes and longer legs of the characters and
a certain buxom quality of many of the female characters. This is an art form
that you either like or you do not as, to my knowledge, there are few anime
artists in the US, though you will find some in Europe and quite a lot more in
Eastern Asia.
One thing about the various anime television series and movies is that they are ripe fields for characters and equipment. The Gundam and similar robot kits come to mind and you'll find plastic kits of many of the various vehicles used in various shows. This sort of stuff is perfect for the figure maker. They get to express their artistry in a medium that will ensure steady if not huge sales. Many figures are premade plastic figures, some with articulating joins. These often get transferred over to the resin medium and at a reduced price over the rather pricey (at least outside Japan) figures.
About 15 years ago, I started getting interested in anime, mainly through the Tsukuda kits from Nausicaa. I then found E-2046 while searching for other figures from the series and have been a rather steady customer ever since. You have seen many of the completed projects here in Modeling Madness. E-2046 not only has resin figures made based on the 'dolls' that are ready made, but has recently gone into having their own line of figures. One of them in called ORI. I have no idea what it means, but their figures are usually alluring to say the least.
A few weeks ago, I was contacted by E-2046 to see if I would like to review one for the web site. They offered me two options and since I had already bought one of them, I chose the other.
| THE KIT |
E-2046
has to be one of the finest resin figure kit makers around. The resin is
absolutely flawless and E-2046 not only removes the majority of the pour stubs,
but they also polish away just about all of the mold seams. I have never heard
of another figure company who does this for its customers. I would be remiss if
I did not mention that these kits come superbly packages. First of all, the
parts are either in individual sealed bags or in a sealed compartmentalized poly bag. Those parts that could be broken in transit are also bubble wrapped. As you
can see in the image, even those in sealed compartments are bubble wrapped. That
is one reason why I included the parts image from E-2046's web site.
bag. Those parts that could be broken in transit are also bubble wrapped. As you
can see in the image, even those in sealed compartments are bubble wrapped. That
is one reason why I included the parts image from E-2046's web site.
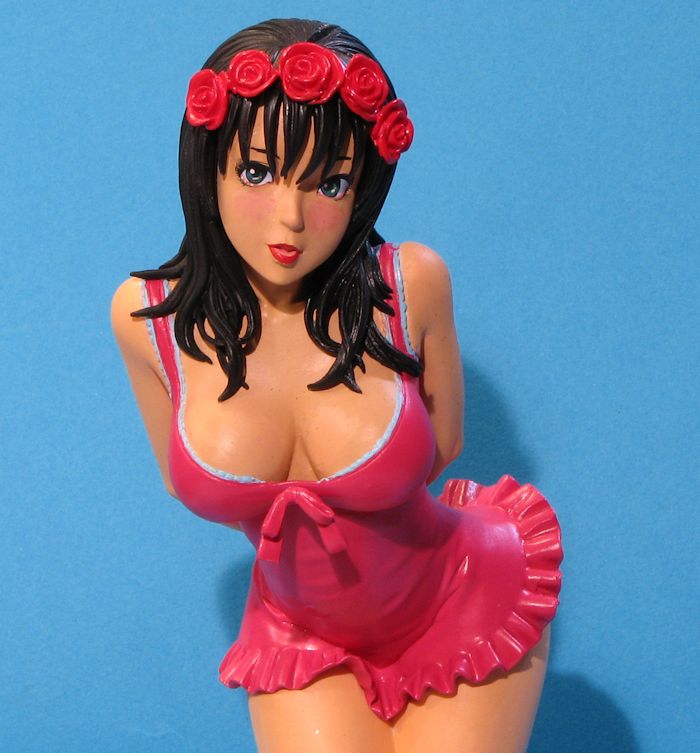
This is not one of their more complex kits, consisting of about a dozen resin parts that includes a wine bottle and wine glass in clear resin. The parts all have very positive attachment points so that alignment is not a problem. One should test fit every part just in case some adjustment needs to be made.
Detail on the parts is excellent and crisply done. No worries about soft edges and these sorts of details makes it easier to mask and paint. Clothing is molded onto the torso and is very nicely done. As is the norm, hair comes in several sections and so will probably need a bit of filler to smooth things out. When I do these sorts of kits, I use a motor tool to engrave over the filled area so things are not too smooth.
A few other things that are becoming more and more common with these sorts of kits are decals for the eyes. This is by far one of the more complicated areas to get right and for those who have difficulty with eyes, the decals are very much a positive thing. Also included is a large decal to fit on your base. Considered a bonus for this initial boxing are labels for the wine bottle.
Instructions are several pages, much of which consist of general instructions for building resin kits and applying decals. An exploded view of all the parts is pretty much the norm for an assembly guide and I've never had a kit where this wasn't more than sufficient. Also included are a couple of photos of the completed kit just to give you some suggestions as to colors. There is no rule regarding how to paint these sorts of figures so you can change both the color of the clothing and skin tone to meet your own desires. One thing I should also mention is that the kit is molded in a light skin shade, a very nice touch.
| CONSTRUCTION |
 Building these sorts of kits pretty much mixes in building and painting as
one often has to paint the bits separately and then put them together.
Building these sorts of kits pretty much mixes in building and painting as
one often has to paint the bits separately and then put them together. 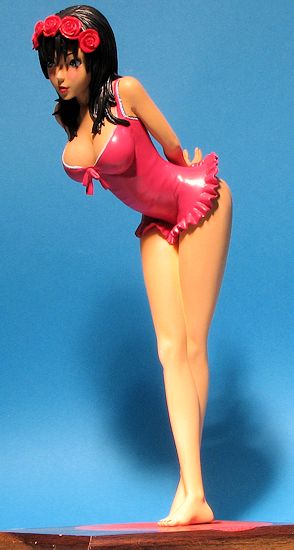 n just by handling the
painted figure. The only paint that did not rub off was the Testors enamel I
used for the dress.
n just by handling the
painted figure. The only paint that did not rub off was the Testors enamel I
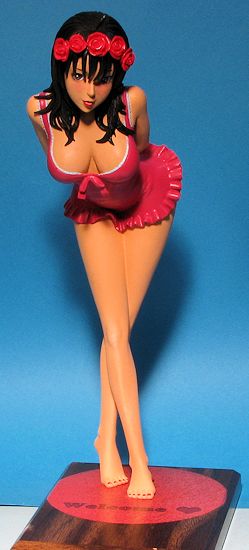
used for the dress.  The large
base decal was then placed on one of the many old award backings that I have
acquired over the years. I used setting solution on this decal as well to
get it to conform, which it did with no problems.
The large
base decal was then placed on one of the many old award backings that I have
acquired over the years. I used setting solution on this decal as well to
get it to conform, which it did with no problems.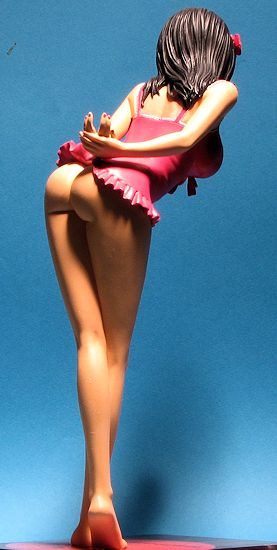 on. The
nails and lips were painted red and it was finally done.
on. The
nails and lips were painted red and it was finally done. | CONCLUSIONS |
I have to say that it has been many years since I've had issues with paint coming off a resin kit simply from handling. I don't know what the issue was and it will probably not occur again for a long time. The kit itself is superbly molded and easy enough when it comes to the assembly of it. I enjoyed the building process and it makes for a quite impressive display when done. It will not be my last build of one of these kits and if you are considering getting into the genre, this one would be an excellent introduction.
December 2013
Copyright ModelingMadness.com. All rights reserved.
Thanks to E-2046
for the preview kit. Depending on stock, you can buy or order yours at
this link.
If you would like your product reviewed fairly and fairly quickly, please
contact
the editor
or see other details in the
Note to
Contributors.