E 2046 1/7 Asuka Test Plug Suit
| KIT #: | FG 5643 |
| PRICE: | $43.99 MSRP |
| DECALS: | Yes |
| REVIEWER: | Scott Van Aken |
| NOTES: | Resin kit |
| HISTORY |
 Asuka Langley Soryu (惣流・アスカ・ラングレーSōryū Asuka Rangurē, IPA: [soːɽjɯː asɯ̥ka ɽaŋɡɯɽeː]) is a fictional character from the Neon Genesis Evangelion franchise. She is designated as the Second Child ("Second Children" in the original Japanese versions) of the Evangelion Project and pilots the Evangelion Unit 02. Her surname is romanized asSoryu in the English manga and Sohryu in the English version of the TV series, the English version of the anime movie and on Gainax's website.
Born and raised in Germany, Asuka is shown as being of both German and Japanese descent, as from her Japanese name and European appearance (her nationality is referred to as being technically American). Her mother, Kyoko Zeppelin Soryu, is a scientist of Gehirn's German branch of the Evangelion Project and, when Asuka is four years old, participates in a contact experiment with Unit 02 (similar to the experiment performed by Yui Ikari with Unit 01). Though she physically survives the test, Kyoko emerges mentally unstable, believing a doll she cares for to be an infant Asuka while only referring to her actual daughter as "that girl over there" and even going so far as to attempt to strangle Asuka so that she could "die with me!" (this is implied in the anime, while explicitly shown in Sadamoto's manga). After being institutionalized, Kyoko  commits suicide by hanging herself; Asuka finding her body when running to tell her that she has been selected to be an Eva pilot. Her American father quickly remarries Kyoko's doctor, with whom he had been having an affair, though Asuka's defensiveness quickly repels her new stepmother and the two learn to tolerate one another while maintaining a cheerful facade of a normal family. Asuka proves to be a child prodigy, earning a university degree in an unspecified field while still a teenager and becoming fluent in Japanese (though she has difficulty reading and writing kanji).
First introduced in episode 8, with the arrival of Eva Unit 02 and the battle with the Angel Gaghiel, Asuka is shown as maintaining a high synchronization ratio and exceptional skills as an Eva pilot, being very aggressive and confident in battle. After first being defeated in battle by Zeruel, Asuka's self-confidence (and, correspondingly, her synch ratio and effectiveness as a pilot) begins to dwindle. This comes to a head in episode 22, when Arael appears and Asuka, burdened by increasingly poor results in synchronization tests, is infuriated by being ordered to serve as backup to Rei. She defies orders and tries to attack the Angel alone, but is overwhelmed by a psychological attack by the Angel, forcing her to relive her painful memories and resulting in a mental breakdown. She loses the will to live and becomes incapable of piloting Unit 02, spending much of the final episodes of the television series in a hospital bed in a catatonic state.
In The End of Evangelion, as Japanese Strategic Self Defense Force invade NERV, Asuka is placed inside Unit-02, which is submerged in a lake within the Geofront, for her protection. As she is bombarded by depth charges, Asuka declares that she does not want to die and, in a moment of clarity, realizes that her mother's soul is within the Eva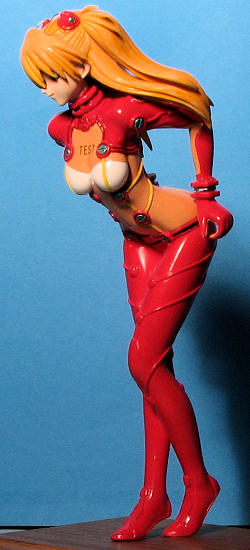 and has been protecting her all along. Her self-identity regained, she emerges and defeats the JSSDF before being confronted by the Mass Produced Evas. Though she successfully disables all nine opponents, Unit 02's power running out and the infinite power of the Mass Produced Evas' S² Engines (which allow them to remain functional despite being severely damaged or mutilated) finally allow them to eviscerate and dismember Unit 02 using their Lance of Longinus replicas. After Shinji rejects Instrumentality, she appears beside Shinji in the film's final scene.
| THE KIT |
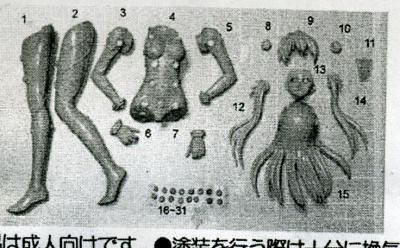 Typical of the kits that come from E-2046 in Honk Kong, this one is superbly cast in a flaw-free verly light tan resin. The folks who cast this take care to remove the majority of all pour stubs and even sand of the majority of mold seams. This leaves the kit relatively ready to go. In this case, the kit includes a section of wire for the A-10 modules on the figure's head and a small decal sheet with the words 'Test' written on it. Interestingly, the various little sensors that fit on the plug suit are separate items, something that nearly doubles the parts count to 31 total parts.
 Instructions are a poorly done photocopy that is only semi-useful in construction. A more useful item is a color photo of the completed kit, though this generally shows but one side. In with the construction instructions was another sheet that had several views of the completed kit and this was quite useful in determining where all the bits and pieces were to fit. A small resin form for getting the correct shape for the A-10 attachment bands is included. A very nice touch to ensure these are uniform.
| CONSTRUCTION |
I had decided to test fit some of the parts, something I do rather frequently when I get one of these kits and before I knew it, I'd started building the kit. Xuron cutters were used to remove the remnants of the pour stubs on the legs and arms. These kits do not have the close tolerances of injected plastic and so one will have to do some sanding and a bit of grinding. I have a battery powered motor tool that I use to grind away any excess resin one mi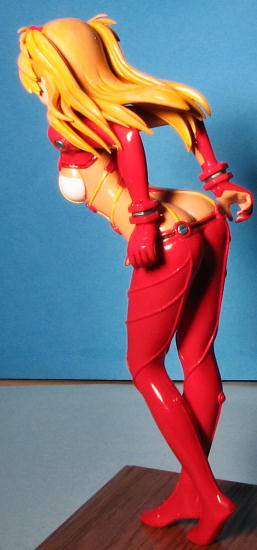 ght find which will prevent a close fit. Frankly, I don't know how anyone could do a good job on one of these kits without this time saving tool. If you have a Dremel or similar motor tool, be sure to have one that will run at a very slow speed. This helps to keep one from overdoing it. The battery powered one I have I can stop with my fingers, something I find very useful to keep from making errors.
Anyway, I cleaned up the torso, arms and legs. I also cleaned up the area where the hands fit and test fit those items to be sure there would be no issues. Same with the head. During this I discovered I forgot to add a neck piece while priming so this was glued in place and the area re-primed along with some other bits that would be used later.
| COLORS & MARKINGS |
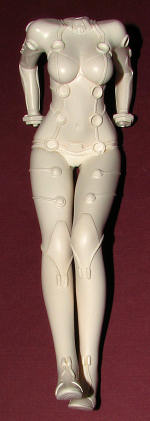 With a kit like this, painting is pretty much an on-going process. I like to attach all the areas that will be painted the same color, assuming there will be no issues with getting to an area with the air brush. I know that many like to paint these things with a brush, but to be honest, I have a terrible time getting most colors to be uniform without streaks when using a brush on large areas. This kit would require white, skin tone, an orange hued skin tone and red as its major shades. After getting the main body together, I sprayed a couple of coats of Tamiya's white figure primer to check for glitches, which I found. I like this paint, but it stinks so be sure to spray it somewhere where either you can exhaust the fumes or won't be visiting for several hours after painting. This primer dries to where you can handle the figure in about an hour or two.
The part of the kit that would be white was masked off with Tamiya tape. As you can see, there will be a lot of brush painting that will need to be done once the main colors have been painted in place. So the first real color was an orange tinted flesh. The torso and inner arms of the suit is a near transparent polymer that helps enhance the effectiveness of the sensors. I used Badger acrylics for this particular job as I like the way the paint sprays. I took the standard flesh and added just a touch of Vallejo Transparent Orange to it. Once this next color was sprayed on and dry, I gave it a coat of clear gloss and a bit later masked it off. Naturally, the masking took an age. The rest of the figure was then painted Testors Guards Red. I also used this shade for the A-10 modules.
I knew that there would need to be some touch up done when I took off the masking, but to be honest, as much as was needed around the edges, I should have just painted all of the bits in the upper torso with the base color and then brush painted all the details. The straps in the main torso were painted yellow and the body was pretty well done so set aside to marinate a bit.
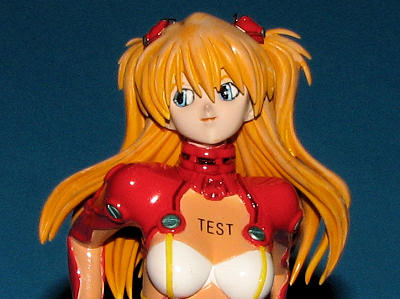
 I then turned to the face. It was painted a very pale flesh color with blue eyes. As usual, eyes are the greatest challenge for me and I generally screw them up in some way or another. I then painted the hair. Asuka is supposed to be a redhead, but honestly, I had difficulty coming up with a proper shade as shown in the photo. Instead, I painted the hair with Badger Ogre Orange. I also painted the small sensors that fit into the circular insets with a nice metallic green shade.
| FINAL CONSTRUCTION |
Next step was to glue in the various sensor buttons. These all had to be removed from the resin sprue and were attached with clear paint. I used Polly Scale Metallic Green for these. Thankfully, several spares are included. Then the head was glued to the rear hair section. This was followed by attaching it to the rest of the body. At this time, I drilled two holes in the feet to accept sections of paper clip. A #65 drill bit was used for this. Once glued in place, the tips were lightly dipped in paint and then touched to the wood display base. This shows where to drill the mounting holes in the base. After that was done, the holes were drilled and the figure somewhat snugly attached. I'll save permanent gluing until after all is done.
I then glued on the other segments of hair to make sure all fit well and attached the hands. The next items were the A-10 head sensor modules. These were glued in place after being painted red. The kit supplies wire to use as the hold downs, but frankly, it is not stiff wire and is a real pain to get into shape, even with the form that is given. I decided to use bronze wire for this as it is much easier to bend. A pair of flat nose pliers is all that is really needed, with the form used to check that the bends are in the right place. It is slow work and I botched a few, but finally got a pair that looked about right. I had to drill holes in the A-10 modules to accept the wire ends, but that was quickly done and they were glued in place.
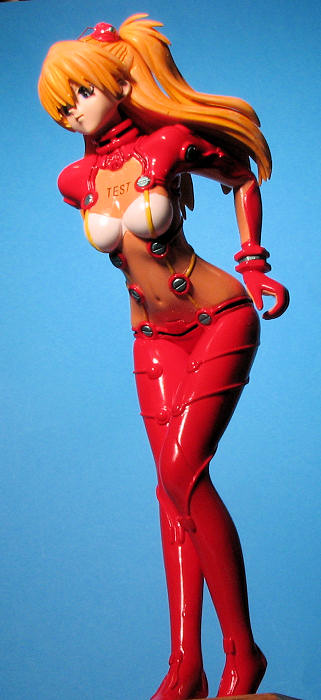
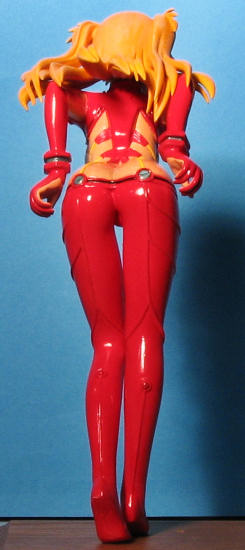
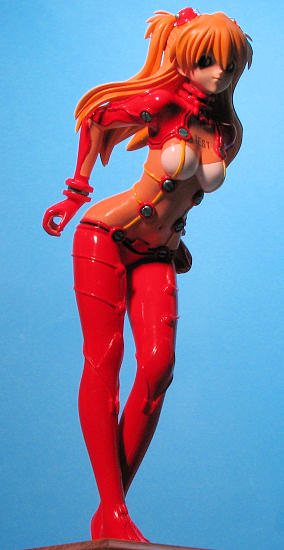
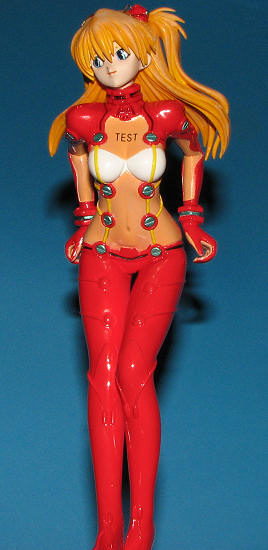 With all the bits in place, the figure was glued to a wooden base (actually an old awards plaque from Evansville, IN). I then attached one of the 'Test' decals that came with the kit. When all was dry, I did some touch-up painting and then applied several coats of Future with a broad, soft brush over all of the suit. The suit is supposed to be some super thin polymer that is basically designed to hold the sensors as close to the skin as possible. So it is very shiny. Only the figure's head and hair were left matte.
| CONCLUSIONS |
I know that these subjects are not everyone's cup of tea and I know many of you out there are uncomfortable building figures of any kind. However, except for having to bend the wire in the last steps, this one is really quite well done and would be a good one on which to start.
As a late note: Somehow, I brain farted and put the hands on the wrong sides. Dunno how it happened, but the fit was really good. Posted a partial image on the forum and it was quickly noted. Snapped them off, cleaned up the super glue, ground out the attachment areas on the arms and hands, and glued them back on the proper side. Had to take all new images, but at least things aren't weird.
| REFERENCES |
June 2010
If you would like your product reviewed fairly and fairly quickly, please contact the editor or see other details in the Note to Contributors.