|
KIT: |
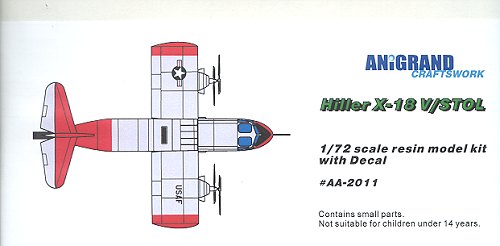
Anigrand 1/72 Hiller X-18 |
|
KIT # |
AA-2011 |
|
PRICE: |
$54.00 MSRP |
|
DECALS: |
one option |
|
REVIEWER: |
Scott Van Aken |
|
NOTES: |
Resin kit |
|
HISTORY |
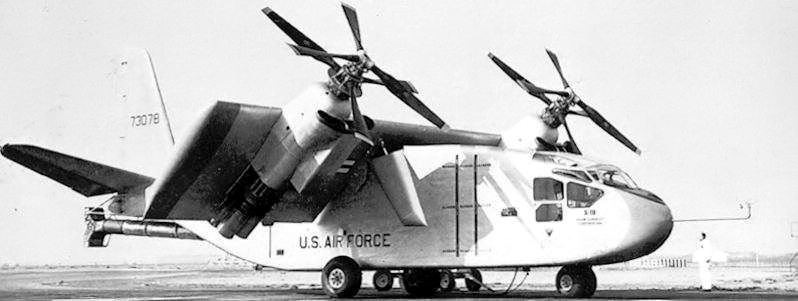
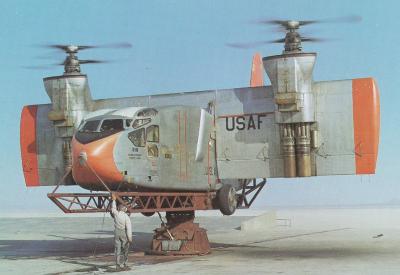 As an in-house study, Hiller aircraft designed a large, tilt-wing V/Stol
aircraft (the first of its kind) to see how viable the system would be.
One year later, in 1956, the US Air Force became interested and decided
to fund a fully working prototype as a possible lead to a medium
transport. In order to speed construction and save on some bucks, a
number of parts were obtained from readily available sources. The
fuselage came from a Chase YC-122C, Allison T-40 turboshaft engines from
the XFV-1 and XFY-1, and miscellaneous bits from the R3Y. A Westinghouse
3,400 lb thrust J-34 provided pitch control thrust.
As an in-house study, Hiller aircraft designed a large, tilt-wing V/Stol
aircraft (the first of its kind) to see how viable the system would be.
One year later, in 1956, the US Air Force became interested and decided
to fund a fully working prototype as a possible lead to a medium
transport. In order to speed construction and save on some bucks, a
number of parts were obtained from readily available sources. The
fuselage came from a Chase YC-122C, Allison T-40 turboshaft engines from
the XFV-1 and XFY-1, and miscellaneous bits from the R3Y. A Westinghouse
3,400 lb thrust J-34 provided pitch control thrust.
The single airframe was completed a year later in 1958 and ground testing commenced. One year later, in November 1959, its first free flight was made with no real difficulties. The aircraft never achieved full VTOL take off or landing, but was able to make partial conversions with wing angles up to 33 degrees relative to the fuselage and a 17 degree nose up. The engines had electric pitch controls and were too slow to provide adequate hover response. Pitch control problems were encountered on the 20th flight, which nearly resulted in a crash.The US Air Force stopped flight testing and performed more ground testing in order to garner data for the upcoming C-142 project. In 1964, the X-18 was scrapped.
|
THE KIT |
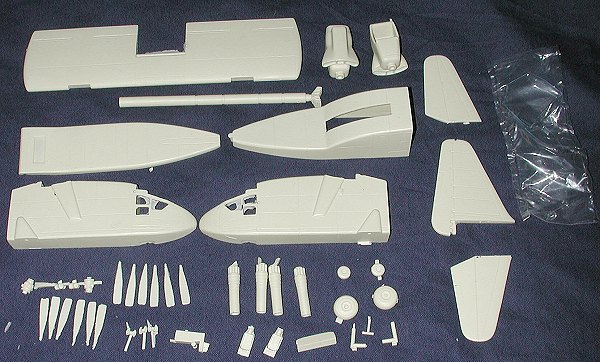
The kit is molded in the usual tan resin and consists of 32 pieces, many of them for the engines. Surface detail is quite good and on a par with the XF-109 that was built recently. The kit provides an interior complete with seats, control wheels, console and instrument panel. There is a decal for the instrument panel. The wing is a solid and hefty chunk of resin onto which the engine pods are places. Each engine consists of two engine/exhaust combos and an eight piece contra-rotating prop assembly. The wing can be displayed in any range of its tilt. The builder must make some short tilt actuating pistons from 1mm rod.
Fuselage is in two major sections; a forward and aft piece. The forward section is split vertically, and the aft horizontally. It works. The interior will need to be installed after the forward fuselage halves are joined. To eliminate the floor seam, some may wish to put in a very thin piece of plastic sheet. Transparencies are vacuformed. The window framing is almost invisible and very difficult to see so masking will not be an easy task. For the side windows it seems as if one has several choices. One is to remove the resin framework and put in the full vac section after masking off the frames. Another is to cut out the individual windows and fit them in place. A third is to take a new piece of clear and cut new side windows. I'll mention again that it would be very nice to have two complete sets of transparencies, especially when they are as indistinct as these.
Landing gear are resin and I would seriously consider replacing them with new ones made from metal as the weight of the rest of the airframe will cause them to distort in short order. Fortunately, they are simple L or T shaped constructs so replacement should be no problem.
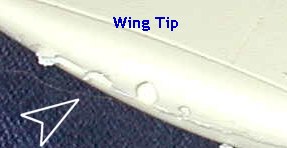
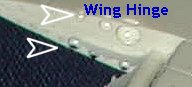
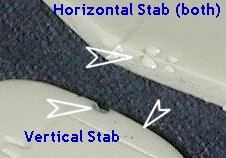
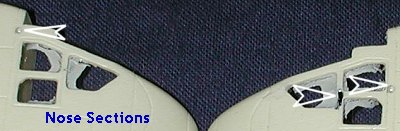
What is a bit of a problem is the preponderance of air bubbles and the holes left by them (see below). One always expects these pesky things, but hates to see them as they only serve to require an inordinate amount of time to fix them. My kit has them on the wing ends, horizontal stabilizers and the tail. There are also smaller ones on the engines and the nacelles. Those on the smaller bits are especially difficult to repair. There were also air holes on sections of the fuselage and one of the window frames was short shot. I also had a prop blade tip with a chunk missing where the resin pour stub was snapped off.
 |
 |
 |
 |
 As I mentioned in the
XF-109 preview, Anigrand really needs to improve its quality control on
its kits. I buy resin figure kits from Hong Kong (where Anigrand kits are
made). They have none of these flaws and are as intricately detailed as
this kit. There should be no reason why Anigrand can't meet the same
standards.
As I mentioned in the
XF-109 preview, Anigrand really needs to improve its quality control on
its kits. I buy resin figure kits from Hong Kong (where Anigrand kits are
made). They have none of these flaws and are as intricately detailed as
this kit. There should be no reason why Anigrand can't meet the same
standards.
Instructions are a single sheet of paper with a history and exploded view of the kit on one side and a super three-view on the other side. Colors are overall aluminum or natural metal with red areas on the nose, tail and wing tips, making for a rather colorful aircraft. Decals are a bit thick, but very well printed. Though my previous experience showed that they are immune to setting solutions, they should work very well on the flat surfaces of this aircraft.
|
CONCLUSIONS |
Other than my whining about the air bubbles, this should be no more difficult to build than any other resin kit. My limited experience with Anigrand kits shows the engineering and general fit to be quite good. I'm not exactly sure just how to tackle the cockpit nose windows, but it should be no real problem, just a bit time consuming. I'm looking forward to building this one and do thank the folks at Anigrand for producing interesting models like this one. Recommended for the intermediate modeler who has experience with resin kits and correcting glitches in the resin.
Many thanks to DMC Models for the review kit.
UPDATE: Nostalgic Plastic is now the US Importer for Anigrand. Please contact them for more information.
If you would like your product reviewed fairly and quickly by a site that has nearly 250,000 visitors a month, please contact me or see other details in the Note to Contributors.