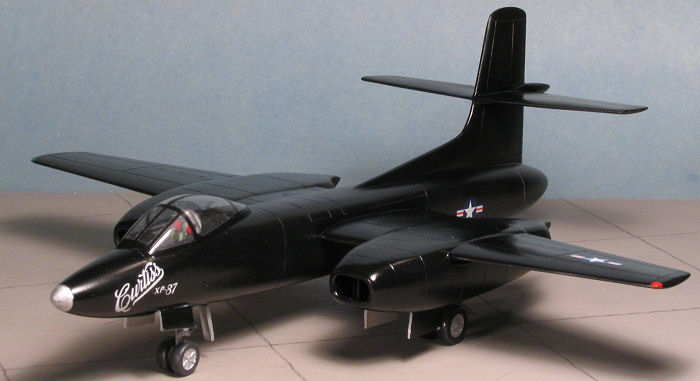
| KIT #: | AA-2047 |
| PRICE: | $58.00 |
| DECALS: | One option |
| REVIEWER: | Scott Van Aken |
| NOTES: | Resin with vacuformed canopy |

| HISTORY |
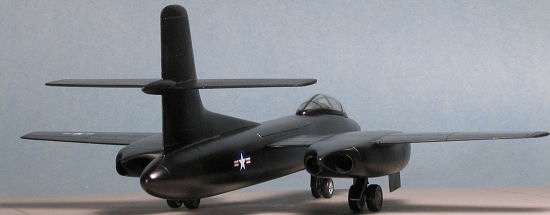 In March 1945, USAAF issued requirement
for the first jet-powered attack aircraft. Curtiss submitted the Model 29
and was awarded contract for two prototypes, designated XA-43. In November
1945, before the prototype was started, Curtiss also proposed the same
model to the USAAF's all-weather night fighter competition as a replacement
for the P-61 Black Widow. The USAAF accepted the proposal and re-designated
the project as XP-87, in competition with the Northrop XP-89 Scorpion. The
first prototype was rolled out in August 1947. After a year of ground
tests, the first flight was made. The project was again re-designated (for
a new Fighter designation system) as XF-87. The XF-87 was judged as
satisfactory but the top speed was slower than expected. In the fall of
1948, the USAF announced the F-89 as the winner of the contest. They
cancelled the second XF-87 prototype and the production orders. The XF-87
was Curtiss' first pure jet aircraft, and also the company's last produced
standard aircraft before Curtiss was sold to North American Aviation.
| THE KIT |
The kit is typical Anigrand. It is molded in a buff resin with somewhat deep engraved panel lines. The quality of the resin in this kit is better than some of the previous releases in that there are very few molding glitches. I found only a couple of air bubbles and a few areas were the sprue stubs had broken chunks out of the part. From what I've seen from the last few kits, it seems as if the quality control is improving.
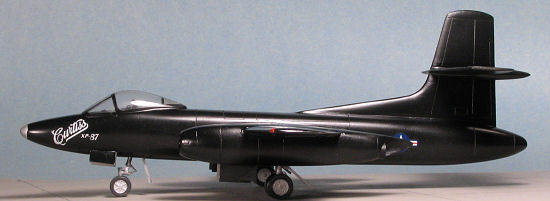 The kit is really quite large and
barely fits into the box, mainly due to the size of the one piece fuselage
halves. You get a pretty good representation of the aircraft's seats and
control stick for the cockpit. A single, rather large transparency covers
the cockpit section. Typical of Anigrand vac canopies, it is difficult to
see the frame lines when masking so care needs to be taken. Only one
transparency is provided. The rest of the resin parts look to be well done.
I am concerned that there will be some deformation of the nose gear after
time from the weight of the kit. This is due to the design of the nose gear leg as
much as anything. The engines have an insert for the compressor faces and
though it may be difficult to remove the seam line from the gear wells,
test fitting showed no problems. A nice touch is that the wings and tail
planes are keyed for their join surfaces. The gear doors are molded closed
so will need to be cut for the gear down option.
The instructions consist of a single sheet of folded paper. On one side is a history and photo of the aircraft along with an exploded view of the kit and parts list. The other side has a nicely drawn three view for the painting and decal guide. There are markings for one aircraft, and that basically consists of insignia from another sheet and the Curtiss XF-87 logo. Apparently the aircraft never carried a serial number. There are photos of this aircraft at other time periods that show this logo on the nose as well as on the fin. Those needing another decal sheet or set of transparencies can get them from Nostalgic plastic rather than have to order them from Hong Kong.
| CONSTRUCTION |
What makes short run kits of any type different from those that are mass produced is that you must take additional time to prep the parts. In the case of resin kits, it means sanding off the various pour stubs or chunks that are left behind, cleaning out any resin balls stuck in the corners of things, removing any flash that might be present, and finally, taking care of any air bubbles/air pockets or other defects in the resin.
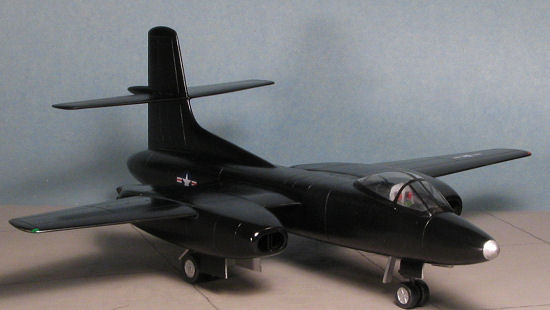 With luck, you'll have a kit that has
few if any of these. All Anigrand kits I've built have had these in some
form or another, but this one was a pleasant surprise in that there were
few of them; mostly on thin trailing edges and on wing tips/leading edges.
I use two things to take care of these. For the larger holes/chunks, I use
super glue and immediately apply some accelerator to it. I then wash the
part and sand. By doing this quickly, the super glue does not have a chance
to totally cure and will be much easier to sand. After taking care of most
of the defect with the super glue, I then use filler. One can use either
standard one part fillers, or the thinner Mr. Surfacer types. I find that
the Mr Surfacer sticks better than most fillers, though it usually takes
multiple applications.
I started with the engine pods. These have intake faces and a splitter that gets glued in. I glued in one half with the splitter and then immediately glued on the other pod half. This allowed me to position the splitter in the middle before the super glue dried. I should also point out that one will have to sand the mating surfaces as these can be rough. I then applied additional super glue to the seams to try to fill them. This was then followed by a sanding and application of Mr. Surfacer. I use the thicker of them, Mr Surfacer 500. It takes several coats to get things smooth, but it is worth it. Any lost engravings (and on Anigrand kits they are a bit larger than the norm), can easily be replaced with a fine toothed saw.
 While
all this was going on with the engine pods and the wings, I turned my
attention to the fuselage. It is quite long and probably at the limit of
Anigrand's mold making, as larger ones are usually in four sections. I
painted the interior in a medium grey and did up the console tops in matte
black along with the instrument panel face. Anigrand provides only
two seats and a control stick for the interior so these can be added just
prior to putting on the canopy. I wasn't sure how badly this would tail
sit, so filled the nose cavity on both halves with as much weight as I
could get in
  there. If this isn't enough, there is still a small amount of
room in the forward cockpit that won't be seen in addition to the nose gear
well, the last choice of most of us! On the fuselage, I glued the nose area
first to get things lined up. Then I lined up the very rear and glued it.
When both of those had dried, the center section was glued, squeezing it
closed in the process. This provides a straight fuselage with panel lines
that line up properly. An additional run of super glue was applied before
sanding and an application of Mr. Surfacer.
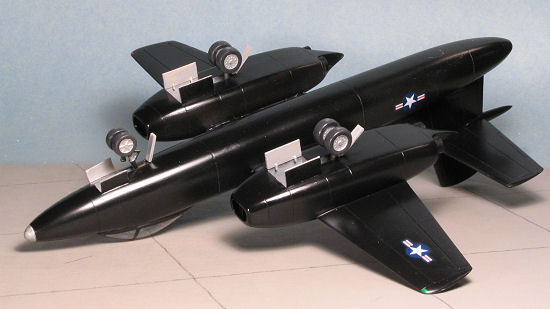
Next step was installing the fin. Though not much of a problem getting the fin in place, the fillet that was part of the fuselage is wider than the fin. I lined things up as best I could and then put on lots of superglue. This was then force-cured with accelerator and quickly sanded down. It took quite a bit of sanding to get the filet to match the width of the fin. Much Mr. Surfacer was used to get the join sections smoothed out as well.
The pods were then glued onto the wings. Fit here is quite good once you smooth the mating surfaces. What the superglue didn't fill, a few applications of Mr. Surfacer took care of. I should mention that my Mr. Surfacer 500 is now about 200 or thicker. In this condition it is an excellent filler that sands well and does a reasonably good job of filling seams, though it still takes at least two applications every time.
![]()
 Back
at the fuselage, I glued on the tail planes. Much to my delight, the fit was
excellent. However, as I often do, they were not put on straight so I had to
snap them off and reattach. After much grumbling about it, I also glued on the
wings with their engine pods. Again, a great fit and this time I aligned them
with the tail planes and left things to cure for a while.
In the meantime, I attacked the canopy. Anigrand only gives you one, though you can get spares from Nostalgic Plastic so it saves time. Anyway, I managed to cut thing one and trim it to where it actually fits rather well. Typical of these short run resin kits, the canopies are generally a bit oversize as they don't seem to take the thickness of the plastic into consideration when molding these things. Regardless, the fit is quite good and so I masked it and set it aside until later.
 I
then opened the packet with the landing gear bits. The struts needed cleaning up
and it was unfortunate that there was some mold shift, meaning that the gear are
a bit oblong. While the nose gear didn't suffer much from this, on the main
gear, it meant that the axles were at a different position from each other. No
real cure for this other than to do an 'axle-ectomey. This is pretty straight
forward. I picked the axle position I wanted to keep, removed the one on the
other side, and, using the one in place as a guide, drilled through the axle. If
everything went according to plan, I would pop off
 the other axle when the drill
bit went through. It worked like a charm. I then picked a piece of plastic rod
that would fit into the holes in the wheels and matched that with a drill bit.
It seems a #53 bit is the one to use and so I further drilled out the hole,
super glued in a section of rod, and that was it. I made the rod too long so I
could trim it back when it was time to attach the wheels.
 Next
step was to attach the wings to the fuselage. This was a pretty painless event.
The fit was quite good once I had cleaned up the mounting tabs and the wing butt
area. I did use filler on the joins as it pretty well required. There is enough
space between the engine pods and the fuselage to work comfortably. I returned
to the cockpit to install the seats and the control stick. The seats look a bit
on the thin side and even then, I had to sand down one of them considerably to
get them both to fit. Two control sticks are supplied and both seem pretty big;
closer to 1/48 by the look of them. I also found it odd that there were two as
the other seat was for the radar operator, so I only installed one on the left
side. After a bit of repainting, I glued on the canopy, which fit quite well.
Then I installed the landing gear and it was off to the paint shop. I found out
that I didn't have enough nose weight so had to add some to the nose gear well
to keep it from tail sitting.
| COLORS & MARKINGS |
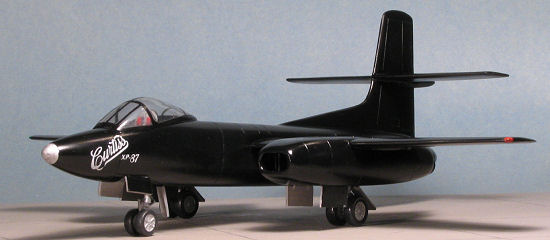
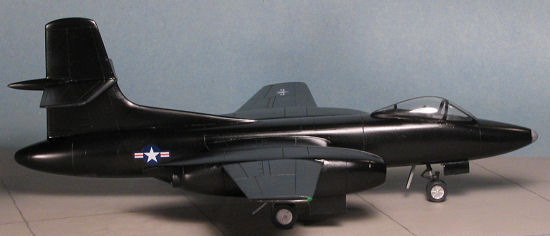
This aircraft was gloss black, and from photos it was quite glossy. However, I find glossy black to be a rather difficult color to work with sometimes so I sprayed the whole thing with Floquil's Engine Black. When it had dried, I applied a couple of coats of clear gloss acrylic (Future). This gave a good base for the decals.
The decals are a generic set from an older kit for the insignia and a new decal for the nose logo. The insignia decals are thick and did not respond all that well to Solvaset. I suggest replacing them on yours with ones from an aftermarket sheet. The nose logo was superb. It was very opaque and nice and thin. I'd surely like to think that all subsequent Anigrand decals will be of this high quality.
| FINAL CONSTRUCTION |
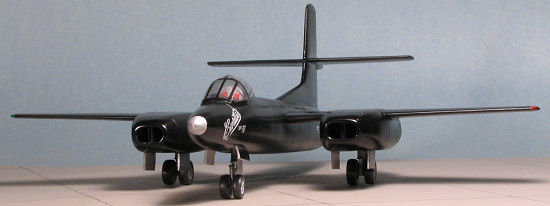 With the
decals on, I applied another coat of clear, this time just a bit less glossy. I
then repainted the parts of the landing gear that had been over-sprayed with
Humbrol Aluminum and attached the wheels. I also painted the gear wells a light
grey as suggested in the instructions. The very tip of the nose was painted
Aluminum, also using the Humbrol paint. Gear doors were the last to go on and
after cutting them out, I attached them with no trauma. Another light coat of
clear just to be sure I caught everything and then I removed the masking from
the canopy for the final step.
| CONCLUSIONS |
Of all the Anigrand kits I've built, this one has to be amongst the most trouble free of any of them. The fit was good and aside from the usual air pockets and seam work, there were no real surprises. The end result is a most impressive looking aircraft. If I were to change anything, I think I'd shorten the nose gear leg a tad, and try to get the canopy to sit lower as it looks to be a bit too tall. Other things I'd do differently would be to paint the engine intake aluminum prior to assembling the pod halves and to drill out the engine exhaust areas in the pod to get the exhaust to fit farther inside. Though it is a large aircraft, the simplicity of construction would make this a very nice first resin kit for just about anyone who is thinking of doing something a bit more interesting. An added bonus is that you don't have to use metallic paints!
| REFERENCES |
Anigrand instruction sheet.
January 2006
#1396 in a series
Copyright ModelingMadness.com. All rights reserved. No reproduction in part or in whole without express permission.
If you would like your product reviewed fairly and fairly quickly, please contact the editor or see other details in the Note to Contributors.