Tamiya 1/48 F4D-1 Skyray
| KIT #: | 61055 |
| PRICE: | Currently $43.00 SRP |
| DECALS: | Three options |
| REVIEWER: | Scott Van Aken |
| NOTES: | New Ware NOTS rocket |
| HISTORY |
 y the Douglas Aircraft Company. Although it
was in service for a relatively short time and never entered combat, it was
notable for being the first carrier-launched aircraft to hold the world's
absolute speed record, at 752.943 mph, and was the first United States Navy
and United States Marine Corps fighter that could exceed Mach 1 in level
flight. It was the last fighter produced by the Douglas Aircraft Company
before it merged with McDonnell Aircraft and became McDonnell Douglas. The
F5D Skylancer was an advanced development of the F4D Skyray that did not go
into service. 420 aircraft were built and eventually operated with nearly
two dozen USN and USMC squadrons. Typical of most Naval aircraft of the
1950s, its active service was relatively short, such was the pace of
aircraft development during the time.
y the Douglas Aircraft Company. Although it
was in service for a relatively short time and never entered combat, it was
notable for being the first carrier-launched aircraft to hold the world's
absolute speed record, at 752.943 mph, and was the first United States Navy
and United States Marine Corps fighter that could exceed Mach 1 in level
flight. It was the last fighter produced by the Douglas Aircraft Company
before it merged with McDonnell Aircraft and became McDonnell Douglas. The
F5D Skylancer was an advanced development of the F4D Skyray that did not go
into service. 420 aircraft were built and eventually operated with nearly
two dozen USN and USMC squadrons. Typical of most Naval aircraft of the
1950s, its active service was relatively short, such was the pace of
aircraft development during the time.
| THE KIT |
 The main parts of the kit are divided into upper and lower wing/fuselage
sections with a separage vertically divided nose. Into this nose goes a
nicely done cockpit tub that sits atop the nose gear well. The cockpit
consists of the usual instrument panel, control stick and rudder pedals with
a separate anti-glare panel. The seat is a five piece construct. A pilot
figure is supplied. No nose weight is indicated.
The main parts of the kit are divided into upper and lower wing/fuselage
sections with a separage vertically divided nose. Into this nose goes a
nicely done cockpit tub that sits atop the nose gear well. The cockpit
consists of the usual instrument panel, control stick and rudder pedals with
a separate anti-glare panel. The seat is a five piece construct. A pilot
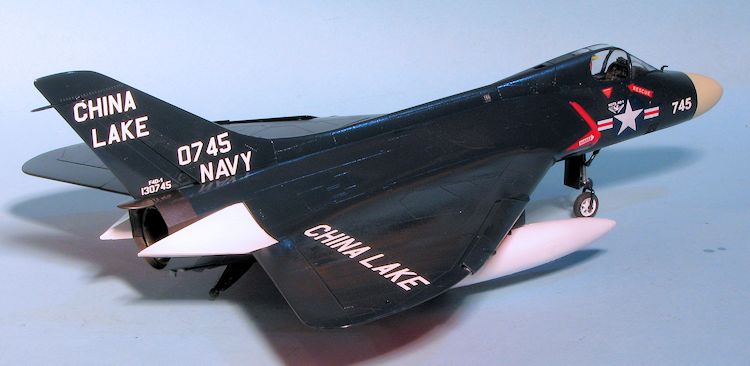
figure is supplied. No nose weight is indicated.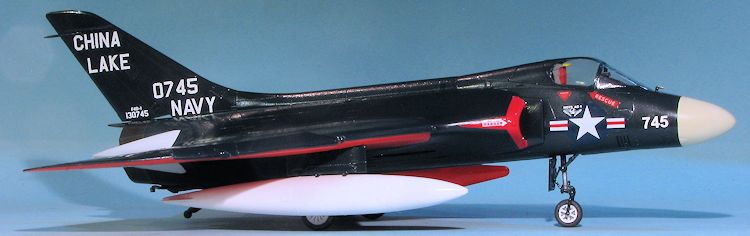 For things under the wings/fuselage you have a pair of large fuel tanks,
Sidewinder missiles and pylons as well as what is called a NAVPAC for under
the fuselage centerline. Outboard are rocket pods which can be displayed
with their aerodynamic nose and tail caps if you so wish.
For things under the wings/fuselage you have a pair of large fuel tanks,
Sidewinder missiles and pylons as well as what is called a NAVPAC for under
the fuselage centerline. Outboard are rocket pods which can be displayed
with their aerodynamic nose and tail caps if you so wish. | CONSTRUCTION |
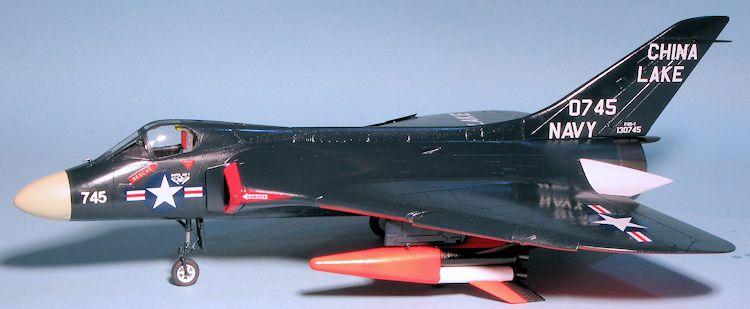
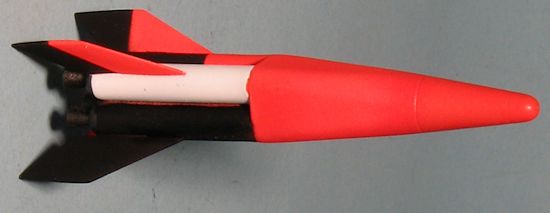 The rocket is relatively simple as things go. There is a fore and aft
section that needs to be removed from a large casting block. I do not do
well with these sorts of things and so had to do quite a bit of sanding to
get things even close to flush before attaching them. Even then, I used
considerable Mr. Surfacer to help fill the gaps. The fins were next and
there are indentations on the aft section showing where these go. Actually,
they are little more than surface lines, but they help. Before attaching the
fins, I flattened the end of each of the rocket motors and then sanded each
nozzle attachment point to where they were all about the same length. Once
the nozzles were glued on, the fins were attached. I then primered the whole
thing and painted it gloss white.
The rocket is relatively simple as things go. There is a fore and aft
section that needs to be removed from a large casting block. I do not do
well with these sorts of things and so had to do quite a bit of sanding to
get things even close to flush before attaching them. Even then, I used
considerable Mr. Surfacer to help fill the gaps. The fins were next and
there are indentations on the aft section showing where these go. Actually,
they are little more than surface lines, but they help. Before attaching the
fins, I flattened the end of each of the rocket motors and then sanded each
nozzle attachment point to where they were all about the same length. Once
the nozzles were glued on, the fins were attached. I then primered the whole
thing and painted it gloss white. 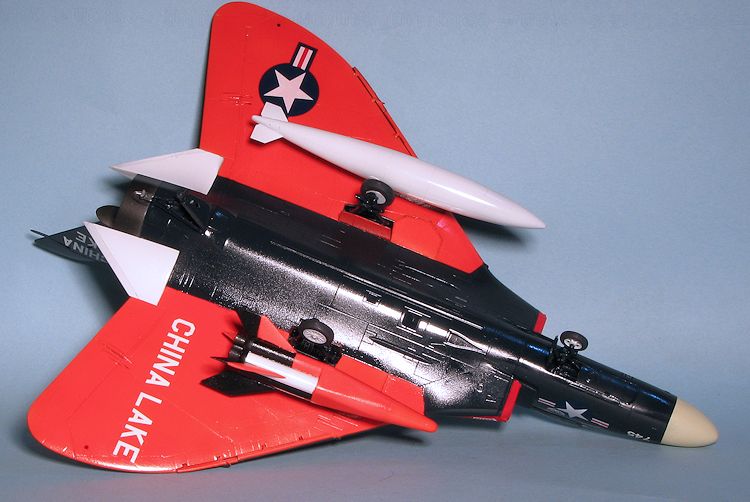 marks so those entering this kit into a contest will have
their work cut out for them. I also found ejector pin marks on other pieces,
most of which were easy to clean up, such as those on the gear legs. There
are some rather large sink areas on the main gear legs which I did not fix.
marks so those entering this kit into a contest will have
their work cut out for them. I also found ejector pin marks on other pieces,
most of which were easy to clean up, such as those on the gear legs. There
are some rather large sink areas on the main gear legs which I did not fix.
| COLORS & MARKINGS |
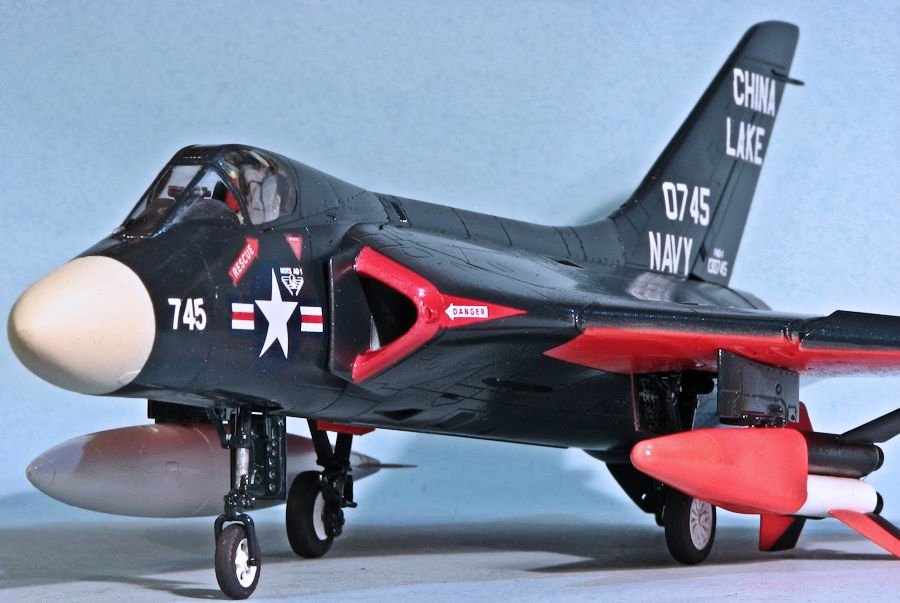
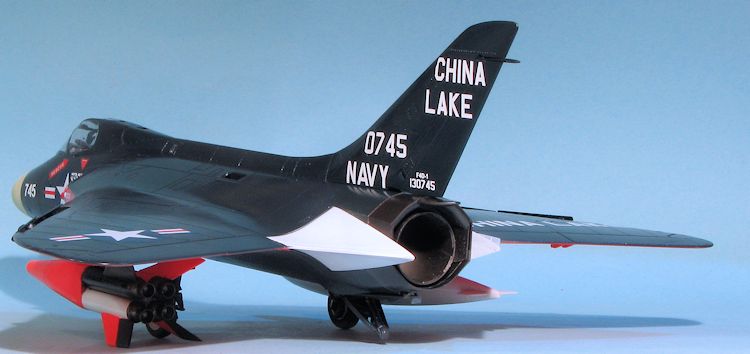
 For this project, I wanted to model one of the China Lake test aircraft that
was involved in the NOTS satellite launch system. In this case,
preproduction aircraft were some of the planes used. The Skyray's excellent
climb performance was the main reason it was used for this task. These early
planes were overall gloss sea blue. Had I been paying attention to the few
photos around, I would have painted the gear wells, inside of the gear doors
and gear legs gloss blue, but I didn't and this caused me to repaint these
areas after most of the other shades had been done.
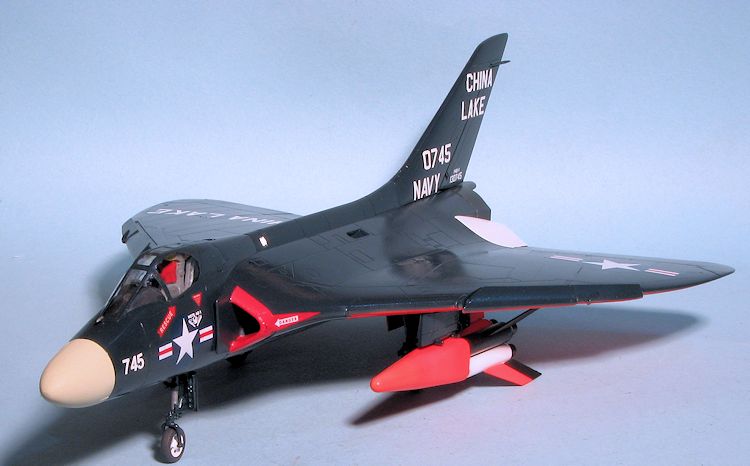
For this project, I wanted to model one of the China Lake test aircraft that
was involved in the NOTS satellite launch system. In this case,
preproduction aircraft were some of the planes used. The Skyray's excellent
climb performance was the main reason it was used for this task. These early
planes were overall gloss sea blue. Had I been paying attention to the few
photos around, I would have painted the gear wells, inside of the gear doors
and gear legs gloss blue, but I didn't and this caused me to repaint these
areas after most of the other shades had been done. 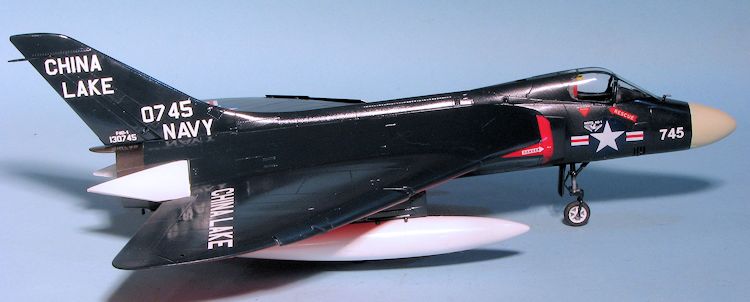 It was after I had unmasked the wings and fuselage sections that I installed
the landing gear and struts. After this had dried, I took a closer look at
photos. Sure enough, during this time period, the gear legs were still sea
blue, though the wheels were white. Were that the case, then the gear wells
would have been this color as well as the interior of the doors. Photos
taken of this plane after this project show a white nose gear leg which was
undoubtedly a replacement. I doubt if they would have repainted the gear
wells. I remasked the wings and other sections and began spraying these
sections with sea blue. Thanks to the various crevices and crannies, I had
to break out the paint brush to get these sections properly covered.
Fortunately, brushed on Testors gloss sea blue looks just like those areas
spray painted, especially when covered with a gloss coat, which was applied
once all the decals were on.
It was after I had unmasked the wings and fuselage sections that I installed
the landing gear and struts. After this had dried, I took a closer look at
photos. Sure enough, during this time period, the gear legs were still sea
blue, though the wheels were white. Were that the case, then the gear wells
would have been this color as well as the interior of the doors. Photos
taken of this plane after this project show a white nose gear leg which was
undoubtedly a replacement. I doubt if they would have repainted the gear
wells. I remasked the wings and other sections and began spraying these
sections with sea blue. Thanks to the various crevices and crannies, I had
to break out the paint brush to get these sections properly covered.
Fortunately, brushed on Testors gloss sea blue looks just like those areas
spray painted, especially when covered with a gloss coat, which was applied
once all the decals were on. | THINGS CONTINUE |
| CONCLUSIONS |
This is one of those projects that I have been wanting to do for many, many years. Each time I think I'll get to it, something else comes up and it goes back on the shelf, sometimes forgotten until I see it while looking for another kit. Finally, I've had the chance to finish it off. The Tamiya kit is, well, a Tamiya kit. The fit is what you pay for and you get your money's worth in that regard. The New Ware rocket did not provide any issues that were not self-induced. I was very pleased with the decals that New Ware provided. From a look on their web site, this item is still available, though at a bit more than I initially paid for it way back when. In all, a nice project that satisfies my like of sea blue planes and some color as well.
| REFERENCES |