Airfix 1/72 F-51D Mustang
| KIT #: | A02047 |
| PRICE: | $7.99 SRP a few years back |
| DECALS: | Two Options |
| REVIEWER: | Scott Van Aken |
| NOTES: |
| HISTORY |
The Mustang was the plane that the US brass did not
want. It was not built for the U.S. and it was felt that adding a 'foreign'
design into the mix was not in the best interest of the USAAF. Sure, the Allison
Mustang was a respectable ground attack aircraft in its A-36 form, and a relatively small number
of A-36 as well as P-51s and P-51As were built to replace P-40s in some units,
but as an air superiority fighter,
 the USAAF was banking on the Curtiss P-60, an
aircraft that was doomed to failure thanks as much to constantly changing
requirements as anything else.
the USAAF was banking on the Curtiss P-60, an
aircraft that was doomed to failure thanks as much to constantly changing
requirements as anything else.
Well, as we all know, the US never did properly develop an air superiority fighter during the war. The P-38 and P-47 were developed prior to the war and while one had the range, it was constantly plagued with engine failures at altitude, a situation that was never cured. The other was far too short ranged, even with additional fuel tanks to be a really good escort fighter. It took US pilots in the UK who had had the opportunity to fly a British Mustang I that had been modified with a Merlin to get the attention of the US brass. It was a hard fought struggle, but eventually the brass gave in and in early 1944, Merlin Mustangs started arriving in the UK, where they were soon found to be just what was wanted.
Post war, the Mustang still stayed in military service with the new USAF and with the nations of many countries. The last military Mustangs were flown by the Dominican Republic until 1984 when they were demobbed and sold to warbird enthusiasts.
| THE KIT |
Those
of you who follow plastic models should realize by now that Hornby has
resurrected Airfix from the dead. After grabbing the company away from the bean
counters, Hornby has been on a rather aggressive program to release new tool
kit. Not surprisingly, most of these kits have been replacements for old
favorites, many of which harken back forty years or more. To this reviewer,
every one of these
 new kits has been a winner. There have been some complaints
from the usual nay-sayers, but I have to think that none of these folks have
actually taken the time to build one of these kits.
new kits has been a winner. There have been some complaints
from the usual nay-sayers, but I have to think that none of these folks have
actually taken the time to build one of these kits.
So, how does one go from a series one to a series two kit? Well, one adds a sprue. And really, that is pretty much a requirement to properly do an F-51D. But first, here is a refresher on what comes with the P-51D, as none of that has changed and is included in the box. As a review:
The first thing that struck me is how much this kit is like the Tamiya Mustang. Not saying they copied it, but it is sure is similar. It has the separate radiator and ducting like the Tamiya kit. The canopy is separate from the frame, just like the Tamiya kit (BTW, I really dislike this approach to canopies as it provides an unfillable seam). Both standard and 'Dallas' canopies are provided. Even the cockpit looks like that on the Tamiya kit. Perhaps there are only so many ways to model a Mustang or perhaps Airfix decided to go with what works.
Anyway, the cockpit has a separate instrument panel
that takes a decal with a nice seat and a control stick that is just begging to
be broken when you remove it from the s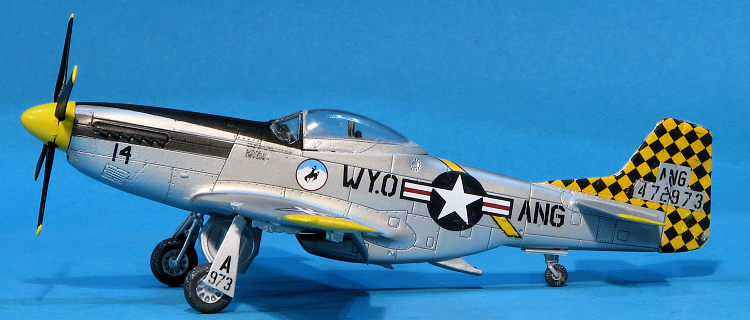 prue. The side console and radio pack are
molded into the cockpit 'tub' along with the upper ducting for the radiator and
the tail wheel well. The kit provides a separate rudder and flaps that can be
placed in the lowered position. The radiator exit duct can also be posed up or
down. Wing pylons are separate and fit into holes you need to open in the
wing. The engine has shrouded exhaust and the pylons have drop tanks, but no
bombs.
prue. The side console and radio pack are
molded into the cockpit 'tub' along with the upper ducting for the radiator and
the tail wheel well. The kit provides a separate rudder and flaps that can be
placed in the lowered position. The radiator exit duct can also be posed up or
down. Wing pylons are separate and fit into holes you need to open in the
wing. The engine has shrouded exhaust and the pylons have drop tanks, but no
bombs.
Now for the F-51D sprue. This one does come with bombs. It also has the under wing rockets that were added to most P-51Ds very late in the war, so one can do a late war P-51D with this kit. Like the Tamiya Mustang, the F-51D boxing is really the version that most will want if they want to do a lot of Mustangs. In addition, the extra sprue includes a cuffless Hamilton Standard prop.
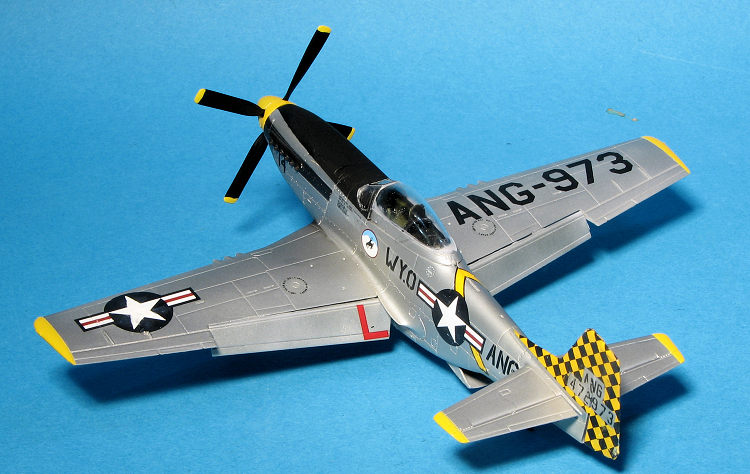
Decals are nicely done and as this is a series two kit, you get two markings options. One is for the box art plane of the 12th FBS/18th FBG in Korea during 1952. The yellow bits will need to be painted. The other is for a pseudo SEA painted Dominican Republic plane from the last year of their operation. Decals are very nicely done and you get a complete data placement guide as well. Color information during the build continues to be only in Humbrol paints. The Dominican plane is in FS 36622 undersides with FS 341079 and 30219 uppers. According to the instructions, this one takes a cuffed prop.
| CONSTRUCTION |
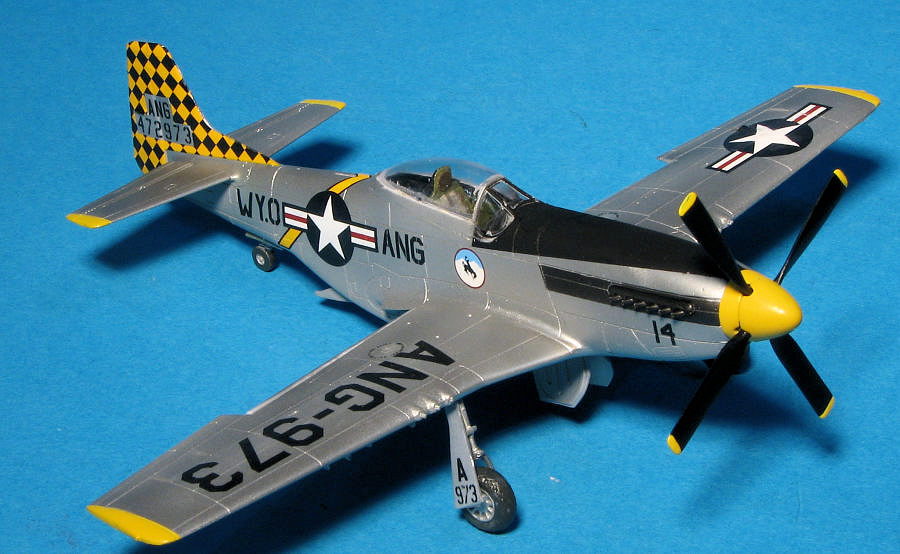
I was looking forward to building this one but until
properly motivated by decals (in this case Caracal 72054: ANG Mustangs), it sat
on the shelf. So to get this one going, I popped open the box and after
installing the seat and control stick, painted all the cockpit bits, instrument
panel and interior with Nakajima Interior Green (because I already had it
mixed). I have read that the cockpit in these planes could have been repainted
black, but being too lazy to really research it, I stuck with green. I used some
1mm tape for a seat harness as one is not included on the decal sheet. I added
the decal to the instrument panel and glued that in place. I left off the gun
sight and that was a big error as it is
 practically
impossible to attach once the fuselage halves have been closed. The radiator was
glued to the underside and all this was trapped between the fuselage halves. The
instructions would have you build and attach the prop at this time, but I didn't
care if it spun or not so left that off until the very end.
practically
impossible to attach once the fuselage halves have been closed. The radiator was
glued to the underside and all this was trapped between the fuselage halves. The
instructions would have you build and attach the prop at this time, but I didn't
care if it spun or not so left that off until the very end.
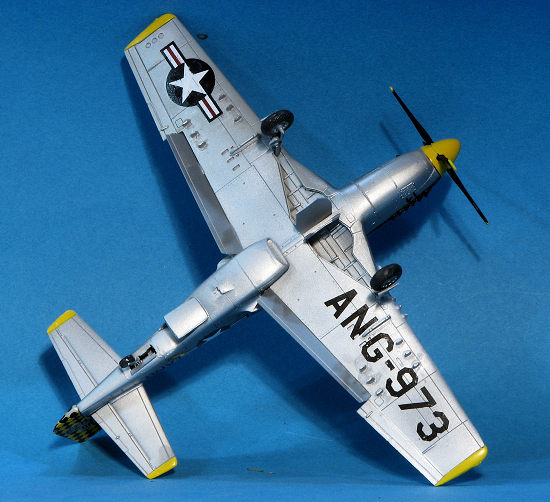
I opened the holes in the wing for rockets and the drop tank pylon. Looking at photos of ANG Mustangs, I noticed that these were carried more often than not. Did not see a photo with the actual rockets, but they did have the stubs. More on that in a bit. Once the wing was assembled, it was glued in place. It is almost an impossible fit and when done the wings do not have the sort of dihedral that one expects to see. I could quickly see that this kit was to be a learning experience. The stabs and rudder where then glued on as were the flaps.
Lower nose intake, radiator exhaust door and the oil cooler intake were then glued in. The ventral intake piece is too small and one will need to do some sanding to get a smooth fit. It was at this point that I decided to do some painting so I glued in the main landing gear legs, which are a very sloppy fit, and the tail gear. Both of these actions were also a mistake.
I assembled the canopy. I really hate the way Airfix (and Tamiya) do the windscreen and canopy. Instead of molding the canopy and frame as a single clear piece, they are separate, making it impossible to get a smooth, seamless, transition. In the front, there is no surrounding fuselage included with the windscreen piece, again, making it impossible to get a decent fit without worries about glue wicking between the instrument coaming and the glass. With those on and masked I headed to the paint shop.
| COLORS & MARKINGS |
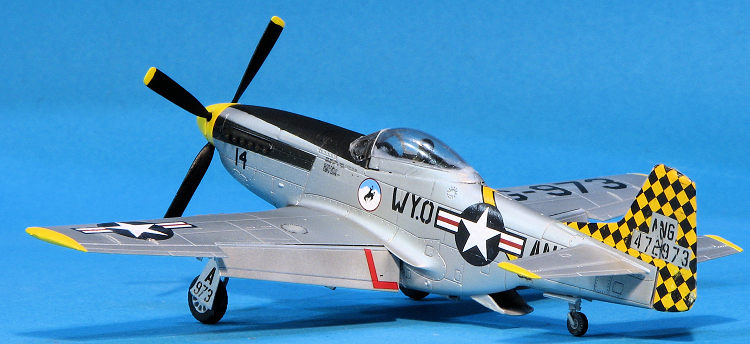
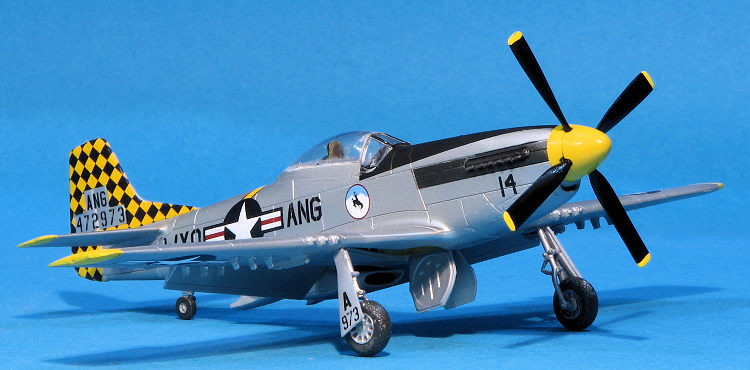
 ainted
everything else with Alclad II Aluminum. The area around the exhaust was
painted Steel. I returned to the bench to add the rockets. When dry, the
rockets were cut away, leaving the stubs. The bomb/drop tank pylons were
also added. This area was repainted and I also did the nose anti-glare panel
at this time.
ainted
everything else with Alclad II Aluminum. The area around the exhaust was
painted Steel. I returned to the bench to add the rockets. When dry, the
rockets were cut away, leaving the stubs. The bomb/drop tank pylons were
also added. This area was repainted and I also did the nose anti-glare panel
at this time. | CONCLUSIONS |
 There are
times when things just don't work out as well as hoped and this was one of them.
Others have commented as to how nice this kit is to build and unless they are
rabid fan-boys of Airfix, I can only come to the conclusions that I screwed the
pooch on this. It wasn't a total disaster and will make a nice 3-footer for the
shelf. I have at least two more of these, so will take what I've learned from
this build and apply it to the next time. There are still five more markings
options on the decal sheet to go.
There are
times when things just don't work out as well as hoped and this was one of them.
Others have commented as to how nice this kit is to build and unless they are
rabid fan-boys of Airfix, I can only come to the conclusions that I screwed the
pooch on this. It wasn't a total disaster and will make a nice 3-footer for the
shelf. I have at least two more of these, so will take what I've learned from
this build and apply it to the next time. There are still five more markings
options on the decal sheet to go.
14 July 2017
Copyright ModelingMadness.com. All rights reserved.
Thanks to me for spending the loot to bring this one to you.
Thanks to If you would like your product reviewed fairly and fairly quickly, please contact the editor or see other details in the Note to Contributors.