| KIT #: | A82011 |
| PRICE: | $17.95 SRP |
| DECALS: | One option |
| REVIEWER: | Scott Van Aken |
| NOTES: | Part of a two kit set |
| HISTORY |
Korea was the first major conflict in which jet fighters fought each other in combat. Much has been said about the two protagonists in terms of which was the better aircraft. As with everything when doing comparisons, a few things have to be taken into consideration.
The first is the aircraft themselves. The MiG-15 was not as sophisticated an aircraft as the F-86. It was lighter, had less wing loading and had a more powerful armament. The F-86 was heavier, had superior electronics for the gun sight, and had better armor. The MiG-15 was a better dog-fighting aircraft thanks to its higher thrust to weight ratio and lower wing loading. It was unstable at very high speed. The heavier F-86 was able to dive better, and had a greater weight of fire from its faster firing .50 caliber machine guns than the MiG did with its three, slow firing cannon.
 Next is the pilot. The major benefit of F-86 pilots was that they had a
G-suit which kept them from blacking out in dog-fights. The MiG-15 pilot did not
have this and so frequently blacked out during tight maneuvers, often resulting
in a smoking hole in the ground. Secondly, F-86 pilots were brought into units
in small numbers as experienced pilots rotated home. They had better in-country
training and meanwhile experienced pilots were always out on patrol. The MiG-15
pilots, who were basically Soviet, were brought in en masse and so the learning
curve for the unit had to start from scratch every time. This meant that the MiG
pilots were tentative at first and after they had become seasoned, became better
and better until it was time to leave and the cycle started all over again.
Next is the pilot. The major benefit of F-86 pilots was that they had a
G-suit which kept them from blacking out in dog-fights. The MiG-15 pilot did not
have this and so frequently blacked out during tight maneuvers, often resulting
in a smoking hole in the ground. Secondly, F-86 pilots were brought into units
in small numbers as experienced pilots rotated home. They had better in-country
training and meanwhile experienced pilots were always out on patrol. The MiG-15
pilots, who were basically Soviet, were brought in en masse and so the learning
curve for the unit had to start from scratch every time. This meant that the MiG
pilots were tentative at first and after they had become seasoned, became better
and better until it was time to leave and the cycle started all over again.
It also turns out that the kill ration is not as high as initially thought, which to anyone who has followed the subject should not be surprised to learn. So it really means that the aircraft were pretty similar with most giving the airframe edge to the MiG and the pilot edge to the F-86.
| THE KIT |
Molded very much like all of its relatively new kits, the engraving may be a bit much for some, but most of us can deal with it OK. Four standard grey sprues and one clear one for the canopy and windscreen come in the now standard folded cardboard box. This one is made in India so Hornby is still spreading the manufacturing.
 So let us get the the straight Sabre bits. This one has a 6-3
non-slatted wing with a fence. Sabre people realize that pretty much it is the
wing that determines the accuracy of the markings to be used. Heaven forbid that
some one put slatted wing Sabre markings on a fixed wing F-86. Heads will roll,
I tell you!. The kit has a nice cockpit which includes a pilot figure. No
harness on the bang seat which is pretty much like the real thing, only much
simplified. Decals for instruments, which is OK. An intake section is included
with the upper piece having '3 Grams' engraved on it. Now this means that 3
grams of weight is needed.
So let us get the the straight Sabre bits. This one has a 6-3
non-slatted wing with a fence. Sabre people realize that pretty much it is the
wing that determines the accuracy of the markings to be used. Heaven forbid that
some one put slatted wing Sabre markings on a fixed wing F-86. Heads will roll,
I tell you!. The kit has a nice cockpit which includes a pilot figure. No
harness on the bang seat which is pretty much like the real thing, only much
simplified. Decals for instruments, which is OK. An intake section is included
with the upper piece having '3 Grams' engraved on it. Now this means that 3
grams of weight is needed.
The wing can have pylons added to the inner section for the use of bombs
if one so wishes. Now I'm not sure if the USAF version is the fighter bomber -35
or not, but in this scale, it probably doesn't matter and those wanting to use
the pylons and bombs will need to do a bit of research if accuracy is important.
The kit has well done landing gear with flattened tires included and two styles
of nose wheel. There are separate 'gear up' gear doors with additional
reinforcement to allow them to be easily i nstalled, a nice touch. The same goes
for the separate speed brakes; a closed option is given. It will be interesting
to see if the molding is such that these brakes are properly drooped down when
open. In addition to the bombs, the standard early drop tanks are provided for
the outer stations. This is topped by a two piece canopy/windscreen that can be
posed open if one wishes.
nstalled, a nice touch. The same goes
for the separate speed brakes; a closed option is given. It will be interesting
to see if the molding is such that these brakes are properly drooped down when
open. In addition to the bombs, the standard early drop tanks are provided for
the outer stations. This is topped by a two piece canopy/windscreen that can be
posed open if one wishes.
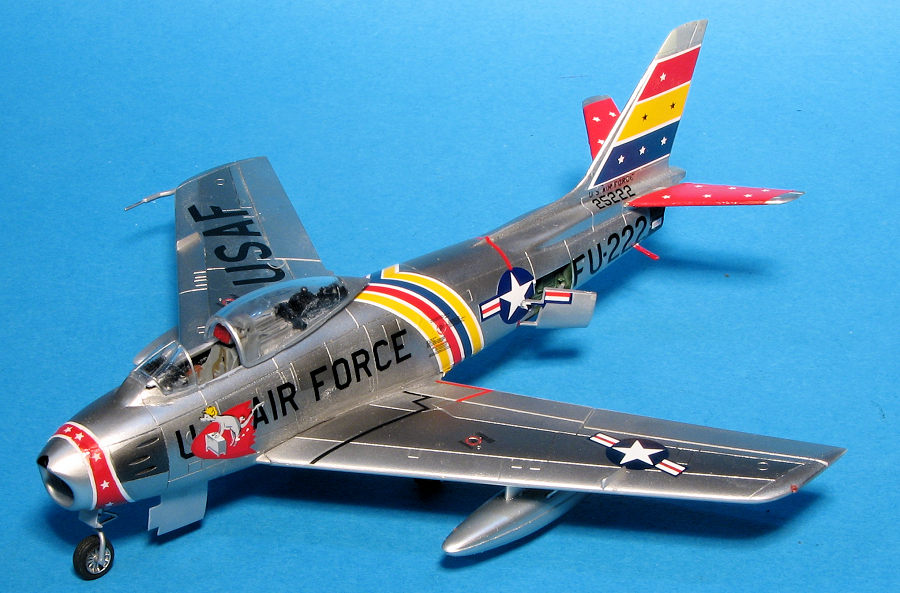
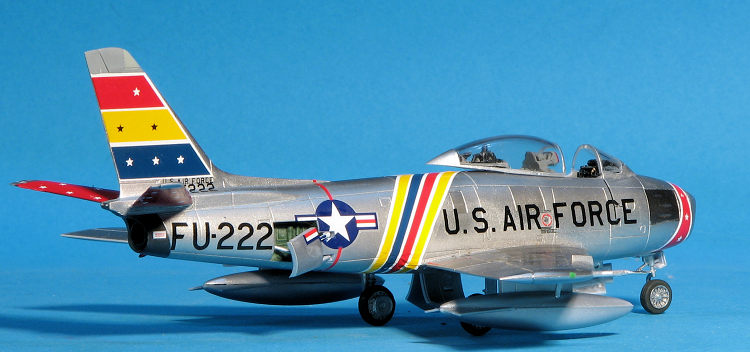
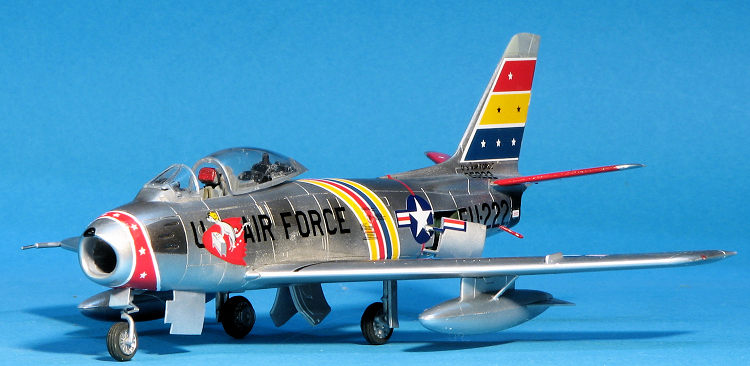
Kit instructions are well drawn with the usual Humbrol paint numbers in place of real paint names except for the camo and markings guide where the colors used on the outside are identified. Markings are for 'Little Rita', the aircraft of Dick Geiger of the 16 FIS in late 1952. Decals are well printed and include not only the Korean War bands but a mass of data markings. I should note that the sheet has the correct North American applied curved font.
| CONSTRUCTION |
 This is not the first Airfix F-86 I have built, but I decided to add some
aftermarket to this one. For the purposes of this article, I used a pair of
Pavla sets: C 72099 Cockpit Set and U 72-126 wheel set. Both have a level of
detail that is higher than what is provided with the kit parts. This is
especially true of the cockpit set with its nice detail on the side consoles,
instrument panel and a lovely seat.
This is not the first Airfix F-86 I have built, but I decided to add some
aftermarket to this one. For the purposes of this article, I used a pair of
Pavla sets: C 72099 Cockpit Set and U 72-126 wheel set. Both have a level of
detail that is higher than what is provided with the kit parts. This is
especially true of the cockpit set with its nice detail on the side consoles,
instrument panel and a lovely seat.
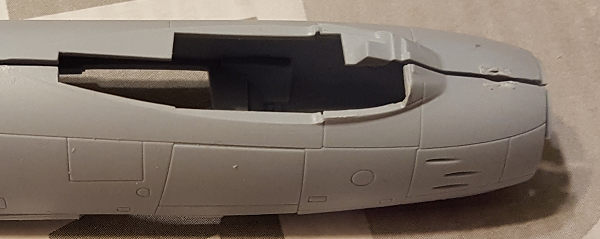
 Preparing the cockpit opening
meant removing much of the area behind the seat and under the windscreen. I
carefully followed the instructions, but it turns out that I removed too much
from the windscreen area. Use the kit windscreen to help when it comes to
cutting this area away. I did fix the error by gluing in some small sections of
plastic card, but it was time consuming due to all the trim and fit I had to do.
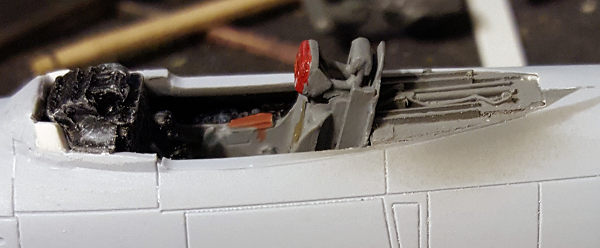
I have included an image of the cockpit with all the bits in place. You can see
the small white areas that I had to replace. Note also that there was quite a
bit of trim and fit to get the area behind the seat to fit as well.
Preparing the cockpit opening
meant removing much of the area behind the seat and under the windscreen. I
carefully followed the instructions, but it turns out that I removed too much
from the windscreen area. Use the kit windscreen to help when it comes to
cutting this area away. I did fix the error by gluing in some small sections of
plastic card, but it was time consuming due to all the trim and fit I had to do.
I have included an image of the cockpit with all the bits in place. You can see
the small white areas that I had to replace. Note also that there was quite a
bit of trim and fit to get the area behind the seat to fit as well.
I then installed the cockpit onto the slot in the top of the nose gear well
piece and glued that into position. The tailpipe was installed as was the upper
section of the intake (the lower is molded into the nose gear well piece). I
forgot to put weight above the nose well so ended up using the area under and
behind the cockpit for this. The nose piece was then glued on and the seam work
was dealt with. Tha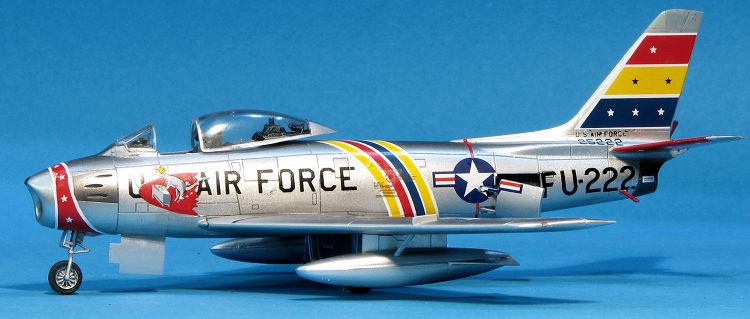 nks to the soft plastic, not as much filler was needed as
would be on other kits as the glue was able to cause the plastic to ooze through
the seams in many cases.
nks to the soft plastic, not as much filler was needed as
would be on other kits as the glue was able to cause the plastic to ooze through
the seams in many cases.
The wings were then built up and installed. I did not open the holes for the bomb racks. Fit of the wing is not the best. It is a tight fit on all accounts and there were gaps at the front and rear to be dealt with. Airfix includes the very inside wing root with a small section of lower forward fuselage as separate pieces on either side. I guess this would be useful if you wanted to display them lowered, but it was just another area that needed some filler and sanding. Tailplanes were attached and I had a somewhat complete airframe. Seemed like a good time to do the initial painting.
| COLORS & MARKINGS |
Surprisingly, I don't have much in the decal stash for 1/72 Sabres. At least nothing like the I have in 1/48 scale. Several were either Canadair Sabres or the longer wing F-40 variant. What I did have was all unpainted metal so I masked the open cockpit with Silly Putty and sprayed pretty much everything with Alclad II aluminum. This rapidly showed areas that needed a bit more work so I did that. Besides the base aluminum, I used dark aluminum and steel for some of the different panels.
I used some Testors FS 34092 to simulate the dark
chromate green in the gear wells and glued in the gear struts after painting
them flat aluminum. Then it was on to decals. I decided to try a very old set of
Microscale decals (72-354) as it had a colorful boss bird from the 21st Fighter
Bomber Wing. I s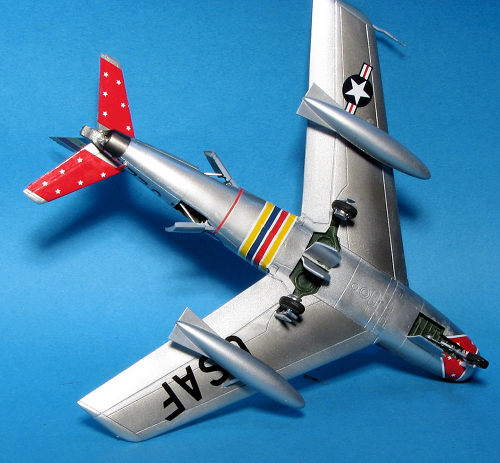 tarted with the horizontal stab markings and knew right away
that I'd be having fit issues. The nose band was particularly difficult as it
was no where near curved enough to actually fit the nose. Yes, these decals were
designed for the Heller kit, and not the Airfix version, but I've learned over
the years that old Microscale/Superscale decals rarely fit well even on the kit
for which they were designed. Not surprisingly, many of the markings were
oversize. When I could, I used markings from the Airfix kit, especially the
insignia around the speedbrake and other common markings.
tarted with the horizontal stab markings and knew right away
that I'd be having fit issues. The nose band was particularly difficult as it
was no where near curved enough to actually fit the nose. Yes, these decals were
designed for the Heller kit, and not the Airfix version, but I've learned over
the years that old Microscale/Superscale decals rarely fit well even on the kit
for which they were designed. Not surprisingly, many of the markings were
oversize. When I could, I used markings from the Airfix kit, especially the
insignia around the speedbrake and other common markings.
During the rather lengthy decal application process, I cleaned up and painted the resin wheels (which are a major improvement over the kit offerings), then attached them after slightly shortening the axles. I then attached the inner main gear doors and the speed brakes. Airfix may well be unique in at least putting a bit of droop in the speed brakes when they are open. I don't think it is enough, but it is nice that they have spotted this feature. None of the other F-86s I have built from other companies provide this.
All this was followed by attaching the rest of the gear doors (very front nose door fits off center, and the outer main gear doors have sink areas), the drop tanks and braces (fiddly), fuel dump tube and pitot tube. I tried best I could to straighten out the bit of a mess on the nose band and was not really all that successful. The clear bits were attached after more fiddling and I figured it was time to call it quits.
| CONCLUSIONS |
I like the Airfix Sabre and any problems in this one were, for the most part, self inflicted. This always happens when I use aftermarket cockpits and using decals not designed for the kit or ones that are quite old at times leads to issues. However, I did end up with a nice 'three-footer' and it is very colorful. I just bought two more of these kits so you will be seeing them sometime in the future.
28 April 2017
Copyright ModelingMadness.com. All rights reserved.
If you would like your product reviewed fairly and fairly quickly, please contact the editor or see other details in the Note to Contributors.
Back to the Main Page Back to the Review Index Page Back to the Previews Index Page