Platz 1/144 JSDF T-6 Texan
| KIT #: | PF-20 |
| PRICE: |
2000
yen SRP |
| DECALS: | Seven options |
| REVIEWER: | Scott Van Aken |
| NOTES: |
New tool kit in conjunction with F-toys |
| HISTORY |
The
North American Aviation T-6 Texan
was a single-engined advanced trainer aircraft used to train pilots of the
United States Army Air Forces (USAAF), United States Navy, Royal Air Force and
other air f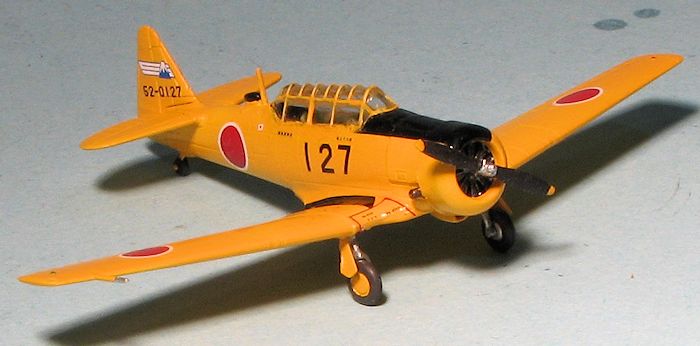 orces of the British Commonwealth during World War II and into the
1970s. Designed by North American Aviation, the T-6 is known by a variety of
designations depending on the model and operating air force. The United States
Army Air Corps (USAAC) and USAAF designated it as the
AT-6,
the United States Navy the SNJ,
and British Commonwealth air forces, the
Harvard, the name it is
best known by outside of the US. After 1962, US forces designated it the
T-6.
It remains a popular warbird aircraft used for airshow demonstrations and static
displays. It has also been used many times to simulate the Japanese Mitsubishi
Zero in movies depicting World War II in the Pacific.
orces of the British Commonwealth during World War II and into the
1970s. Designed by North American Aviation, the T-6 is known by a variety of
designations depending on the model and operating air force. The United States
Army Air Corps (USAAC) and USAAF designated it as the
AT-6,
the United States Navy the SNJ,
and British Commonwealth air forces, the
Harvard, the name it is
best known by outside of the US. After 1962, US forces designated it the
T-6.
It remains a popular warbird aircraft used for airshow demonstrations and static
displays. It has also been used many times to simulate the Japanese Mitsubishi
Zero in movies depicting World War II in the Pacific.
The aircraft was used by literally dozens of military air arms and I would wager there are still hundreds of them flying in civilian hands. The airplane is not the easiest to fly, as befits an advanced trainer, but can be flown in a spirited fashion by an experienced pilot.
| THE KIT |
 There is a cockpit interior that includes molded in
seats, a separate engine and cowling, two canopies, the option to build the kit
with the wheels up or down, and a nicely done display stand. The two canopies
differ from each other in the number of panes on the side panels. Though one of
the markings options shows a single piece rear transparency, both of the
included canopies
have the multi-pane version so you'll have to sand those unwanted frames if
doing that option. Another options is to have the small ADF antenna housing on
the back behind the standard antenna. The fuselage antennas are molded in place
as is the pitot tube on the one-piece wing.
There is a cockpit interior that includes molded in
seats, a separate engine and cowling, two canopies, the option to build the kit
with the wheels up or down, and a nicely done display stand. The two canopies
differ from each other in the number of panes on the side panels. Though one of
the markings options shows a single piece rear transparency, both of the
included canopies
have the multi-pane version so you'll have to sand those unwanted frames if
doing that option. Another options is to have the small ADF antenna housing on
the back behind the standard antenna. The fuselage antennas are molded in place
as is the pitot tube on the one-piece wing.
The instruction sheet is large and includes sections in English. There are five well drawn construction steps that show the various options. The other side of the sheet is devoted to markings and painting. There are seven options, all Japanese and while I have titled this preview 'JASDF' some of these may be Navy. All save one option is in overall trainer yellow while that lone options is in unpainted metal. Typical of Platz, the decal sheet is very comprehensive, offering even the black anti-glare panels and the wing walk areas. They also include roundels for all seven options, even though you can only build two from the kit.
| CONSTRUCTION |
I am sure there are modelers who could have this done
in a day, but I'm slow so it took me about a week to finish these two. First
thing I did w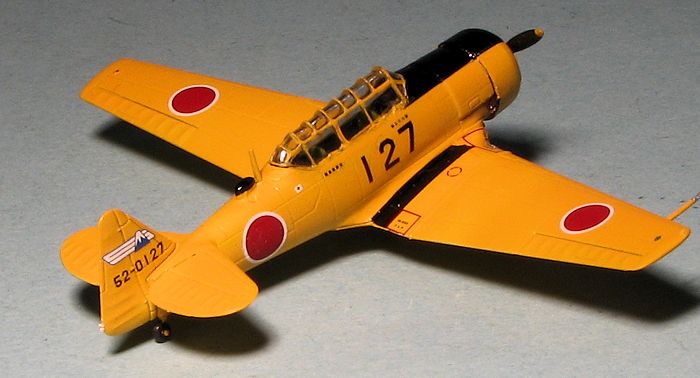 as
to paint the interior with standard Interior green. I had considered adding
belts, but not much can be seen through the thick canopy sections, so I did not
do that.
as
to paint the interior with standard Interior green. I had considered adding
belts, but not much can be seen through the thick canopy sections, so I did not
do that.
The kit as very large alignment pins and receptacles, so could almost be considered a snap kit, but you do have to glue things in place. The fuselage halves were glued together and the interior attached to the inside of the wing piece. I did use some filler though I am thinking that many who build this kit will not. Next the tailplanes were attached and I pushed the cowling in place for painting. I had decided to build one Navy SNJ-5 and one Air Force T-6G so the Navy plane had the antennas cut off and sanded down. The Air Force version required the ARN-6 ADF antenna housing. This tiny part has to be handled carefully or it will disappear during placement. I know one of mine did so I was fortunate that one of the options did not need it.
| COLORS & MARKINGS |
 Most of
the options on the markings sheet are for yellow planes and so I sprayed
both airframes with Tamiya white primer, followed by a coat of Tamiya X-1
gloss white. This was followed by Testors RLM 04 enamel which was pretty
much the right color. I masked the interior during this process to reduce
the amount of repainting needed. I should mention that I did the white then
yellow deal on the wheels and gear doors as well. I painted the landing gear
silver and also dry brushed the engine with this color.
Most of
the options on the markings sheet are for yellow planes and so I sprayed
both airframes with Tamiya white primer, followed by a coat of Tamiya X-1
gloss white. This was followed by Testors RLM 04 enamel which was pretty
much the right color. I masked the interior during this process to reduce
the amount of repainting needed. I should mention that I did the white then
yellow deal on the wheels and gear doors as well. I painted the landing gear
silver and also dry brushed the engine with this color. | FINAL CONSTRUCTION |
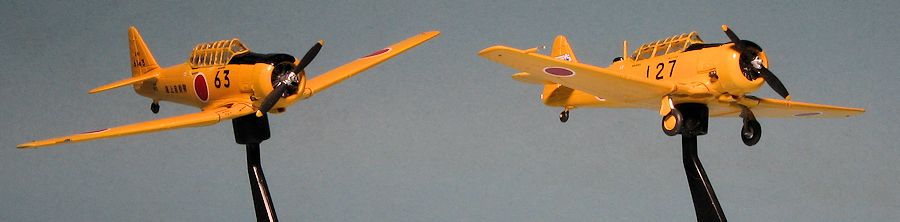
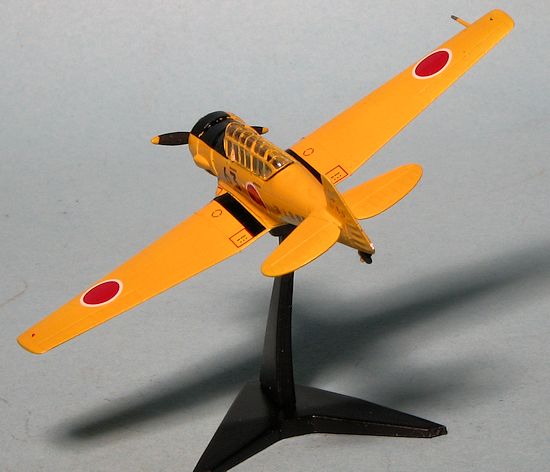
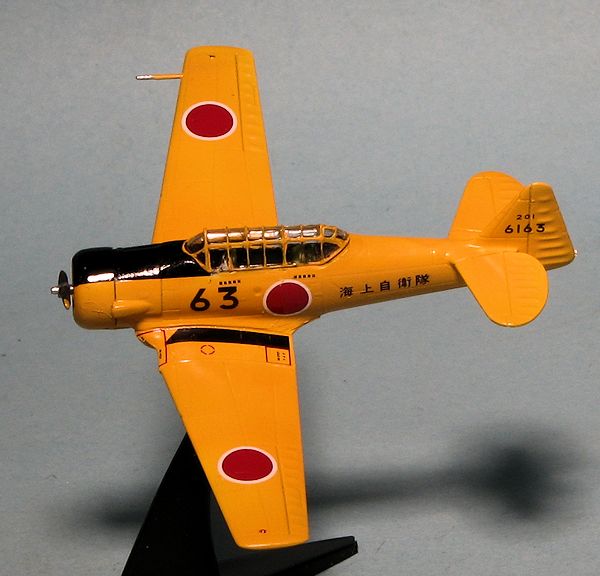
With the decals in place (and by the way, the
included display stands are great for holding the plane while doing this), I
decided to build the JMSDF plane with the gear up and the JASDF plane with the
gear down. The main landing gear legs are very flimsy and I ended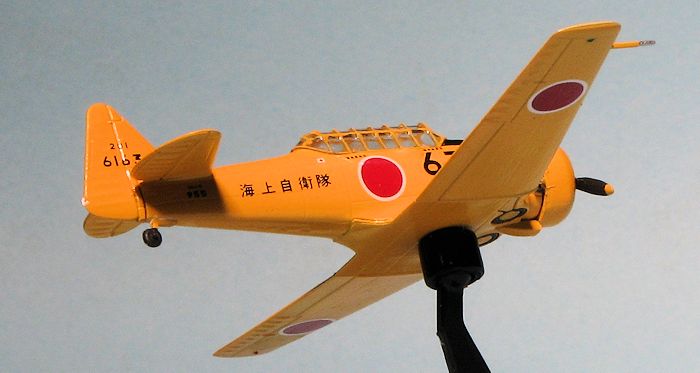 up using super glue to hold them in place. I also found the wheels to be less
than eager to attach themselves to the axle stubs.
up using super glue to hold them in place. I also found the wheels to be less
than eager to attach themselves to the axle stubs.
The canopies gave me the most trouble with the kit. First off, the sprue attachment points are right on the clear part of the canopy. I removed all four from the sprues and then chose the two best. Even those two are not all that great. There is no way most will mask these with all those teeny panel. Fortunately some of the frame lines are quite proud of the panes. At least those running left and right. The ones running fore and aft, not so much. Despite all that help, I had some trouble as my hand isn't as steady as I'd like. Once painted and dry, I atteched them. They do not fit well. They are a tad narrow in the back so the areas painted black on the interior were visible outside the canopy. They also did not fit flush with the cockpit ledge.
With those in place, I did the usual touch-up painting, which in this case was more than I'd have liked. I pushed the props in place, stuck them on the display stands and that was it.
| CONCLUSIONS |
I have to confess that I'm quite pleased with the
results, despite the issues I found with it. It is very much a weekend special
and I'm sure many will be able to build these in a three day time period. Platz'
decals 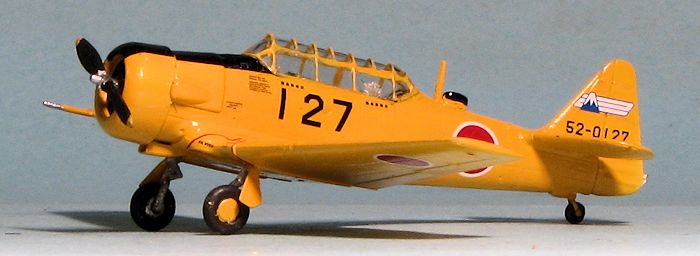 are
first rate and having them offer everything, including anti-glare panels and
wing walks is quite thoughtful. I should also point out that there is no prop
spinner included in the kit, though all the options show one and these were
standard on Japanese T-6/SNJ aircraft. While I am sure they will be rather easy
to make, they should have been included. Due to the flimsy landing gear, I would
recommend building the kit wheels up, especially as Platz has been thoughtful
enough to include a very nice display stand.
are
first rate and having them offer everything, including anti-glare panels and
wing walks is quite thoughtful. I should also point out that there is no prop
spinner included in the kit, though all the options show one and these were
standard on Japanese T-6/SNJ aircraft. While I am sure they will be rather easy
to make, they should have been included. Due to the flimsy landing gear, I would
recommend building the kit wheels up, especially as Platz has been thoughtful
enough to include a very nice display stand.
Overall, I can easily recommend this kit to those who like the scale and do not have any problems with small parts.
| REFERENCES |
http://en.wikipedia.org/wiki/North_American_T-6_Texan
January 2015
Thanks to Platz for the preview kit. You can find this one at your favorite hobby shop or on-line retailer.
Copyright ModelingMadness.com. All rights reserved. No reproduction in any form without express permission from the editor.
If you would like your product reviewed fairly and fairly quickly, please contact the editor or see other details in the Note to Contributors.