Platz 1/144 F-82F/G Twin Mustang
| KIT #: | FC-3 |
| PRICE: | 2160 yen plus shipping (about $26.00 total) |
| DECALS: | Three options |
| REVIEWER: | Scott Van Aken |
| NOTES: | Two complete kits |
| HISTORY |
The North American F-82 Twin Mustang was the last American piston-engine fighter ordered into production by the United States Air Force. Based on the P-51 Mustang, the F-82 was originally designed as a long-range escort fighter in World War II; however, the war ended well before the first production units were operational.
 In the postwar era, Strategic Air Command used the planes as a long-range escort fighter. Radar-equipped F-82s were used extensively by the Air Defense Command as replacements for the Northrop P-61 Black Widow as all-weather day/night interceptors. During the Korean War, Japan-based F-82s were among the first USAF aircraft to operate over Korea. The first three North Korean aircraft destroyed by U.S. forces were shot down by F-82s, the first being a North-Korean Yak-11 downed over Kimpo Airfield by the USAF 68th Fighter Squadron.
Several airframes are extant in the US. None are the night fighter version. The aircraft portrayed as such at the USAF museum is actually an F-82B.
| THE KIT |
In conjunction with F-Toys, Platz has released a very nice kit of the Twin Mustang for 1/144 modelers. You would expect the kit to be relatively simple and it is. There is a cockpit for each side with a pilot blob in each seat. The wing is in one piece with a slot already formed for the radar pod. To build the E model, that slot will need to be filled.
Two fuselage halves are provided for each side and the prop is a single piece along with the spinner. A cap is provided to allow the prop to spin when trapped in the fuselage halves. Though th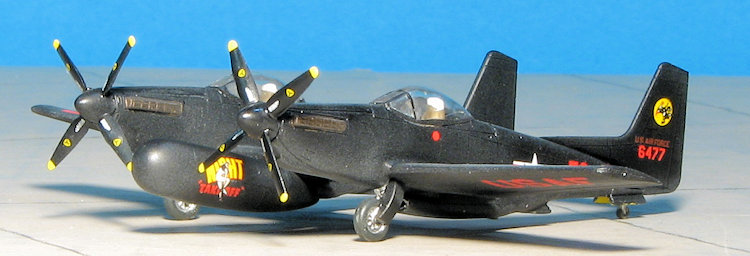 ere is no stand, closed gear is an option. THe lower intakes are separate bits that slot into the lower wing once it is attached. Single mold main gear/door pieces are given and you get tail wheel wells complete with doors into which the tail gear is installed. Each cockpit canopy is a single piece.
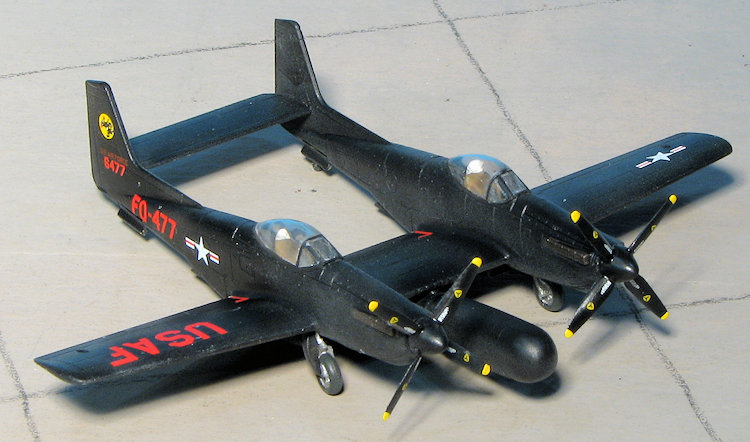
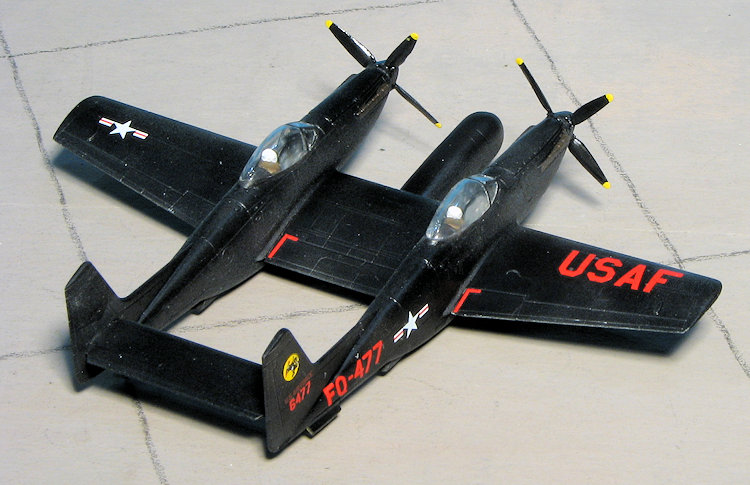
Instructions are quite simple, consisting of six steps. Three markings options are provided. One is 'Night Takeoff' an F-82G with the 319 FS in Korea while the other G model is with the 5th FS. This has the blue tail with yellow stars. The blue will need to be painted here and on the wing tips. The lone F-82E is with the 449 FS and is unpainted metal with large 'Arctic' red areas on the wings and tail section. The gaps in the red where the markings are to be applied are provided on the decal sheet, though perhaps masking would work better. The decals are very nicely done and it does appear that there are enough insignia to do any two planes.
| CONSTRUCTION |
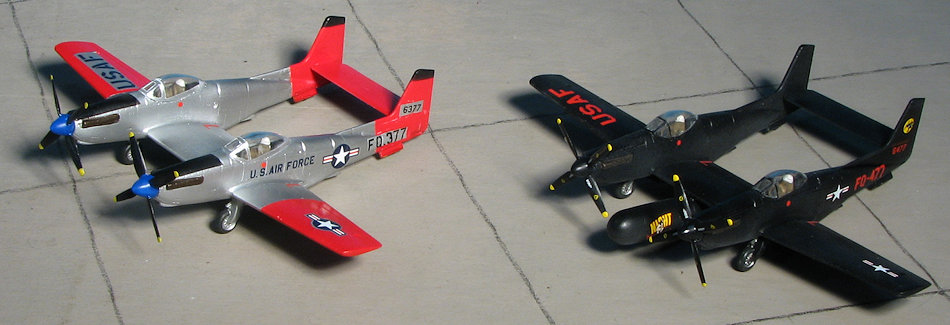
 One would expect these to be simple, but I'm betting they are not quite that simple. First thing one has to do is decide what versions to build. I picked one of each, an F and a G. Then break out the filler as the wing will need the hole filled where the radar pod would go and the one with the pod will need the hole on the bottom where a display stand (not provided) would fit.
 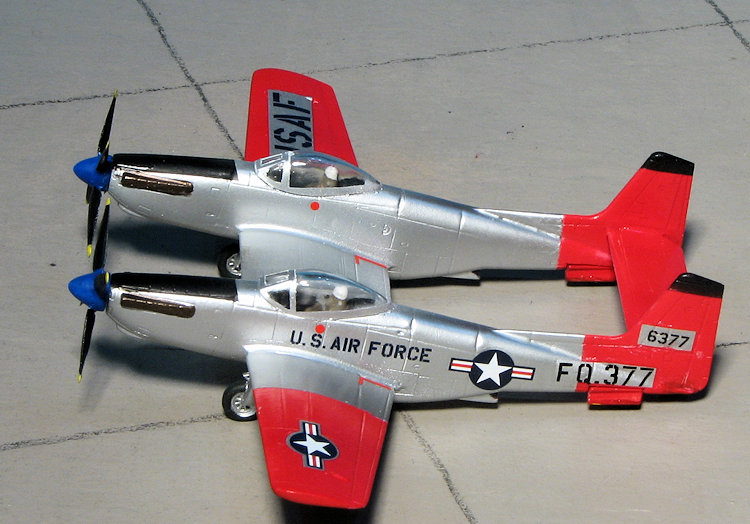 already guessed, several applications of filler were required to take care of the rather large gaps. That having been dealt with for the time being. I installed the canopies. These fit about as well as the rest of the kit so far, which is to say not all that great. The frame lines on the rather thick plastic are quite indistinct, making masking a bit of a challenge. I used PMA's 3mm tape for most of this and finally got them done. It was then time for some paint.
 | COLORS & MARKINGS |
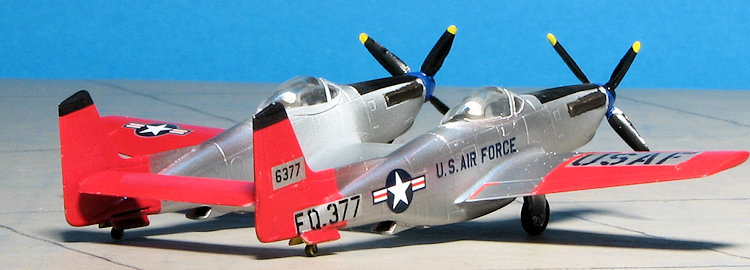
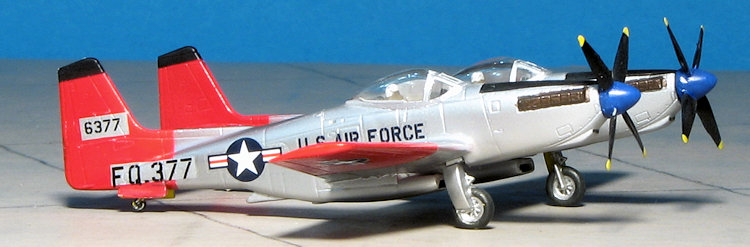
The initial step in this process was to give both a coat of primer so I could see what I missed. the F got white Tamiya extra fine while the G got the grey. I then painted the F with Tamiya gloss white and the G with matte black. This was later glossed up with Future. The F had its outer wings and tail section painted with Gunze H-3 Red.
 After the red had dried, it was masked off and the airframe painted with Alclad II auminum. The fin tips and anti-glare panels were then painted matte black. Exhaust on both got a bit of Tinny Tin from Vallejo's Game Colors.
Next step for both was the installation of the tail gear well and tail wheels. Then the main wheels were glued in. If you didn't trim the flash from the main gear, the fit was quite tight. If you did, then the fit was quite loose. The gear wells were all painted with chromate yellow from the small Testors bottle. I did the gear legs and wheels in aluminum, outer gear doors in the surrounding color and the tires in Tamiya's NATO black. For some reason, the instructions seem to show the outside of the main gear doors in aluminum, or perhaps that is what they want you to do the main gear wells. Regardless, on the real deal the wells were primer.
The G was the first to get decals. The markings are thin, but not overly so and went on superbly. I used a bit of setting solution to get them to snuggle down, Mr Mark Softer being my main choice, though I should mention that it is strong so one should put it on with the brush nearly dry. I continue to find it odd that Platz includes complete markings, including stencils and insignia for all three  options. One thing I did note is that there are markings for ten prop blades. All the red markings are backed with white as are the yellow ones so they are very opaque. One thing to note is that the decal sheet does include a pair of silver-backed insignia for the wings on the F, however, these have no white in them so it is best to go the route of stacking them as shown. The aluminum on the underlying areas is also very opaque and matches the Alclad II rather closely.
| CONCLUSIONS |
 This is a very nice addition to the growing lineup of 1/144 kits from Platz and other manufacturers. The kit is not up to the standards of Sweet or even other Platz kits I've built so I'm not sure what the difference might be. Not to say it is 'bad', but it does take filler and the details are a bit more clunky. Still, you get great markings options and even if the kit is not a 'shake and bake', it produces very nice and most welcome replicas of this interesting aircraft.
| REFERENCES |
https://en.wikipedia.org/wiki/North_American_F-82_Twin_Mustang
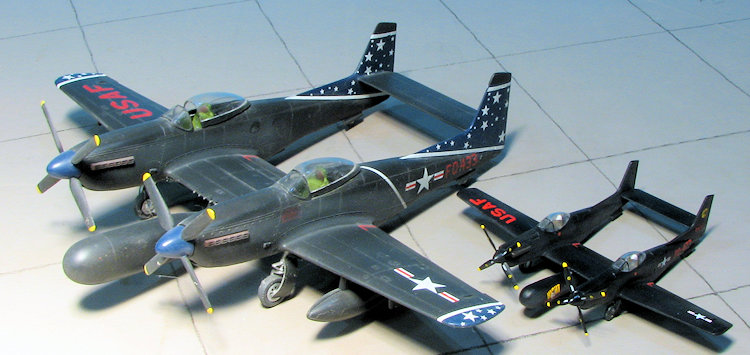 Just for fun, here is a photo of my ancient Monogram 1/72 F-82G and the Platz kit. This gives an idea of the difference in size between the two scales.
April 2016 Copyright ModelingMadness.com Thanks to me for picking this one up. If you would like your product reviewed fairly and fairly quickly, please contact the editor or see other details in the