Anigrand Craftworks 1/72 D.558-I Skystreak
| KIT #: | AA-2051 |
| PRICE: | $33.00 (From Nostalgic Plastic) |
| DECALS: | Three options |
| REVIEWER: | Scott Van Aken |
| NOTES: | Resin kits with vacuformed canopies |
| HISTORY |
 In
December 1944, after NACA launched the rocket engine
powered XS-1 (X-1) with U.S.A.A.F for the supersonic flight research, NACA and
U.S. Navy agreed to develop other aircraft that could able to fly transonic speed for a
long time with turbojet power. Douglas was selected to propose the design as
Douglas was conceived some high performance planes for Navy at that time. In
February 1945, Douglas offered the Model D-558 design and was received contract
for six testbed aircraft but later changed to three. The first D-558-1 was rolled out in
February 1947 and was made it first flight in Aprilof that year. During its ninth flight in
August, the D-558-1 set a new world speed record at Mach 0.85. After it reached
its max speed at Mach 1.01 in September 1948, the first D-558-1 was served as
spare for the third D-558-1 while the second D-558-1 crashed during test by NACA. From April 1949 to June 1953, the third D-558-1 carried out an
intensive research programs that allowed NACA to perfect its knowledge in
aerodynamics in the transonic range. At least one if not both of the remaining
D.558-I aircraft have survived in Museums.
In
December 1944, after NACA launched the rocket engine
powered XS-1 (X-1) with U.S.A.A.F for the supersonic flight research, NACA and
U.S. Navy agreed to develop other aircraft that could able to fly transonic speed for a
long time with turbojet power. Douglas was selected to propose the design as
Douglas was conceived some high performance planes for Navy at that time. In
February 1945, Douglas offered the Model D-558 design and was received contract
for six testbed aircraft but later changed to three. The first D-558-1 was rolled out in
February 1947 and was made it first flight in Aprilof that year. During its ninth flight in
August, the D-558-1 set a new world speed record at Mach 0.85. After it reached
its max speed at Mach 1.01 in September 1948, the first D-558-1 was served as
spare for the third D-558-1 while the second D-558-1 crashed during test by NACA. From April 1949 to June 1953, the third D-558-1 carried out an
intensive research programs that allowed NACA to perfect its knowledge in
aerodynamics in the transonic range. At least one if not both of the remaining
D.558-I aircraft have survived in Museums.
| THE KIT |
Molded in Anigrand's usual tan resin, the overall detailing is engraved panel lines that look a bit overdone at first, but once under a coat of paint look just fine. The kit includes optional wing tip tanks as flown in later sorties. Hand made kits like this are always an unknown when it comes to the actual condition of the parts themselves.
 In this case, I found holes in the upper wings, a tail
plane tip and a short shot inner gear door mount. Not bad as I've had worse and
all are not difficult to fix. The holes on the wing are from the wing being very
thin and the need to supply a mounting hole. In this case, you'll be wise to
wait until after the main gear legs are installed to try to fix this or you may
not be able to mount the gear.
In this case, I found holes in the upper wings, a tail
plane tip and a short shot inner gear door mount. Not bad as I've had worse and
all are not difficult to fix. The holes on the wing are from the wing being very
thin and the need to supply a mounting hole. In this case, you'll be wise to
wait until after the main gear legs are installed to try to fix this or you may
not be able to mount the gear.
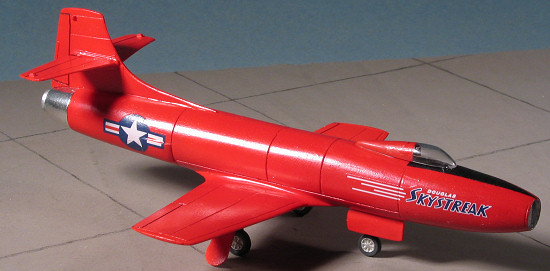
There is room behind the cockpit to install weight as without it, I believe this one will be a tail sitter. Two canopies are provided with one being an earlier version which is more clear and not flat on the top. The wing tip tanks can be used on the second aircraft with the modified canopy. It does not use the "Skystreak" decal as that was gone by that time. The third aircraft was painted white, but left the rudder, ailerons and elevators in red so they would not have to be rebalanced. The decal sheet is generic for all three of the Douglas experimental aircraft. For the Skystreak, the only serial provided is 37970, the first aircraft. If you wish to model either of the other two, you'll need to change the last digit to a 1 or 2. You could do the third plane as NACA 142, but you'll have to find the later NACA markings for the fin and the NACA wing markings from some other source.
 The Anigrand instructions are unchanged over the
years, providing a parts count, exploded view and historical section on one side
with a painting and decal placement guide on the other side. I should add to the
rather confusing information provided earlier regarding markings, that if you
use the 'NAVY - 37970' on the fin, do not use the "Skystreak" decal. When using
this decal, the serial and Navy were very small and have not been included in
the sheet. The white painted version does not appear to have used the larger
serials either, but from the reference you can barely make out photos of the
smaller serial as was typical on in-service planes in the late 1940s. No wing
insignia on any of them. For those wishing to do the initial roll-out markings
of aircraft 1 and 2, you will need fuselage insignia without the red bar.
Probably more than you wanted to know.
The Anigrand instructions are unchanged over the
years, providing a parts count, exploded view and historical section on one side
with a painting and decal placement guide on the other side. I should add to the
rather confusing information provided earlier regarding markings, that if you
use the 'NAVY - 37970' on the fin, do not use the "Skystreak" decal. When using
this decal, the serial and Navy were very small and have not been included in
the sheet. The white painted version does not appear to have used the larger
serials either, but from the reference you can barely make out photos of the
smaller serial as was typical on in-service planes in the late 1940s. No wing
insignia on any of them. For those wishing to do the initial roll-out markings
of aircraft 1 and 2, you will need fuselage insignia without the red bar.
Probably more than you wanted to know.
| CONSTRUCTION |
Getting down to it, the first thing I did was to take
care of the pour stub remants and sand those off. I then sanded the mating
surfaces to get a relatively flat join. Next, I attacked the various holes in
the resin parts. For this I used A-poxie Scupt, a two part epoxy putty. This was
pressed into the various holes, some of which were made a bit larger to handle
the filler. I also did the holes in the wings, despite concerns about fitting
the gear, which I'll get into a bit later. When this had dried, I sanded down
the filler. 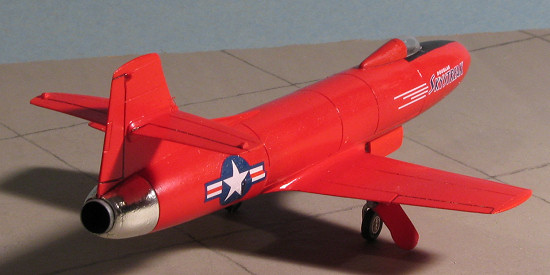 Some of the holes were a bit 'loose' so those were given a dab of
superglue to hold the filler in place and the area then given some standard
filler. I put as much weight as I could behind the cockpit to help keep it from
tail sitting and I hope it was enough. I painted the interior dark grey with
black consoles. I left out the seat and control stick and instrument panel to
put in later. Not a wise move as I couldn't fit in the instrument panel once the
fuselage halves were mated. In hindsight, it makes little difference as it would
be invisible anyway.
Some of the holes were a bit 'loose' so those were given a dab of
superglue to hold the filler in place and the area then given some standard
filler. I put as much weight as I could behind the cockpit to help keep it from
tail sitting and I hope it was enough. I painted the interior dark grey with
black consoles. I left out the seat and control stick and instrument panel to
put in later. Not a wise move as I couldn't fit in the instrument panel once the
fuselage halves were mated. In hindsight, it makes little difference as it would
be invisible anyway.
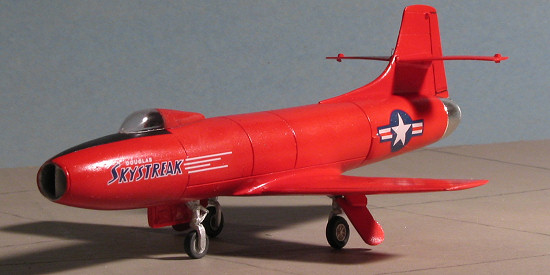
I then cemented the fuselage halves together, trapping the intake splitter. This area had been prepainted aluminum prior to joining. I then added the fin and applied filler to all the joins. At this time, I also attached the wings. These are very short and the butt join seems adequate. Filler was used on all these joints as well. Attaching the tail planes was a bit more difficult as they are so thin. They were also a bit warped, but just running hot water over them seemed to remove most of this. At least enough to where it doesn't look odd!
With the airframe smoothed out, I installed the seat after painting it black. I left out the control stick as you won't be able to see it. It really is that small an opening. Especially after you put on the windscreen cover. This fit so-so, but after some super glue and sanding, it was nice and smooth.
Didn't seem like it, but it was already time for paint!
| COLORS & MARKINGS |
 Painting this one is really simple. Red. I first
painted on some gloss white as red needs a white undercoat. I also painted the
gear doors this color on both sides. According to some color photos in the
reference, the nose gear leg was also red, but I decided to keep it aluminum. I
used Model Master Gloss White enamel thinned with lacquer thinner so it would
cover well and dry quickly. I then sprayed on some red acrylic. I think it is
Gunze, but I'm not sure. It covers very well indeed. Both the inside and outside
of the gear doors were painted this color. The airplane was probably painted
Insignia Red so if you have that (I didn't) use it. I'd cut out the canopy
already and masked of the windscreen portion so that the back of it could
also be given a coat of white then red to match.
Painting this one is really simple. Red. I first
painted on some gloss white as red needs a white undercoat. I also painted the
gear doors this color on both sides. According to some color photos in the
reference, the nose gear leg was also red, but I decided to keep it aluminum. I
used Model Master Gloss White enamel thinned with lacquer thinner so it would
cover well and dry quickly. I then sprayed on some red acrylic. I think it is
Gunze, but I'm not sure. It covers very well indeed. Both the inside and outside
of the gear doors were painted this color. The airplane was probably painted
Insignia Red so if you have that (I didn't) use it. I'd cut out the canopy
already and masked of the windscreen portion so that the back of it could
also be given a coat of white then red to match.
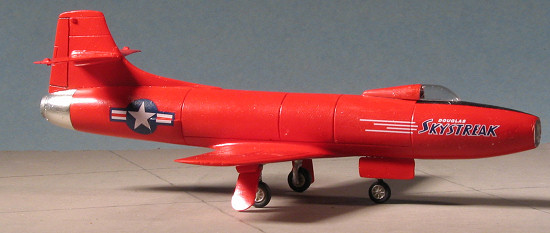
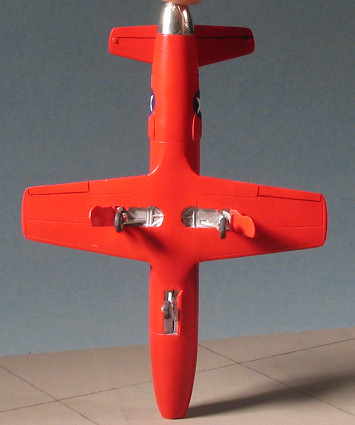
With the paint on, I returned to the work bench and installed the landing gear after painting the wheel wells silver. They may have been red as well, but I don't have proof so will assume silver. I also painted the door hinges in silver. The black anti-glare panel was then painted on.
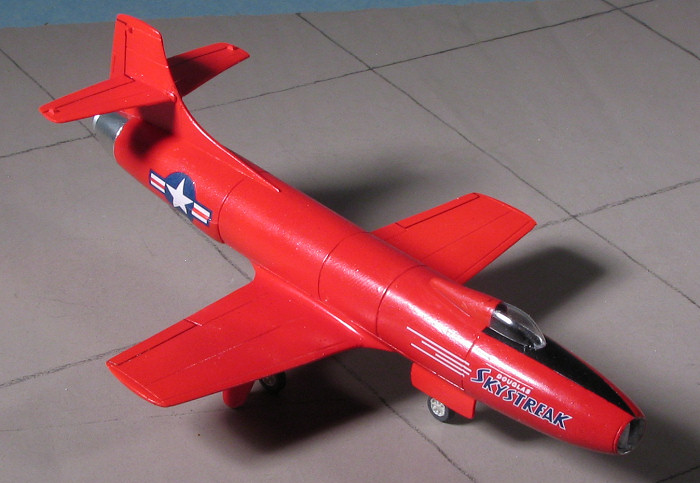
For decals, this aircraft used only the Skystreak logos and national insignia on the fuselage. These insignia had to go over the speed brakes and it took several Solvaset applications and some pressure to get them to conform. Thankfully, the decals are rugged so put up with all this fuss.
| FINAL CONSTRUCTION |
 If you recall I had filled in the holes for the landing
gear when I filled the holes in the upper wing. To compensate, I sanded down on
the main gear then simply butt glued them in place. Fortunately, the retraction
struts have depressions they fit in so lining things up was not a problem. Once
dry, the wheels were attached and then the gear doors.
If you recall I had filled in the holes for the landing
gear when I filled the holes in the upper wing. To compensate, I sanded down on
the main gear then simply butt glued them in place. Fortunately, the retraction
struts have depressions they fit in so lining things up was not a problem. Once
dry, the wheels were attached and then the gear doors.
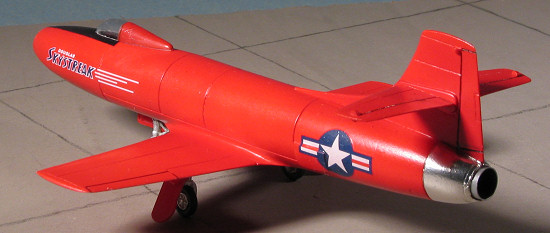
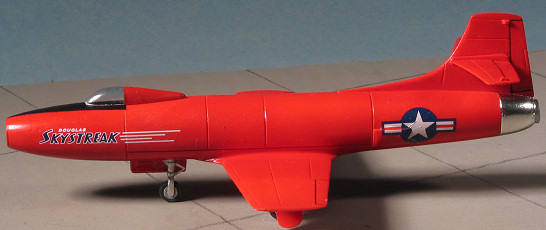
Since this was the first incarnation of the Skystreak, I used the most simple canopy. This was cut off and then glued in place with white glue. Not the easiest canopy to get to sit in one place while the glue dried, but the end result is most acceptable. The final bit was to use Bare Metal Foil chrome on the exhaust area and then push in the exhaust pipe.
That was it.
I should point out that the aircraft really is red. For some reason digital photography (or at least mine), makes it look orange.
| CONCLUSIONS |
 I know I've probably said this before, but this is
really an easy to build kit. There are minimal parts and the subject is one that
should interest many. This kit was finished after about a week's worth of work,
which for me is light speed. It is one that I can highly recommend to those who
have an interest in experimental aircraft or who just want something neat for
the display shelves.
I know I've probably said this before, but this is
really an easy to build kit. There are minimal parts and the subject is one that
should interest many. This kit was finished after about a week's worth of work,
which for me is light speed. It is one that I can highly recommend to those who
have an interest in experimental aircraft or who just want something neat for
the display shelves.
| REFERENCES |
An outstanding reference on this aircraft is Specialty Press' "Skystreak, Skyrocket and Stiletto" that was published last year.
April 2006
#1409 in a series
Copyright ModelingMadness.com. All rights reserved. If you would like your product reviewed fairly and fairly quickly please
contact
the editor or see other details in the
Note to
Contributors.