| KIT #: | FDR 72-001 |
| PRICE: | £33.00 |
| DECALS: | Six options with the production kit |
| REVIEWER: | Scott Van Aken |
| NOTES: | Resin with vac canopy, preproduction kit. |
| HISTORY |
The Saunders-Roe SR.177 was a 1950s project to develop a combined jet- and rocket-powered interceptor aircraft for the Royal Air Force and Royal Navy. The German Navy also expressed interest in the project, which was cancelled due to changes in Britain's military policies in 1957. An even larger variant was studied under the SR.187 project, but this work was also cancelled in 1957.
In 1952, Saunders-Roe had won a contract to develop a similar aircraft, the Saunders-Roe SR.53. However, as development progressed, the shortcomings of the design became increasingly evident. Most particularly, as with the German rocket-powered interceptors of World War II, the range and endurance of such an aircraft were limited by the high rate of fuel consumption by the rocket engine. However, as turbojets developed and became increasingly powerful and efficient, soon new powerplants were available that would make the aircraft more practical.
 The SR.177 began as an advanced design concept for the SR.53, but when a development contract was issued by the Ministry of Defense (specification F.155), the project was given its own designation.
The most significant difference between the two aircraft was the use of a jet engine with nearly five times the thrust of the one chosen for the earlier aircraft. This meant that while the SR.53 relied mostly on its rocket engine for climbing, the SR.177 would be able to add considerable endurance by conserving use of its rocket only for a dash towards a target. It was expected that the added endurance would allow the SR.177 to perform roles other than pure interception, and these were expected to include strike and reconnaissance. The SR.53 design was considerably enlarged to accommodate the new engine, and the original sleek lines were forfeited for a large, chin mounted intake to supply it with air.
Funding was secured in July 1956 for a total of 27 aircraft, and the first was expected to fly by April (later, October) 1958. However, 1957 was to see a massive re-thinking of air defense philosophy in the UK, outlined in the 1957 Defense White Paper which called for piloted warplanes to be replaced by missiles. By the time that the program was axed later that year, the aircraft had proceeded little past mock-up stage.
Work on the aircraft continued a little longer, however, in the anticipation of continued interest from Germany. The British Ministry of Supply agreed to continue funding development of five of the six prototypes, but nothing was to come of it. The German government had changed its priorities from looking for an interceptor to a strike fighter, leading Saunders-Roe to redesign the aircraft for this role. This was followed immediately by another redesign when Rolls-Royce successfully convinced the German government to replace the de Havilland engine intended for the SR.177 with a Rolls-Royce turbojet. Even with Heinkel preparing to manufacture the aircraft locally under license, Germany withdrew support and eventually chose to purchase the F-104 Starfighter instead.
| THE KIT |
 This is an Anigrand produced kit so everything that you'll find on a standard Anigrand kit you'll find here. That includes somewhat pronounced engraved panel lines and a number of small molding glitches, mostly air bubble pockets on the ends of things like the wings. Nothing major and all easy enough to fix. There is also flash and some resin attachment bits that will need to be cleaned up. I had one of the fins on the missiles break off during shipment, again, nothing unusual though Anigrand does try to keep this from happening by shipping parts in a compartmentalized plastic bag.
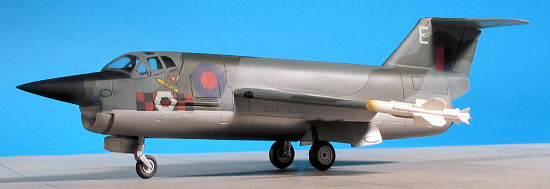
The kit has a nice bang seat and control stick for the interior. That is it. A bit Spartan, but standard for Anigrand. You can spruce things up a bit from your spares box should you wish, though I don't think you'll see much through the small openings in the canopy. Speaking of which, you get two of them in this kit. I appreciate that as often I'll botch one. Another note is that what looks like thick flash behind the intake lip is part of the moveable intake, so don't cut that off. You may want to trim it by about 1/3 as it is a tad too long, but that is about it.
This is a pre-production kit so does not come with instructions or any sort of markings. I've been told that the production kit will have not only nice instructions but several sets of markings for the prototypes and for the 'whiffer' crowd.
| CONSTRUCTION |
 As with any resin kit, the first step is to clean up parts. This means removing pour stubs and checking for glitches. I found some air pockets that needed some filling with superglue and did so. Some will take multiple applications as superglue does shrink when it dries. I then painted the cockpit with matte black and put some weights in the nose. I do hope they will be enough as there is not a lot of room there for weight.
Next, I glued the fuselage halves together, making sure the panel lines matched up. Well, I could either have the nose lines match or the rest of the fuselage so I took the second option. I also glued on the rocket exhaust section to the back and the main intake section to the underside of the nose. There were some rather long chunks where the main fuselage sprues were removed by the factory and I used some epoxy putty to fill those in as it would have taken three or four applications of standard filler or super glue to get it all filled in.

This was all sanded down and a few more areas were touched up with an application of Mr Surfacer 500. I also glued on the intake. Now one would think that the part given would have a flush fit, but I have been cautioned by Freightdog that this item would move forward and back, with it being in the forward position most of the time. It makes an already unlovely aircraft even more homely looking.
 Next, I attached the fin after some sanding to get the best possible fit. No trauma here. The wings followed. As often seems to happen. One wing fit perfectly while the other took sanding and additional filler. The wings have some anhedral so one needs to pay attention to that. When they had dried, I used superglue to fill the gaps top and bottom at the wing/fuselage join. This was sanded when dry. The tailplane was then attached after removing a bit of additional resin that got into the attachment area. This fit quite well.
 I then tackled the canopy and after much trimming and test fitting had one that would fit well. Though I may not have mentioned it earlier, I also filled the holes for the drop tanks. Two reasons; one was that I thought it looked cooler without them and the other is that the forward part of both of my tanks had huge air pockets in them and I didn't want to go through the work of filling and sanding them. Lazy slob aren't I? They look like they were taken from a Hawker Hunter so they will be useful later on.
Back at the interior, I painted it black and went to put in the control stick, when I broke it. Hmmmm. The seat that I have for the kit is a really poor casting, full of air pockets and bits of trash. I highly recommend replacing it with an Aeroclub metal seat. That will also help with some needed weight. Now, having said that, I painted the one provided as best I could and glued it in place (mainly because I didn't have a seat to use). Then the canopy was attached with white glue, using superglue on the very back where the hinge is located. At least there won't be a fogging problem back there. The canopy was masked prior to attachment and is typical Anigrand with faint and somewhat wide canopy frame lines. I appreciate the second canopy as I totally hosed the first one cutting it out.
| COLORS & MARKINGS |
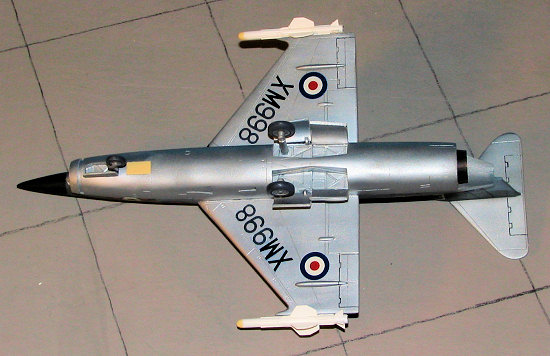
Prior to actual painting, I sprayed the entire kit with Alclad II primer. This had been thinned even more with some lacquer thinner and sprayed at around 5-7 psi. That low pressure helps to keep it smooth and cuts back considerably on the roughness that often happens when sprayed into corners. This was then sanded with 1000 grit paper and then I sprayed the entire aircraft with Alclad II  Aluminum. This showed a few areas I'd missed so those were fixed and the area resprayed. The nice thing about Alclad II and using lacquer thinner is that I can handle the area sprayed within just a few minutes.
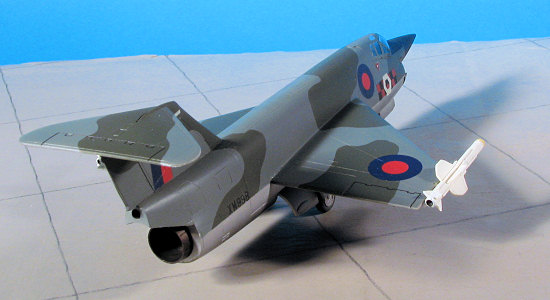
I then masked off the lower surfaces and sprayed the nose and anti-glare panel with black. This was masked off and a grey was sprayed over the upper surface of the airframe. This was then masked in a random disruptive pattern and a dark green was then painted on. One of those, one hour to mask, five minutes to paint sort of deals. Thanks to the very thin paint and very quick drying, I was able to unmask it almost immediately. It was then left for a day to cure before clear acrylic gloss was sprayed on.
Back at the workbench, I glued on the landing gear and the gear doors. When cutting the doors apart, follow the outside engraving as often I've found that the inside and outside marks are not the same. A few heavy cuts and I was able to snap the pieces apart. I recommend attaching the rear gear doors first otherwise you may not have space for the front ones. I put the main door on the right side and hoped that it was correct (no instructions, remember?).
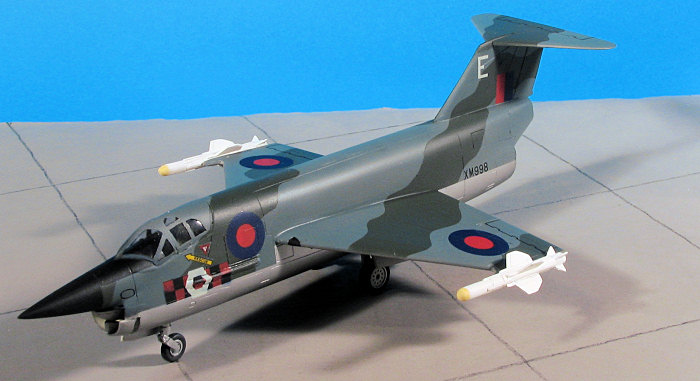
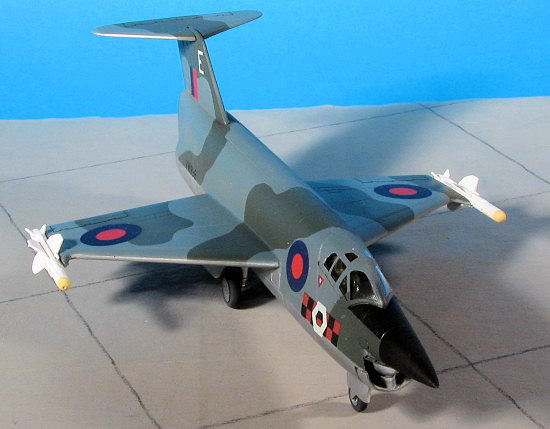
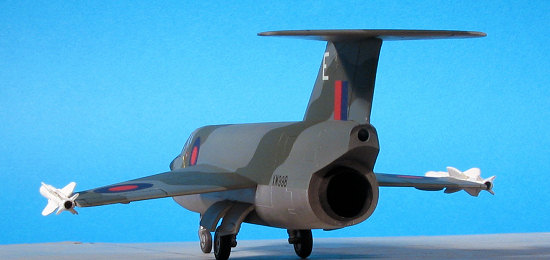
 Now for markings (no decals, remember?). I was torn between the gloss finish with all full color insignia or going with the next step where the finish was flat with reduced color upper insignia. I had a look through my Modeldecal collection for the appropriate insignia and decided on the latter option. It was when putting these on the kit that I noticed that the under wing aileron hinge fairings were different distances from the wing tip. Hmmmm.
I also had to come up with a serial and found one that would be in the proper time frame and was not assigned to any aircraft. Piecing together the serials took me back several decades to when I used to do this all the time in order to get the markings I wanted on a kit. Many a Frog kit was so decorated, especially when I did a run of Sea Furys back in the mid 1980s. I also had to find serials for the underside. Once again, Modeldecal to the rescue. I found it interesting that the old sheets were a lot more opaque than the ones recently printed by Hannants.
With the insignia in place, it was time to hunt up a squadron. I wanted to pick something that wasn't 'standard' and so started rooting around for what I could find. What I found was an old Scale Aircraft Modelling sheet from the mid 1980s that was for the Gloster Javelin. In amongst the various markings was one for 85 Sq. Since this unit went on to Bloodhound SAMs instead of interceptors, I thought it would be appropriate. I pinched the unit band and an aircraft letter from the sheet and applied them. A bit thick, but worked great, even after over 20 years. Some ejection triangles and a rescue arrow came from an old Matchbox sheet and that was pretty much it for decals. The kit was then given an overall matte clear to seal everything in place.
| FINAL CONSTRUCTION |
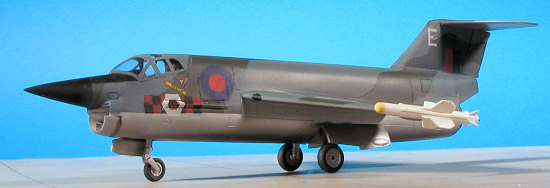
Not really that much to do for final construction. The wing tip missiles had to be installed. These castings are about as awful as the bang seat. There were stray mold lines on some very fragile parts, the molds were mismatched leaving steps and there were pin 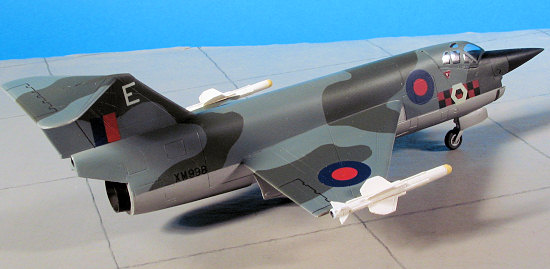 holes in the most inaccessible places. I suggest replacing them with some from another source. I used them as I didn't have replacements. They were painted white with buff tips and the exhaust drilled out. They are supposed to fit into holes in the wing tips, but the fit isn't that good as on my sample, the pins are a bit farther apart than the mounting holes. I ended up cutting off one of the mounting pins and sanding down the other to get a reasonable fit.
The only other thing to do was to remove the masking from the canopy (you can pretty well see the seat so get a replacement) and to glue in the exhaust. I'm sure the real plane would have had radio antennas and a pitot tube or two, but I didn't add any of those items. Oh yeah, Add More Nose Weight. This puppy will sit on its tail quite easily.
| CONCLUSIONS |
 Kudos to FreightDog for having this kit done. It is an interesting subject, will be much beloved by not only the RAF '58 group, but also by whiffer modelers everywhere, and these are really a growing crowd. I have to take away points for the poorly molded seat and missiles, but those can be easily replaced from the aftermarket crowd.
As it is molded by Anigrand it is a known quality and is not a difficult build. As such, it is a perfect first kit for those who wish to see what all resin kits are like. And thanks so much for putting in two vac canopies!
| REFERENCES |
November 2006
#1439 in a series
Copyright ModelingMadness.com. All rights reserved.
No reproduction in any form without express permission from the editor.
Thanks to FreightDog Models for the review kit. If you would like your product reviewed fairly and fairly quickly, please contact the editor or see other details in the