Airfix 1/72 Vampire T.55
| KIT #: | A02058 |
| PRICE: | $8.99 SRP |
| DECALS: | Two options |
| REVIEWER: | Scott Van Aken |
| NOTES: | New tool kit |
| HISTORY |
The de Havilland DH.100 Vampire was a British jet fighter
commissioned by the Royal Air Force during the Second World War. Following the
Gloster Meteor, it was the second jet fighter to enter service with the RAF.
Although it arrived too late to see combat during the war, the Vampire served
with front line RAF
 squadrons until 1953 and continued in use as a trainer until
1966, although generally the RAF relegated the Vampire to advanced training
roles in the mid-1950s and the type was generally out of RAF service by the end
of the decade. The Vampire also served with many air forces worldwide, setting
aviation firsts and records.
squadrons until 1953 and continued in use as a trainer until
1966, although generally the RAF relegated the Vampire to advanced training
roles in the mid-1950s and the type was generally out of RAF service by the end
of the decade. The Vampire also served with many air forces worldwide, setting
aviation firsts and records.
Almost 3,300 Vampires were built, a quarter of them under licence in other countries. The Vampire design was also developed into the de Havilland Venom fighter-bomber as well as naval Sea Vampire variants.
T.11: two-seat training version for the RAF. Powered by a Goblin 35 turbojet engine; 731 were built by DH and Fairey Aviation. As an added note, it seems like Australia and Switzerland were two countries who built most of the license versions. They were also built in Italy and France
| THE KIT |
To my knowledge, this is the first injected 1/72 plastic kit of this variant of the famous Vampire jet and is most welcome. I did a conversion using the Heller kit many, many years ago and while it turned out well, I had always hoped for a proper injected kit. Now we have one.
 Molded in India, the surface detailing is nicely done, though it may be a bit
'coarse' for those who want Hasegawa-like panel lines. Still, I have no
objections to it, especially as we are not paying Hasegawa-like prices for the
kit. The cockpit tub consists of a pair of basic seats and control sticks. The
instrument panel uses a decal and has the twin gun sights. A nicely done rear
cockpit section is included and there are pilot figures for you to put in to
cover up the lack of seat detail. There is some sidewall detail, but since the
cockpit is black, no need to put much effort into it.
Molded in India, the surface detailing is nicely done, though it may be a bit
'coarse' for those who want Hasegawa-like panel lines. Still, I have no
objections to it, especially as we are not paying Hasegawa-like prices for the
kit. The cockpit tub consists of a pair of basic seats and control sticks. The
instrument panel uses a decal and has the twin gun sights. A nicely done rear
cockpit section is included and there are pilot figures for you to put in to
cover up the lack of seat detail. There is some sidewall detail, but since the
cockpit is black, no need to put much effort into it.
A nice part of the kit is a set of full intake trunking, culminating at a
compressor face. There is room in the nose for the required 7 grams of nose
weight. The fuselage halves do not include the upper section. Airfix has molded
the upper wings and the upper fuselage as a single piece so you do not have to
worry about dihedral issues. The tail booms are so designed that they are
complete and fit into notches in the rear of the wing sections. This should
eliminate the issues many have with alignment and having a seam to fill right
behind the wings. Landing gear are well done with the outer gear doors
incorporating the e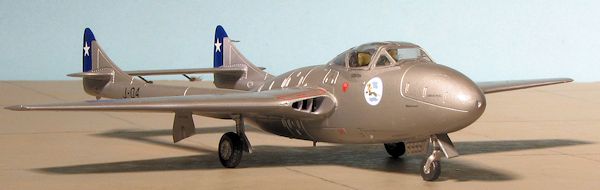 xtention/retraction brace. You have the opportunity to
install tanks under the wings as these fuel-thirsty jets often carried them.
Holes will need to be opened to use them. This is topped by a three piece cockpit
covering. You can display the canopy section open if you so wish.
xtention/retraction brace. You have the opportunity to
install tanks under the wings as these fuel-thirsty jets often carried them.
Holes will need to be opened to use them. This is topped by a three piece cockpit
covering. You can display the canopy section open if you so wish.
Instructions are well done with color information provided by Humbrol paint numbers so have your conversion chart ready if not using these paints. Markings are for two aircraft, both in a base color of High Speed Silver lacquer. The box art plane is a warbird flown by the Vampire Preservation Group. I can only assume these markings were chosen in return for crawling around the plane to get data for this kit. This has the scheme with the yellow training bands around the wings and booms. I have no idea if the markings are accurate or not as a search has turned up images of this plane with different unit markings. The other is one for the da-glo fans with a ton of the stuff on the airframe. This one was assigned to the 5 FTS in 1962. Decals are nicely printed and include a full stencil suite.
| CONSTRUCTION |
Once I got a nice decal sheet, I wasted no time in starting construction. First thing I did was to paint the inner gear doors, struts, wheel wells and other bits with Tamiya XF-16 flat aluminum. All of the cockpit parts, including the interior walls were painted with Tamiya XF-1 flat black. When dry, I started attaching the bits together. I used the nice instrument panel decal and after trimming away the clear surround, it fit very well. I really like that the gun sights are positively keyed so no worries about them falling off as is so often the case with other kits.
 I then glued the tail booms together and cleaned them
up. The engine intake and compressor face parts were painted with the flat
aluminum and also assembled. With the interior assembled, it was attached to one
fuselage half. When dry, I started installing bits of weight in the nose. The
instructions call for 7 grams and so I cut a 14 gram weight in half. It was
quite a challenge to get all that weight in the nose but I was successful. I
also installed the seats after painting the cushions with khaki and adding some
tape seat belts. I then glued on the engine intakes and set the halves aside to
dry. This would turn out to be a mistake.
I then glued the tail booms together and cleaned them
up. The engine intake and compressor face parts were painted with the flat
aluminum and also assembled. With the interior assembled, it was attached to one
fuselage half. When dry, I started installing bits of weight in the nose. The
instructions call for 7 grams and so I cut a 14 gram weight in half. It was
quite a challenge to get all that weight in the nose but I was successful. I
also installed the seats after painting the cushions with khaki and adding some
tape seat belts. I then glued on the engine intakes and set the halves aside to
dry. This would turn out to be a mistake.
The fuselage halves were then glued together. The
instructions suggest gluing the booms to the horizontal stab and the end pieces
prior to trapping them between the wing sections. I did not do this and instead,
glued the upper wing in place as per the instructions. It was obvious that there
was something amiss with the intake pieces as the fit was terrible. Instead, I
should have glued on the intake sections along with the wing as this would have
allowed me time to make adjustments to things before the cement dried. As it
was, I had to do some sanding on the various bits to get a reasonable fit. I
then glued on the lower wings, trapping the booms in the sections. I did not
attach the main gear legs to the booms prior to this as was suggested by the
instructions for fear of breaking them off while handling the kit. Once the
wings were on and dry, I forced the intakes back as far as I could and used
super glue with accelerator to keep them in place. The seams
 were attended to
either by simply sanding or filler. The large depressions in the wing flap area
were taken care of at this time as well.
were attended to
either by simply sanding or filler. The large depressions in the wing flap area
were taken care of at this time as well.
At the back, the horizontal stab was glued in as were the small extension stubs. I then masked the clear bits and glued those in place. The fit is actually pretty good. I flipped over the airframe and attached the very thin elevator balances and then attached the landing gear legs. As I thought, I had to trim the attachment point on the landing gear to install them so they really should be glued in place when cementing the wings together. However, I have to tell you that I would have broken them off several times had I done that!
| COLORS & MARKINGS |
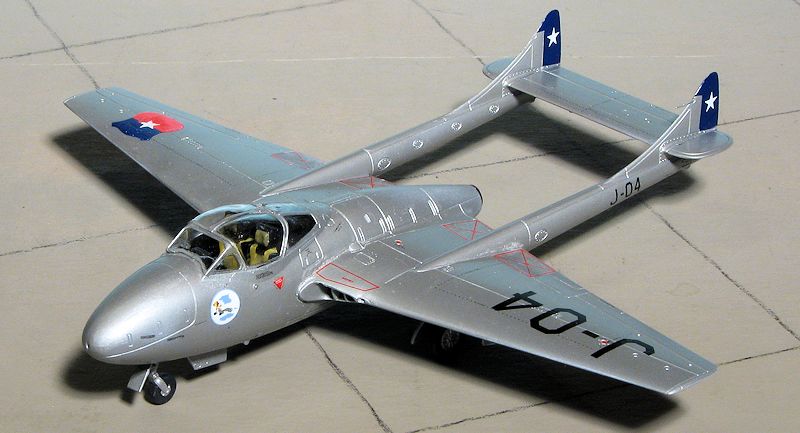
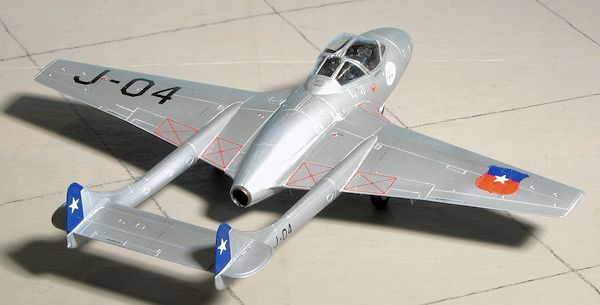
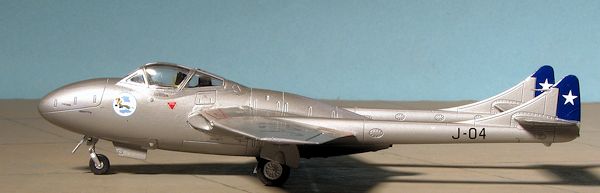
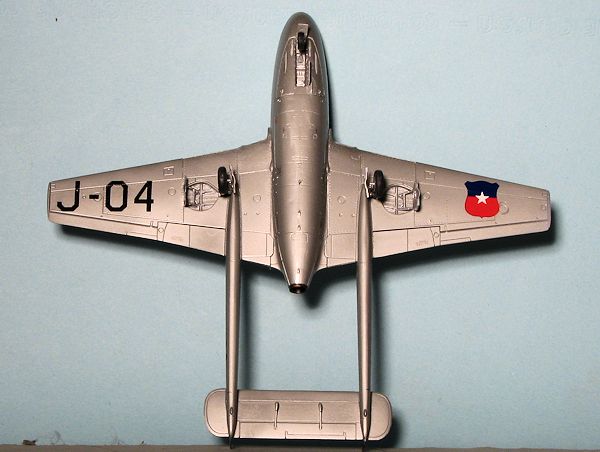
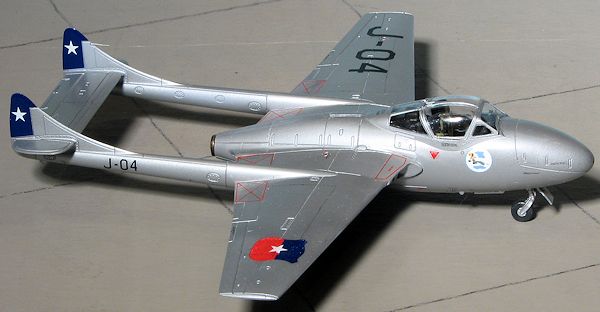
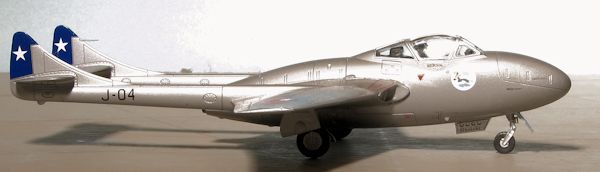
It was time to head to the paint shop and the daunting choice of having to pick from several excellent markings schemes from Xtradecal sheet X72174. I was quite torn between several schemes, but since the ones I wanted to do were in overall high speed silver, I went ahead with painting. For this color, I used the RAL 9001 that I had used on the earlier Trumpeter 1/48 Vampire as that seemed to work out well for that aircraft.
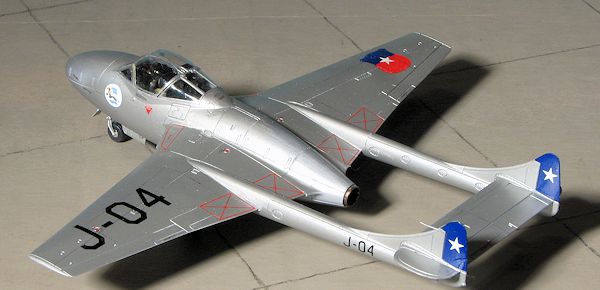
I decided to use the Chilean markings on this one so
I started applying markings starting with the large warning areas on the
intakes. It was a disaster. For some reason, the decal is not a solid clear on
the inside 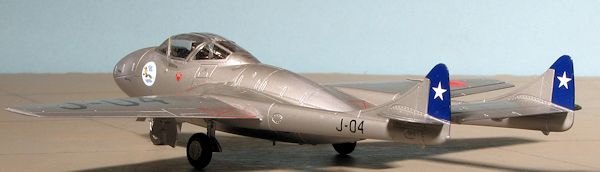 of the marking so the very thin external lines are in all respects
unsupported by a large clear film. These lines twisted and tangled up in every
way you can imagine. I had to dunk them into a bowl of water to try to untwist
them and was not totally successful. Thumbs down to Xtracolor for designing
these in that manner. Were it not for the need to have Spanish warnings on these
parts I would have used the kit decals. Oddly, this is not the case for the
other sets of warning markings that are in English, only the ones in Spanish. To
prevent this disaster from striking the other warning markings for this scheme,
I coated the decals with Microscale Decal Film. Even this was only partially
successful as I should have given them two coats. I ended up using the kit
warning areas for all of these and these have the benefit of being the right
size as the Xtradecal sheet markings are a bit too large for the inner flap
section. I should also warn you to use the weakest setting solution you can on
the decals. I started to use some Mr. Mark Softer on one and it caused the ink
to run.
of the marking so the very thin external lines are in all respects
unsupported by a large clear film. These lines twisted and tangled up in every
way you can imagine. I had to dunk them into a bowl of water to try to untwist
them and was not totally successful. Thumbs down to Xtracolor for designing
these in that manner. Were it not for the need to have Spanish warnings on these
parts I would have used the kit decals. Oddly, this is not the case for the
other sets of warning markings that are in English, only the ones in Spanish. To
prevent this disaster from striking the other warning markings for this scheme,
I coated the decals with Microscale Decal Film. Even this was only partially
successful as I should have given them two coats. I ended up using the kit
warning areas for all of these and these have the benefit of being the right
size as the Xtradecal sheet markings are a bit too large for the inner flap
section. I should also warn you to use the weakest setting solution you can on
the decals. I started to use some Mr. Mark Softer on one and it caused the ink
to run.
Eventually, I got all of the data markings in place, but it added about a week to the build.
| FINAL CONSTRUCTION |
 There really
was not all that much more to do once the decals were in place. It was a matter
of gluing on the main wheels then the landing gear doors. The attachment points
are quite positive so no worries about alignment and none of them are butt joins
as one finds so often. The engine exhaust piece was the last bit glued in place.
I removed the masking, was delighted that no paint crept under the masking and
that was pretty much it.
There really
was not all that much more to do once the decals were in place. It was a matter
of gluing on the main wheels then the landing gear doors. The attachment points
are quite positive so no worries about alignment and none of them are butt joins
as one finds so often. The engine exhaust piece was the last bit glued in place.
I removed the masking, was delighted that no paint crept under the masking and
that was pretty much it.
| CONCLUSIONS |
 The Airfix
Vampire is a superb kit. The fit of the parts is very good and if one remembers
to install the engine intakes at the same time as the wings and
intake/compressor assembly, there will not be any issues such as I had when I
did the intakes first. I would also recommend gluing all of the tailplanes/booms
at the same time as well as the instructions suggest. I would be quite surprised
if Airfix does not do a whole raft of Vampires as they certainly have just about
all the bits they need to do the fighter variants. It was a fun kit and the only
thing that I found disappointing were the Xtradecals. They are very nicely
printed, but I found them to be a real chore to apply, thanks to their very thin
nature and short working time. While your experiences may vary, I will be using
kit decals for all but the unique markings on future Vampire trainers.
The Airfix
Vampire is a superb kit. The fit of the parts is very good and if one remembers
to install the engine intakes at the same time as the wings and
intake/compressor assembly, there will not be any issues such as I had when I
did the intakes first. I would also recommend gluing all of the tailplanes/booms
at the same time as well as the instructions suggest. I would be quite surprised
if Airfix does not do a whole raft of Vampires as they certainly have just about
all the bits they need to do the fighter variants. It was a fun kit and the only
thing that I found disappointing were the Xtradecals. They are very nicely
printed, but I found them to be a real chore to apply, thanks to their very thin
nature and short working time. While your experiences may vary, I will be using
kit decals for all but the unique markings on future Vampire trainers.
| REFERENCES |
http://en.wikipedia.org/wiki/De_Havilland_Vampire
June 2013
Thanks to me for the review kit, and Julien Dixon for the Xtradecal sheet.
If you would like your product reviewed fairly and fairly quickly, please contact the editor or see other details in the Note to Contributors.