| KIT #: | 02850 |
| PRICE: | $31.99 SRP |
| DECALS: | Three options |
| REVIEWER: | Scott Van Aken |
| NOTES: | New tool kit |
| HISTORY |
By 1942, Supermarine designers had realised that the aerodynamics of the Spitfire's wing at high Mach numbers might become a limiting factor in increasing the aircraft's high-speed performance. The main problem was the aeroelasticity of the Spitfire's wing; at high speeds the relatively light structure behind the strong leading edge torsion box would flex, changing the airflow and limiting the maximum safe diving speed to 480 mph (772 km/h) IAS. If the Spitfire was to be able to fly higher and faster a radically new wing would be needed.
 Joseph Smith and the design team were aware of a paper on
compressibility, published by A D Young of the R.A.E, in which he described a
new type of wing section; the maximum thickness and camber would be much nearer
to the mid-chord than conventional airfoils and the nose section of this airfoil
would be close to an ellipse
Joseph Smith and the design team were aware of a paper on
compressibility, published by A D Young of the R.A.E, in which he described a
new type of wing section; the maximum thickness and camber would be much nearer
to the mid-chord than conventional airfoils and the nose section of this airfoil
would be close to an ellipse
Specification 470 described how the wing had been designed with a simple straight-tapered planform to simplify production and to achieve a smooth and accurate contour. The wing skins were to be relatively thick, aiding torsional rigidity which was needed for good aileron control at high speeds. Although the prototype was to have a dihedral of 3° it was intended that this would be increased in subsequent aircraft. Another change, to improve the ground-handling, was replacing the Spitfire's narrow-track, outward-retracting undercarriage with a wider-track, inward-retracting system. The Air Ministry were impressed by the proposal and, in February 1943, issued Specification F.1/43 for a single seat fighter with a laminar flow wing; there was also to be provision made for a wing folding scheme to meet possible requirements. The new fighter was to use a fuselage based on a Spitfire VIII.
The new wing was fitted to a modified Spitfire XIV NN660, in order to make a direct comparison with the earlier elliptical wing, and was first flown on 30 June 1944 by Jeffrey Quill. Although the new Spitfire's speed performance was comfortably in excess of an unmodified Spitfire XIV, the new wing displayed some undesirable behaviour at the stall which, although acceptable, did not come up to the high standards of Mitchell's earlier elliptical wing. NN660 crashed 13 September 1944, killing pilot Frank Furlong. No reason for the loss was officially established.
In the meantime, the opportunity had been taken to
redesign the Spitfire's fuselage, to improve the pilot's
 view over the nose and
to eliminate a slight directional instability by using a larger fin and rudder.
This instability had been apparent since the introduction of the more powerful
Griffon engine. The instability was exacerbated by the increase in propeller
blade area due to the introduction of the four-bladed and
subsequent
five-bladed Rotol airscrews for the next aircraft,
NN664 (for which Specification
F.1/43 had been issued). The updated design incorporated the new fuselage
(although lacking the enlarged fin/rudder) and, as it was now substantially
different from a Spitfire, the aircraft was named "Spiteful" (although "Victor"
had been originally proposed).
view over the nose and
to eliminate a slight directional instability by using a larger fin and rudder.
This instability had been apparent since the introduction of the more powerful
Griffon engine. The instability was exacerbated by the increase in propeller
blade area due to the introduction of the four-bladed and
subsequent
five-bladed Rotol airscrews for the next aircraft,
NN664 (for which Specification
F.1/43 had been issued). The updated design incorporated the new fuselage
(although lacking the enlarged fin/rudder) and, as it was now substantially
different from a Spitfire, the aircraft was named "Spiteful" (although "Victor"
had been originally proposed).
The Spiteful was ordered into production as the Spiteful XIV (having no preceding marks of its own, the numerals were carried over from the original Spitfire XIV conversion), and 150 of the aircraft were ordered. With the advent of jet propulsion, however, the future of high-performance fighters was clearly with the jet fighter, and so the order was later cancelled with only a handful of Spitefuls built (19 total including 2 prototypes).
The enlarged fin/rudder of the Spiteful was also used on the Spitfire Mark 22 and 24s and Seafire Mark 46 and 47s and was usually referred to as the "Spiteful type" tail.
| THE KIT |
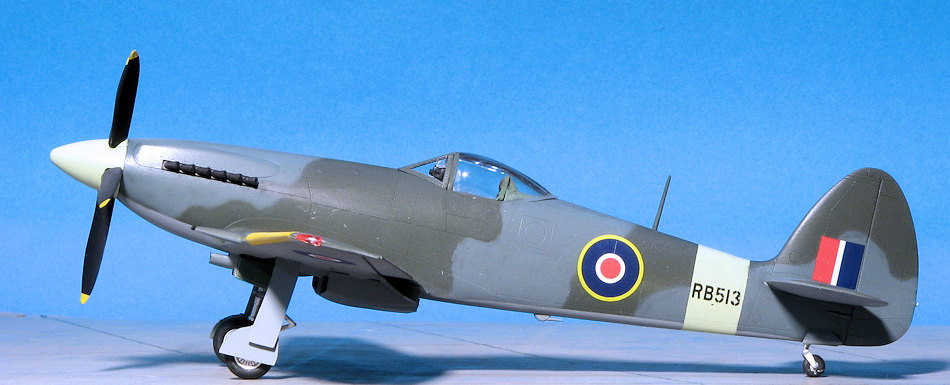
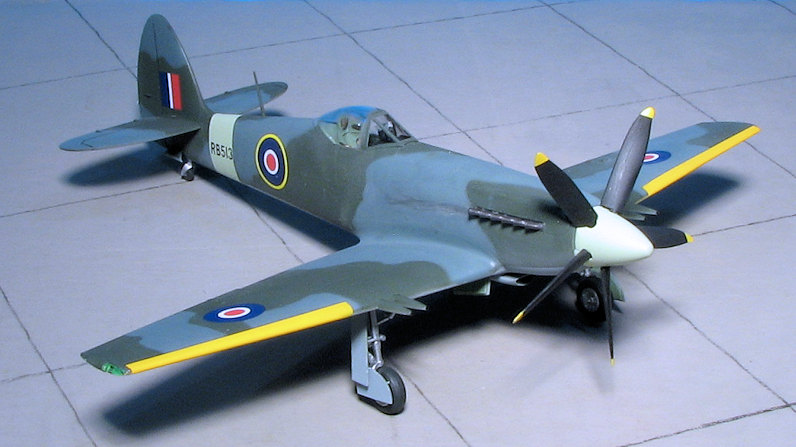
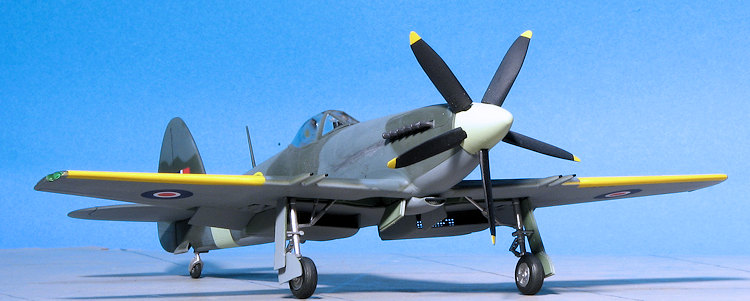
The kit is very nicely molded and has the usual fine engraved panel lines and rivet detail that we have come to expect from modern injected plastic kits. In fact, the rivets are nicely understated and one has to inspect things closely to see them. As this is a pretty basic aircraft and was never fitted with drop tanks or weapons, it should prove to be a pretty fast build.
T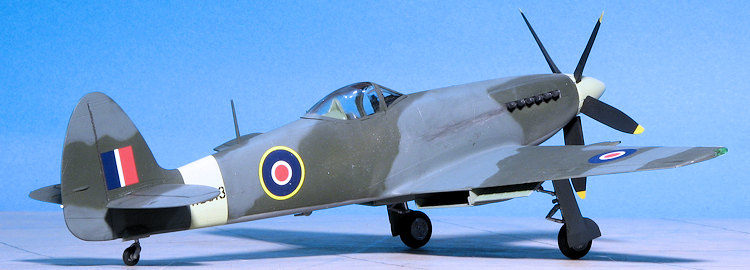 he cockpit is rather un-Spitfire like in that there is a
different instrument panel and there are real side consoles such as you'd see in
an F-15, for example that run the full length of the
cockpit. This
is not totally prototypical as the real Spiteful cockpit was rather busy and
cluttered. But it is not bad for a mass
produced kit and to my eye, is not the disaster that has been mentioned
elsewhere. Until a much more detailed resin cockpit comes (and so far, one has
not been done), it is adequate enough for most. Besides, the clear canopy is
a bit on the thick side and unless posed open, the detail within will not be all
that easily seen. I
should mention that the canopy section is a true bubble and has a seam down the
center of it that will need to be sanded smooth.
he cockpit is rather un-Spitfire like in that there is a
different instrument panel and there are real side consoles such as you'd see in
an F-15, for example that run the full length of the
cockpit. This
is not totally prototypical as the real Spiteful cockpit was rather busy and
cluttered. But it is not bad for a mass
produced kit and to my eye, is not the disaster that has been mentioned
elsewhere. Until a much more detailed resin cockpit comes (and so far, one has
not been done), it is adequate enough for most. Besides, the clear canopy is
a bit on the thick side and unless posed open, the detail within will not be all
that easily seen. I
should mention that the canopy section is a true bubble and has a seam down the
center of it that will need to be sanded smooth.
The kit provides a photo etch fret for the lower carb intake and both of the wing mounted radiators. Later Spitefuls had a longer carb intake section that reached to just behind the propeller, but all Spitefuls seem to have been built with the shorter carb first and then modified.
There are few options with the kit. One is to have a camera
installed in the fuselage for which not only is the camera and rack provided,
but the modeler will need to open the hole for the camera window. This seems to
have been a pretty standard arrangement late in the war as many Spitfire XIVs
had this as did later Spitfires and Seafires. The other is to have the flaps
down. The kit has separate ailerons, bu t those are to be molded in the neutral
position. I should also mention that the radiator outlet flaps are molded down.
The kit comes with three spoke wheels with circumferal tread tires. Photos of
the real plane show that at least one aircraft had four spoke wheels.
Other photos of Spitefuls show the three spoke variety.
t those are to be molded in the neutral
position. I should also mention that the radiator outlet flaps are molded down.
The kit comes with three spoke wheels with circumferal tread tires. Photos of
the real plane show that at least one aircraft had four spoke wheels.
Other photos of Spitefuls show the three spoke variety.
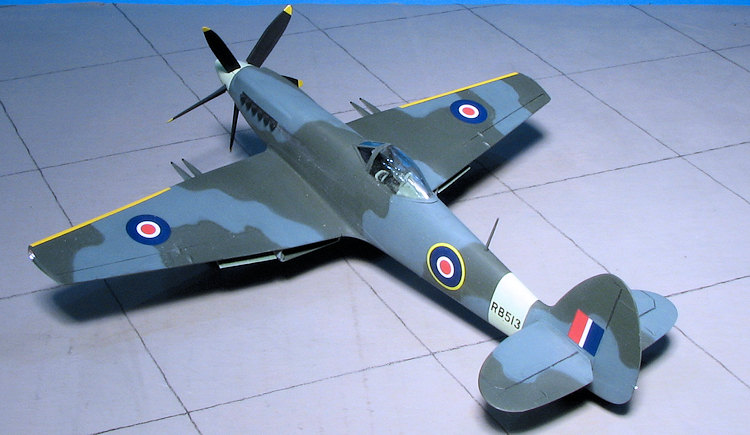
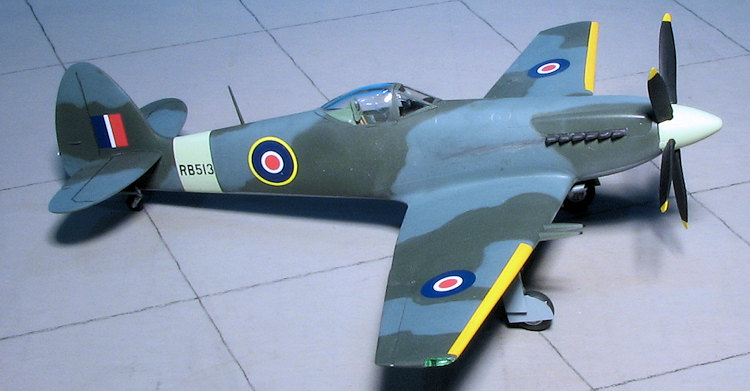
Instructions are well done as is the norm with Trumpeter. There is no color information provided during the construction sequences, so one has no clue as to what color to paint the cockpit. I find this to be irritating in the least, but will have to assume that British Interior Green is the proper shade to use. The full color painting guide does offer a variety of manufacturers from which to choose your colors. It shows the wheel wells as being aluminum. There are options for three aircraft. One is for RB 518 as in one of the photos above. This is in standard RAF European colors with the yellow wing leading edges. As you can see from the images, these planes were apparently polished as the colors are certainly not matte. The other two markings are for the what if crowd with one being for a Dutch aircraft in RAF camo and the other for a Finnish plane in silver (or unpainted aluminum). The decals are well printed and glossy. However, the red for the RAF roundels is too bright and I fear that the yellow surround will be a bit on the transparent side. Fortunately, getting replacements is not really that much of an issue. You will also notice that a decal is provided for the instrument panel if the builder so desires.
| CONSTRUCTION |
My first task was to paint interior bits, wheel wells and the inside of gear doors as well as the various inside radiator bits. I chose RAF Interior Green for this. I also painted the prop blades and the instrument panel with matte black.
Next task was to assemble the radiators. I did this while also
assembling the wings themselves. The wheel wells are a very tight fit and one
almost doesn't need to glue them, but I did anyway. There are photo etch
radiator grilles. This stuff is almost paper thin so take care when using it.
Every photo I've seen of a
 Spiteful shows the radiator exhaust doors in the up
position. Fitting the door up takes a little work as the fit is tight and you
need to remove the small tabs from them. There are very fine radiator screens
that fit into these radiators. They are thin to the point of being flimsy. Once
glued in, you'll find they are see through as Trumpeter didn't bother with a
radiator core to block this. I did not install a section of card, but next time
I will. These were then glued to the bottom of the wings. I'd recommend not
doing this until the wing is attached as it makes cleaning up the rear
wing/fuselage seam difficult.
Spiteful shows the radiator exhaust doors in the up
position. Fitting the door up takes a little work as the fit is tight and you
need to remove the small tabs from them. There are very fine radiator screens
that fit into these radiators. They are thin to the point of being flimsy. Once
glued in, you'll find they are see through as Trumpeter didn't bother with a
radiator core to block this. I did not install a section of card, but next time
I will. These were then glued to the bottom of the wings. I'd recommend not
doing this until the wing is attached as it makes cleaning up the rear
wing/fuselage seam difficult.
Once the cockpit bits were all assembled (I used Eduard etched belts for the seat) the cockpit and the piece that fits behind it were glued in place. The cockpit fits so well that you may decided not to glue it in. The piece behind the seat does not fit well as it seems the seat is too far back and almost fits under the forward edge of it. I also glued the prop shaft retaining piece and placed that in the slot prior to cementing the fuselage halves together. Don't forget that the tail gear has to be glued in prior as well.
Fit of the fuselage halves was fairly good but they did not
want to close all the way around the cockpit. I used the old "press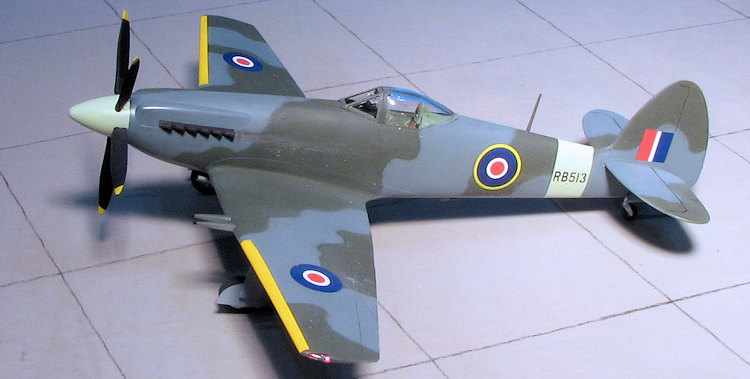 together,
use super glue and then accelerator" treatment on these areas. Naturally, I
managed to glue the prop shaft solid.....
together,
use super glue and then accelerator" treatment on these areas. Naturally, I
managed to glue the prop shaft solid.....
This is not a filler-free kit (at least not for me) and once the fuselage was treated, the wing attached. Fit here is fairly good but all the joins need filler. I found that the upper wing was a bit higher than the corresponding wing root. Recommend attaching the upper wings then the lower and dealing with the seam while it is attached to the fuselage. Tailplanes are rather loose, but do fit pretty well.
Back at the cockpit, I attached the gun sight and the sight glass. This whole assembly is too tall as when the windscreen is attached it will push down on the sight glass piece. Fit of the canopy is also not perfect, which is why most modelers model it open. I should point out that I painted the area behind the seat interior green. Some have painted this black, but looking at color photos of this plane, it doesn't look that dark. With all this on, the canopy had the seam sanded down and then it was masked in preparation for painting.
| COLORS & MARKINGS |
 ween upper
surface colors. I free-hand sprayed the ocean grey over the previous colors.
When dry, it was given a gloss coat in preparation for decals.
ween upper
surface colors. I free-hand sprayed the ocean grey over the previous colors.
When dry, it was given a gloss coat in preparation for decals.| CONCLUSIONS |
| REFERENCES |
http://en.wikipedia.org/wiki/Supermarine_Spiteful
Spitfire: The History, by Morgan and Shacklady, 1987, Key Publishing
April 2016
Copyright ModelingMadness.com
If you would like your product reviewed fairly and fairly quickly, please contact me or see other details in the Note to Contributors.