Xtrakit 1/72 Hunter T.7
| KIT #: | XK72013 |
| PRICE: | £15.42 plus about £5.50 shipping (I ordered two and that is about half the shipping price). |
| DECALS: | Three options |
| REVIEWER: | Scott Van Aken |
| NOTES: | Short run, tooled by MPM |
| HISTORY |
The Hawker Hunter is a subsonic British jet aircraft developed in the 1950s. The single-seat Hunter entered service as a maneuverable fighter aircraft, and later operated in fighter-bomber and reconnaissance roles in numerous conflicts. Two-seat variants remained in use for training and secondary roles with the Royal Air Force (RAF) and Royal Navy until the early 1990s. The Hunter was also widely exported, serving with 21 other air forces. Fifty years after its original introduction it was still in active service, operated by the Lebanese Air Force until 2014.
 On 7 September 1953, the modified first prototype broke the
world air speed record, achieving 727.63 mph (1,171.01 km/h). Hunters were also
used by two RAF display teams: the "Black Arrows", who on one occasion looped a
record-breaking 22 examples in formation, and later the "Blue Diamonds", who
flew 16 aircraft. Overall, 1,972 Hunters were produced by Hawker Siddeley and
under licence. In British service, the aircraft was replaced by the English
Electric Lightning, the Hawker Siddeley Harrier and the McDonnell Douglas
Phantom.
On 7 September 1953, the modified first prototype broke the
world air speed record, achieving 727.63 mph (1,171.01 km/h). Hunters were also
used by two RAF display teams: the "Black Arrows", who on one occasion looped a
record-breaking 22 examples in formation, and later the "Blue Diamonds", who
flew 16 aircraft. Overall, 1,972 Hunters were produced by Hawker Siddeley and
under licence. In British service, the aircraft was replaced by the English
Electric Lightning, the Hawker Siddeley Harrier and the McDonnell Douglas
Phantom.
The T.7 variant was a two-seat trainer built for the RAF. A side by side seating nose section replaced the single seat nose. Engine and systems as for the F.4; six were rebuilt F.4s, and 65 were new build. The dog-tooth leading edge and follow-up tailpane mods, as on the F.6, were fitted to the T.7. The T.7A was a T.7 modified with the Integrated Flight Instrumentation System (IFIS). Used by the RAF as a Blackburn Buccaneer conversion training aircraft. Just about every RAF Hunter squadron had at least one of these for refresher or conversion training.
| THE KIT |
 Xtrakit
is a Hannant's brand and they have their kits produced by MPM. This means a
short run kit with engraved panel lines, a photo etch fret and often
some resin bits. In this case, the resin covers the two seats and the exhaust,
so nothing daunting. Photo etch is used for the main instrument panel, side
consoles, front and rear of the main wheels, pull handles on the seats and
windscreen wipers. I had wondered why no etched seat belts were included until I
had a 'Homer' moment and realized this feature was already molded onto the resin
seats.
Xtrakit
is a Hannant's brand and they have their kits produced by MPM. This means a
short run kit with engraved panel lines, a photo etch fret and often
some resin bits. In this case, the resin covers the two seats and the exhaust,
so nothing daunting. Photo etch is used for the main instrument panel, side
consoles, front and rear of the main wheels, pull handles on the seats and
windscreen wipers. I had wondered why no etched seat belts were included until I
had a 'Homer' moment and realized this feature was already molded onto the resin
seats.
The other two sprues fill the box and include the two fuselage halves, upper and lower wing sections, tailplanes, a pair of drop tanks and all the other bits required. There is wheel well detail in the upper wing halves and a separate nose gear well. I should mention that there is an acetate instrument sheet that fits behind the instrument panel. The cockpit also has control sticks and rudder pedals.
 Nose gear has a separate wheel, which I prefer over one molded
in place. The main gear has separate oleo scissors and, as mentioned, the main
wheel detail is photo etch as the plastic detailing is a bit bland. All of the
gear doors are separate so no need to cut them apart. A tail hook and speed
brake fit under the rear fuselage. The kit comes with clear plastic windscreen
and canopy. Though not shown open, I think that one could easily pose the canopy
in this position. There is a separate nose cap which will come in handy if the
plane needs nose weight. None is indicated, but I would install some just in
case.
Nose gear has a separate wheel, which I prefer over one molded
in place. The main gear has separate oleo scissors and, as mentioned, the main
wheel detail is photo etch as the plastic detailing is a bit bland. All of the
gear doors are separate so no need to cut them apart. A tail hook and speed
brake fit under the rear fuselage. The kit comes with clear plastic windscreen
and canopy. Though not shown open, I think that one could easily pose the canopy
in this position. There is a separate nose cap which will come in handy if the
plane needs nose weight. None is indicated, but I would install some just in
case.
Instructions are well done and provide Xtracolor paint references as well as standard color names. A nice selection of color schemes are provided. First is the box art plane with 237 OCU in 1986/7. This was the Buccaneer training squadron. A Royal Navy T.8 in roundel blue over white is provided as is a standard camouflaged version with 2 Squadron in 1970. This plane has the high speed silver undersides, unlike later planes that used a light grey. The decals are superbly done and will be quite thin. The lower wing serials are in sections already, making them easy to apply on the gear doors.
| CONSTRUCTION |
The first thing I did was to cut the fuselage halves and wing bits from the sprues. This allowed more room in the box for the bits and the sprues tend to crowd the box. I then cemented the fuel tanks together and painted all the interior bits with matte black. After that, the interior pieces, save the seats, were assembled. With everything in there being black, it is sort of odd that there is all the photo etch for consoles, but with some drybrushing, a bit of detail can be seen.
 While working on the interior, I glued the nose gear well in place. There are
alignment notches on one fuselage half to help. Typical of short run, the nose
gear well is flat where it should be curved and curved where it should be flat,
making installing a bit of a challenge. I also glued the wings together. Test
fitting showed that individually, the upper and lower wing pieces fit snugly
into the fuselage, but once the wing halves were glued, that snug fit
disappeared and showed a lot of potential gaps.
While working on the interior, I glued the nose gear well in place. There are
alignment notches on one fuselage half to help. Typical of short run, the nose
gear well is flat where it should be curved and curved where it should be flat,
making installing a bit of a challenge. I also glued the wings together. Test
fitting showed that individually, the upper and lower wing pieces fit snugly
into the fuselage, but once the wing halves were glued, that snug fit
disappeared and showed a lot of potential gaps.
At the back of the fuselage, I cut the pour stub away from the exhaust. Then I sanded a lot of the remaining aft exhaust piece down. Even then, the fuselage halves would not close. So I used my motor tool and after grinding away a lot of the aft interior, the exhaust piece finally fit and allowed the fuselage halves to join.
After dealing with the seams on the fuselage, I attached the wings. The fit on these is actually rather poor. As mentioned, they don't fit into the recesses provided, even after flooding the join area with glue in hopes that the melting plastic might help out. I had to trim the very back end of the wing where it meets the fuselage as it is too long. After a lot of fiddling, the melted plastic helped to fill some of the gaps, but otherwise it was up to super glue to actually get the wings to achieve any semblance of fit. Be sure when doing this to ensure that the wings are properly straight. Eventually, I got these in place and then attached the tailplanes. The nose was next after I was sure that it would not tail sit. The nose is too small in width so I used filler to smooth out the step.
In the meantime, I masked the canopy and windscreen then test fit these items
to make sure I had a good match. There was a bit of trimming of both clear flash
and the 'hinge' area of the fuselage to get a proper fit. These were set aside
until I had finished painting and assembling the seats. At this time, the cannon
 and tailhook were glued in place. There is an ejector pin tower in both of the
gun housings provided (you only need one), so that was removed prior to
installation. This seems to also cover the alignment pin so it ends up a butt
join.
and tailhook were glued in place. There is an ejector pin tower in both of the
gun housings provided (you only need one), so that was removed prior to
installation. This seems to also cover the alignment pin so it ends up a butt
join.
Having finished the seats, these were installed, but not without some additional issues. One is that they are too wide to fit into the cockpit. Out came the grinder and I ground all the lower external detail away to get them to fit. . Then I discovered they were too tall and so the canopy could not be closed over them. More grinding until I got them to fit. This won't be an issue for those posing the canopy open. The gun sights jut up too far and keep the windscreen from being attached. These had to be sanded down as well. The clear bits were then glued in place in the closed position.
Back at the landing gear, I installed the p.e. main wheel detail. Problem here is that the p.e. is flat and the wheel hubs are conical. Either put up with it or grind down the hub until it is flat. I also assembled the external tanks. These have separate fins with no placement locations. Since I feared getting these really crooked, I first glued the tanks to the pylons. This would give me a good vertical reference. Then the little fins were attached. I should point out that the pylons have pins on them, but there are no holes in the lower wing or even ones that could have been opened. The instructions simply show the tanks as going in a general area.
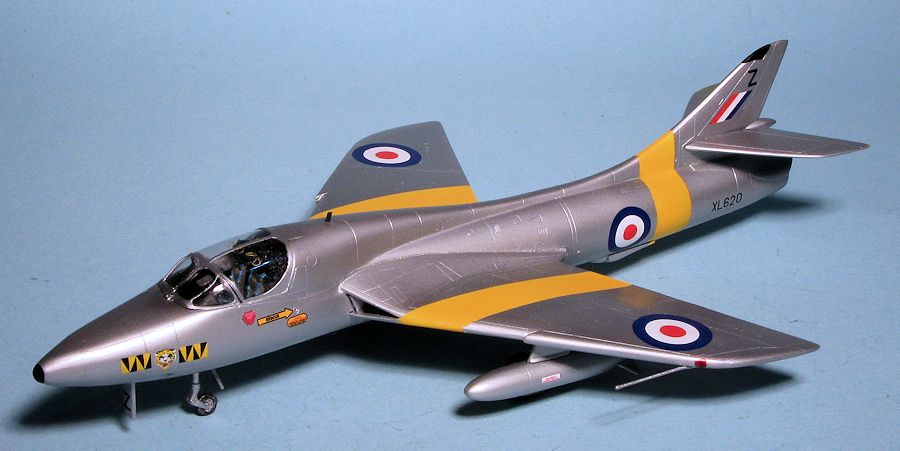
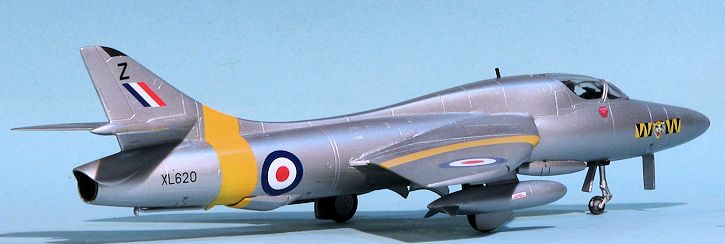
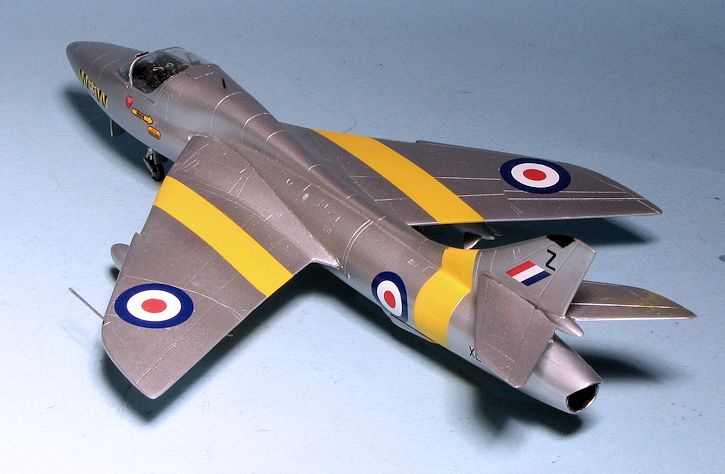
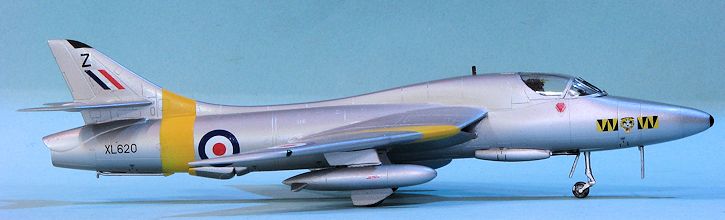
| COLORS & MARKINGS |
I decided to do this one in the high speed silver with yellow bands scheme as I do not have a model in this scheme. The last one I built in these markings was the ancient Airfix Jet Provost T.3 and that model was turned to parts in a move long ago. The first thing I did was to paint the wheel wells with Alclad II. Then I filled the gear wells with blu-tak and placed the gear doors on it. This is because not only do the trainer bands go over the doors, but the serials in the decal sheet I'm using are a single piece and will need to be cut once over the doors. This is one time I wished for one-piece gear doors that I would have to cut apart later. Naturally, the gear doors were not a good fit.
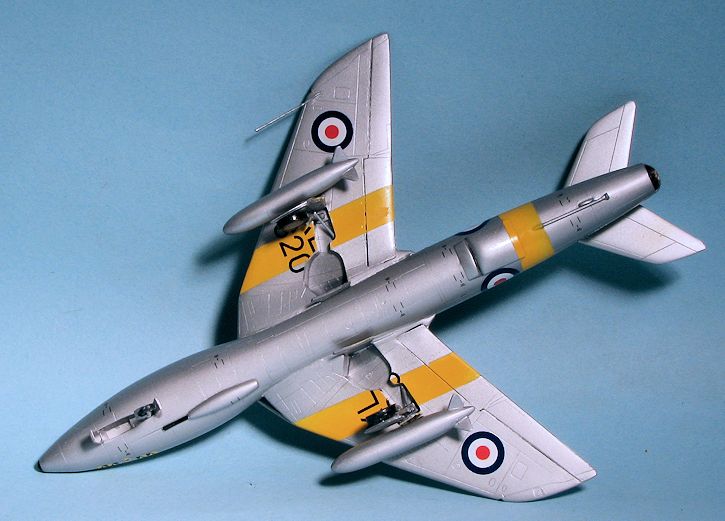 Once the white and yellow were sprayed on, I masked them. 18
inch bands in 1/72 scale come out to .25 inches or 6.35mm. I used 6mm tape for
the bands, figuring the small difference would not be all that noticeable. The
rear band goes over the speed brake so I had to use some 2mm tape to help
provide the proper width where the tape deformed over the brake. Once this was
applied, the airframe was painted with Tamiya AS-12. This is a spray paint and
looks more like painted aluminum than anything I've used in the past. I was
getting ready to mask off an anti-glare panel on the nose when I noticed that
none of the high speed silver with yellow band planes had one. I took off the
masks from the yellow stripes and as I'd feared, I cannot make straight fuselage
bands.
Once the white and yellow were sprayed on, I masked them. 18
inch bands in 1/72 scale come out to .25 inches or 6.35mm. I used 6mm tape for
the bands, figuring the small difference would not be all that noticeable. The
rear band goes over the speed brake so I had to use some 2mm tape to help
provide the proper width where the tape deformed over the brake. Once this was
applied, the airframe was painted with Tamiya AS-12. This is a spray paint and
looks more like painted aluminum than anything I've used in the past. I was
getting ready to mask off an anti-glare panel on the nose when I noticed that
none of the high speed silver with yellow band planes had one. I took off the
masks from the yellow stripes and as I'd feared, I cannot make straight fuselage
bands.
 I eventually got all the gear doors attached and also glued on the drop
tanks by drilling a forward hole in each wing and cutting off the rear pin
from each pylon. I also noticed that I did not glue the fins far enough back
so these look a bit odd. The upper antenna was attached and a few stencil
decals were applied. As a note on the decals, for some reason, they did not
seem to stick all that well and I had markings that had dried for days and
even been treated with setting solution come off. Perhaps they did not like
the clear gloss finish, I don't know. I also found that the nose wheel had
slipped after being glued and attempts to fix that came to naught as I was
afraid of breaking the nose gear fixing it.
I eventually got all the gear doors attached and also glued on the drop
tanks by drilling a forward hole in each wing and cutting off the rear pin
from each pylon. I also noticed that I did not glue the fins far enough back
so these look a bit odd. The upper antenna was attached and a few stencil
decals were applied. As a note on the decals, for some reason, they did not
seem to stick all that well and I had markings that had dried for days and
even been treated with setting solution come off. Perhaps they did not like
the clear gloss finish, I don't know. I also found that the nose wheel had
slipped after being glued and attempts to fix that came to naught as I was
afraid of breaking the nose gear fixing it. | CONCLUSIONS |
I honestly had high hopes for this one, but a combination of errors on my part and really poor fit made this a kit that fought me almost the entire way from start to finish. Though short run kits have come a long way, some are still quite a challenge and so it is with this one. I have not built the PJ Production/Revell conversion set and it could be a more hassle free way of doing this sort of thing. The Revell kit is nicely engineered and attaching the Pavla nose couldn't be more work than this kit, but that is all speculation until I build it. There is still another of these kits in the stash and I may well give that one a try down the road, but not right away. Overall, I have to caution those considering this kit that you'll need to use your developed skills on it and for that reason, any recommendation from me would be conditional.
| REFERENCES |
http://en.wikipedia.org/wiki/Hawker_Hunter
July 2015
Thanks to me for the review kit. Thanks to Fantasy Printshop for the decals.
If you would like your product reviewed fairly and fairly quickly, please contact the editor or see other details in the Note to Contributors.