Frog 1/72 Hornet F.3
| KIT #: | F.239 |
| PRICE: | $2.00 |
| DECALS: | Two options |
| REVIEWER: | Scott Van Aken |
| NOTES: | Kit came in a bag with no box, no instructions and no decals. |
| HISTORY |
The de Havilland DH.103 Hornet was a piston engine fighter that further exploited the wooden construction techniques pioneered by de Havilland's earlier Mosquito. Entering service at the end of the Second World War, the Hornet equipped postwar RAF Fighter Command day fighter units in the UK and was later used successfully as a strike fighter in Malaya. The Sea Hornet was a carrier-capable version.
 The Hornet F.1 was a standard day fighter and was built in rather small numbers. It was later supplanted by the Hornet F.3 which was more of a fighter-bomber. The F 3's wings were stressed to carry external ordnance. Two to four "60 lb" (27 kg) RP-3 rockets could be carried under each wing; it was also possible to carry a combination of four rockets with one bomb of up to 1,000 lb (454 kg), or an additional drop tank on each wing, ranging in capacity up to 200 Imp gal (909 l). Internally, the fuel tanks were enlarged from a total capacity of 360 Imp gal (1,636 l) to 432 Imp gal (1,964 l) and additional equipment was added. Larger horizontal tail surfaces were adopted, with larger elevator horn balances. With the evolution of longer-range, jet-powered fighters such as the de Havilland Vampire, de Havilland Venom and Gloster Meteor, the Hornet became obsolete fairly quickly. The F 3 was the last Hornet derivative to see operational RAF service.
| THE KIT |
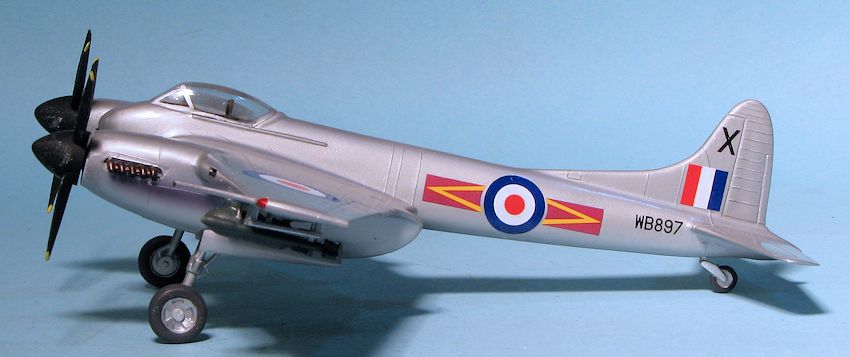
Until just a few years ago, if you wanted a 1/72 de Havilland Hornet, this is what you built. To my eyes, one of the sleekest looking piston engine aircraft ever built, Frog's kit is quite typical of the times with engraved panel lines and a very basic cockpit. Of course, it helps that the real plane was wood so there are not a ton of detail lines anyway. This particular kit was one I bought many years ago that came without a box, instructions or decals, but for $2 I figured I could get it built without any hassles.
 This kit may have been a Novo product as flash is a bit of a concern, especially on smaller parts. The cockpit consists of a molded in floor onto which a control stick and rear bulkhead with head rest are glued. There is a brace behind the head rest, the pilot sits on the floor and that is it. Wings are in two pieces for each side and the holes for bombs and rockets are already opened up for you. The bombs come complete with molded on rack while the rockets are molded onto their rails save for the fin pieces, which are quite flashy.
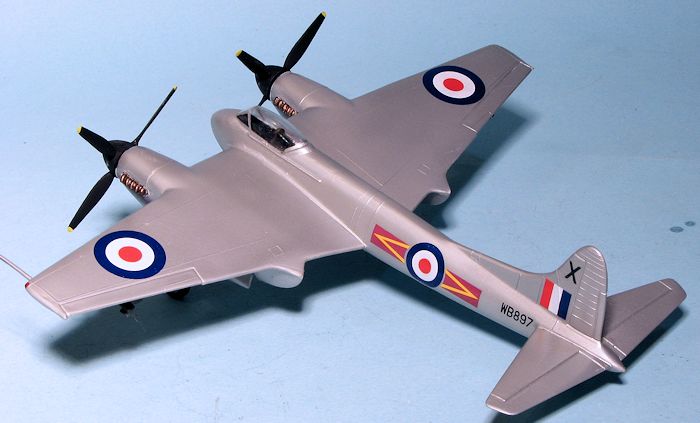
Landing gear is nicely done and the main gear wells are semi-boxed in. The tail wheels is molded onto the tail strut. As you can see, the rudder and ailerons are molded onto one half of the fuselage or wing which provides a fairly sharp trailing edge. There are separate exhaust pieces. The props are molded on the spinner and one can build them to spin before installing them onto the front of the engine nacelles. A one-piece, and rather thick canopy is also provided along with various aerials and antennas.
I seem to recall that Frog instructions were pretty good, but with a relatively low parts count were not complex. The kit provided markings for two planes. One in camouflage with 41 squadron and one in high speed silver with 19 squadron. Both had PRU blue undersides. I'm sure the decals in any extant kits are beyond their 'use by' age but the markings are not complex and could easily be gleaned from various insignia as well as letter and number sheets.
| CONSTRUCTION |
 As mentioned above, I suspect that this bagged kit was a Novo version rather than one molded by Frog. The reason for this is that the molds do not appear to have been in the best shape as there were a lot of rather shallow lumps on many of the parts, along with flash on some parts, which could be heavy at times. Regardless, I decided to build it straight from the box, other than the markings for which I had little choice.
I started this one by gluing the wings and then the interior. The lower wing section has the full wheel well and the exhaust need to be installed before cementing the halves together. The exhaust were quite flashy and needed work prior to installation. There is also a housing to hold in the prop shaft. I am sure the instructions would have you glue the prop and shaft in place prior to assembling the wings, but I decided to glue them on later. I drilled out the gun ports on the fuselage halves and after the interior was assembled (basically a floor, control stick and armor plate), it and the interior were painted matte black. The fuselage halves were then closed up, trapping the interior between the halves.
 I'll state at this time that you'll use filler on pretty much all the joins. Several times on some. Once all that was done, I attached the wings and then the tailplanes. You will need to do some scraping on the wings at the root to get the best join you can. I then attached the tailplanes after some sanding and scraping as well.
Next I went to attach the canopy. Several problems here. One is that the framework is very indistinct, making masking troublesome. Another is that it doesn't fit the opening. It is too short so there is a large gap at the front. It also will not reach all the way at the back to match the fuselage there. I'm sure there is a vacuform replacement for it from Falcon, but on a $2 kit, I wasn't going to spend the funds. Eventually it was in place and the gaps taken care of with clear paint.
On the underside, I installed the main gear legs as well as the tail wheel. There are small struts that also have to be glued in place. I cut the very thick gear doors and glued them in place. You may wonder why I did all this without prepainting and that is because the kit will be sprayed one color.
| COLORS & MARKINGS |
For this kit I decided to use a sheet I'd used on my Frog Tempest, and that is one from Freightdog Models on post-war RAF. This time, it was from 80 Squadron in Hong Kong during 1954. I used some German silver paint from Xtracolor on this one and sprayed everything in sight with it.
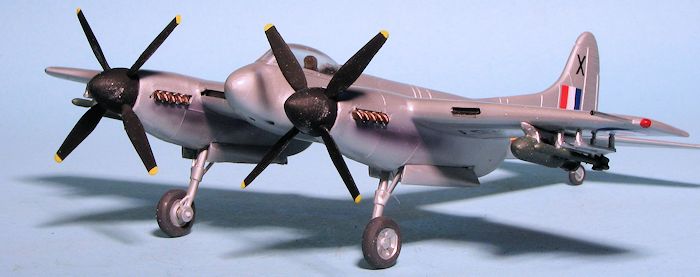
 While the paint dried, I cleaned up the props and painted them matte black. I also spent quality time on the ordnance. These parts are pretty crudely done and the rocket fins are pretty much impossible to clean up properly. I painted the bombs and rockets with Vallejo Bronze Green. Two of the rocket bodies were cut away from their rails so I'd only have to fuss with two of them. I also installed the long pitot tube at this time. There are no anti-glare panels on the nose or inner engine nacelles.
The decals went on just fine, though they do need some help to snuggle over the detail. I think the red parts of the insignia are a tad too bright, but they still look nice on the finished product. I used Solvaset without any issues.
Meanwhile, I painted the wheels and installed the axle stubs. These actually just snap into the main gear legs, a situation that turned out well. With all the bits in place, I used some Alclad II Smoke to do a bit of exhaust staining, removed the masking and that was it.
| CONCLUSIONS |
 I know that most modelers will not pick kits like this to represent types like this in their collection, especially when the newer kits are so much nicer. However, old kits still deserve to be built, rather than just shuffled around from one person's collection to another. While I'm not into doing all my models like this, it is nice to look back at what we thought was great and see just how far our hobby has progressed.
| REFERENCES |
http://en.wikipedia.org/wiki/De_Havilland_Hornet October 2014 Thanks to me for the review kit. Copyright ModelingMadness.com. All rights reserved. No
reproduction in part or in whole without express permission from the editor.
If you would like your product reviewed fairly and fairly quickly, please contact the editor or see other details in the