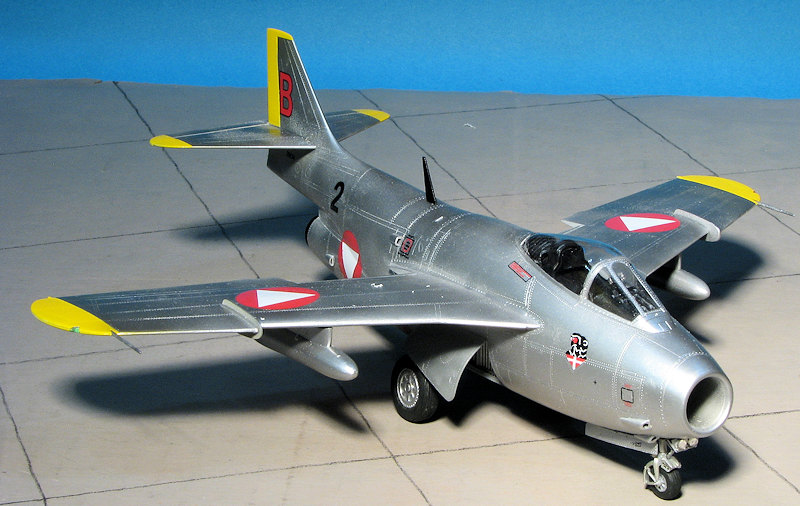
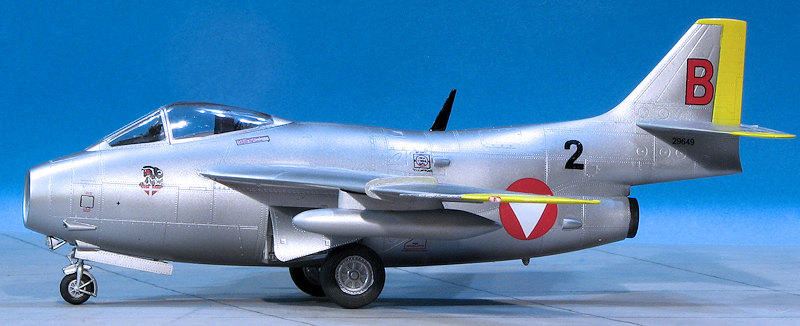
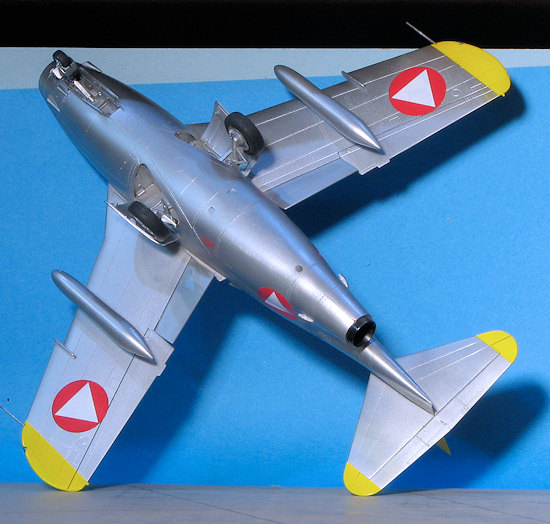
Hobby Boss 1/48 J.29F 'Tunnan'
| KIT #: | 81745 |
| PRICE: | $45.99 SRP |
| DECALS: | Two options |
| REVIEWER: | Scott Van Aken |
| NOTES: | New tool kit |
| HISTORY |
The
Saab 29,
colloquially called Flygande
tunnan
(English: "The flying barrel"), was a Swedish fighter designed and manufactured
by Saab in the 1950s. It was Sweden's second turbojet-powered combat aircraft,
the first being the Saab 21R; additionally, it was the first Western European
fight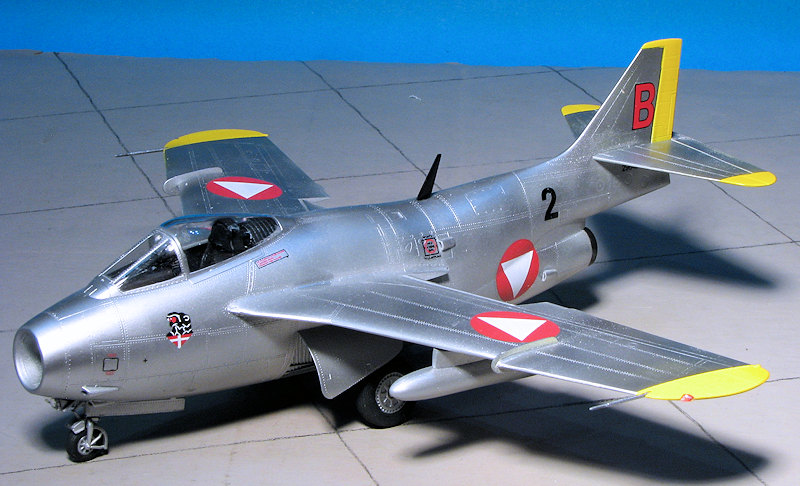 er to be produced with swept wing. Despite its rotund appearance, from
which its name derives, the J 29 was a fast and agile aircraft for its era. It
served effectively in both fighter and fighter-bomber roles into the 1970s.
er to be produced with swept wing. Despite its rotund appearance, from
which its name derives, the J 29 was a fast and agile aircraft for its era. It
served effectively in both fighter and fighter-bomber roles into the 1970s.
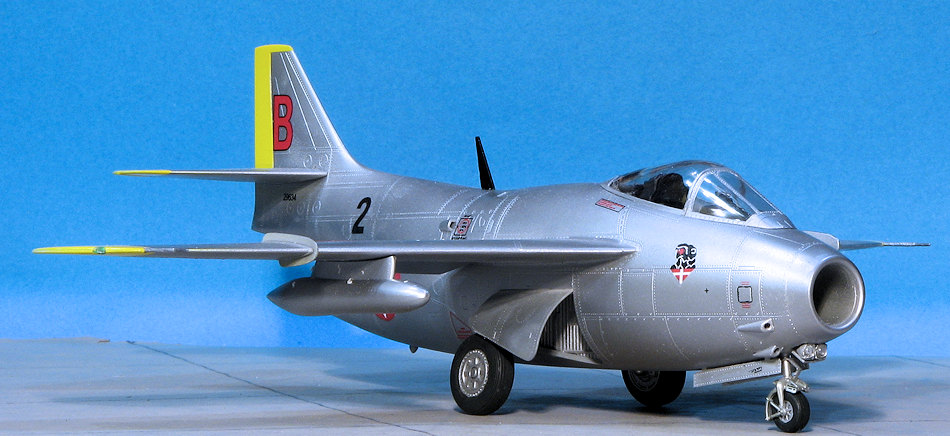
The J 29F, which is the subject of this kit, was an upgrade and all 308 examples were converted from extant D and E variants between 1954 and 1956. This included an afterburning Ghost engine and the dog-tooth wing leading edge. in 1963 the aircraft were upgraded to carry Swedish built Sidewinder missiles. It was also the variant exported to its sole non-Swedish customer, Austria, which operated the type from 1961 until 1972. Austrian planes were not Sidewinder capable as they were forbidden by treaty with the Soviets from carrying air to air missiles.
| THE KIT |
I'm quite pleased to see this aircraft finally being kitted in this scale. The external detailing is superb and includes very fine rivet detail along with the usual engraved panel lines. There are four grey and one clear sprue along with a nicely done sheet of decals.
The cockpit tub is built up and includes sidewall
details for which there are decals, a nice seat and a set of rudder pedals and
control stick. The instrument panel also has a decal. All the gear wells are
built up from relatively flat pieces and installed prior to assembling the
fuselage halves. The kit includes a full nose intake that ends in a co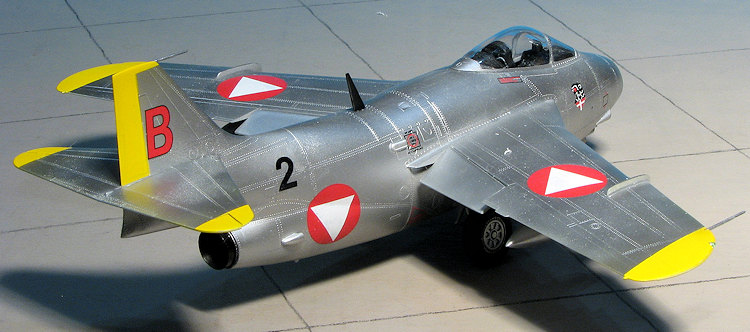 mpressor
face. A similar approach is taken with the exhaust. All of this 'stuff' leaves
little room for nose weight so the builder will have to be clever about finding
places to place it as the kit will need it. Instructions state that 5 grams is
required.
mpressor
face. A similar approach is taken with the exhaust. All of this 'stuff' leaves
little room for nose weight so the builder will have to be clever about finding
places to place it as the kit will need it. Instructions state that 5 grams is
required.
Due to the mid-wing position, there are upper and lower wing halves for each side. The modeler will need to open any holes in the lower wing for stores. A choice on each side of four rockets and a fuel tank is offered. There is no Sidewinder or pylon for it. Wing fences are separate items as are the flaps. Landing gear are quite well done and each leg has a two piece wheel/tire assembly to place upon it. Thanks to careful planning, there are no ejector marks on any of these bits or the inside of the gear doors. There are actuating arms for the main doors. Canopy and windscreen are separate and you can pose this open. Other clear bits are for the taxi light lenses and the wing tip formation lights as well as the glass for the gun sight.
Markings are for two planes. One is the box art plane with the Austrian Air Force and the other is for 'red S' of the Swedish Air Force that has a red nose band and forward fin. Decals are nicely printed and should provide no issues. I'm not sure if a plane like this will engender any aftermarket sheets as the Tunnan was not camouflaged except for those sent to the Congo, but we'll see.
| CONSTRUCTION |
After studying the instructions, I started painting. A
lot of the kit is aluminum, including the intake and all the gear wells and
doors. These were painted using Alclad II as was the exhaust area, using their
Jet Exhaust. I then painted the floor and back of the cockpit with Aircraft Grey
and the sidewalls and instrument panel in black. The next step was to apply the
decals to the side panels and the instrument
 panel. These are VERY thin, but fit
beautifully. THen all the parts were assembled together.
panel. These are VERY thin, but fit
beautifully. THen all the parts were assembled together.
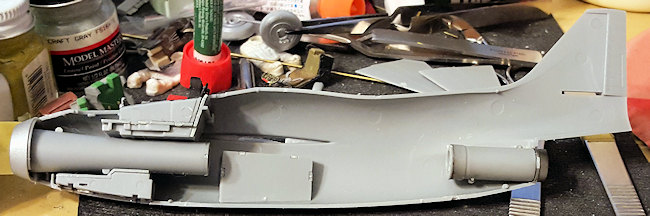
With the cockpit done and set aside, I built up the intake and exhaust assemblies. Both required additional painting. The intake trunking fits securely into the nose piece and test fitting showed a superb fit to the fuselage front. Next on my list was to assemble each of the gear wells. These fit quite well. I had prepainted them with aluminum.
At this time, I glued in the cockpit, gear wells and exhaust. I have to say that the fit is excellent. There are positive alignment tabs and slots to assist in getting everything straight. I also taped on the intake section to see how much room I'd have to install nose weight. About the only large space is directly under the intake aft of the nose gear well. I ended up putting in more than I had originally planned. It is always a good idea to tape all the major airframe bits together when determining the amount of weight needed. It saves that 'ah s''t' moment later on.
 Meanwhile, I drilled the holes in the lower wing for the drop
tanks. I decided not to install the rockets as few images of the plane showed
them. Were I to do a plane in the Congo, I'd add them. The wings were then glued
together along with the tail planes. I'm not a fan of the latest craze of
putting sprue attachment points flush with the gluing surfaces as I tend to
oversand the nubs and sometimes it puts divots in thin bits (like the leading
edge of the tailplanes). They are great for clear bits, however.
Meanwhile, I drilled the holes in the lower wing for the drop
tanks. I decided not to install the rockets as few images of the plane showed
them. Were I to do a plane in the Congo, I'd add them. The wings were then glued
together along with the tail planes. I'm not a fan of the latest craze of
putting sprue attachment points flush with the gluing surfaces as I tend to
oversand the nubs and sometimes it puts divots in thin bits (like the leading
edge of the tailplanes). They are great for clear bits, however.
Once the flight surfaces were cleaned up and enough weight was installed in the fuselage, I closed the two halves. Next subassemblies were the fuel tanks and their pylons. The pylons are handed so if you are like me (glue the halves together first and figure it out later), test fit these before gluing onto the wing. After the usual filler on fuselage seams, I glued on the tail planes. These seem to be sided so test fit before gluing. I like to do the tailplanes first as it makes it easier to try to get the wings aligned. I say try as this is an area of my builds that give me to greatest difficulty. The wings were then attached after installing the fences. These require some tweaking to get straight and there are root gaps that had to be filled once all was aligned.
The kit also has a number of small items that need to
be attached to the fuselage. There are four rear fuselage scoops and the four
forward gun fairings. There are placement areas outlined on the fuselage for
these. The gun bits are difficult to clean up because the sprue is attached to
the gluing surface. I then attached the elevator piece and though period photos
rarely showed the flaps lowered, I lowered mine
 anyway. For the interior, the
instrument panel anti-glare panel was installed as was the gun sight. Then the
clear parts were masked and glued in place. I glued the canopy closed as you can
see through it just fine and it keeps dust out.
anyway. For the interior, the
instrument panel anti-glare panel was installed as was the gun sight. Then the
clear parts were masked and glued in place. I glued the canopy closed as you can
see through it just fine and it keeps dust out.
Next, I turned my attention to the landing gear. The main gear legs and their retraction struts are tricky to install, especially the main gear legs, which need to be fussed about to get in position. Once installed, they and the nose gear are quite sturdy. I built up the landing light assembly and realized I had forgotten to install the housing when joining the fuselage halves together. Not much I can do about it now and so glued that in place. The drop tanks were attached to their pylons and will be installed at the end of the build.
| COLORS & MARKINGS |
This is an easy paint as the plane is overall unpainted aluminum. However, the wing tips, stab tips and rudder are yellow so those areas first got a coat of gloss white and when dry, the yellow was sprayed on. I used Tamiya Lemon Yellow instead of a more orange shade. This was masked off and the airframe painted aluminum using Alclad II.
 It was then time to attach the wheels. The nose gear
needed the other side of the front fork attached and that went without issue.
The main wheels, however needed some fiddling about as they wanted to be quite
splayed out at the bottom like the main wheels on a Bf-109. Photos showed these
to be fairly straight up and down.
It was then time to attach the wheels. The nose gear
needed the other side of the front fork attached and that went without issue.
The main wheels, however needed some fiddling about as they wanted to be quite
splayed out at the bottom like the main wheels on a Bf-109. Photos showed these
to be fairly straight up and down.
Once those were dry enough to allow the airframe to stand on its wheels, I applied the decals. These are very thin and will fold up quite easily if allowed to. The glue also disappears from the paper as soon as the marking is able to be slid off, so unlike other decals, if you don't get the marking off the backing quickly, you end up needing to peel it off with tweezers. Setting solution was used, in this case Mr. Mark Softer almost 'dry brushed' on each marking after it had settled down.
The last bits to add were the upper radio antenna and the wing tip pitot tubes. The various lower fuselage antennas shown on the box art are not part of the kit. I then installed the landing light lenses, the wing tip formation light lenses and removed the masking from the clear bits.
| CONCLUSIONS |
I have to say that this kit was a very nice build and
did not provide any major issues. I have come to expect this from newer Hobby
Boss/Trumpeter kits, though they do have their issues in other areas. I would be remiss if I did not mention that this kit has been
touted by those who
measure models to be unde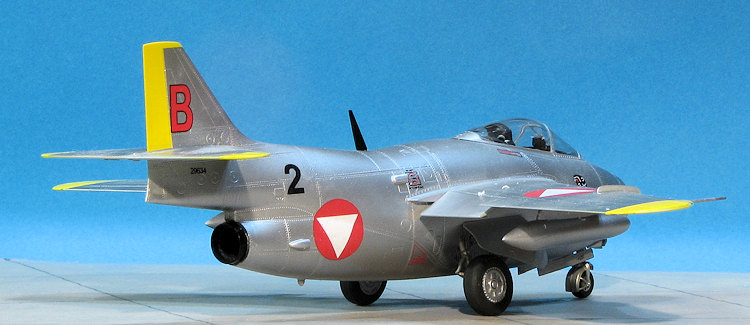 r-scale. So I measured it. It comes to a tick under 20cm
in length. With an actual length of 10.23 meters according to Wiki, this makes
the model about 1/51.
r-scale. So I measured it. It comes to a tick under 20cm
in length. With an actual length of 10.23 meters according to Wiki, this makes
the model about 1/51.
However, one needs to put things into context. Yes, it should be the proper scale, and Hobby Boss gets a 'bad company!' for this glitch, but then again, how many Tunnans will you have on your shelf? If this is the only one, then there will be nothing to provide as a comparison. We've built older 1/50 Tamiya and Fujimi kits and have no issue plunking those on the display shelf. Only if you are a fan of the type will having one smaller than the norm be an issue. In which case, you should skip this kit and go for the pricier Pilots Replica kit when it makes it to the market. If it is not an issue, then pick up this one. Based on how nicely it builds, I can easily recommend it.
| REFERENCES |
https://en.wikipedia.org/wiki/Saab_29_Tunnan
April 2016
Copyright ModelingMadness.com Thanks to me
for the review kit. If you would like your product reviewed fairly and fairly quickly, please
contact
the editor or see other details in the
Note to
Contributors.