MasterCraft 1/72 MiG-21MA "PinUp Girl"
| KIT #: | C17 |
| PRICE: | $3.31 at www.hobbyshop.cz |
| DECALS: | Five options |
| REVIEWER: | Scott Van Aken |
| NOTES: |
| HISTORY |
 I'll have you do a bit of research via www.google.com if you need a lot of background history on this jet. Suffice it to say that a lot were built and a lot are still in service. Modelers like the MiG-21 as there are not only a number of variants, but they served with literally dozens of air forces around the world. Some of them were nicely camouflaged and many modelers are more interested in the camo and markings of a model than in total accuracy of lots of detail. I have to confess that I very much fall into this category to some extent. To me, a kit is nothing more than a canvas for a camo/markings scheme. It is probably one of the reasons why I've never been one to grab a ruler and plans when a kit comes out. I'm generally just not that concerned about a few minor differences.
| THE KIT |
 Here is a look at the preview so you can see what comes in the box. Upon initial inspection, the kit doesn't look all that bad. In fact, it is sort of reminiscent of the Fujimi kit as compared to the KP kit. Construction would see if this was indeed the case. For one thing, I noted that there were a few short cuts taken and for sure the bang seat and the missiles would have to be replaced as they are pretty basic. Fortunately, I have a Dragon Soviet weapons set and a nice True Details KM-1 ejection seat to use. The decals in the kit are not bad looking at all. The nose art is rather basic, but the various insignia look just fine. Of course, I have a ton of aftermarket MiG-21 decals in this scale. The last one I built I put into Cambodian markings and I know that I'll do something equally exotic with this one.
With a high heart that I'd foreseen all my difficulties, it was on the build.
| CONSTRUCTION |
First step was to remove the fuselage and wings and tail planes from the sprue. No problem here and after some clean-up of minor flash, the wings and tail planes were set aside. I began on the fuselage by gluing in the rear engine turbine into the 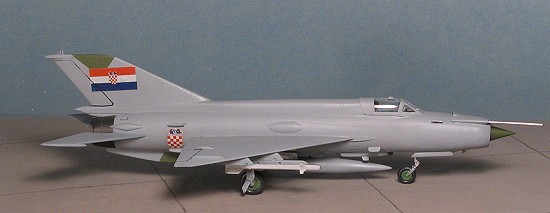 exhaust section. Well, for one thing, this is way too far aft, but I'll be painting it black anyway. For another, it did not want to fit well into the slot. A little trimming got it into place and I then turned to the cockpit. I first removed the tub and clipped off the raised tower in the middle of it. This was either an ejector pain tower (probably) or a raised platform for the 'seat'. The aft bulkhead was cut from the sprue and it immediately snapped in half. After gluing it back together, it was attached to the back of the tub.
While that was drying, I removed the nose cone. It was pretty obvious that it would not fit into the slots provided. For one thing, the circular 'tab' around the cone was in no way deep enough. In another, even if it would have fit flush on the top (which it didn't), it would have been too far back. I stopped and pondered things for a moment and then test fit the cockpit tub. The mounting tabs on the inside of the kit looked nothing like what was in the instructions. I had a choice of mounting the tub too high, mounting too low, or cutting it short and sticking it in the middle.
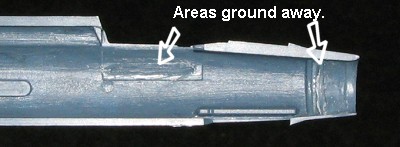 Thankfully, I have a battery powered motor tool that is perfect for plastic as it doesn't run too fast, doesn't have a ton of torque, and is rather light. Using this, I ground away about half of the cockpit mounting are until the cockpit fit about right. Moving to the front, I ground off some of the plastic from in front of the nose cone mounts so that the cone would be able to fit in place and not be too far back. I also sanded a touch off the back of the cone so it wouldn't jut out too far.
This wasn't portending well for the kit. Three attempts at installing bits and three times I had to do major cutting and hacking. I also had to sand down the side of the resin seat so that it would fit into the tub as the tub is too narrow for it. Make that number 4. With this done, I glued the cockpit and the instrument panel 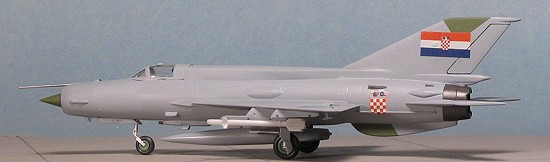 and the thing that looks like a control stick into the fuselage halves and glued those together, trapping the cockpit in place. I had to trim the instrument panel as it was too wide. I also managed to snap the control stick so it is a tad short.
With the halves together, I noted that the fit was not good. It was especially bad near the fin and so several applications of filler were needed. Of course, this meant rescribing a bunch of panel lines. Once that was finished, I attached the wings. These were the first parts that actually fit well. No filler was used. Then, I glued on the various scoops on the back of the fuselage. These required some scraping down as the mold shift made these rather nasty. I drilled out the big ones before putting them on and the little ones after the glue had thoroughly dried.
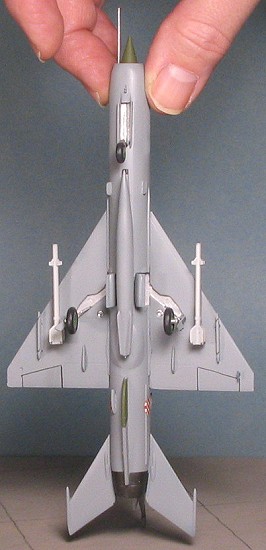
Then the gun pod was glued to the underside. I drilled out the barrels on this to improve its looks and then glued on its small aerodynamic 'wings'. The blanking plates over the engine bypass doors were glued on at this time as well. Moving to pylons, the centerline and four wing racks were attached. The pre-drilled holes for the wing racks were about twice the size they need to be as too shallow. For the racks, though the instructions show all of them being part #20, only two of the four are supplied. The others are part #18 and are a different shape. These latter ones I glued to the outside. The centerline rack was also glued on. All these have mold misalignment problems that will require trimming prior to installation.
 The inner racks had the missile pylons installed. I only did the inside as I broke two of the four supplied, thanks to the brittle plastic. The drop tank wasn't too bad and after the usual sanding and filler, was glued to the underside pylon.
Moving to the front, I glued in the radar 'spike' as best I could and then glued on the circular intake ring. This dramatically showed that the fuselage is oval in shape with the sides being way too wide. Too late to fix now, but were I to do another of these (which I won't), I'd sand down each fuselage half starting just forward of the fin. This is because both the upper fuselage spine is sort of flat-topped and the speed brake is similarly deformed. Of course, this will make the interior too wide and even more trimming will be needed. And on it goes.
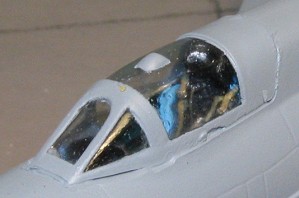
At this stage I test fitted the canopy. It fits superbly to one side or the other, but as you might guess, it is too narrow! One result is that the upper portion of the instrument panel is too wide so more was trimmed.
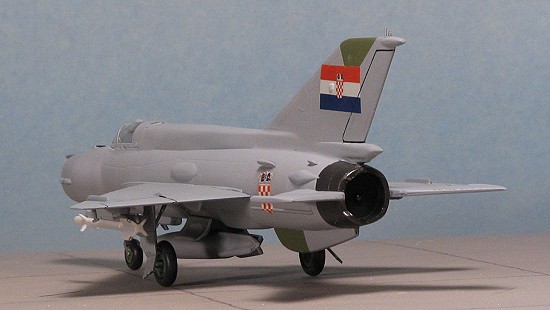
I decided to do a bit of painting prior to continuing. I painted the antenna dielectric panels with a nice Russian Green I had already mixed. I also painted the exhaust area with Alclad II Jet Exhaust. When dry, these were masked off and I looked for an interesting scheme that did not involve unpainted metal. I didn't want all the scratches and other glitches to be so visible!
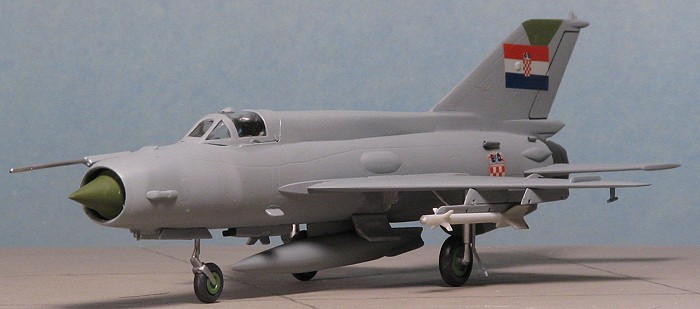
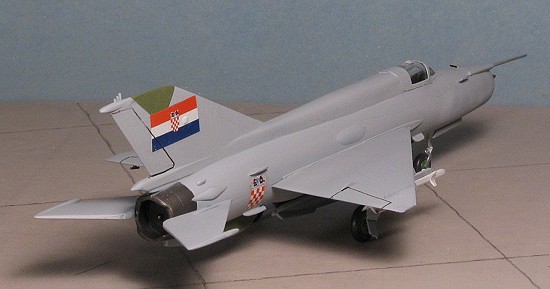
 I found a very early Croatian set of markings from 1992 when their first MiG-21s were supplied by defecting Yugoslavian pilots. These were in overall light grey so painting would be relatively simple. The decals were by Blue Rider and I've had good results from these in the past.
I painted up the seat as was shown in the instructions, with a light blue frame and black seat interior and head set. I deviated a bit and painted the belts in a dark tan color. This was then glued into the cockpit. I attached the pitot and smaller probe to the nose and then the canopy that I masked prior to gluing. I had to trim the front of this a bit for a better fit as it was also a bit long in addition to being too narrow. A chunk broke out of the canopy when I was removing it from the sprue. A fault of the brittle plastic.
| COLORS & MARKINGS |
 It was now time to do an overall paint job. The Blue Rider decals only suggested light grey and didn't go into any other information. I've got a number of light greys so wasn't too sure which to use. I finally settled on some FS 36475 that I had mixed up already for the F-18F I did a few weeks back. It looks good enough and though the actual shade is probably something different, this will suffice. Once it was nice and dry, I sprayed on a coat or two of clear acrylic gloss (Future floor polish) in preparation for decals.
Back at the bench, I got to work adding more stuff, specifically the landing gear. The one on the front has the wheel molded in with the strut and naturally, the upper portion broke when I was cutting it from the sprue. The main gear legs are basically tubes with axles. No other detail.
To fix the nose gear, I drilled out the strut and inserted a piece of tubing. It is very thin, but should hold well. Then the main gear legs and the retraction struts were glued into the wheel well. There is no locator either on the gear leg or the well for this strut. Just put them both in the same place on either side so things won't look too odd. The nose gear first had the grossly oversized attachment hole filled with super glue. When it dried, I drilled a smaller hole and glued in the nose gear. Both the wells and the gear legs were brush painted with Humbrol Matte Aluminum and look fairly good. Then the wheels were brush painted with Testors camo green enamel that comes in the small square bottles. It looks very much like the green the Russians use for their wheels when compared to pictures. Then the tires were painted with Floquil Weathered Black and set aside to dry.
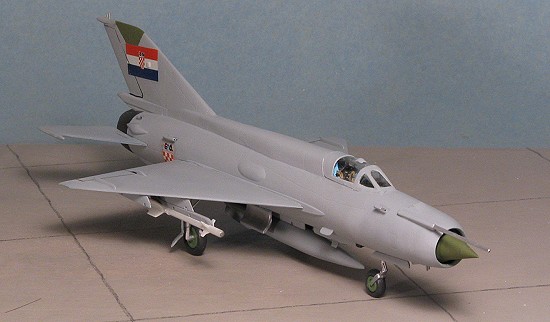
Now was a good time to apply the decals. Not much here other than a fuselage insignia and a large fin flag. These markings are from a Blue Rider sheet that covers the Croatian AF in 1992, during the Balkans war. The decals are very much like ModelDecal and they are also a bit out of register. I trimmed off the white peeking out from the fin flags, but was pretty much at a loss on the fuselage insignia. The carriers on these are large and while I didn't trim mine, I suggest that you do. The decals fit fairly well and I did use Solvaset on them as they didn't want to snuggle down by themselves.
| FINAL CONSTRUCTION |
With the decals in place, I then glued on the gear doors. As usual, I had trouble with the brittle plastic. The main outer doors are supposed to have a section sawn nearly all the way through and then bent out. Naturally, one main door broke and it was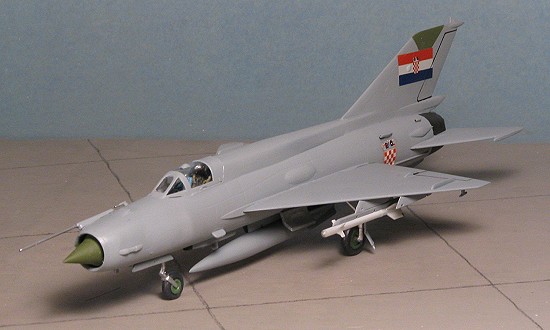 nowhere near the bend. Same trouble with one of the nose gear doors. It snapped quite easily. These were repaired and then glued in place, followed by the inner gear doors and the main wheels. I then cut off the wing rad alt antennas; unfortunately, after one was glued in place, the other disappeared into the distance, never to be seen again. Why does this always happen to the second one? The last thing to add on were the missiles. These AA-2s came from a Dragon 1/72 Soviet Weapons set that includes a bunch of other neat missiles and is perfect for when you get a kit that has garbage missiles.
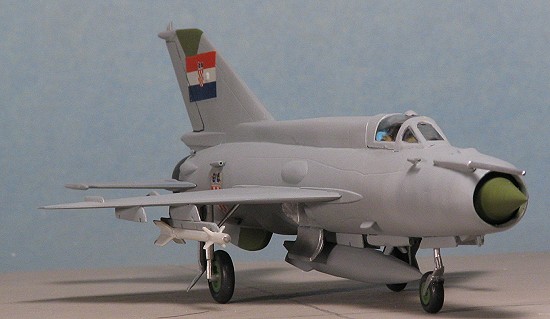
That concluded the gluing. I then took it back to get a coat of clear semi-matte sprayed on it and I sprayed some slightly lighter grey over the areas where the old Yugoslav insignia and nose number would have been. It is barely visible. The final thing was to install the landing lights. These clear plastic bits are way too thick and the thought of installing these was not pleasant. Fortunately, MV Productions lenses # LS 29 are a perfect fit and I had a set of them. A drop of clear paint and the lenses were in for the duration. As these aircraft weren't flown much, I didn't do any weathering. The tape was removed from the dielectric bits and the canopy and that was it.
| CONCLUSIONS |
Now I'm sure that many of you are wondering why I put all the time and aftermarket into what is decidedly a second-rate kit. I mean, there are few serious modelers who would touch this one. It has some real fit issues and because of those and the shape problems and the brittleness of the plastic, it took about twice as long as would a Fujimi kit. About the best that could be said is that it looks like a MiG-21 MF.....from a distance of a few feet.
 Well, scale modeling is about a lot more than building an endless train of Tamiya or Italeri or Revell kits. There are a lot of modelers out there who, for reasons of finance or availability, just can't build the top of the line stuff. But yet, they want to be players in this hobby as well. Sure, this kit is the last choice of many, but there are a lot for whom it is the only choice. The purpose of building a kit like this and others I could mention but won't until the time has come, is to show that you can make a very nice model, one that will look good on your shelves out of just about any kit on the market. Face it, most of your non-modeling friends won't have a clue about what isn't up to snuff.
Having said all that, if you have another choice in a 1/72 MiG-21 MF, then take it as this one is surpassed by all others on the market. Oh, one other thing, I tried the kit decals on another model that is underway to see how they were. They seem to work OK. They hated the Solvaset and curled up, but once I pushed them back down and applied some Microsol, they seemed happier.
Late Note: Any comments on the accuracy of the decals or information provided in the Blue Rider sheet can be sent to Blue Rider. I'm sure they'd appreciate hearing from you.
December 2005
# 1394 in a series
Copyright ModelingMadness.com. ALl rights reserved. No
reproduction in part or in whole without express permission from the editor. If you would like your product reviewed fairly and fairly quickly, please contact the editor or see other details in the Note to Contributors.