SMER 1/48 MiG-17F/Lim-6bis
| KIT #: | 125 |
| PRICE: | $ |
| DECALS: | Five options |
| REVIEWER: | Scott Van Aken |
| NOTES: |
| HISTORY |
 Following the success of the MiG-15, it was realized that in order to keep pace with western aircraft, the type needed to be improved. Though similar in layout to the MiG-15, the MiG-17 has a number of major differences. The airframe is larger, the engine different in that all the initial versions have an afterburner, the wings are a different shape, it carried more fuel and so on.
The type was also developed into a good fighter-bomber, though typical of Soviet designs, it wasn't able to carry much or it couldn't carry it very far. Still, it was widely exported and there wasn't a Soviet client state in the 1960s that did not have some of these on hand. They were easy to fly, easy to maintain and were quite rugged. They also maneuvered quite well and in the hands of a skilled pilot were a dangerous adversary even to much newer aircraft.
| THE KIT |
I have always liked MiG-15/17 fighters and it is often a mystery to me why I've not built many. In this scale, there have been models by Hobbycraft, this one by SMER, and a newer tool by Hobby Boss. I built the Hobbycraft kit many years ago (as in over 30) and that has pretty much been it. I bought this one long ago, but have never really gotten to the point of actually popping it out of the shrink wrap.
 The first thing I noticed is that it comes in a 'lunchbox' style box where the front and side flaps are glued to the bottom of the box. This basically ruins the ability to keep the box together once it is opened. Chalk that up to a really dumb idea, though it does prevent parts theft.
The two grey sprues are well done with no real flash. However, the detailing is rather heavy-handed, at least by today's standards. It reminds me of the OEZ MiG-21 I built back in the 'old days'. I also found sink areas on the upper wings opposite the wheel well detailing. The cockpit is built up of several flat sections and contains an eight piece bang seat. The side panels have detail and side consoles and a stick and rudder pedals attach to the floor. An instrument panel is provided with decals for its instruments and also for the side consoles.
A two piece intake fits atop a two piece nose gear well. This will eventually have the cockpit sitting atop it. You will need nose weight and while no indication of how much is provided, there is sufficient room for it. When the cockpit is trapped in the fuselage halves, the tail pipe assembly is also held in place. There is a separate nose piece that I'd fit on before the guns and after the weight has been installed. Wings are upper and lower halves as is the fin, with single piece tailplanes. The kit provides the later fin for the LIM-6 with the parabrake housing, though the shape seems a bit odd.
 A nice pair of drop tanks are included which is good as the long, slit placement area is already opened up in the bottom of the wings. Landing gear is actually quite simple with the nose gear being two pieces that traps the nose wheel between them. The wheels are a single piece so no worries about gluing two wheel halves together.
On the underside are various cannon bits, antennas, lights and the short ventral fin. Canopy and windscreen are separate with well defined frames. For ordnance you have your choice of bombs or rocket pods or even wing mounted rockets that are in pairs. When mounting either the pylons for the bombs or the rocket rails, one has to look for little dimples in the lower wing to determine where they go. Note that most MiG-17s were not always equipped with these things, though the Polish Lim was, and so were most Egyptian planes once the MiG-21 took over their interceptor duties. The bomb pylons for these were locally manufactured and quite different from those installed by LIM.
Instructions are well drawn, though one has to pay attention to when bits are attached. The instructions are on a pseudo newsprint type of paper with the marking and painting guides in color. There is a separate stencil page with the others dedicated to the Czech, Polish, North Vietnamese and Egyptian planes. These pages skip the Soviet option though it is shown on the box side. Decals are large, well printed, glossy and yellowed. The reds are far too light and I've a feeling that none of the colors are backed in white so would probably fade considerably on a non solid surface. I'm not sure how viable they are as the wax cover sheet was difficult to remove prior to scanning it for this article. There are, however, quite a few aftermarket decal sheets for this plane so finding one should be easy.
| CONSTRUCTION |
 As seems to often be the case, I chose to build an older kit when there is a newer, and probably better one out there. I even have it in my stash, yet this one, which I've probably had for 20 years, is the one that gets the nod. Many years back, I built the OEZ MiG-21 when it first came out and this kit reminds me a great deal of that one, especially in the rather overdone surface detail. It is as if the Matchbox 'mad trencher' was let loose on this one as well.
 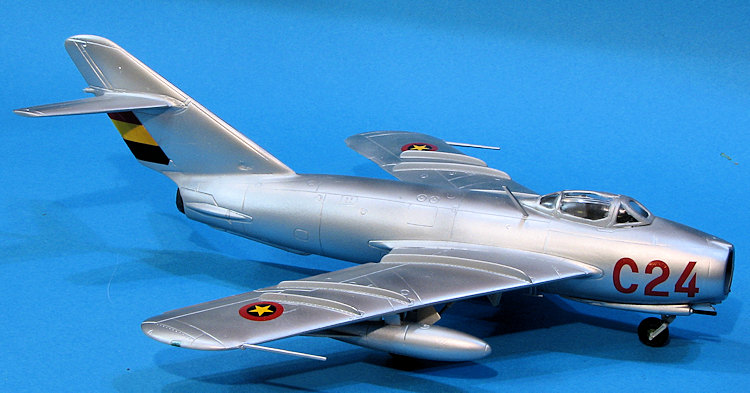 The tailpipe assembly was made up after spraying the inside of it with Alclad II's jet exhaust. Then the interior was glued into one side of the fuselage. I then taped together the already assembled wings, fuselage and fin to be sure I had enough weight. It is a major tail sitter. To the back wall of the cockpit (the only place left), I attached 20 grams of weight. Still not enough. 7 grams went into the cockpit forward of the instrument panel. Still not enough. Another seven was stuffed into the top of the nose gear well. This seems to have done it. We will see. As a note, the fitting of the cockpit is rather fussy if you don't get the instrument panel in there just right.
 | COLORS & MARKINGS |
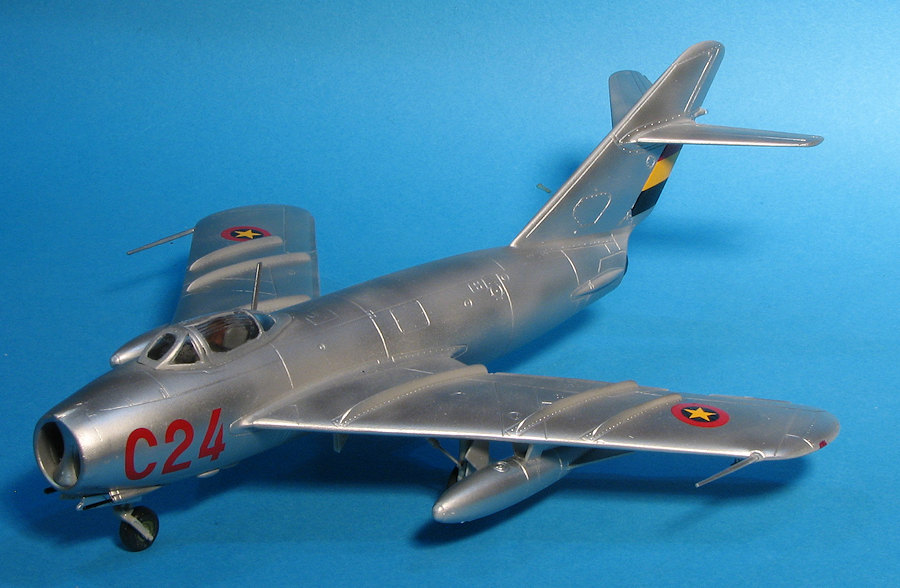
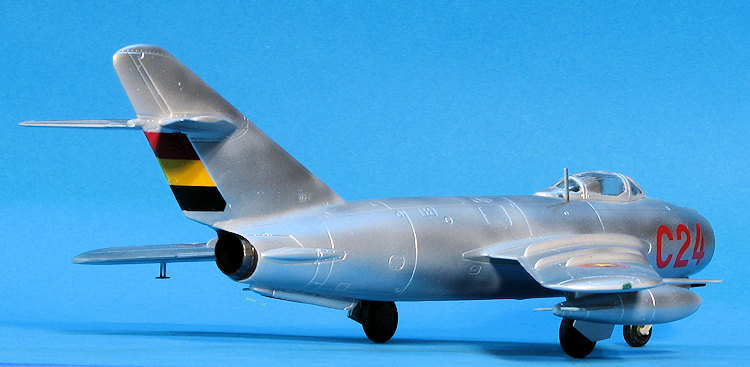
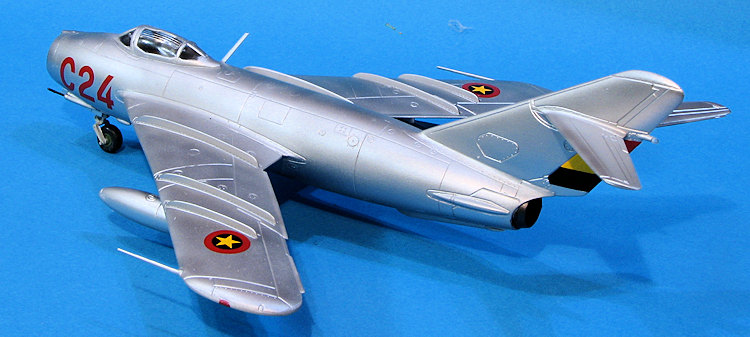
 The airframe was primered with Tamiya extra fine grey and then given a nice coat of Alclad II Aluminum. I had wanted to do an aluminum aircraft for this one, saving a camo one for a later kit. All the wheel wells and inner gear doors as well as the gear bits were painted with light gull grey while the wheels got FS 34097 green.
 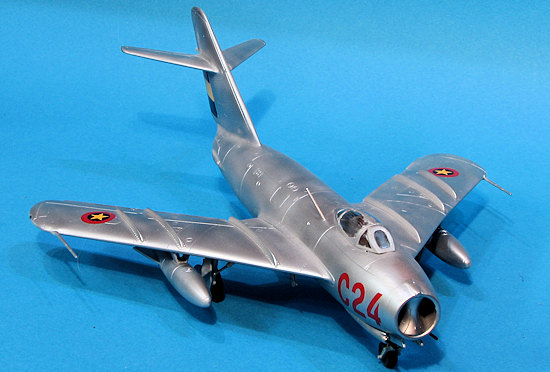 Before decaling, I assembled and glued on the landing gear. I had more than enough weight to prevent tail sitting. The main gear legs will not go all the way into the holes and I had to both open up the hole for the nose gear and drastically sand down the little side pegs before it would go into the well. Gear doors were an odd mix as the big main gear doors had positive attachment points on the gear legs while most everything else was a butt join. The retraction struts for the main gear were a bit of a mystery as there was no locating section on the main gear legs and the instructions were vague on where they fit.
 | CONCLUSIONS |
So, would this be worth picking up? There is no kit that is not worth building (well, almost no kit), and while this one wasn't bad, the others out there have to be better. I have not built the Hobby Boss kit, but have built the Hobbycraft one and I'd rather build that than this Smer kit. Now I'm not sure how accurate this one is compared to the others, but it certainly looks the part when one gets finished with it. It makes for a nice shelf model and for most of us, that is all we are seeking.
July 2016
Copyright ModelingMadness.com
Thanks to me for picking this one up.
If you would like your product reviewed fairly and fairly quickly, please contact the editor or see other details in the