Hobby Boss 1/72 MiG-15UTI
| KIT #: | 80262 |
| PRICE: | $9.99 SRP |
| DECALS: | Two option |
| REVIEWER: | Scott Van Aken |
| NOTES: | Quick Build Kit. 2008 issue |
| HISTORY |
We all are aware that the MiG-15 was the Soviet Union's first widely used jet fighter. Earlier jets were based on German designs and powered by German design engines. These were, for the most part, 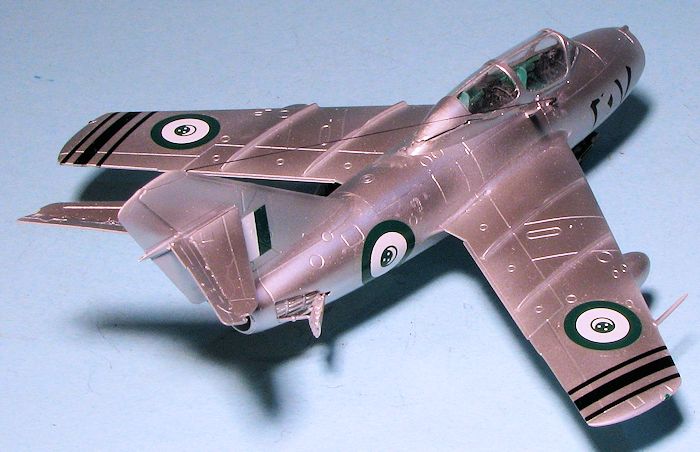 straight wing planes that provided the needed turbojet training, but were not capable enough to be seriously considered for mass production. The MiG-15 combined Soviet engineering with a British turbojet to produce a world-class fighter that was a considerable surprise to the West when met in combat over Korea.
However, it was quite a leap from piston power to turbojets for most pilots and the MiG was considered a relatively stable aircraft to fly. A trainer was needed and what better airframe to provide that than a proven design. Hence, the two seat MiG-15 UTI. As with its contemporary T-33 (also based on a then-current fighter, the F-80), the MiG-15 UTI (like the T-33) well outlasted its originator in unit service, some being used as Air Force trainers with some of the smaller nations up until the turn of the century, a remarkable life span. Because of their simplicity and ease of maintenance, many MiG-15 UTIs are still flying in the loving hands of various warbird owners.
| THE KIT |
Nothing really new in terms of the presentation of this kit aside from the fact that, unlike their small WWII kits, this one only has the major airframe bits in the plastic insert. Under it is a sprue that is common with the standard MiG-15 kit and includes wheels, landing gear, fuel tanks, gear doors and a number of other pieces. In fact, It would be fair to say that this kit has probably as many parts to it as a standard 1/72 kit of this aircraft.
 Where the Hobby Boss kit differs is that the fuselage is split horizontally instead of vertically. This provides the benefit of having the fin in one piece. The upper and lower fuselage halves are designed to fit with one half having an overlapping section that fits along side an indented section in the other half. This runs the length of the fuselage. Makes for a pretty clean fit, though it also puts a seam through the inside of the speed brake well. Alignment pins are large, but are not the 'snap fit' ones of older kits.
Interior is one piece with the control sticks and consoles molded into the tub. Control sticks are just that and have no bearing on the look of the real thing. I surmise that the consoles are equally as vague. Two instrument panels are provided, both totally devoid of features and there is no instrument decal to use in their place. Hobby Boss really needs to address this and provide at least a decal for these very visible panels.
The one-piece wing is trapped between fuselage halves, making seam clean-up more difficult for the area behind the wing. The wheel wells have surprising depth and detail, in fact, the whole kit's detailing is quite good, though perhaps a bit overstated for some. The speed brakes can be posed open and one is provided with a proper cannon and radar altimeter antennas. There are also optional fuel tanks for under the wings. The mounting holes are drilled for either. This aircraft was most often seen with the larger, non-conformal tanks. There is a separate nose and a nicely done splitter intake. You will need weight and 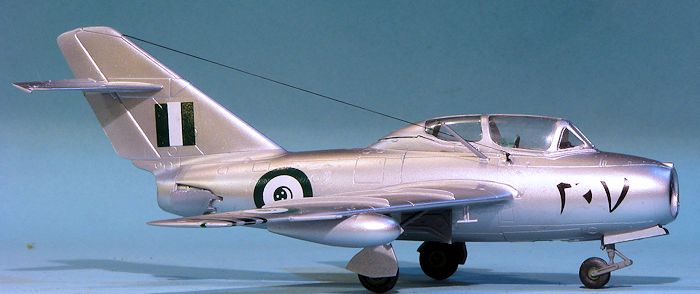 though no information is provided, there is room inside the splitter. A single piece canopy tops the whole thing.
Instructions are well done with one side of the sheet in full color and it includes the painting and decal guide. Several paint brands are provided in the reference, but the only one with all the colors shown is Gunze. The two options are for a Soviet or Iraqi camouflaged plane. The decals are well printed and very gloss. The Iraqi green looks to be too bright to my eyes. Fortunately, there are a number of aftermarket sheets that include UTI markings though you may have to do some searching to find them.
| CONSTRUCTION |
As you know, this is supposed to be an easy to assemble kit and while it is nicely detailed, it is a bit generic in some respects, particularly the cockpit. Since I had some upgrade parts specifically for this kit, I decided to go ahead and use them. Now I may have doomed the kit to never getting finished, but we will see. The sets I chose are all by Pavla. Two are specifically for the UTI version, those being the cockpit set C 72078 and the other upgrade set U72-102, which contains a new nose, nose gear doors, and 37mm c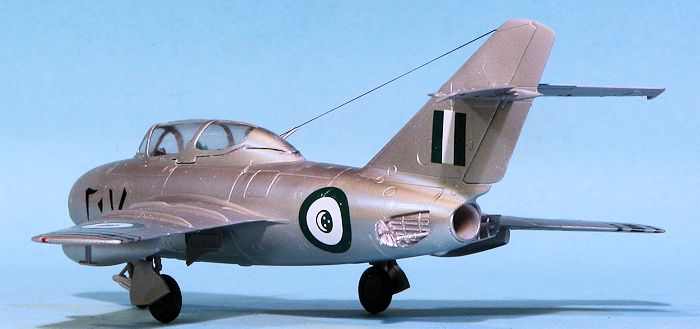 annon fairing. The other two are for both single and two seat versions and are U 72-99, main wheels, speed brakes and jet pipe as well as U 72-100 which are new horizontal tail planes that have separate elevators. These planes were sometimes seen seen on the ground with the elevators in the up position.
So I started this one by painting the cockpit bits and building up the cockpit. Note that the forward instrument panel has to butt up against the forward consoles. The instructions would have you attach it farther forward. I also took the opportunity to cut out the cockpit bits that would interfere, which was the aft cockpit section and the instrument panel anti-glare panel. This took a lot of sanding and fitting to get the resin cockpit to where it would properly fit, so expect to spend considerable time on it.
Once I got the cockpit in place, I glued the intake section to the lower fuselage, the new resin tailpipe to the lower half as well as the two windows that are there. I then started cramming in the weight. There is not a lot of space in which to put this so it was a simple matter of load up the weight, tape the major airframe bits and add more weight if needed.
 When all that was done, the upper and lower fuselage sections were glued together. I had to use super glue and accelerator on this as the halves gave me some trouble properly mating. Undoubtedly due to the nose weights and different cockpit. During this process one has to trap the one-piece wings between the upper and lower assembly. Fit is fairly good though there are somewhat large gaps between the wing and fuselage.
Rummaging through the Pavla resin bits, I attached the new intake piece as well as the horizontal stabilizers. I also cleaned up the kit canopy and checked fit. Once the alignment pins were removed, it showed it would fit with no issues. That was masked and set aside. I stink at vacuform canopies so was not going to use the one supplied in the Pavla set. Besides, the kit canopy is very clear so one can see the interior.
The elevators were then installed after opening up the hinge cutouts a bit. Next was the new canon fairing as the kit one has the wrong gas/shell ejector ports. The old one has to be sanded flat to install the new one. Since they were part of the package, I went with the open speed brakes. The Pavla replacements ha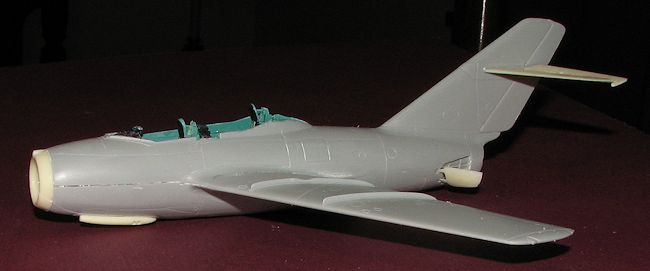 ve a lot more depth than those from the kit. When installing them open, I found that the kit actuating rods had to be trimmed back. I also noticed that the thin resin mounting points are quite flimsy so it will be interesting to see if they are easily broken. I have included a photo of the kit with most of the resin upgrade bits installed.
I then finished up the cockpit be drilling holes for the control sticks, gluing in them and the seats. I had to trim a small amount from the back of the rear seat to get the kit canopy to fit. This would not be an issue with the vac canopy as it is designed to be displayed open. Because I'm using the kit canopy, the resin brace for in between the two canopies was not used. The canopy was then masked and glued in place, followed by the rad alt and radio antennas. I also glued on the under wing fuel tanks.
| COLORS & MARKINGS |
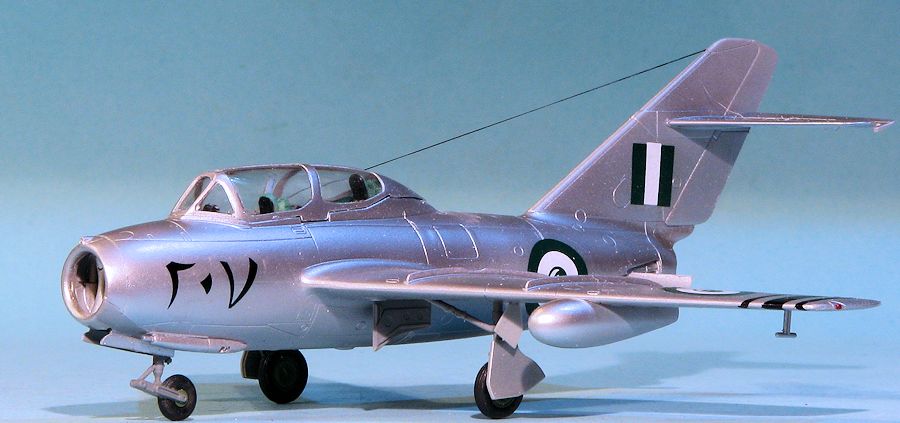
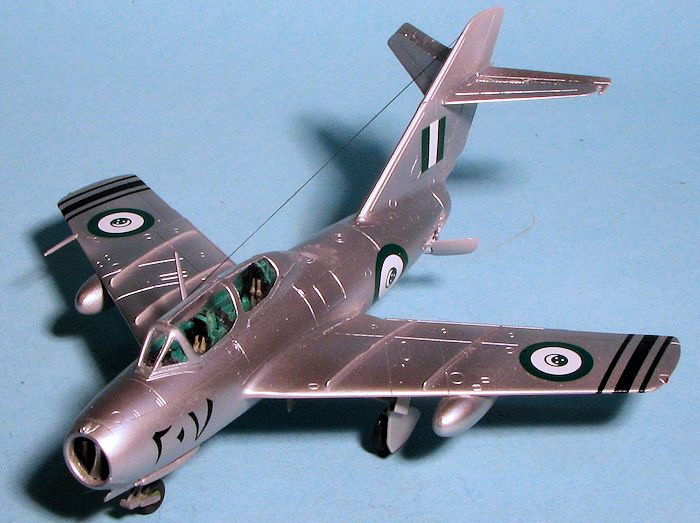
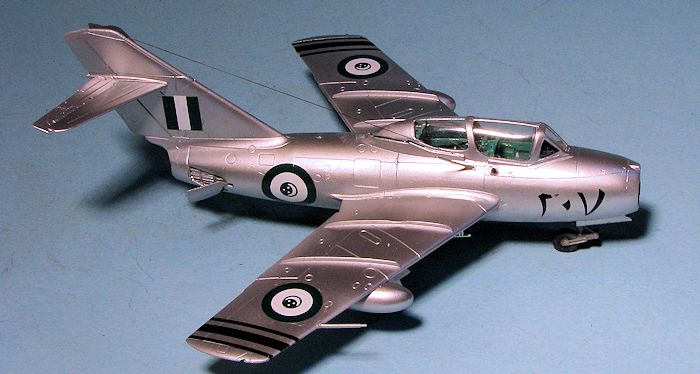
First off, the airframe was sprayed with Tamiya extra fine grey primer. This was followed by a bit of duralumin right in front of the gun and once masked off, the rest was sprayed with aluminum by Alclad II. 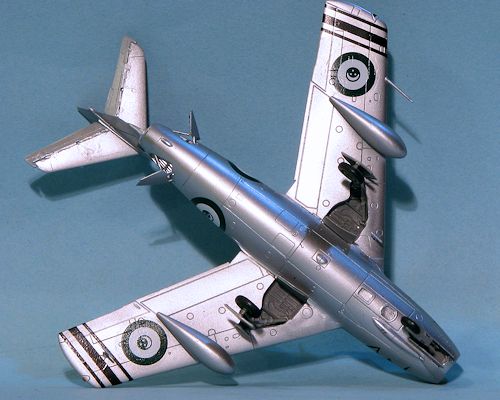 When dry, I then glued on the nose and main landing gear legs. These have a positive fit so were not a problem. For decals I decided to use more of the markings from Microscale 72-426. I had seen photos of Egyptian trainers with the black wing stripes used during the Suez war and this sheet had those. I started with the stripes and these were about 50% longer than the wings of the kit! Guess the old Airfix kit was really out of scale as the insignia are a bit oversize as well. Having the extra wasn't an issue and eventually I got all the markings on. I realize the nose number was from the single seat version, but it looks just fine on the twin seat version and it saved me from having to fork out funds for a decal sheet.
The last bits of the build were pretty straight forward. These were the gear doors as everything else had been attached prior to painting. The resin wheels needed to be drilled out a tad prior to installation, but that was it. I did a bit of detail stuff in terms of formation lights and the radio wire and that was it.
| CONCLUSIONS |
I do have to say that I enjoyed building this one, even if the canopy did not fit as well as I would have liked. The Pavla stuff was pretty much a breeze to use and adds not only a lot to the cockpit, but adds more detail to the rest of the model as well. Even in its stock form, the Hobby Boss kit is well worth whatever it is retailing for at this time and compares well in terms of detail with the Eduard kit right from the box.
March 2015
Thanks to me for the kit and to Pavla (http://www.pavlamodels.cz ) for the upgrade parts.
If you would like your product reviewed fairly and fairly quickly, please contactthe editor or see other details in the