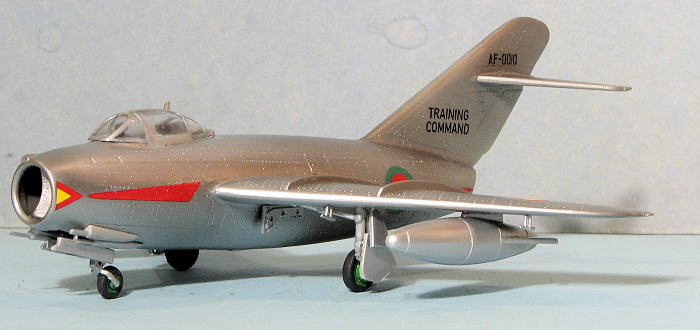
Hobbycraft 1/72 MiG-15 "International"
| KIT #: | HC 1313 |
| PRICE: | $1 is what I paid (Raffle) |
| DECALS: | Eight options |
| REVIEWER: | Scott Van Aken |
| NOTES: |

| HISTORY |
 Without a doubt, one of the biggest surprises to the Allies in Korea during 1951 was the introduction of the Mig-15. Here was an aircraft that in many ways, was superior to the best that the US could bring to bear; the F-86 Sabre. It had greater altitude limits, faster climbing, and more powerful armament. It was also subject to snaking at high speed and was generally flown by pilots with lesser skill than the average USAF fighter jock.When flown by an expert, the Mig-15 was able to exact quite a toll on US aircraft as seen by the now available information on Russian pilots who flew during that conflict. A rugged and simple to maintain aircraft, the Mig-15 was exported widely and in its two seat trainer variant, might still be found in some air forces.
| THE KIT |
I saw this kit on the shelf at a local Hobby Lobby during their half price sale and couldn't resist picking it up to see what was in the box. Frankly, I was lured in by the rather exotic decal selection shown on the rear of the box! I'm just a sucker for that kind of stuff! Anyway, once opening the slightly crunched box, a single sprue of light grey plastic awaited me. It looked vaguely familiar. Now I've not bought or built the Dragon Mig-15 kit, but this one sure looks a lot like that one.
There is oodles of depressed rivet detail and very finely done panel lines. The general surface of the plastic is quite matte and some parts display a touch of flash on them. The backside of some parts like the wing inserts, nose gear floor and instrument panel ar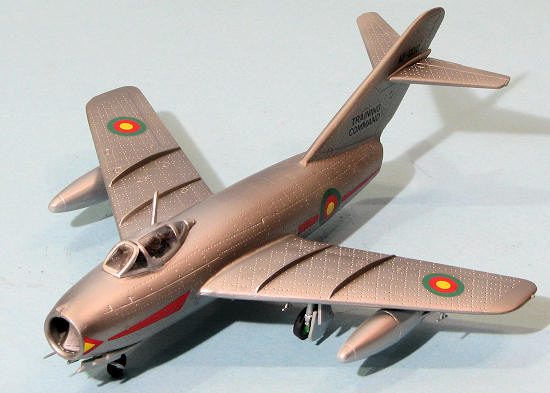 e extremely rough. The upper wings have some ejector pin towers that should be trimmed down before assembly. The under wing fuel tank shape looks a trifle off somehow and I'm also not sure that the intake opening is right, either, but that will have to wait until construction. I've heard that the Dragon kit has the wrong wing sweep, but frankly, unless it is grossly off, I won't spot it.
In terms of options, the only one I see is the choice to install the wing tanks and to have the canopy open or closed. The framework of the canopy is separate from the clear bit, an arrangement that I generally don't like, but I'll wait to see how it builds before passing judgment on it. Clear bits are thin enough and mine have a few stress lines in them so I won't be putting any pressure on them.
Hobbycraft instructions have been improving through the years and these are well done. No historical background but lots of color info and a nice color chart in several languages. No FS or any specific paint line correlation is given, just generic names. No indication of any needed nose weight is provided, but I can assure you that it will be needed. Judging from the look of the kit, you'll also need a blanking plate behind the intake to keep what weight you put in there from falling out!
The real attraction of the kit (at least for me) is the decal sheet. Hobbycraft decals are among some of the best in the industry and this one has a super choice. There are two North Korean aircraft, one with a large red nose (two insignia options are provided for this plane) and one that is in a camo scheme of tan, brown and green over light blue. The rest (as are the first two Korean planes) are in natural metal. A nice Chinese version with an all red tail section, then an Egyptian version from the 1956 war, and is a Tanzanian aircraft from 1968 with a yellow nose and rudder with a zebra on the nose. The last two are from Guinea and are identical with a large red cheat line down the side. Only the insignia is different with one from 1962 and another from later in 1966.
| CONSTRUCTION |
 This is obviously not one of Hobbycraft's home brew kits. It looks like something done by older Eastern European makers or possibly an initial attempt from a Korean company. However, as it appears a rather simple build (famous last words), on we go.
First step was with the cockpit. Yeah, I know that is a bit trite, but with airplane models it is pretty standard stuff. The interior and other inside bits were painted either a darkish grey or black. The wing tanks were cemented together and later the seams worked on. Back at the inside bits, I installed the nose gear well. Actually, it is just a roof, but adequate, considering the kit. Though the instructions imply an alignment area in the nose for this part, one does not exist. Since placement is a bit of guess work, I taped the fuselage halves together while gluing one side to the inner fuselage. This was a rather fiddly job, but really the best way to take care of the situation.
Meanwhile, I cemented the wing halves together. There is a lot of 'stuff' on the inside of the wing that needs to be sanded away to ensure a decent fit. I found a lot of this rough detritus on several parts so that adds to the work needed during the build. When I eventually got around to putting these onto the fuselage, I had to do some hacking and smoothing to get them to provide even a modicum of fit.
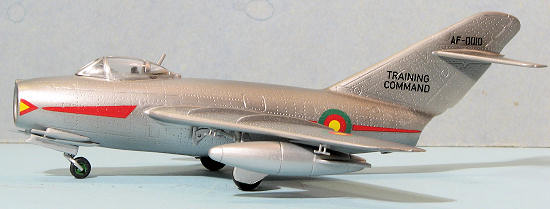 So returning to the fuselage, the interior was glued in place minus the seat. If you haven't figured it out, there was a lot of fussing about to get it to fit. I'm not sure who actually designed this kit, but they must have been drunk most of the time. The exhaust piece was cemented as best I could and the fuselage halves were glued together. After the usual filler, sand, repeat, I glued in some weight and then the intake splitter (which didn't fit worth a damn). The nose then was next. After more filler, sand, repeat, I glued on the wings (see the above paragraph). More filler (as a note, I generally use super glue for this unless the gap is huge as it doesn't shrink and is easy to scribe without the edges chipping). The tailplanes were then cleaned up and attached as well. At this time, I looked it over and while there are some egregious shape errors (I'm referring to the too wide rear fuselage more than anything else), it does look like a MiG-15.
| COLORS & MARKINGS |
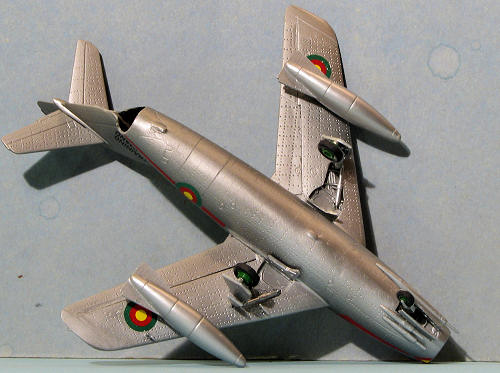 With a pretty much complete airframe, I taped off the cockpit and headed for the paint booth. A couple of coats of Alclad II dark aluminum were then sprayed on. Naturally, this showed a number of missed areas so those were given the attention they needed. I also took this opportunity to assemble and paint the drop tanks as well as paint the landing gear and doors.
Returning to the bench, the gear struts were cemented in place. Care is needed as fit is iffy. Then it was time to cement in place the canopy. Obviously the canopy is designed for another kit as it certainly didn't fit this one. The kit makers provide a HUGE area on which to glue the windscreen that is almost too narrow. The rear section is supposed to slide in a slot, but forget that. Hobbycraft provides a two piece movable canopy section with the glass fitting atop the frame, sort of like Tamiya's. However, the lower section has a flat bottom which is to fit atop a curved fuselage. Break out the grinder to take care of this. The clear part of this also doesn't fit particularly well. This whole construct does not come close to fitting on the fuselage and against the windscreen.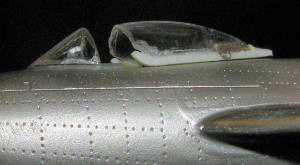
Once I glued in the seat, I then cemented the canopy section as best I could. Huge gaps. Out came the filler, which was liberally slathered on the lower forward join area. This was then sanded down and some clarity restored using Master Details' Alpha Precision Abrasives. This was then masked off.
Before more painting, I attached more bits. This included the cannon, some gear doors, the radio mast, and the rad alt antennas. These latter items only had one of the two mounting holes drilled and that one was well oversize. With those in place, more Alclad II.
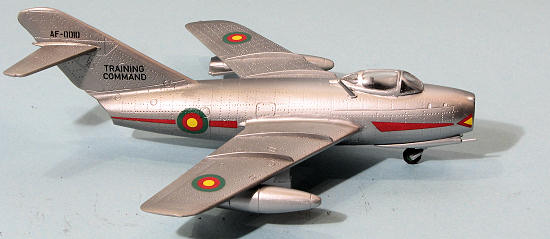
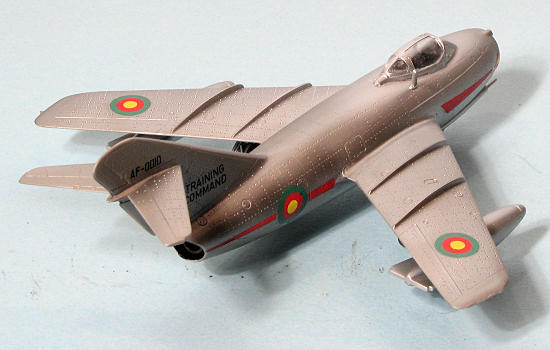
Then it was time for the best thing about this kit, the decals. I chose the early Guinea markings from 1962 as they just looked cool. Truth is that it was the markings options that drew me to the kit in the first place. The decals went on without a hitch and succumbed easily to Mr Mark Softer setting solution. No clear coat was applied.
| FINAL CONSTRUCTION |
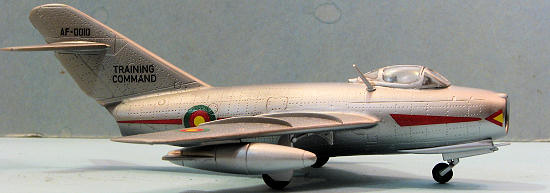 Not much more to apply really. Mainly the wheels and the few gear doors left to attach. The nose gear has a second part of the wheel fork to glue in place. I waited on this until the wheel was cemented onto the one molded into the strut. Good thing as the additional fork section is about a quarter of the thickness of the one already molded in place. The main wheels were glued onto the teeny nubs that are supposed to be axles. Finally, the drop tanks were glued on. These have holes already drilled into the wing which are not only about 6 times larger in diameter than the pins on the tank pylons, but are also farther apart than the pins on the pylons.
Once everything was glued and dry, the masking was taken from the clear bits, a bit of touch up painting done and I was finished.
| CONCLUSIONS |
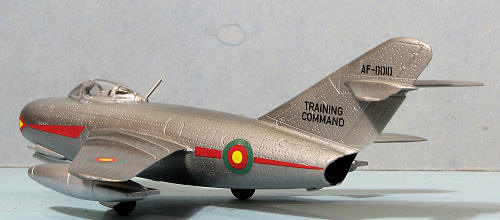 I cannot recommend it to anyone unless you want the decal sheet, which is actually quite nice. As poor as the original Airfix MiG-15 is, it is difficult to decide which is actually worse. Thankfully, we have a lot of very nice MiG-15s out there in 1/72 scale from Hobby Boss and the new Airfix version to choose from. Leave this one on the shelf to rot away. If you win one in a raffle, pawn it off on some unsuspecting kid. You have been warned.
July 2011
Thanks to me for grabbing this one. Nice decals.
If you would like your product reviewed fairly and fairly quickly, please contact the editor or see other details in the Note to Contributors.