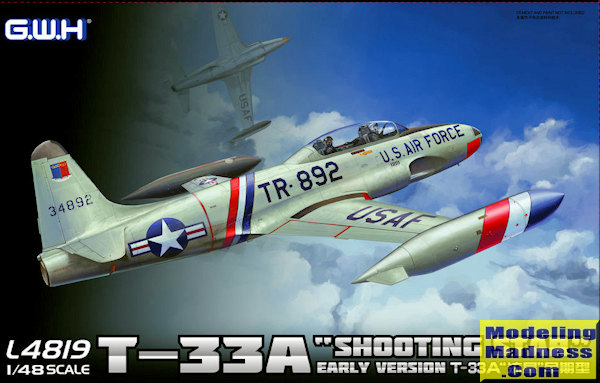
GWH 1/48 T-33 Shooting Star 'Early Version'
| KIT #: | L4819 |
| PRICE: | $ |
| DECALS: | Three options |
| REVIEWER: | Scott Van Aken |
| NOTES: | New tool kit (2016) |
| HISTORY |
The Lockheed T-33 Shooting Star is an American-built jet trainer aircraft. It was produced by Lockheed and made its first flight in 1948, piloted by Tony LeVier. The T-33 was developed from the Lockheed P-80/F-80 starting as TP-80C/TF-80C in development, then designated T-33A. It was used by the U.S. Navy initially as TO-2 then TV-2, and after 1962, T-33B. While there are no more military T-33s still in active service, the type is very popular with the jet warbird crowd. Many T-33s spent over 40 years on active service before being retired.
| THE KIT |
 The
T-33 has always been a somewhat popular subject. Regarding 1/48, in the 1960s we
had one from Hawk that was reissued several times by Testors. Twenty years or so
after that we had a much nicer version from Hobbycraft that was reboxed by
Academy. Nice as it was it was still lacking in the detail we expect today,
though it did not have the big shape issues of the Hawk kit. Now, GWH has
produced a thoroughly modern mold for the T-33 fan.
The
T-33 has always been a somewhat popular subject. Regarding 1/48, in the 1960s we
had one from Hawk that was reissued several times by Testors. Twenty years or so
after that we had a much nicer version from Hobbycraft that was reboxed by
Academy. Nice as it was it was still lacking in the detail we expect today,
though it did not have the big shape issues of the Hawk kit. Now, GWH has
produced a thoroughly modern mold for the T-33 fan.
If you have seen any GWH kit you know that the detailing is excellent. Nicely engraved panel lines and rivet detail, though nothing overboard. I know that some modelers don't like engraved rivets, but they are part and parcel of modern aircraft kits. Most of us do not mind at all. All the parts save the clear bits are in GWH's light grey plastic. Inspection of the parts showed no ejector pin marks that would be visible save perhaps one in the center piece of the main gear well. Gear doors and the face of the inside intake showed some light sink areas as I also found on the rudder that would have to be dealt with, but nothing major.
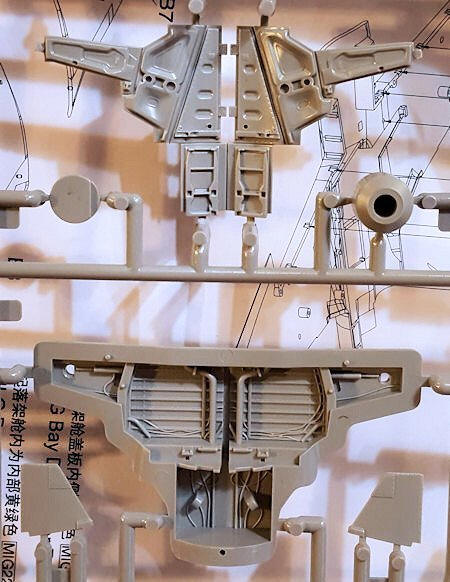 Reading through the instructions I saw a few areas
that made me raise my eyebrows. One is that one was supposed to completely build
up the landing gear prior to installing the gear wells into the appropriate
areas. This is, for me, just asking to break bits. It looks like the landing
gear can be installed after painting and that is what I'll do. Another is that
all the main gear doors, and this includes the speed brakes, are molded shut in
a single piece,
requiring the builder to cut them open. I've not seen this on a modern kit in
many years. To the right is a photo of the main gear/speed brake piece showing
the well piece for them just below. The two nose gear doors are also molded
together. I also question the order of parts installation in steps 3 and 4 as
it seems they want the fuselage together before adding the inner intake pieces.
When you see it, you'll see what I mean. Most modelers will be able to work
around this without any issues.
Reading through the instructions I saw a few areas
that made me raise my eyebrows. One is that one was supposed to completely build
up the landing gear prior to installing the gear wells into the appropriate
areas. This is, for me, just asking to break bits. It looks like the landing
gear can be installed after painting and that is what I'll do. Another is that
all the main gear doors, and this includes the speed brakes, are molded shut in
a single piece,
requiring the builder to cut them open. I've not seen this on a modern kit in
many years. To the right is a photo of the main gear/speed brake piece showing
the well piece for them just below. The two nose gear doors are also molded
together. I also question the order of parts installation in steps 3 and 4 as
it seems they want the fuselage together before adding the inner intake pieces.
When you see it, you'll see what I mean. Most modelers will be able to work
around this without any issues.
The kit's cockpit is really nicely done. The one piece tub has raised side console detail, though one could put decals on them if one so wishes. The seats are each seven pieces and while there is no belt detail, they look very nice. Something new to me was that the instrument panels are in two pieces. One is to trap an instrument decal between the two pieces. This will allow one to pre-paint the panel and then have glossy instrument faces. It will be interesting to see how this works out. Rudder pedals attach to the back of the instrument panels.
You are provided with pretty long intakes and while there is no engine compressor face, they are long enough to make it believable. There are a few ejector pin marks on the inside of the outer intake pieces so you may want to deal with those. There is a single exhaust tube that has a compressor piece attached to the back. The instructions show the nose gear well attached to the underside of the cockpit and an area to put weight, but no amount is suggested.
Wings are a single lower piece with two upper ones. To pose the flaps lowered, each lower wing side gets four actuating pieces. The main gear well is a single piece with a separate piece between the wells. There are holes in the lower wings for pylons, but none are supplied. I should also mention that the nose guns are plated over.
All the control surfaces are separate and while one almost never saw the flight control surfaces any way but neutral, the speed brakes were often down and one could also find the flaps lowered while on the ramp. Landing gear is nicely detailed and as I mentioned, the instructions want these installed rather early. I suggest leaving them off until later if you can. The underside of the aircraft has a number of small pieces that fit there including four little bumps in between the flaps. I have no idea what these are. Perhaps something to do with air flow. There is an interior piece for the canopy and the instructions show this in the open position. A nice ladder is provided as a single piece so no fiddly steps, though one will have some quality seam removal time ahead of them.
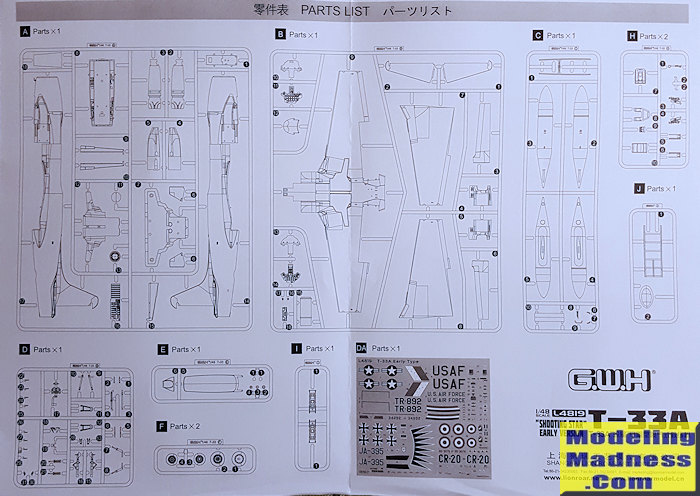
 The
instructions for the kit are in three different sheets. One is a map-like fold
out with the construction steps. I mentioned that some of the sequences did not
seem to follow a logical progression so keep that in mind. All the color
call-outs are with MIG or Gunze paints. The reference diagram for these paints
is on another large sheet that includes the sprues layout and the aircraft
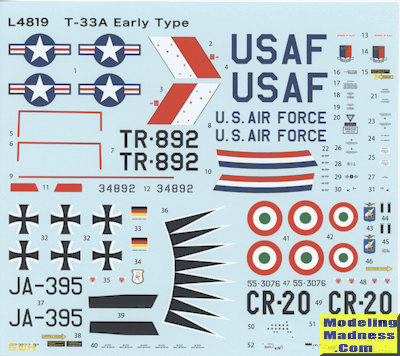
history. Then there is the full color painting diagram. All the planes are shown
in a base color of flat aluminum. The box art plane is with the 78th FG in
1957. Then there is a Bundeswaffe plane with a tulip nose from JG 71 in 1961.
The rear fuselage and outside of the tanks are shown as being red, but looking
at period photos, I'm willing to bet they are da-glo. Finally an Italian version
with a radar calibration unit. Most of this airframe is the standard orange in
which Italian trainers were painted for years. Having the center of the aircraft
in unpainted metal makes for an interesting scheme and a bit of a masking
challenge. The large decal sheet is nicely printed and should work just fine as
I've had positive experiences with GWH markings.
The
instructions for the kit are in three different sheets. One is a map-like fold
out with the construction steps. I mentioned that some of the sequences did not
seem to follow a logical progression so keep that in mind. All the color
call-outs are with MIG or Gunze paints. The reference diagram for these paints
is on another large sheet that includes the sprues layout and the aircraft
history. Then there is the full color painting diagram. All the planes are shown
in a base color of flat aluminum. The box art plane is with the 78th FG in
1957. Then there is a Bundeswaffe plane with a tulip nose from JG 71 in 1961.
The rear fuselage and outside of the tanks are shown as being red, but looking
at period photos, I'm willing to bet they are da-glo. Finally an Italian version
with a radar calibration unit. Most of this airframe is the standard orange in
which Italian trainers were painted for years. Having the center of the aircraft
in unpainted metal makes for an interesting scheme and a bit of a masking
challenge. The large decal sheet is nicely printed and should work just fine as
I've had positive experiences with GWH markings.
| CONCLUSIONS |
If you are a fan of this aircraft, you have to be excited about its release. I'm not sure what changes the 'late' version will offer aside from possibly wing pylons, but I can tell you that you cannot build a Canadair version out of this one without doing a bit of modification. If you don't like the markings provided, there have been a number of aftermarket sheets for 1/48 T-33s, and while those were sized for the Hobbycraft kit, they should, for the most part, also fit this one. I'm not sure when these are hitting the stores, but I encourage you to grab one.
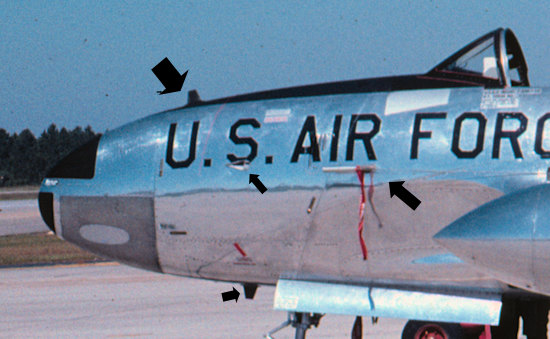 Late note: Allow me to add some clarification between the 'early' and 'late' T-33s. Thanks to info I got after posting this preview, I found out that the 'late' boxing will have some changes made to it that some (myself included) did not realize existed.
At some time in the T-33s life, the following changes were made, most of them having to do with the nose section. First of all, a small NACA vent was added to the doors to the gun bays. Secondly, the pitot was moved from under the nose to where there were two of them on either side of the fuselage halfway down the side and forward of the windscreen. I am also thinking that the upper and lower TACAN antennas were a later addition as well. What this means is that you will not be able to use many of the aftermarket decal sheets that are on the market and have an accurate kit. We will have to wait for our decal friends to start producing proper sheets for planes from the 1950s and early 1960s before any of these mods were made. Another interesting bit is that apparently not all planes were moded. I've photos of Navy T-33Bs in the early 1970s that still have all the 'early' features.
| REFERENCES |
http://en.wikipedia.org/wiki/T-33A_Shooting_Star
May 2016 Copyright ModelingMadness.com Thanks to Great Wall Hobbies for the preview kit. These
should be on store shelves soon. If you would like your product reviewed fairly and
fairly quickly, please
contact
the editor
or see other details in the
Note to
Contributors.