
Matchbox 1/72 Hunter FGA.9/T.7
KIT # | PK 117 |
PRICE: | $10.00 |
DECALS: | 92Sq for the T.7 & 58Sq for the FGA.9 |
REVIEW: | |
NOTES: | Aeroclub conversion: $6.00 |
|
HISTORY |
Hawker's beautiful Hunter is the epitome of what many think of as the classic jet fighter. Personally, I believe the F-86 fits that bill, but would get an argument from a lot of people on that. Only recently pulled out of service by the Swiss A.F., the Hunter still soldiers on in Chile and a few other countries around the world, mostly in secondary roles or as display aircraft. The RAF stopped flying them in squadron service in the early 1980s where they were used as weapons trainers. Some may still be on hand with the RAE, flying in test status.
|
THE KIT |
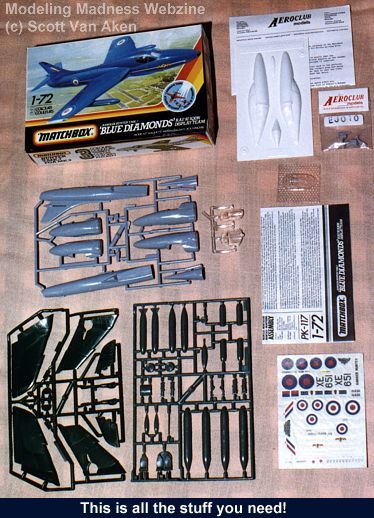
In 1/72 there have been a few Hunters produced. Airfix produced an early version without the 'dogtooth' in the wing followed later by an upgraded kit to FGA.9 standards. Although it has some profile problems in the nose area, it is the best mainline kit to be had in 1/72. Frog also produced an FGA.9, but it is even worse than the early Airfix kit. Back in 1976, Matchbox released its version of the FGA.9 and offered a T.7 as well in the same kit. It also suffers from shape problems, but the worst area is the nose section. Aeroclub has come to the rescue with vacuform replacement noses for both versions. The T.7 conversion was chosen for this article.
First off, what is provided by the kit? Well, if you remember, the kit was molded in 1976 (says so on the inside of the fuselage). This means trenches for panel lines, multiple colors of plastic for the sprues, nowheel well, intake or exhaust detail, and a cockpit that is basically just a hole. The kit was designed to be slapped together in an afternoon and to hold up to active play. However, it is the only 1/72 Hunter T.7 on the market and if you want a kit of one, this is what you have to use.
Secondly, why do a conversion of such a mediocre kit? The purpose of this is to introduce various easily done conversions to those who are leery of all the resin stuff out there or who want to try something simple for an initial attempt. This particular one is slightly more complicated than those using short run plastic bits in that it uses vacuformed plastic for the nose section. These conversions are a great way to introduce yourself to vacuformed plastic. There are very few parts and if you screw it up too badly, nothing is lost and you can still use the kit parts to complete the model. There is no hacking of the basic kit in any way to do this conversion.
Having said all that, you need to know that there are no other modification done to this kit. You can, of course, detail the devil out of it as it cries for an exhaust or boxed in wheel wells or a detailed cockpit. However, there are no A-R people on this side of the keyboard (today) so all will be kept very basic and simple.
|
CONSTRUCTION |
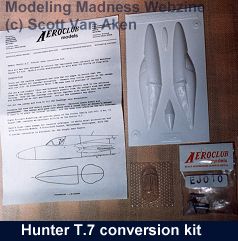
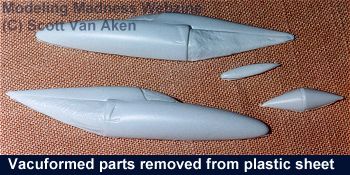
Well the first thing you will notice with the Aeroclub conversion are the vacuform parts. You get two forward fuselage halves, a gun blister and a new nose should you wish to do a T.8M, used to train Sea Harrier FRS.1 pilots how to use the radar system (hence the new nose). Now, to cut out vacuform parts, here is what you do. First, get a good, sharp soft lead pencil. Then draw around the parts to be removed from the backing sheet. Then, taking a hobby knife with a new, sharp blade (the pointed ones work best), score around the parts a couple of times, holding the knife at about a 45 degree angle. Then simply grab the piece and surrounding plastic and bend it. The plastic should snap right off, leaving the part in your hand. The reason for the 45 degree angle is that way you'll have less plastic to sand off.
Now, get a large, flat piece of 320 grit wet and dry sandpaper and, using double sided tape, stick it to a flat surface ( I use a piece of plexiglass). Then put the sandpaper under a slowly running faucet and, using a circular motion, slowly sand off the excess plastic on the bottom of the part. The reason for the pencil mark is that when you start to sand into it, stop. Now I will admit that this is the most trying part of a vacuform kit as it is so easy to take off too much plastic. The key is to stop a lot and check as well as to provide even pressure on the plastic while sanding. Small pieces can be held with a handle made of masking tape.
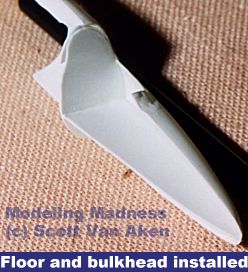 Once the pieces are sanded down enough, then take out the cockpit area; again by scribing it with your knife and snapping away the excess plastic. Next, using the templates given, cut out the floor and bulkhead from scrap plastic sheet. I tape the template to the back of the sheet and then hold it up to the light. Then I make a pencil drawing on the plastic sheet and cut it out using my knife. I'll warn you at this part, that the templates are overlarge and that you will have to file them back to get them to fit. Just remember that it is easier to take off material than to put it back on. Again the key is constant dry fitting. It will seem like a hassle at first, but with practice you'll get very good at it.
 Before fitting the floor and bulkhead into the nose section, it is time to think about the nose wheel well. You have two options. You can build a new one from plastic card, or you can cut one from the kit nose. I chose the kit nose option. I crudely cut out the nose well from the FGA.9 nose and glued it together. When dry, I trimmed it even more then fit it where it should be using the kit T.7 nose for a guide. Then I installed the floor and bulkead in one half; again trimming and dry fitting all the time. Once those are installed, paint a piece of plastic card flat black and when dry, attach the kit instrument panel decal. Then fit that into the cockpit. The cockpit should be flat black. Finally install short strips of plastic card around the nose section to act as tabs for the other half to glue to. Install weight in the nose to prevent tail sitting. Then, after the usual dry fitting and adjustments, glue the halves together. That all sounds very simple, and can be, but for me this meant a lot of filing and filling as I am not good with vacuformed plastic. Sorry that there aren't any photos of all this as something always happens and for some reason, I had the shutter speed at 2000 instead of 90; ergo no photos!
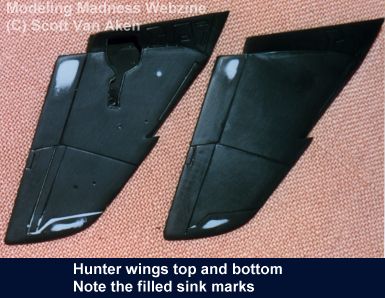
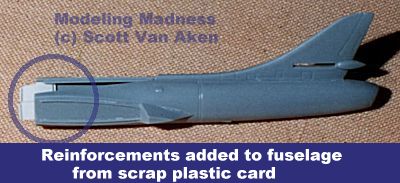
While things are drying on the new nose, you can start on the rest of the airframe. You will notice that this kit is blessed with a number of sink holes on the wings and fuselage that must be filled. Assembly of the wings and fuselage is very straightforward. I painted the fuselage sides and wing intake areas flat black, since there is no detail. After the fuselage is dry, I attached pieces of card to the forward section to provide mating surfaces for the new nose.
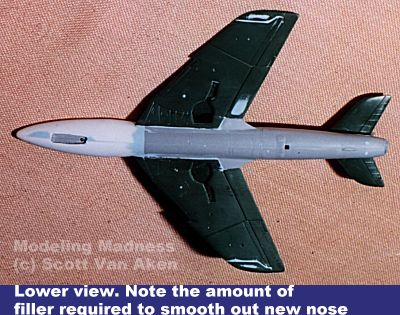
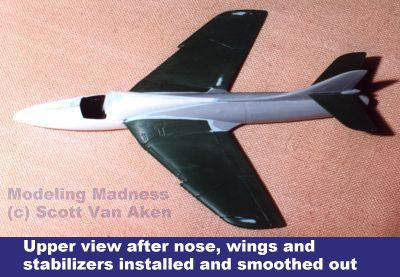
The nose was then attached and the ensuing attachment area smoothed out with several coats of putty. Then the wings were attached and again smoothed out with several coats of putty. Although this sounds very straightforward, it is actually several days worth of fiddling and puttying!! By this time, things are looking up. The tailplanes were then glued on and the result is a semi-complete airframe that actually starts to look like a twin-seat Hunter!

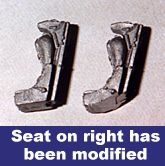
Next is outfitting the cockpit. The first thing I did was to carefully cut out the vacuform canopy. As with all vacuform parts, start by cutting it way too big and then gradually trimming it down to fit. Lucked out with this one and it actually looked like it was going to be a good fit! Next the seats were painted flat
black with green cushions and other bits and pieces highlighted with various paints. Ejection handles were made from pieces of brass wire and properly painted. After which it was carefully drybrushed with aluminum to show wear. Then they were tacked to the interior with a dab of superglue to see if the canopy would fit over them. As luck would have it, they were too tall! Well my options were to lower the floor or shorten the seats. I chose the easy way and filed the bottom off until the canopy fit reasonably well over them. The seats were then permanently glued and the canopy attached using 5-minute epoxy. The fit is not a great one, and I do wish that Aeroclub had included a spare so I could have tried again, but it is presentable, albeit no where near good enough for a contest.
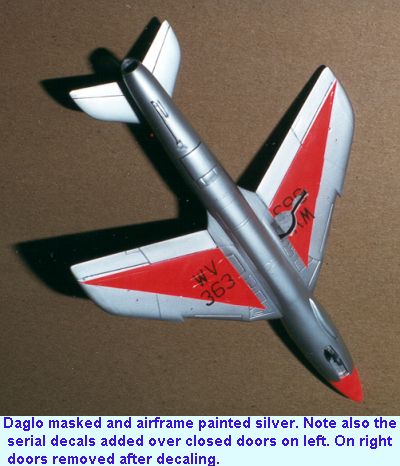
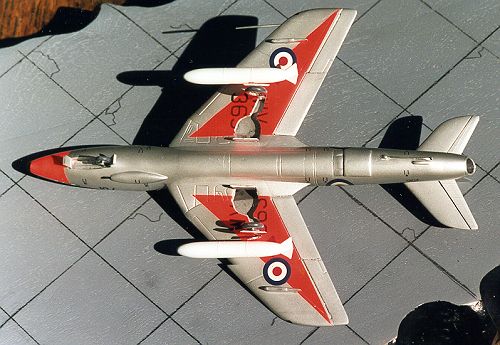
Next the main gear doors were attached in the closed position with white glue in preparation for painting and decaling. In addition to needing to be closed for the paint scheme, Hunter underwing serials covered the gear doors, so the doors have to be closed for decal application. After the decals are applied and dry, they will be cut and the doors removed. After the doors were closed, the gun bulge on the left side was attached and a barrel made of brass tubing installed. Then the canopy was masked and it was off to the paint shop. You'll note that no underwing pylons will be attached until after painting or they will interfere with the paint scheme.
|
PAINT & DECALS |
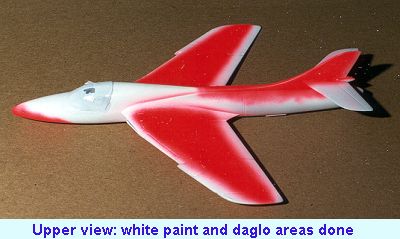
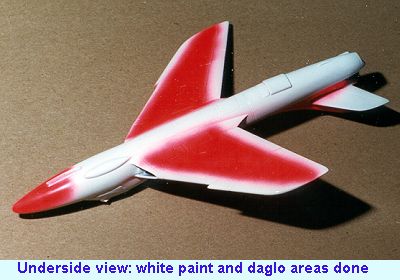
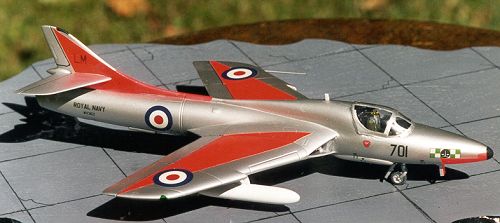
Painting is rather basic. First the entire airframe is painted gloss white, as were the short fuel tanks and inner pylons. This is to provide a nice base for theDay-Glo and the aluminum. After that is dry, the areas of Day-Glo were painted, and this includes the front nose gear door, but not the aft one. I used GunzeDay-Glo and it took a number of coats to get a more or less consistent finish. Once that was dry, the airframe was masked using lo-tak and scotch Magic tape. Then the entire airframe was painted with Testors AluminumMetallizer. Also the outer wing pylons were painted this color.
 Allowing ample time for all to dry, the masking was removed and attempts were made to touch up any overspray. In this process, I smudged a small area on the fin, which will be repaired at a later date. Next, the entire aircraft was sprayed with Future gloss floor wax. This is done to seal the metallizer and it also dulls it sufficiently to look like aluminum paint instead of bare metal. When that had dried it was time fordecaling.
This kit is a representation of a Hunter T.8 (the T.7 is the RAF version) from 764 Sq at Lossiemouth, Scotland in 1964. Modeldecal sheet #28 provided me with the markings I needed. Common markings such as insignia need to come from another source. Application of the decals was no problem, except for the roundels, and they reacted well to all setting solutions including the industrial strength Champ solution. Roundels were a problem. This is because theDay-Glo paint is such an intense color. I used Modeldecal roundels from sheet #47, but the paint still bled through the white areas. Eventually, I had to underlay each of the upper and lower wing roundels with two layers of white decal to get the bleedthrough down to a reasonable level. The next time, I will put the insignia down on the white undercoat, and spray theDay-Glo over it. When the Day-Glo is dry, lightly scribe around the edge of the insignia and remove it with a piece of tape leaving a white area for the finaldecaling. One lives and learns.
Speaking of learning, I had forgotten to add the arrestor hook and attachment point until after I had finished the painting. The tailhook came from an Aeroclub pack and I made the attachment point from a bit of scrap plastic. These were attached, the area sanded again and then repainted. RN Hunters never landed on a carrier deck; these tailhooks were for emergency use at shore stations.
After decaling, the gear doors were removed (note here; be sure to cut the decal with a sharp, new blade before removing the doors), the interiors painted aluminum, the gear legs and wheels installed, the doors reinstalled in the open position, pylons and drop tanks attached, and an antenna attached just aft of the canopy. Final bits of painting included the black nose and antenna fairing at the tip of the tail, both of which had to be done free-hand as there are no areas marked. There is no black anti-glare area on the nose of this particular Hunter as on some other RN Hunters. One final bit. While the daglo doesn't look too bright in these photos, I can guarantee that it is quite brilliant, especially in direct sunlight.
|
CONCLUSIONS |
Finally the aircraft is complete. Looking back on this conversion, it was not as easy as it seemed at first, but not impossible. About halfway through, I was having second thoughts about this being good for an initial conversion attempt, but on reflection, it does give one the opportunity to try a number of different modeling skills. The end result is an unusual model that will look fine on the shelf at home and be a good conversation piece for the club meetings.
|
REFERENCES |
'Hunter Squadrons' by Richard Ward, 1985
Modeldecal Sheet #28, 1975
Copyright ModelingMadness.com. All rights reserved. No reproduction in part or in whole without express permission from the editor.
Back to Reviews Page 2023