Valom1/72 Dassault Ouragan
| KIT #: | 72060 |
| PRICE: | $ |
| DECALS: | Two options |
| REVIEWER: | Scott Van Aken |
| NOTES: | Short run with photo etch fret and resin seat |

| HISTORY |
As citizens of an occupied country, the French were not able to contribute significantly to the great strides made in aircraft design made duringWorld War II. After the war, aviation designerMarcel Dassault was eager to re-establish the aviation industry with an all-French jet fighter, which was outlined in 1947. The government response to the proposal was positive and prototype construction began soon after the design was finalized.
Detailed design work on the new aircraft, which was given the designation M.D. (Marcel Dassault) 450, began in October 1947, with construction beginning on 7 April 1948 at Dassault's factory inSaint-Cloud. A French government contract for three prototypes followed on 7 December 1947. The first Ouragan fighter flew on 28 February 1949 withKostia Rozanoff at the controls. The M.D.450-01 prototype lackedpressurization, armament, and the distinctive wingtip fuel tanks. Powered by aRolls-Royce 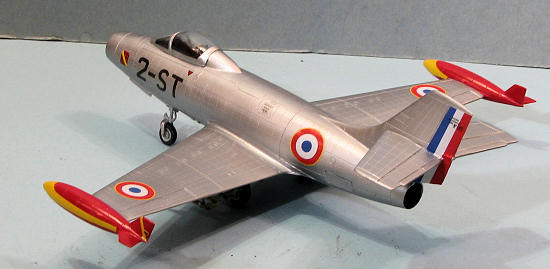 Nene 102centrifugal-flow jet engine generating 22.27 kN (2,270 kp/5,000 lbf) of thrust, the aircraft reached a top speed of 980 km/h (529 knots, 609 mph) and initial climb rate of 43 m/s (8,465 ft/min) in service trials in 1949. The 450 liter (118.9 US gal) wingtip tanks that would become the indelible feature of all Ouragans first appeared in December 1949. The pressurized second prototype, M.D.450-02, climbed to 15,000 m (49,213 ft), while the third prototype, M.D.450-03, was powered by aHispano-Suiza-licensed Nene 104 was used in weapons trials with 15 mm and later 20 mm cannon.
In 31 August 1949,French Air Force ordered 15 pre-production aircraft (later reduced to 12), which were eventually used for evaluation of various engines (includingSNECMA Atar), armament schemes, and payloads. The contract was signed on 15 December 1949. These aircraft were to be produced at Dassault's plants outside Paris. On 31 August 1950, Dassault received an order for 150 production Ouragans, with an additional 200 ordered in the following years.
Four production aircraft modified for rough-field operation with the two-wheel main landing gear with low-pressure tires retracting into a fairing added under the wing roots, and a brake parachute. The configuration was intended for operations inAlgeria, and the nickname came from the Arab word "baroud," meaning "battle." First flight 24 February 1954. Despite good performance, the project was abandoned in 1958 with two aircraft converted back to standard Ouragans.
In contrast to France and India, the Israeli Air Force was an enthusiastic Ouragan user. Seeking to augment its jet aircraft force of British Gloster Meteors, IAF initially considered French Dassault Mystère IIC and Canadian-built F-86 Sabre Mk.6 fighters. Due to development problems with the Mystère and a Canadian embargo on the Sabres, the order was changed to Mystère IVAs, with a batch of Ouragans purchased as a stop-gap measure. By 1955, the IAF had received at least 75 aircraft, comprising a mix of newly-built and retired French Air Force examples.
 Israeli Ouragans entered combat on 12 April 1956, shooting down an Egyptian Vampire. At the onset of the Suez Crisis on 29 October 1956, Ouragans shot down an additional four Vampires. The two documented encounters with Soviet Mikoyan-Gurevich MiG-15 fighters (also powered by the Nene engine but with a more modern swept wing) ended with one Ouragan surviving several 37 mm (1.46 in) cannon hits to fly the next day and one MiG-15 being heavily damaged after it entered a turning dogfight with the Ouragans. The poor training of the Egyptian pilots who were consistently unable to realize their advantage in numbers as well as the MiG-15's speed and climb characteristics helped Ouragans to survive despite their inferior performance. On 31 October, a pair of Ouragans armed with rockets strafed the Egyptian destroyer Ibrahim el Awal (ex-HMS Mendip), resulting in the capture of the ship.
The Ouragans were relegated to advanced training shortly after the Suez Crisis, although they saw more combat in the 1967 Six-Day War. In 1975, the IAF sold 18 Ouragans to El Salvador, where they remained in service until the late 1980s.
| THE KIT |
This one is quite typical of the newer Valom kits in that the surface detailing is superb (assuming you like the 'pock mark rivet' look) with the moldings nice and crisp. Only a small amount of flash was noted on the single major sprue of injected plastic. There are two smaller sprues carrying weapons along with a somewhat thick clear one-piece canopy. Resin is used for the bang seat and there is a small photo etch fret for some interior details (such as the main instrument panel and its accompanying acetate instrument sheet), and the bands around the rockets.
 The interior is well appointed and includes nicely done sidewall planes. There are etched belts for the resin seat. The kit has a well done nose intake section with a separate lower gun panel. The wheel wells are separate items as are the wing tip tanks. Landing gear are nicely molded and the kit comes with weapons for all six of the wing pylons. On each wing, the central of the three is for the slick bomb while the other two are for stacked rockets. This is a basic early jet so no oodles of options or other bits are included.
Instructions are well done with two folded sheets. The outer sheet is in full color and includes your paint reference chart and painting/markings guide. The construction steps include color information as well as Valom's usual very large parts/color blocks. Two sets of markings are included. First is the box art plane of the 113 Squadron in the later camouflage scheme of light earth, blue-grey over light blue. It includes the unit's huge shark mouth and a unit or personal badge. The second option is a bare metal version from EC 2/4 'Lafayette' that is currently in the French AF museum. For this option the modeler will need to paint the red flashes and stripes on the tip tanks. Decals are superbly printed by Boaagency and show no registration errors.
| CONSTRUCTION |
Not sure why I chose this one to build. I had just finished a plank winged 50's jet with an F-84 when this one said "build me please" and I listened to it.
Valom kits have all had superb exterior detail and are molded in a somewhat thick and somewhat soft plastic. This has two benefits. One is that you can sand the dickens out of it if you need to and the softness means it is easy to replace lost detail and easy to polish. I expect these sorts of kits to have a few bumps in the road when it comes to parts fit, but having built a bunch of short run kits in my life, I was prepared for what might come.
On this one, I started by assembling the wings and the tip tanks. Be sure to have a 'rivet replacement' tool as I found you'll need one when you sand down the detail. The center wheel well insert needs to have some trimming done to fit. Also be sure not to sand too much on the tank attachment area or you'll end up like me and need filler. Many of the parts were pre-painted while on the sprue. The cockpit bits are basically black so o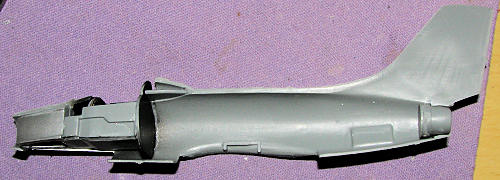 nce those were painted, they were drybrushed with some white to bring out the detail. The instrument panel is a three piece sandwich if one wants to use the etched panel face. There is a separate intake section that has very little room to put weight so finding spots for nose weight may well be an issue on this one.
Getting it to fit into the fuselage half took a bit of work, but I was prepared for that. There are some placement indicators that will help out in this regard. I eventually glued in the intake piece, cockpit tub and the small back piece behind the cockpit as well as the exhaust section. The fuselage halves were then glued in sections, using super glue. The fit isn't the best, but then it isn't all that bad either. The worst gap I had was the 'hump' behind the cockpit. I also found the intake lower section to be a bit troublesome. Make sure that the parts are lined up between right and left sides or you'll have panel line mismatches. Once glued, I started in the usual filler, sanding, replace lost detail sequence.
When the fuselage halves were together, I took a goodly sized piece of lead, squished it with pliers, and cemented it to the bulkhead behind the cockpit. This along with some small pieces in the intake splitter section, were enough to keep the finished model on its nose; barely. THe lower gun/nose well section was then cemented in place. It is a bit too wide so the usual sanding and filler were needed.
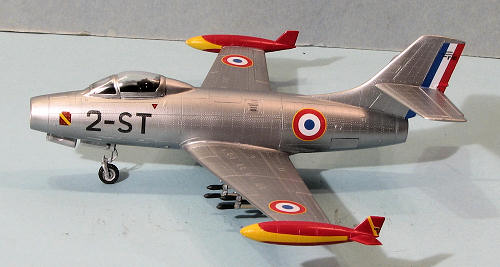 Once I was pleased with how the fuselage turned out, I glued the tail planes in place. This turned out just fine once I sanded the mating surface. I pre-painted the wings with aluminum, masked them off and painted the tip tanks white, then red. Once dry, the wings were attached to the fuselage. The fuselage is a bit narrow so there is a gap you'll need to fill. I used super glue. I tried to install a spreader bar, but the opening in the lower fuselage is rather short (no 'stretch') so I was not successful when trying that. More sanding and filler.
Since the kit was going to be overall aluminum, I continued to attach bits. This included the landing gear legs and the shorter gear doors. The nose gear has a separate nose wheel fork with no real positive attachment point. One just has to sand the mating surfaces flat and apply glue. I also glued the speed brakes in the closed position. Valom made these brakes as flat pieces, when they should be curved to match the fuselage contours. I also found that one speed brake well was smaller than the other so one door had to be sanded down to fit. Returning for a moment to the landing gear, Valom provides etched brass oleo scissors, but I just left the plastic ones in place. When it came time to attach the masked canopy, I found it to be a tad large for the opening in length. This was cured by some sanding on both the fuselage and the canopy. It is also a bit tall in the front, but I did not adjust that for fear of making a mess. I should mention that I installed the bang seat prior to putting on the canopy. I had to sand away most of the back of the seat rocket rail to get it to fit.
| COLORS & MARKINGS |
Though the box art touts a very nice shark mouth IAF plane, I wanted to do a French one. The second option is a museum plane and I didn't want to do one of those. Fortunately, I have ModelDecal sheet #68 from 1983 that provides a goodly number of Ouragan options. Typical of Modeldecal sheets, they offer pretty much only the unique markings, requiring insignia and codes to 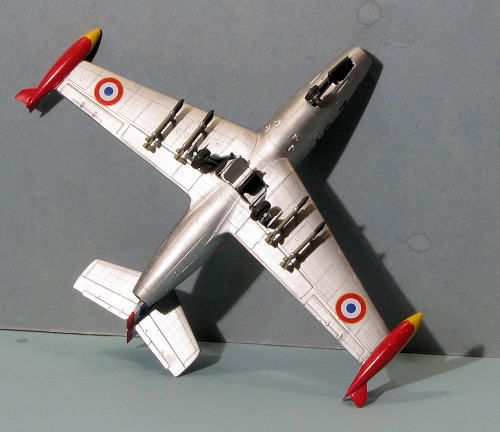 be obtained from one of their other sheets. It also means they want you to paint the rudder stripes.
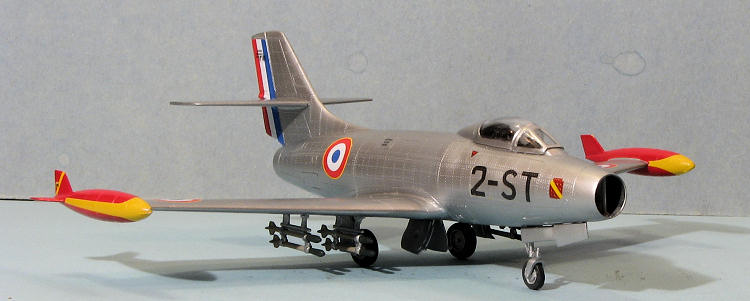
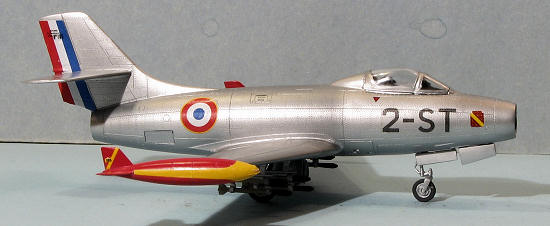
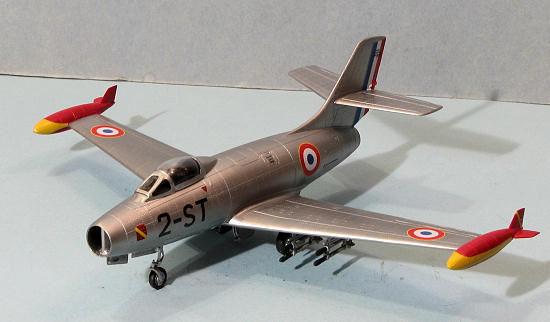
Anyway, I picked a particular scheme which was an EC 2/2 plane that had red tip tanks, hence the earlier wing painting option. These red tanks were masked off and the rest of the airframe was painted Alclad II aluminum. Though the instructions state interior green for the wells and inner gear doors, the Modeldecal sheet states these were unpainted aluminum and I believe Modeldecal first.
Once the paint was dry (I give it overnight though I know it is good to go within an hour), I started on the decals. For the insignia and some of the common data markings, I used the Valom decals. These are thin, opaque enough to work well and work well with setting solutions. According to the drawing, the roundels are a bit too large. Valom also printed the rudder stripe as one piece, perhaps forgetting that the tail planes prevent a single decal from being used. So I had to cut mine. Good thing as they'd have been too short if one piece. I still had to cut bits from the IAF sheet to patch the red parts of the rudder stripe. The Modeldecal parts are not quite as crisply done, but they also worked quite well. The tank has yellow bits on them and I have to say that the parts that wrapped around the front gave me fits. No matter how I sliced it, I got wrinkles. Even my killer setting solutions seemed to have no effect in flattening things out.
| FINAL CONSTRUCTION |
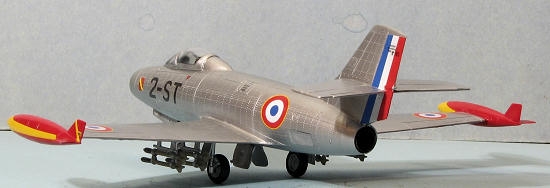 Not much left, really, I glued on the wheels as that was pretty well it and was going to call it quits when I decided to add some under wing armament. I was going to leave the wings bare as the instructions were not very good when it came to placement of the racks. There was a head on view showing the rocket and bombs so I knew about how far out on the wing the racks would go. However, there was no placement information on how far forward or aft these actually fit.
I then decided to just fit the rockets as I like these types of rockets. This meant some pretty detailed clean-up as the rockets were separate as were the racks. I guesstimated on where the racks would fit, and after painting them, they were glued in place. Then the rockets were painted with grey bodies, dark green warheads and silver attachment brackets. These were then glued in place. Masking pulled from the canopy and a bit of touch up to finish what turned into a pretty nice model.
| CONCLUSIONS |
Valom's short run kits do take a bit more work than some others, but the end result is a very nice looking model of France's first full service jet fighter. It is a kit that anyone with some short run kit experience can easily build.
| REFERENCES |
http://en.wikipedia.org/wiki/Dassault_Ouragan
August 2011
Copyright ModelingMadness.com. All rights reserved. No
reproduction in part or in whole without express permission from the editor.
If you would like your product reviewed fairly and fairly quickly, please
contact the editor or see other details in the