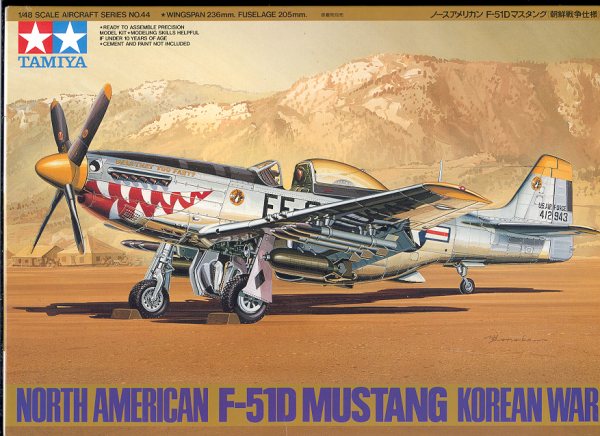
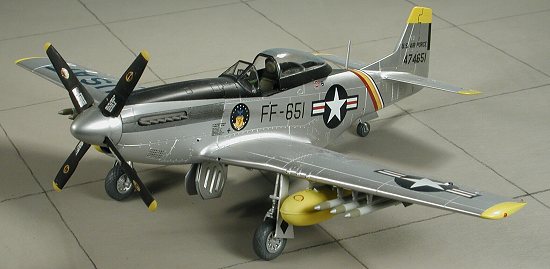
Tamiya 1/48 F-51D Mustang
|
KIT # |
61044 |
|
PRICE: |
$26.00 |
|
DECALS: |
Three aircraft |
|
REVIEWER : |
|
|
NOTES: |
` |
|
BACKGROUND |
For a short history and a look at what comes in the box, visit the preview.
|
CONSTRUCTION |
 Let's start with the cockpit. The first thing done was to have
the interior painted interior green. This includes the seat and control stick as
well as the cockpit walls. The armor plating, instrument panel and the radio
compartment was painted flat black along with that area inside the fuselage.
Then some of the sidewall detail was picked out with flat black. The cockpit was
built up with no real problems. Make sure you do not install the radiator in
backwards. It is easy to do. The grille area should point aft when done. This
was painted flat black as well. Then all of these parts were dry-brushed with
aluminum to bring out detail. The final bit was a black wash using part of the
Rustall system.
Let's start with the cockpit. The first thing done was to have
the interior painted interior green. This includes the seat and control stick as
well as the cockpit walls. The armor plating, instrument panel and the radio
compartment was painted flat black along with that area inside the fuselage.
Then some of the sidewall detail was picked out with flat black. The cockpit was
built up with no real problems. Make sure you do not install the radiator in
backwards. It is easy to do. The grille area should point aft when done. This
was painted flat black as well. Then all of these parts were dry-brushed with
aluminum to bring out detail. The final bit was a black wash using part of the
Rustall system.
 At
this time, the interior was trapped between the fuselage halves. Fit of this an
most other parts was excellent, though there was a small amount of seam filling
needed in a few parts. Then the nose inlet was glued in place and smoothed out
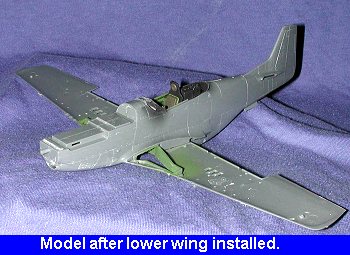
with sandpaper to match the surrounding area. Tamiya has you glue the lower wing
in place first. This is something I have rarely done, but decided to go with the
flow and did so after installing the upper wheel well insert. Then the each
upper wing was glued in place. Fit is very good indeed with only a trace of
filler needed on the front right side. Before gluing the upper wing, I made sure
that the rocket stub and pylon holes were opened up.
At
this time, the interior was trapped between the fuselage halves. Fit of this an
most other parts was excellent, though there was a small amount of seam filling
needed in a few parts. Then the nose inlet was glued in place and smoothed out
with sandpaper to match the surrounding area. Tamiya has you glue the lower wing
in place first. This is something I have rarely done, but decided to go with the
flow and did so after installing the upper wheel well insert. Then the each
upper wing was glued in place. Fit is very good indeed with only a trace of
filler needed on the front right side. Before gluing the upper wing, I made sure
that the rocket stub and pylon holes were opened up.
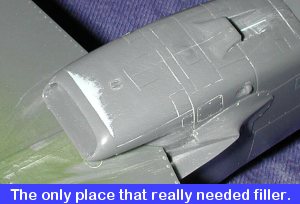 With the
wing glued in place, the next step was to glue on the lower radiator inlet and
the exhaust door. Since the kit would be a representation of the plane on the
ground, the door was glued in the lowered position. Filler was needed on the
lower inlet and has been the poorest fitting part so far.
With the
wing glued in place, the next step was to glue on the lower radiator inlet and
the exhaust door. Since the kit would be a representation of the plane on the
ground, the door was glued in the lowered position. Filler was needed on the
lower inlet and has been the poorest fitting part so far.
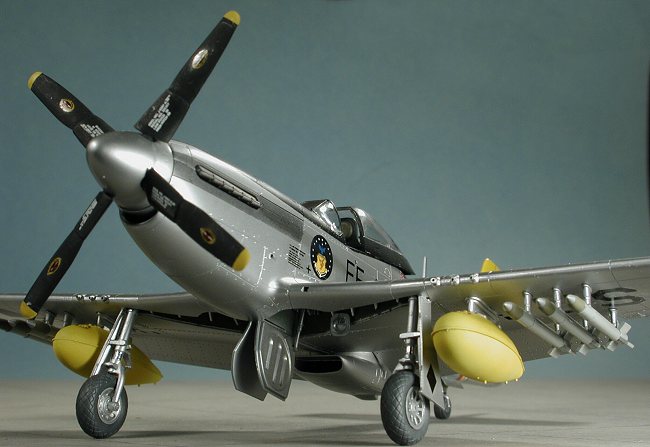
The next step was a bit of research. You have a choice of exhaust and of props with this boxing. I had chosen to do one of the kit decal schemes so went searching for a photo of the real plane. This was found in the reference and showed the plane to have a cuffed prop and the fairing over the exhaust, just like a WWII-era Mustang. As an aside, the series of books such as that used in the reference are superb if you have any interest at all in the Korean War.
 With those details worked out, the horizontal stabilizers were
glued in place. Again, great fit. Then the canopy parts were glued on. I managed
to tear the forward windscreen side so this won't be a contest kit! I also do
not like the way the canopy fits. The separate glass and frame just means that
you'll have a cut mark on the clear part as you cannot really cleanly remove the
clear bits. At least with the frame as part of the clear bit, you can fill the
glitch with putty or superglue and sand it smooth. Can't do that with the clear
bits done the way Tamiya has designed them. Once the bits were glued on they
were masked and the canopy tacked in place. Then the upper engine cowling was
tacked in place and the kit was taken to the paint shop.
With those details worked out, the horizontal stabilizers were
glued in place. Again, great fit. Then the canopy parts were glued on. I managed
to tear the forward windscreen side so this won't be a contest kit! I also do
not like the way the canopy fits. The separate glass and frame just means that
you'll have a cut mark on the clear part as you cannot really cleanly remove the
clear bits. At least with the frame as part of the clear bit, you can fill the
glitch with putty or superglue and sand it smooth. Can't do that with the clear
bits done the way Tamiya has designed them. Once the bits were glued on they
were masked and the canopy tacked in place. Then the upper engine cowling was
tacked in place and the kit was taken to the paint shop.
|
PAINT & DECALS |
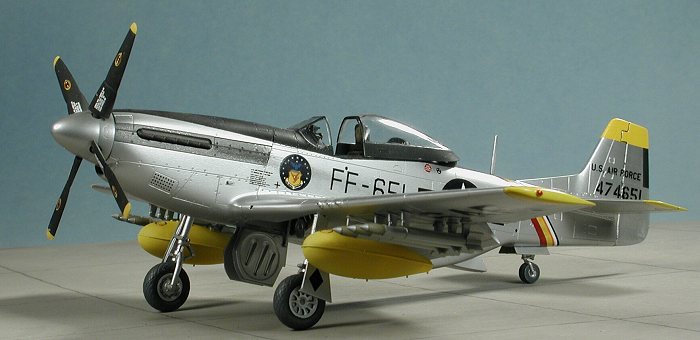
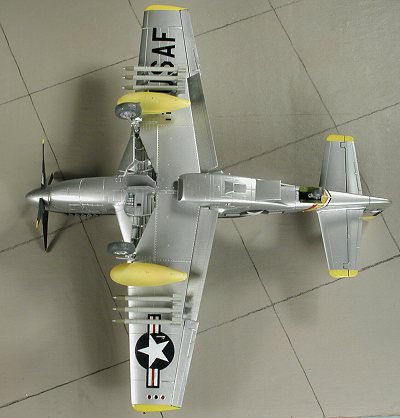
Since this was to be a metallic finish, I sprayed all of the parts that would be getting the aluminum with light grey. This would provide a smooth backing for the metallic. The parts were then left to dry/cure for several days before the metallic paint was applied. The kit was then sprayed with Testors aluminum Metalizer. I didn't use Alclad II on this kit as I wanted the dulled aluminum paint look for the top of the wings and a more weathered look for the rest of the aircraft. When dry, a coat of clear gloss acrylic was sprayed on to dull the metallic look even more. Then the yellow tip areas were painted with Tamiya yellow acrylic
I really wanted to do the wing
commander's aircraft with the multi-colored tail band. However, when I placed
the decal in the water, it shattered. I then cut another decal and it shattered
as well. Hmm. Going to another F-51D kit I had, I cut off a decal from its sheet
and the same thing happened (see image). Even coating the decals with Microscale
decal film had no effect. The sheet was sent in to Tamiya America for a
replacement, and three weeks later, a new sheet a
really wanted to do the wing
commander's aircraft with the multi-colored tail band. However, when I placed
the decal in the water, it shattered. I then cut another decal and it shattered
as well. Hmm. Going to another F-51D kit I had, I cut off a decal from its sheet
and the same thing happened (see image). Even coating the decals with Microscale
decal film had no effect. The sheet was sent in to Tamiya America for a
replacement, and three weeks later, a new sheet a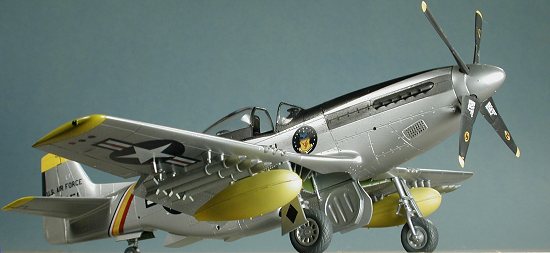 rrived. With much trepidation,
I cut out the fuselage band and dipped it in warm water. After a prolonged
period, it finally came free of the backing, but started to tear. I managed to
get it in place along with the other decals on the sheet, but all of them were
prone to tearing and had to be carefully handled. Unfortunately, I totally
buggered a few of them and had to rob similar ones from other sheets. I'd recommend an aftermarket
sheet for this kit as it seems there was some sort of problem with the Scalemaster decals in this kit. Even when dry, they did not conform well to
anything but a flat surface. Face it, these decals are pieces of crapola and
basically ruined my kit. Trying to get them off will mean a total repaint and so
I suffered with them as they were and continued the build.
rrived. With much trepidation,
I cut out the fuselage band and dipped it in warm water. After a prolonged
period, it finally came free of the backing, but started to tear. I managed to
get it in place along with the other decals on the sheet, but all of them were
prone to tearing and had to be carefully handled. Unfortunately, I totally
buggered a few of them and had to rob similar ones from other sheets. I'd recommend an aftermarket
sheet for this kit as it seems there was some sort of problem with the Scalemaster decals in this kit. Even when dry, they did not conform well to
anything but a flat surface. Face it, these decals are pieces of crapola and
basically ruined my kit. Trying to get them off will mean a total repaint and so
I suffered with them as they were and continued the build.
|
LAST STEPS |
 Leaving things set for a few days so I didn't trash the kit in anger over the
decals, it was time to add the final bits. First off were the engine exhausts.
These had been painted Burnt Iron and were then glued in place. The upper engine
cover was such a tight fit that it was pressed into place without gluing. On the
underside, the inner gear doors and their actuating arms were glued in place
with no trouble. Then it was on to the wing pitot tube and the under wing
rockets. I was going to use the drop tanks on this kit, so painted them yellow.
Often old drop tanks were filled with napalm. Those that were so used were
painted yellow to differentiate them from normal tanks. Again, fit was very
good. You'll find that painting the rockets will be 'fun' as they require
several different colors. Take your time and they'll look great.
Leaving things set for a few days so I didn't trash the kit in anger over the
decals, it was time to add the final bits. First off were the engine exhausts.
These had been painted Burnt Iron and were then glued in place. The upper engine
cover was such a tight fit that it was pressed into place without gluing. On the
underside, the inner gear doors and their actuating arms were glued in place
with no trouble. Then it was on to the wing pitot tube and the under wing
rockets. I was going to use the drop tanks on this kit, so painted them yellow.
Often old drop tanks were filled with napalm. Those that were so used were
painted yellow to differentiate them from normal tanks. Again, fit was very
good. You'll find that painting the rockets will be 'fun' as they require
several different colors. Take your time and they'll look great.
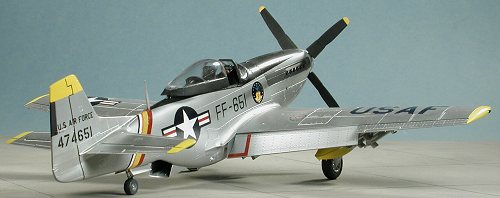
The final parts were the attachment of the prop, installation of the gun sight (which I had forgotten when doing the cockpit), and gluing on the canopy. Then the masking was removed. Final bits of painting were done with the wing tip lights and the three colored lights under the right wing tip. These were done with the required shades of Gunze transparent paints. Pastels were very sparingly used for exhaust stains as this was the Wing Commander's plane and wouldn't be very dirty.
|
CONCLUSIONS |
The kit wasn't the shake and bake I'd thought it would be. It was an easy build, but there were some areas that needed work. The decals are without a doubt, the major disaster of this kit. Be warned that you'll probably come to grief using them. Get aftermarket decals instead. I only wish I'd done that before things started to go awry. Were I a 'real' modeler, I'd have stripped the entire kit and redone it, but publishing being what it is, I often don't have the luxury to go back over a kit. Even from disaster I learn, and each model tends to gain from that experience.
January 2002
|
REFERENCES |
F-51 Mustang Units Over Korea, by Warren Thompson. Osprey, 1999
Copyright ModelingMadness.com. All rights reserved. No reproduction in part or in whole without express permission.
If you would like your product reviewed fairly and fairly quickly, please contact the editor or see other details in the Note to Contributors.
Back to Reviews Page 2021