Williams Bros 1/32 Shoenfeldt Firecracker
|
KIT # |
32-116 |
|
PRICE: |
$16.95 MSRP |
|
DECALS: |
two options |
|
REVIEWER: |
Scott Van Aken |
|
NOTES: |
|
BACKGROUND |
For a history of the aircraft and a look at what comes in the box, please visit the preview.
|
CONSTRUCTION |
If you have ever built a short run kit, then this one will prove to be no different. The plastic parts are well done, though there is considerable flash on some of them. This means that you need to spend considerable time cleaning up parts prior to cementing them together. Since I'm doing a gear down version, this meant that I had to cut out the gear openings in the lower wing, a rather time consuming job. Once that was done, the upper and lower wings were glued together. The trailing edges are thicker than most would like so you may want to do the considerable shaving needed to make these thinner. I did have to use filler all the way around to get things smoothed out.
 I then turned my attention to the inside of the
aircraft. Most of the small parts are molded extremely close to the large
sprues, so much care needs to be taken when removing them. I used a fine
toothed and thin saw to do so as the attachment points are somewhat thick
and using a hobby knife would probably have caused several parts to
break.
I then turned my attention to the inside of the
aircraft. Most of the small parts are molded extremely close to the large
sprues, so much care needs to be taken when removing them. I used a fine
toothed and thin saw to do so as the attachment points are somewhat thick
and using a hobby knife would probably have caused several parts to
break.
During this time I decided to paint a number of the parts using Alclad II Aluminum. This included the interior of the fuselage, the seat back and aft bulkhead, the wheels and the various gear struts and retraction struts. The landing gear struts were rather badly molded and needed quite a bit of clean-up and reshaping prior to painting. Even then they don't look that great and one may wish to consider replacing them with scratch-build gear made from tubing. I then glued in the rudder pedals to one fuselage side, taping the fuselage halves together while they dried to be sure it dried at the proper angle.
Then the kit sat for about a year. I got sidetracked onto other projects and this kit lost its immediacy. This happens to me all the time. I'll be going along just fine and then something new will show up and what was a priority item ends up gathering dust.
Blowing off the dust and getting back into things, I
assessed the situation and made sure that no
 parts had gone missing
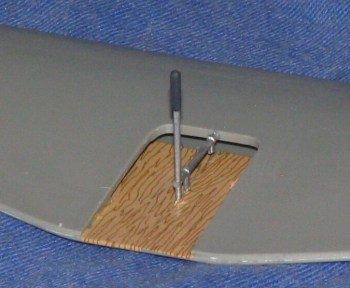
(which does happen). I then decided to use Aeromaster wood grain decal to
do the floor and the aft bulkhead as they are varnished plywood and I
figured I'd not be able to duplicate that effect very well. Meanwhile, I
painted the engine front and glued in the instrument panel. There is
supposed to be a decal for it, but I didn't find one on the sheet, so I
just painted it black and left it as it was. I then glued the engine
front to the front of the fuselage and glued the fuselage halves
together. Fit is fair but not perfect and it required some squeezing to
get the glue to sort of melt the halves into place.
parts had gone missing
(which does happen). I then decided to use Aeromaster wood grain decal to
do the floor and the aft bulkhead as they are varnished plywood and I
figured I'd not be able to duplicate that effect very well. Meanwhile, I
painted the engine front and glued in the instrument panel. There is
supposed to be a decal for it, but I didn't find one on the sheet, so I
just painted it black and left it as it was. I then glued the engine
front to the front of the fuselage and glued the fuselage halves
together. Fit is fair but not perfect and it required some squeezing to
get the glue to sort of melt the halves into place.
At this time I also glued the aft bulkhead to the
seat and slid the combination onto the floor section to check fit. A very
tight fit it is. I then glued the nose to the fuselage. I am going to do
the 1938 version as it has the neatest decals and I won't have to add the
separate exhaust pipes.
 The fit of the nose section is rather poor
and I can see the need for lots of filler. At this time I also cemented
the wings in place so that I'd have all the major bits in place at the
same time. Fit is OK, but not great. This is, after all, a short run kit.
The usual filler was applied to all the seams. Actually filler was
applied several times to all the seams, especially the upper wing root.
The fit of the nose section is rather poor
and I can see the need for lots of filler. At this time I also cemented
the wings in place so that I'd have all the major bits in place at the
same time. Fit is OK, but not great. This is, after all, a short run kit.
The usual filler was applied to all the seams. Actually filler was
applied several times to all the seams, especially the upper wing root.
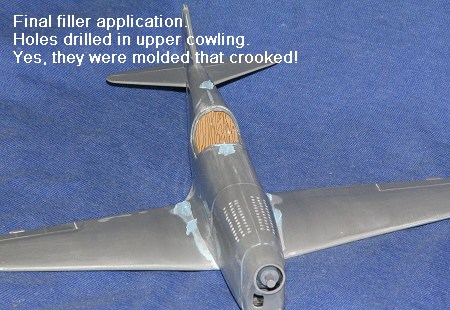 While
all this filler drying was going on, I also took the opportunity to drill
out the cooling holes in the upper cowling. I'd open up the louvers if I
knew how to do it without making a mess. While you might think I was not
very careful with the cooling holes, they were molded in that crooked
fashion. I also added the tail planes, which you can install upside down
if you are not careful. I'm also thinking they might have fit a bit
farther up, but decided to leave things as they were as I just didn't
know. Several test flights were made at this time to ensure
air-worthiness and the aircraft passed with flying colors. Engine sounded
a bit rough at times.....
While
all this filler drying was going on, I also took the opportunity to drill
out the cooling holes in the upper cowling. I'd open up the louvers if I
knew how to do it without making a mess. While you might think I was not
very careful with the cooling holes, they were molded in that crooked
fashion. I also added the tail planes, which you can install upside down
if you are not careful. I'm also thinking they might have fit a bit
farther up, but decided to leave things as they were as I just didn't
know. Several test flights were made at this time to ensure
air-worthiness and the aircraft passed with flying colors. Engine sounded
a bit rough at times.....
The next step was to install the canopy. This item is a bit brittle, and needs some trimming to fit, especially the forward corners. Even then it seemed a bit small for the opening, but it did cover everything up and doesn't look too bad. It was then masked in preparation for painting. The last thing glued on was the tail skid. It doesn't look much like a skid, but on the other hand, these planes were very light so it didn't really need much.
|
COLORS & MARKINGS |
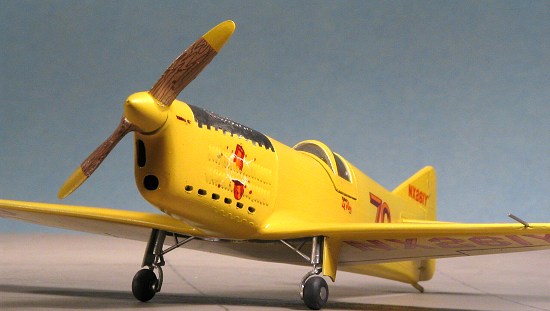
 First step was to paint the upper cowling with a
polished metal. I used Polished Aluminum from Alclad II. This meant that
I had to first apply a gloss black primer to that area to get the correct
effect. I used the Alclad II primer specifically for this
First step was to paint the upper cowling with a
polished metal. I used Polished Aluminum from Alclad II. This meant that
I had to first apply a gloss black primer to that area to get the correct
effect. I used the Alclad II primer specifically for this
 purpose.
Once dry, several light coats of Polished Aluminum were applied. After it
dried, I masked this area off. Thanks to the rather faint lines on this,
I reverted to the Scotch low stick tape in the blue plaid box that I'd
used for years before discovering Tamiya Tape. This took a bit of time to
properly cut as the panel has to have the hinges delineated.
purpose.
Once dry, several light coats of Polished Aluminum were applied. After it
dried, I masked this area off. Thanks to the rather faint lines on this,
I reverted to the Scotch low stick tape in the blue plaid box that I'd
used for years before discovering Tamiya Tape. This took a bit of time to
properly cut as the panel has to have the hinges delineated.
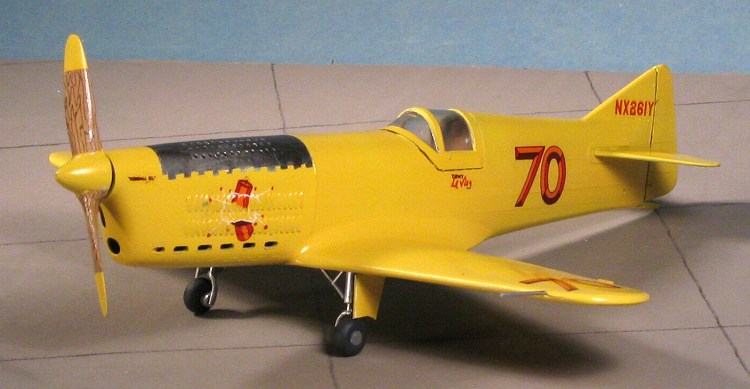
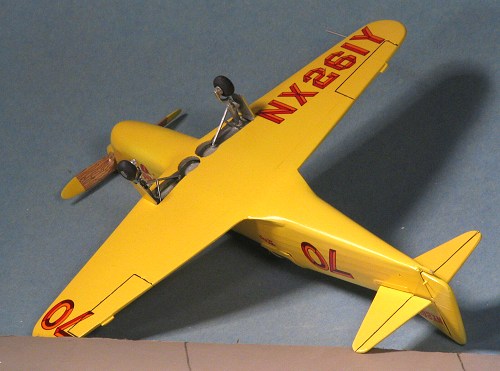 With that done, the kit was given an overall coat of
Floquil Reefer White lacquer. This was to provide a light base for the
next color. Instructions said to paint this aircraft Canary Yellow. The
few color photos I've seen of it showed it to be a rather pale yellow. I
didn't have any ready to go pale yellow, so mixed up some with Floquil
Reefer White and Testors Insignia Yellow until I got a shade I liked.
This was then sprayed on the entire aircraft as well as the prop. When it
was dry, several coats of Future (gloss clear acrylic) were sprayed on it
in preparation for the decals.
With that done, the kit was given an overall coat of
Floquil Reefer White lacquer. This was to provide a light base for the
next color. Instructions said to paint this aircraft Canary Yellow. The
few color photos I've seen of it showed it to be a rather pale yellow. I
didn't have any ready to go pale yellow, so mixed up some with Floquil
Reefer White and Testors Insignia Yellow until I got a shade I liked.
This was then sprayed on the entire aircraft as well as the prop. When it
was dry, several coats of Future (gloss clear acrylic) were sprayed on it
in preparation for the decals.
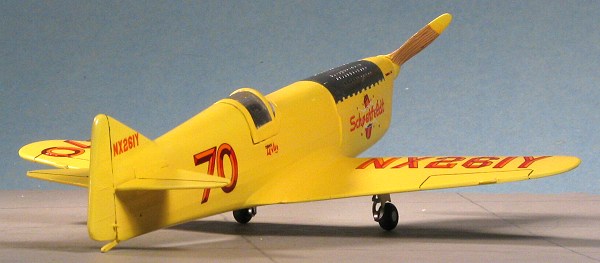
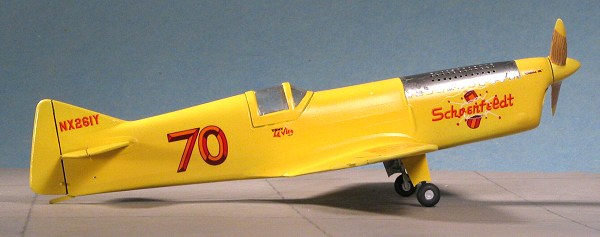
The decals for this kit are very colorful and printed in Mexico. They were also just starting to yellow a tad, but since the aircraft is yellow, that isn't a problem! I found them to take a bit of time to release from the backing and they are somewhat thick when compared to newer decals. However, they did fit well and succumbed to Solvaset. I tried Microsol first, but it did not seem to affect them much at all. The stronger solution is required on the left side of the nose as there are a lot of louvers over which a decal is placed.
With the decals on and dry, the kit was wiped down with clean water to remove any solution or glue residue.
|
FINAL CONSTRUCTION |
Last parts that needed to go on were the landing gear,
pitot tube and the prop. The landing gear needed a bit of attachment
enlarging for the struts to fit. I also noted that they two gear were not
in the same place when you compared left and right sides! A minor problem
with short run kits. The forks on which the wheels attach are rather flimsy
so one does need to take 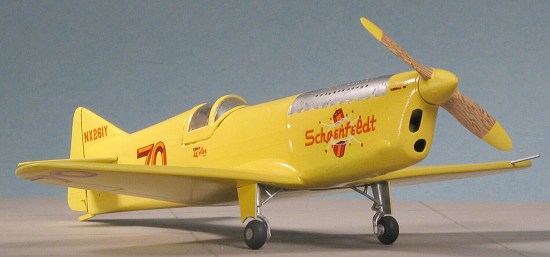 care
when gluing on the wheels. I had to sand down the axles a touch to get the
wheels to fit. The gear retraction struts do have attachment points in the
wheel well, but none on the gear. Good thing, too, as it is a case of 'fits
where it touches' when it comes to these parts. It took a tad of sanding to
get the gear doors at the same angle as the gear, but they glued to the
wing with no problems. The pitot tube was a no brainer. The wheel
wells and inner gear doors were painted in aluminum as was the pitot tube.
The prop was painted an overall yellow that was the same shade as the
aircraft. I then used wood grained decal sheet, a lot of fussing and
fuming, and Solvaset to do the 'naked wood' part of the prop. Doesn't look
great, but doesn't look bad either.
care
when gluing on the wheels. I had to sand down the axles a touch to get the
wheels to fit. The gear retraction struts do have attachment points in the
wheel well, but none on the gear. Good thing, too, as it is a case of 'fits
where it touches' when it comes to these parts. It took a tad of sanding to
get the gear doors at the same angle as the gear, but they glued to the
wing with no problems. The pitot tube was a no brainer. The wheel
wells and inner gear doors were painted in aluminum as was the pitot tube.
The prop was painted an overall yellow that was the same shade as the
aircraft. I then used wood grained decal sheet, a lot of fussing and
fuming, and Solvaset to do the 'naked wood' part of the prop. Doesn't look
great, but doesn't look bad either.
The last thing to do was to take off the masking. I removed that from the canopy with no problem. There was a problem with the masking over the Alclad II. Apparently something in the Scotch tape reacted with the Alclad II and left some rather nasty looking blotches. You cannot see them that well in the photos thanks to a camera's ability to fib. I had zero trouble with those sections of the cowling masked with Tamiya tape so be warned. The Scotch tape also left a lot of residue, and this was the low tack stuff! The prop was stuck on the nose and the model was complete.
|
CONCLUSIONS |
 I have to say that
despite the glitches and the long delay, I am happy with the overall
result. Of course, I'd probably say that regardless of what I finished, but
in this case, that splash of yellow in the display case really looks nice.
I was very pleased with the way the decals worked and the end result is
something that is colorful and doesn't take up very much space at all.
I have to say that
despite the glitches and the long delay, I am happy with the overall
result. Of course, I'd probably say that regardless of what I finished, but
in this case, that splash of yellow in the display case really looks nice.
I was very pleased with the way the decals worked and the end result is
something that is colorful and doesn't take up very much space at all.
December 2004
# 1343 in a series.
Copyright ModelingMadness.com. All rights reserved. No reproduction without express permission.
Kit courtesy of me and my fondness for racers.
If you would like your product reviewed fairly and quickly, please contact the editor or see other details in the Note to Contributors.