Dekno 1/72 Spartan 7W Executive
| KIT #: | 720100 |
| PRICE: | $47.00 from www.coopersmodels.com |
| DECALS: | Two Options |
| REVIEWER: | Scott Van Aken |
| NOTES: | Full resin kit |
| HISTORY |
Designed for comfort, the interior of the 7W was large
and spacious featuring 18 in (46 cm) of slide-back seat room for front-seat
passengers, arm rests, ash trays, dome lighting, deep cushions, cabin heaters,
ventilators, extensive soundproofing, large
 windows, and interior access to the
100 lb (45 kg) capacity luggage compartment. Built during the Great Depression,
the 7W was the brainchild of company-founder William G. Skelly of Skelly Oil who
desired a fast, comfortable aircraft to support his tastes and those of his rich
oil-executive colleagues. Unlike many pre-World War II aircraft, the Spartan 7W
Executive was popular enough to see design replications continue well into the
post-World War II period of aviation. Of a total of 34 7W Executive's built,
many are still extant. This version was impressed into the USAAC at the start of
the war as the UC-61.
windows, and interior access to the
100 lb (45 kg) capacity luggage compartment. Built during the Great Depression,
the 7W was the brainchild of company-founder William G. Skelly of Skelly Oil who
desired a fast, comfortable aircraft to support his tastes and those of his rich
oil-executive colleagues. Unlike many pre-World War II aircraft, the Spartan 7W
Executive was popular enough to see design replications continue well into the
post-World War II period of aviation. Of a total of 34 7W Executive's built,
many are still extant. This version was impressed into the USAAC at the start of
the war as the UC-61.
The Executive's high performance allowed the aircraft to compete in the 1939 Bendix Air Races piloted by Arlene Davis. It earned fifth place. A military variant of the 7W Executive was produced by Spartan with a more powerful 600 hp (447 kW) Pratt & Whitney Wasp engine and named the Spartan 8W Zeus.
| THE KIT |
 My kit was molded in a rather bilious green resin that reminded me of VW's
of the 60s. The kit is quite well detailed as such with some detail bits in
the interior. Clear parts are resin as well as while not as clear as
injected plastic can be, they are still not badly done at all. The one-piece
engine cowling had a few nicks in the front where the pour stub had been cut
away which will need filled. There is a full engine accessory section that
fits onto the fire wall and then has the engine attached to it.
My kit was molded in a rather bilious green resin that reminded me of VW's
of the 60s. The kit is quite well detailed as such with some detail bits in
the interior. Clear parts are resin as well as while not as clear as
injected plastic can be, they are still not badly done at all. The one-piece
engine cowling had a few nicks in the front where the pour stub had been cut
away which will need filled. There is a full engine accessory section that
fits onto the fire wall and then has the engine attached to it. | CONSTRUCTION |
 With resin kits such as this, the initial step is to remove as much of the
resin flashing as possible. In this case, most of it was in the fuselage
windows. Two windows, however, has very thick flash that was not quite as
simple to remove. I highly recommend a set of miniature files when doing
resin work. They will provide the control one needs to not only clean
delicate areas like this, but are great for removing small amounts of
material.
With resin kits such as this, the initial step is to remove as much of the
resin flashing as possible. In this case, most of it was in the fuselage
windows. Two windows, however, has very thick flash that was not quite as
simple to remove. I highly recommend a set of miniature files when doing
resin work. They will provide the control one needs to not only clean
delicate areas like this, but are great for removing small amounts of
material.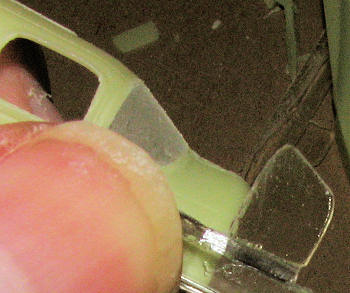 fitting was needed. The problem I have with resin clear bits is that
they soon become quite fogged up with all the handling and trimming. I've
not been super successful in returning them to clarity, though I've been
able to get them close enough to tell there is something on the other side.
fitting was needed. The problem I have with resin clear bits is that
they soon become quite fogged up with all the handling and trimming. I've
not been super successful in returning them to clarity, though I've been
able to get them close enough to tell there is something on the other side.
 More
trimming was needed to get the interior to fit well, but I was able to get
it pretty well in place from the underside before committing it to cement.
More
trimming was needed to get the interior to fit well, but I was able to get
it pretty well in place from the underside before committing it to cement.
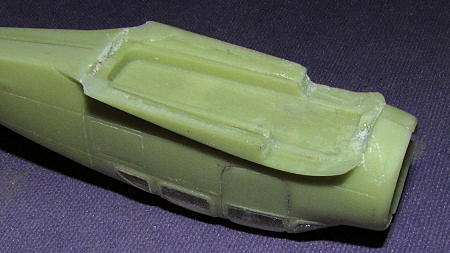
 m
this image, the interior section was level all the way to the forward
section. That and part of the fuselage root and forward section needed much
grinding. I also had to grind on the wing section itself, but couldn't do
much for fear of breaking through the wheel wells.
m
this image, the interior section was level all the way to the forward
section. That and part of the fuselage root and forward section needed much
grinding. I also had to grind on the wing section itself, but couldn't do
much for fear of breaking through the wheel wells. 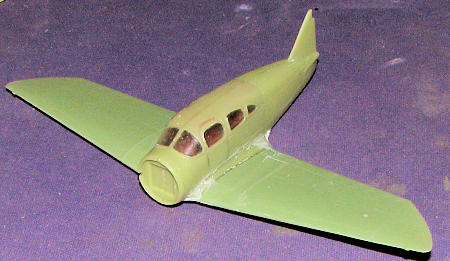 fuselage
to where it blended in rather well.
fuselage
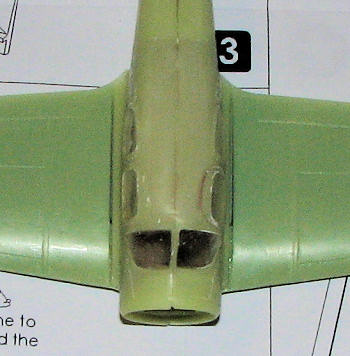
to where it blended in rather well.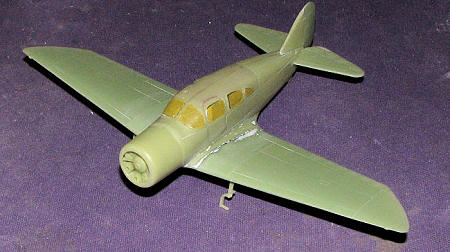 the
wing and fuselage! On the underside, I had to enlarge the tail wheel opening
to get the tail wheel to fit.
the
wing and fuselage! On the underside, I had to enlarge the tail wheel opening
to get the tail wheel to fit. | COLORS & MARKINGS |
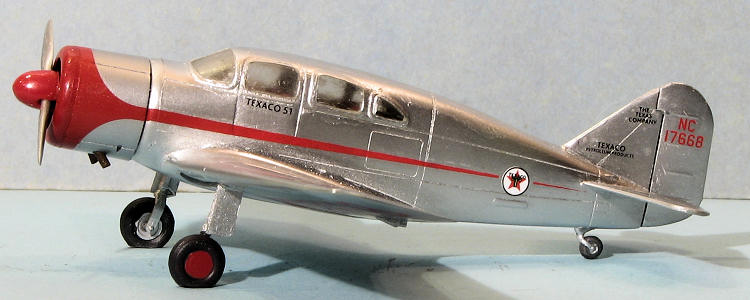
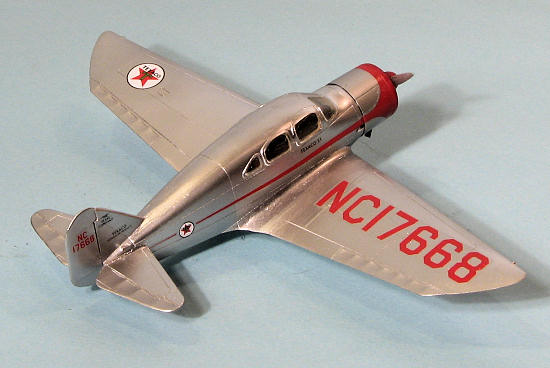
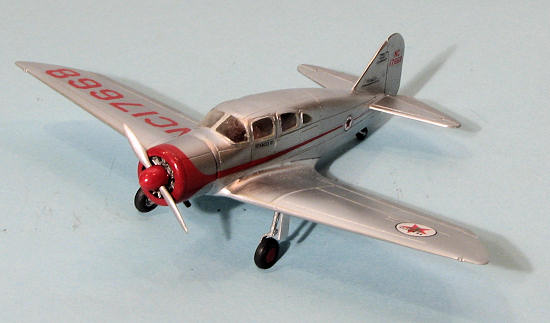
The kit offers two different options when it comes to
schemes. One is a nice polished metal civil version as owned by Texaco in
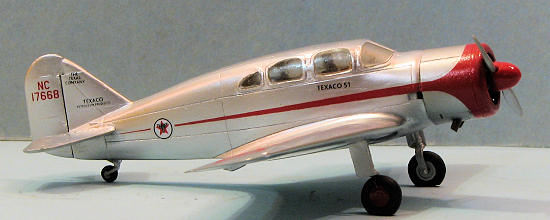 the late
1930s and the other is an impressed version in the USAAC at the beginning of the
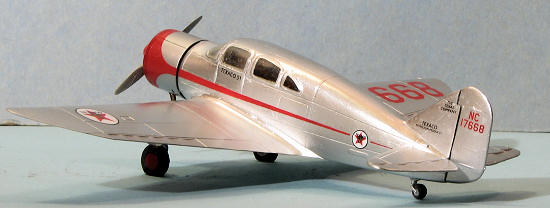
war. Now I really wanted to do the civil one so I started by painting the entire
airframe with Alclad II aluminum. No primer, just sprayed on a couple of coats.
Since the plane has fabric control surfaces, these were masked. I then painted
everything with Alclad II polished aluminum to give it a shine. And shine it
does.
the late
1930s and the other is an impressed version in the USAAC at the beginning of the
war. Now I really wanted to do the civil one so I started by painting the entire
airframe with Alclad II aluminum. No primer, just sprayed on a couple of coats.
Since the plane has fabric control surfaces, these were masked. I then painted
everything with Alclad II polished aluminum to give it a shine. And shine it
does.
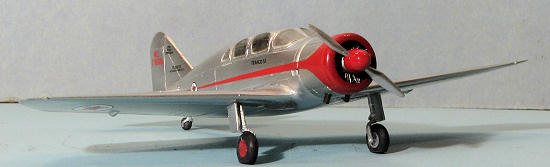
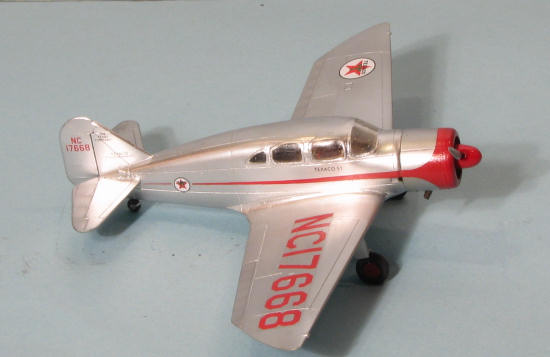
Bits of the plane, specifically the forward cowling, wheel hubs and spinner were painted gloss red using Humbrol's paint. I hoped this would match the red on the decals. It turns out it is close, but a bit dark. You might want to try Gunze Red Madder as this seems like it might be a closer match. One thing I found is that the red decals darkened a tad when applied so the difference isn't horribly apparent.
Speaking of decals, they are superb. They look a bit 'pebbly' but they fit just great. I used Mr. Mark Softer for a setting solution with no issues. I considered using Testors Metallizer Sealer but decided against it.
| FINAL CONSTRUCTION |
 Not much
here, actually. Just painting and installing the wheels as well as the prop. You
have to drill out the axle holes about double what is shown on the wheels and I
also trimmed the axles a bit as they seemed too long. The engine had the prop
shaft hole drilled as well.
Not much
here, actually. Just painting and installing the wheels as well as the prop. You
have to drill out the axle holes about double what is shown on the wheels and I
also trimmed the axles a bit as they seemed too long. The engine had the prop
shaft hole drilled as well.
Last bits to attach were the exhaust. The holes here also needed enlarged. These were painted Vallejo Tinny Tin and one of them went 'zing' when I went to install it. Fortunately, the short protection stubs on the resin blocks are just a teeny bit larger so I cut and drilled one of those to use as a replacement. No weathering was done on the aircraft as these were generally kept in pristine condition.
The masking was removed from the clear parts and I was done.
| CONCLUSIONS |
 When I
finish a kit, I'm generally pleased with the results and this one is no
exception. This one took me quite a bit of work, but the end result is very
pleasing, despite the cloudy clear bits. I was prepared to do work on this one
as I do on just about every resin kit I've ever built. Not sure if I would
prefer vacuformed windows or not, though they would be more transparent, that is
for sure. Perhaps the answer to this would be a pair of clear fuselages, but
really clear resin is a tough thing to accomplish and is better left to when one
goes to injected styrene.
When I
finish a kit, I'm generally pleased with the results and this one is no
exception. This one took me quite a bit of work, but the end result is very
pleasing, despite the cloudy clear bits. I was prepared to do work on this one
as I do on just about every resin kit I've ever built. Not sure if I would
prefer vacuformed windows or not, though they would be more transparent, that is
for sure. Perhaps the answer to this would be a pair of clear fuselages, but
really clear resin is a tough thing to accomplish and is better left to when one
goes to injected styrene.
If between the wars civil aircraft are an interest, then you may well want to look into one of these kits. Dekno will be doing more aircraft like this and I look forward to being able to build another.
| REFERENCES |
http://en.wikipedia.org/wiki/Spartan_Executive
August 2011
Thanks to www.coopersmodels.com for the preview kit. Get this and other neat kits from the link.
If you would like your product reviewed fairly and fairly quickly, please contact the editor or see other details in the Note to Contributors.