Hasegawa 1/200 Boeing 737-500
| KIT #: | 10664 |
| PRICE: | $ |
| DECALS: | One Option; two serials |
| REVIEWER: | Scott Van Aken |
| NOTES: |
| HISTORY |
First envisioned in 1964, the 737 entered service in 1968. Forty years later it has become the most ordered and produced commercial passenger jet in the world. It is Boeing's last surviving narrow-body airliner, sometimes serving markets previously filled by 707, 727, 757, DC-9 and MD-80/90 airliners. Continuously manufactured by Boeing since 1967 with over 8,000 ordered and over 5,800 delivered as of 2008, there are over 1,250 737s airborne at any given time. On average, a 737 departs or lands somewhere every five seconds.
After the success of the Boeing 737-200
Advanced, Boeing wanted to increase capacity and range, incorporating
improvements to upgrade the plane to modern specifications, while also retaining
commonality with previous 737 variants. Development began in 1979, and in 1980
preliminary ai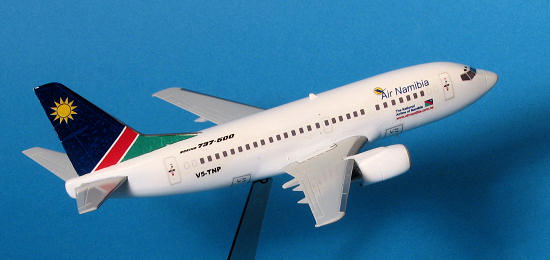 rcraft specifications were released at the Farnborough Airshow.
In March 1981 USAir and Southwest Airlines each ordered 10 aircraft, with an
option for 20 more.
rcraft specifications were released at the Farnborough Airshow.
In March 1981 USAir and Southwest Airlines each ordered 10 aircraft, with an
option for 20 more.
The new series featured CFM56 turbofan engines, which yielded significant gains in fuel economy and a reduction in noise, but also posed an engineering challenge given the low ground clearance of the 737. Boeing and engine supplier CFMI solved the problem by placing the engine ahead of (rather than below) the wing, and by moving engine accessories to the sides (rather than the bottom) of the engine pod, giving the 737 a distinctive non-circular air intake.
The wing incorporated a number of changes for improved aerodynamics. The wing tip was extended 9 in (23 cm). The leading-edge slots and trailing-edge flaps were adjusted. The flight deck was improved with the optional EFIS (Electronic Flight Instrumentation System), and the passenger cabin incorporated improvements similar to those on the Boeing 757.
The 737-300/400/500 aircraft are all considered the '737 Classic' series and have since been replaced by newer variants on the production line.
The -500 series was offered, due to customer demand, as a modern and
direct replacement of the 737-200. It incorporated the
 improvements of the 737
Classic series; allowing longer routes with fewer passengers to be more
economical than with the 737-300. The fuselage length of the -500 is 1 ft 7 in
(47 cm) longer than the 737-200, accommodating up to 132 passengers. Both glass
and older style mechanical cockpits arrangements were available. Using the
CFM56-3 engine also gave a 25% increase in fuel efficiency over the older -200s
P&W engines.
improvements of the 737
Classic series; allowing longer routes with fewer passengers to be more
economical than with the 737-300. The fuselage length of the -500 is 1 ft 7 in
(47 cm) longer than the 737-200, accommodating up to 132 passengers. Both glass
and older style mechanical cockpits arrangements were available. Using the
CFM56-3 engine also gave a 25% increase in fuel efficiency over the older -200s
P&W engines.
The 737-500 was launched in 1987 by Southwest Airlines, with an order for 20 aircraft, and flew for the first time on 30 June 1989. A single prototype flew 375 hours for the certification process, and on 28 February 1990 Southwest Airlines received the first delivery. The 737-500 has become a favorite of some Russian airlines, with Aeroflot-Nord, S7 Airlines, and Rossiya Airlines all buying second-hand models of the aircraft to replace aging Soviet-built aircraft.
| THE KIT |
Hasegawa first issued its 'Loveliner' series of 1/200 airliners back in the late 1970s. At the time, the aircraft had raised panel detail, open cabin windows, and landing gear that could only be modeled in the 'down' position. This latter feature required the modeler to expend considerable effort to do a wheels up display, as often times main gear doors folded into each other when the gear was down. As cabin window configuration was not always the same, it would require the modeler to fill in those not needed. However, this was not a problem for a number of modelers who liked this feature.
This latest in the series has no cabin windows,
no cockpit window,
optional 'wheels up' landing gear door parts, and fully engraved detailing.
Things that are not changed are the inclusion of a display stand and a hefty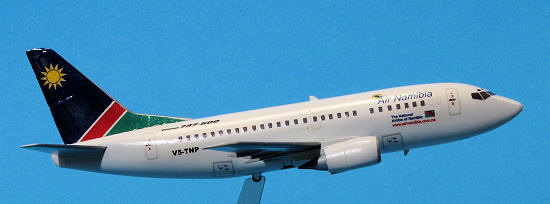 weight for those building the kit with wheels down. In fact, the kit is designed
to be put on the stand as there is a large hole in the bottom of the fuselage
for the attachment point. For display on the ground, this will need to be filled
in. The main gear legs have the doors molded as part of the assembly. I also
like that this particular boxing has one piece engine/pylon combinations. No
need to be concerned
about filling an intake seam. The front fan pieces simply plug in as the exhaust
is molded in with the engine.
weight for those building the kit with wheels down. In fact, the kit is designed
to be put on the stand as there is a large hole in the bottom of the fuselage
for the attachment point. For display on the ground, this will need to be filled
in. The main gear legs have the doors molded as part of the assembly. I also
like that this particular boxing has one piece engine/pylon combinations. No
need to be concerned
about filling an intake seam. The front fan pieces simply plug in as the exhaust
is molded in with the engine.
Tail planes are one piece as are the wings on this version because they are so short. Thanks to the option for wheels up, one can build this in flight, something that many airliner fans can appreciate. Probably the biggest difference from 'standard' airliner kits is that this one has the fuselage split horizontally. Not sure how much that will change things, but it does move the seam to where it will be under the window and cheat-line decals.
Instructions are standard Hasegawa and use Gunze paint references. The planes are basically overall white with medium grey wings, tailplanes and engines. The decals are very nicely printed and allow one of two Air Do aircraft. Of course, cabin and cockpit windows are included. For those who'd rather paint on the light blue and yellow, separate windows and livery markings are provided. The decals are the latest new wave type and should react favorably to setting solutions. The simple livery would make this an ideal first airliner for someone
| CONSTRUCTION |
Really, the construction of this one was going to be as simple as I
could make it. Hasegawa provided me with a stand and I'm not afraid to use it.
This meant no need for the huge weight or the landing gear, so that eliminated a
goodly percentage of the small
 bits. I really appreciate not having to fill in
windows and the upper/lower fuselage split means that I can actually keep the
molded in antennas intact!
bits. I really appreciate not having to fill in
windows and the upper/lower fuselage split means that I can actually keep the
molded in antennas intact!
I first removed the really long sprue towers with a pair of sprue cutters. Then I glued the upper and lower body together. The tail plane will slot in once the fuselage halves are closed. I made sure of this before applying cement to the halves. I also glued in the clear bit in which the stand will go. There is a blanking plate for those who want their plane on its wheels.
I also took the time to round off the nose a bit. It is sort of squarish looking and just didn't match the box top. It isn't perfect, but looks better. I also sanded off all the mold seam lines from the other parts I was going to use. Of course, I used filler on just about every join. I have never built a 'filler free' kit that didn't go together with a screwdriver so I don't think they really exist. Urban legend stuff.
| COLORS & MARKINGS |
 After
painting the leading edges (and most of the rest) of the flight surfaces with
Alclad II Aluminum, it was masked off. I then painted the wings and tail planes
with Xtracolor Boeing Grey enamel. This was then masked (after several days of
drying) and the rest of the airframe painted white using Testors Boyd's Gloss
White enamel. I also painted the engines and pylons at this time.
After
painting the leading edges (and most of the rest) of the flight surfaces with
Alclad II Aluminum, it was masked off. I then painted the wings and tail planes
with Xtracolor Boeing Grey enamel. This was then masked (after several days of
drying) and the rest of the airframe painted white using Testors Boyd's Gloss
White enamel. I also painted the engines and pylons at this time.
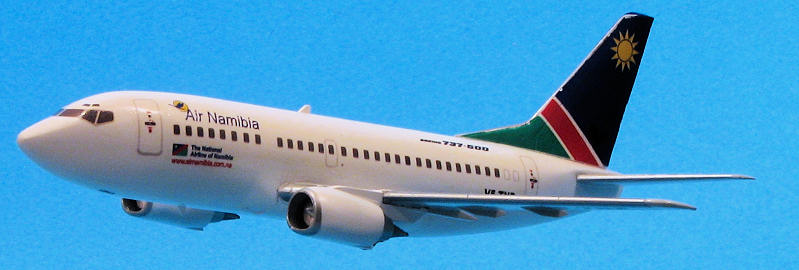
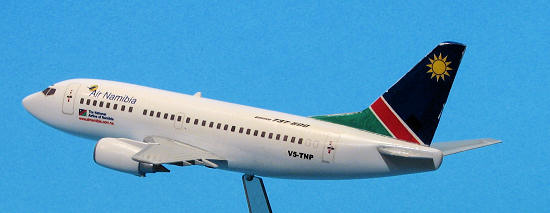
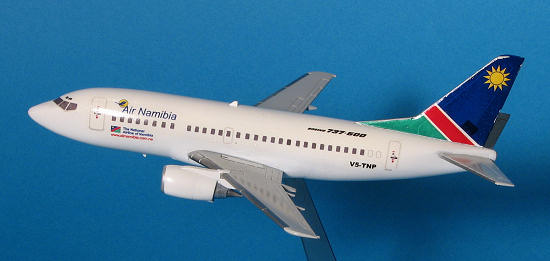
When it was all dry, I started decaling. I used Draw
Decals 1/200 Air Namibia markings. This was the first time I'd used Draw Decals.
They have a single carrier and each decal needs to be cut out separately. I
started with the fin markings. The decals are nearly transparent when you look
at them as they slide off the backing, so a white background is needed. The fit
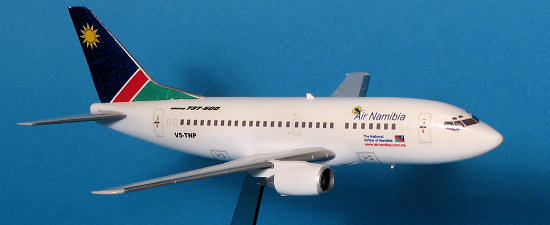 was fair and
I found out that they do not like setting solutions, Should not be cut too close
to the color areas as they chip easily, they tear easily, and refuse to conform
around any sort of sharp corner (like the fin tip). In fact, they chipped rather
badly when I tried to force them. Draw Decals provided extra sections of the
blue and green which is nice. What isn't nice is that when I applied a patch of
the blue, it darkened considerably, making it quite obvious. What with the
chipped tail decals and the botched patch, in disgust, I threw the kit into a
box where it sat for nearly a year.
was fair and
I found out that they do not like setting solutions, Should not be cut too close
to the color areas as they chip easily, they tear easily, and refuse to conform
around any sort of sharp corner (like the fin tip). In fact, they chipped rather
badly when I tried to force them. Draw Decals provided extra sections of the
blue and green which is nice. What isn't nice is that when I applied a patch of
the blue, it darkened considerably, making it quite obvious. What with the
chipped tail decals and the botched patch, in disgust, I threw the kit into a
box where it sat for nearly a year.
When I got it back out to finish, I decided "to hell with it" and made no attempt to cure the decal problem. The rest of the markings went on fairly well, though there were wrinkles and they tend to silver. There are some markings that are not shown on the profile that comes with the decals and I had no clue as to which wing got the registration number or where the baggage doors are supposed to go. I guess Draw Decal assumes you have a swath of photos of the plane to determine such things. I don't.
| FINAL BITS |
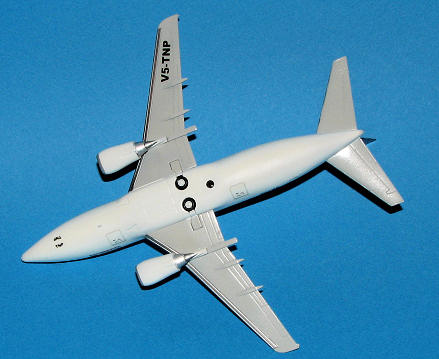 Once the
decals were on I installed the 'wheels up' option for the main gear. These fit
quite well. The last step was to install the engines. These appeared to be a
simple matter of clicking them into place on the wing. Boy, was I wrong and on
both of the pylons, I broke off the upper engine mount. I eventually got the
engines glued in place, but made zero attempt at filling and sanding smooth the
broken mount. I did little more that a bit of scraping and applying a dab of
gloss white to attempt to cover up the break. I then went and photographed the
model before placing it on my 'shelf of shame' where it will never see the light
of day again!
Once the
decals were on I installed the 'wheels up' option for the main gear. These fit
quite well. The last step was to install the engines. These appeared to be a
simple matter of clicking them into place on the wing. Boy, was I wrong and on
both of the pylons, I broke off the upper engine mount. I eventually got the
engines glued in place, but made zero attempt at filling and sanding smooth the
broken mount. I did little more that a bit of scraping and applying a dab of
gloss white to attempt to cover up the break. I then went and photographed the
model before placing it on my 'shelf of shame' where it will never see the light
of day again!
| CONCLUSIONS |
Well, I learned two things. One is that Draw Decals are not my cup of tea and I can hardly recommend them to anyone based on my experiences with them. Stick to normal silk-screen waterslide decals that are flexible enough to mold around sharp corners without breaking apart and are opaque enough to let you 'mend' them if needed. Secondly, just because a kit looks simple, doesn't mean it won't give you trouble. I have learned a valuable lesson with this one, so it wasn't a waste of time.
| REFERENCES |
http://en.wikipedia.org
September 2009
Copyright ModelingMadness.com. All rights reserved.
If you would like your product reviewed fairly and quickly , please
contact
the editor or see other details in the
Note to
Contributors.