Huma 1/72 Bücker Bü-181 'Bestmann'
| KIT #: | ? |
| PRICE: | $9.98 when new |
| DECALS: | Seven options |
| REVIEWER: | Scott Van Aken |
| NOTES: | Sort of short run. |
| HISTORY |
The prototype Bü 181 (D-ERBV) made its maiden flight in February 1939 with Chief Pilot Arthur Benitz at the controls. After thorough works and official flight testing by the Reichsluftfahrtministerium (RLM) the Bü 181 was nominated to be the standard primary trainer for the Luftwaffe. Series production of the Bü 181 commenced in 1940/41. The types were designated A to D with only slight variations between each and could be powered either by the Hirth 500A or 504 engine.
The Bücker factory at Rangsdorf built most of the Bü 181's, but because of demand was forced to license the Fokker Company in the Netherlands, who subsequently built 373 of the type for the Luftwaffe all of which were delivered by the end of 1943.
Production of both the Bü 181A and the slightly modified Bü 181D was begun
by Fokker in Amsterdam in 1942 and its total
 wartime production was 708
aircraft. Between 1943 and 1945, Hägglund & Söner AB in Sweden built 125 Bü
181's with the Hirth 500A engine with the Swedish military designation SK 25.
Just prior to the German withdrawal from Czechoslovakia, production of the Bü
181D was initiated in the Zlin plant at Otrokovice, and production continued
after the war, as the C.6 and C.106 for the Czechoslovak Air Force and as the
Zlin Z.281 and Z.381 in various versions for civil use.
wartime production was 708
aircraft. Between 1943 and 1945, Hägglund & Söner AB in Sweden built 125 Bü
181's with the Hirth 500A engine with the Swedish military designation SK 25.
Just prior to the German withdrawal from Czechoslovakia, production of the Bü
181D was initiated in the Zlin plant at Otrokovice, and production continued
after the war, as the C.6 and C.106 for the Czechoslovak Air Force and as the
Zlin Z.281 and Z.381 in various versions for civil use.
During the 1950s the Heliopolis Aircraft Works of Egypt acquired a Czechoslovak licence to produce the Bestmann in versions similar to the Zlin Z.381 with a 105 hp Walter-Minor engine. It was produced for the Egyptian Air Force as the Gomhouria ("Republic") and subsequent versions were supplied to other Arab air forces.
In all, 3,400 aircraft were built although only a handful survive today.
Although built as a primary trainer for the Luftwaffe, the type also performed other duties such as communication, glider towing, and even transporting Panzerfaust weapons (a rocket projectile with a hollow-charge warhead used as an infantry weapon against tanks.) Movie buffs will recognize this plane as the one in the end scenes of 'The Great Escape'.
| THE KIT |
Huma started out producing a rather extensive batch of one-sprue kits that were short run, but often superior to some of the 'mainstream' kits that one finds. These all came in polybags with the cover of the instruction sheet as the 'box top' and if the plane really existed, a photo was part of that.
The plastic on these kits is a
somewhat soft white plastic. I found on this kit, for instance, that the
detailing was well done with engraved panel lines (what few there are) and
nicely done fabric representations. Only a tiny sink mark was found and there
was  a small amount of flash on some of the parts. All will need to be cleaned up
anyway as the mold seams are more pronounced than you'll find on some other
kits.
a small amount of flash on some of the parts. All will need to be cleaned up
anyway as the mold seams are more pronounced than you'll find on some other
kits.
There really is only one option and that is on the landing gear legs where one option allows for the oleo and scissors to be covered. A single piece canopy is provided that is clear enough to see into the cockpit. Of this, there is not too much. Just seats, controls and instrument panel. But then one doesn't need all that much for a trainer. I should mention that though you are provided markings for a Panzerfaust equipped plane, these weapons are not included.
The instructions are superb as not only are there the usual construction drawings, but you get full 1/72 three views of both the wheeled and ski-equipped planes. Markings are provided for no fewer than 7 aircraft. One from pre-war, two RLM 70/71/65 painted planes from the basic training school in 1940 and the aforementioned Panzerfaust unit in 1945. Two are Swedish builds, one for the Swedish AF on skis and the other a civil marked plane in yellow. There is also a French registered aircraft and a Swiss registered Zlin build. I'd give color info, but the instructions use a greyshade equivalent chart that I can't really decipher as the shades are so close. The large decal sheet is well printed and matte with large carrier areas around the markings. Unusual for a German company, the sheet includes swastikas, though they are not printed in the instructions as such.
| CONSTRUCTION |
Snarled the editor; "Van Aken, we need an article for next Friday and we need it quick. It doesn't have to be pretty, but it does have to be competently done." Staring at my shoes to see if some sort of inspiration would arise from them, I muttered something about doing my best to come up with a good article. "You damn well better, or your fired, downsized, looking for alternative work, or whatever will motivate you." said the heartless and cruel editor as he slammed the office door and returned to surfing the web for porn.
 Great,
only a week to build something, have it competently done, and good enough not to
get canned. I thought of the myriad of ongoing projects and as I looked at each
one, I dismissed it as needing more work to finish than I could do in a bit over
a week. It was my own fault, really. I tend to get all caught up in projects
that appear to be easy, but end up being anything but simple.
Great,
only a week to build something, have it competently done, and good enough not to
get canned. I thought of the myriad of ongoing projects and as I looked at each
one, I dismissed it as needing more work to finish than I could do in a bit over
a week. It was my own fault, really. I tend to get all caught up in projects
that appear to be easy, but end up being anything but simple.
Rummaging through project ideas I came up with many, but after looking at the kits, the subject was placed back onto the shelf as needing more time than I could put into it. What I needed was something that wasn't done to death, had a lot of decal options and would be able to be built in a relatively short time. That left out any resin kits, and pretty well led me to 1/72 or smaller. I had some 1/144 kits, but I wanted something that had been around for a while. Rummaging through the section marked 'Older kits that are still nice and don't take a lot of work', I came up with several Huma kits. These are very nice light planes, don't have a lot of parts or really complex markings schemes and have a lot of decal options.
Picking the Bu-131, I first started removing the big bits, once the bag was opened. These parts were then cleaned up with a sanding stick and set aside. The interior was then glued together and test fitted into the interior of a fuselage half to be sure all the pieces would line up. Huma doesn't have any specific locators for the interior, which is good as it may leave sink areas in the nicely formed fabric exterior. Once the interior bits minus the seats were glued, the whole thing was painted in RLM 02. Huma's instructions are mum on interior colors so RLM 02 seemed safe. Once dry, the other fuselage half was cemented in place, trapping the now glued interior in place. I then looked at the rest of the bits and glued the cowling front to the cowling. At this time, I also cemented the fin to the horizontal stabilizer. The seams were filled and things set aside to dry. Only a day into it and things were progressing nicely.
Feeling good about things, I popped open a Root Beer and slammed it down. The belch was enough to scare small animals for miles around.
Next day I sanded down the first application of filler. Needed a
second as I thought. Tamiya filler is good stuff, but rarely is one application
enough. At this time I
 also attached
the tail section after filing the mating area to get a good fit. Of course, the
soft plastic does help align things, giving me 'wiggle' room. I added filler to
the root area of the tail plane and glued on the forward cowling at this time as
well. Then I retired to follow my editor's footsteps and do some web 'research'
myself.
also attached
the tail section after filing the mating area to get a good fit. Of course, the
soft plastic does help align things, giving me 'wiggle' room. I added filler to
the root area of the tail plane and glued on the forward cowling at this time as
well. Then I retired to follow my editor's footsteps and do some web 'research'
myself.
The next day, it was more filler and sanding. I noticed to my horror that the fin had slipped and the rudder was no longer even up with the end of the fuselage. A panic took over me as I ran around the room bemoaning my fates and with certainty that this was the end. Then I stopped and thought "Wait a minute. No need to panic. The readers won't notice it unless I tell them about it. Heck, most of them probably can't tie their shoes without directions". Calmed by this knowledge, I returned to the near-forgotten kit and after reaming out the attachment holes for the wings, squeezed them into place. A superb fit with the roots matching up pretty well. Once dry, some filler on the underside and a few practice sorties to ensure flight capabilities. Back at the work table, some more painting was done for the seats and the instrument panel decal was applied. Amazingly, after nearly 20 years, the decals slid off the paper as if bought yesterday.
Then it was time to prepare the clear bits. The Bestman has one of those canopies that masking companies love and most modelers hate. Lots of frames. Of course, no masking producer has thought to do a set for the 181, so out with the Tamiya tape and brand new scalpel blade. After briefly thinking of other uses for the scalpel that involved my editor, I carefully cut out the frame work by holding the taped over canopy to a strong light source. At this time, I also glue on the tiny quarter windows and masked them.
 Relieved
at my seeming success, I rewarded myself with a movie: Chainsaw Nurses: Bad
to the Bone.
Relieved
at my seeming success, I rewarded myself with a movie: Chainsaw Nurses: Bad
to the Bone.
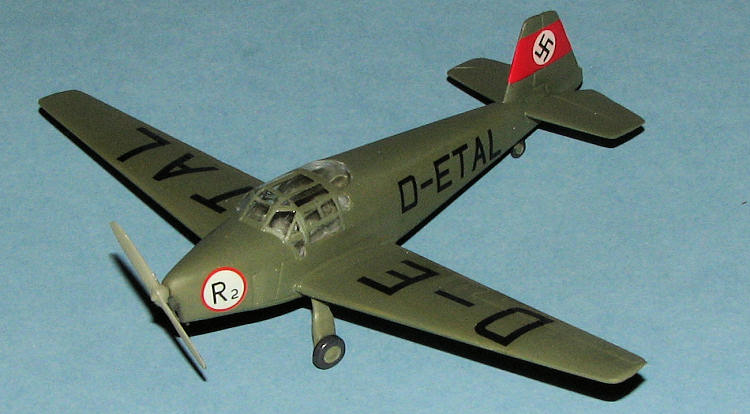
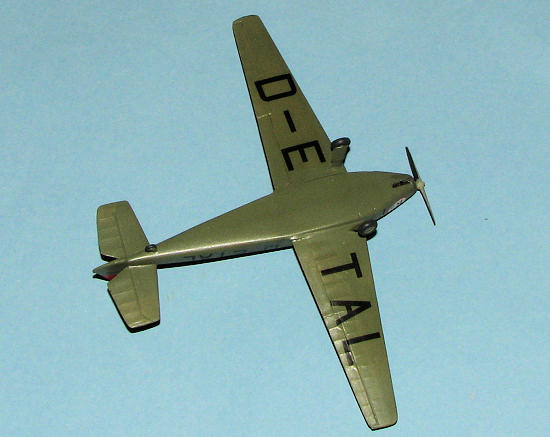
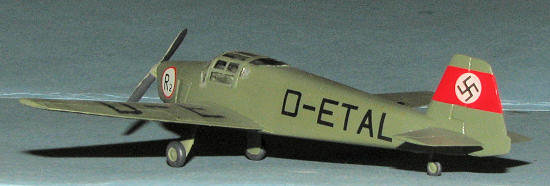
Unable to sleep following the film, I looked over the markings options in the construction sheet. There certainly were a lot of possibilities. I could do a very early plane with civil registration and what looked like a racing number, some Luftwaffe versions, the Swedish one on skis as well as several post war civil planes with French, German, or Swiss registration. I thought about the Swedish one as it was quite colorful, but wasn't sure if the decals were opaque enough to cover. Yellow is such a tricky shade and needs to be solid to be effective. In the end, I decided on the early version. This one had slightly different landing gear without exposed oleo scissors, which would make for a stronger landing gear. It was also one color overall, simplifying painting. Mind made up, I fell into a restless sleep, dreaming of high-pitched two stroke motors and a lot of screaming.
Next morning, after several cups of coffee (shaken, not stirred), I returned to the model, attaching the canopy. Again, thanks to the somewhat soft plastic, I was able to get a good fit. The early landing gear legs and the tail wheel were then glued in place and left to dry while I went to see if I had the paint required.
| COLORS & MARKINGS |
I was in luck. Underneath some old manuscripts, I found an unused tinlet of Agama's finest RLM 63 enamel. 2006, a very good year for enamels. Vigorously shaking the tinlet, I poured some into a bottle for use. "Wow, this is darker than I thought", I muttered to myself. And it is true. Over the years, the true shade of RLM 63 has been discovered and it is not the light grey we have thought for decades, but a more brownish shade of RLM 02. Wondering if I should use the RLM 63 called for or fake it and use Lufthansa Grey, I decided to go for the RLM 63. Mixing it with Agama's thinner, I then sprayed on several thin coats. The paint coats superbly and in no time, I had the entire airframe painted.
 As
I left to let it dry, I took another look at the instructions. I was then struck
with horror. I'd forgotten all about the red fin band! Again, panic set in as I
looked at the calendar and noticed that time was slowly slipping away. Thoughts
about claiming that the article had been stolen by a band of roving Gypsies
crossed my mind, but were erased as I'd used that one before.
As
I left to let it dry, I took another look at the instructions. I was then struck
with horror. I'd forgotten all about the red fin band! Again, panic set in as I
looked at the calendar and noticed that time was slowly slipping away. Thoughts
about claiming that the article had been stolen by a band of roving Gypsies
crossed my mind, but were erased as I'd used that one before.
Returning to the kit once the paint was dry, I used a combination of JammyDog white paper microtape and Tamiya tape from the 'preused' tape section to mask off the band on the fin. This area was then sprayed with Floquil's Reefer White, thinned with lacquer thinner and left to dry.
Another fitful night as I knew time was running out. Even time spent listening to my favorite music CD 'Catcalls of the Catskills' was not enough to calm my unraveling nerves.
Next day, Tamiya Red was sprayed over the white band and the tape removed. On one small section, the RLM 63 paint peeled up. Must have been an area with some sort of oils on it. The red fin band was then taped over (Tamiya acrylic dries hard enough to mask in about 4-6 hours), and more RLM 63 sprayed on.
| FINAL CONSTRUCTION |
With the majority of paint completed, I took the time to clean up the main wheels and the prop. I also painted the small exhaust section that goes under the cowling using Testors Burnt Iron Metallizer. The prop was a complete unknown in terms of how to paint it. Again, the instructions were silent and it was as if the images were laughing at me as I struggled to interpret the near-identical greyshade color references. It looked like the prop was painted the same color as the front of the cowling on all the drawings. Not Good!
Flinging caution to the wind, and with time running low, I decided to paint the back of the blades black and the rest of the prop in RLM 02.
Meanwhile, the airframe was given a coat of gloss clear acrylic in
preparation for the decals. Then I started applying the markings. First was the
tail swastika in its white circle. As feared the light colors were not opaque
enough to hold back the red from bleeding through. I congratulated myself on not
choosing the Swedish options. The markings went on easily and though the clear
on each one was rather excessive, I had no problems. I also used decided to help
the decals snuggle do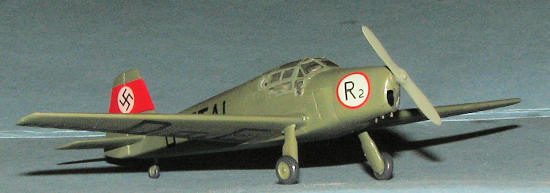 wn
so used Mr. Mark Softener on the first ones. No worries on the small markings as
I went slowly with this, allowing each marking to fully dry before going on to
the next.
wn
so used Mr. Mark Softener on the first ones. No worries on the small markings as
I went slowly with this, allowing each marking to fully dry before going on to
the next.
When I put on the first large wing marking, I noticed that when dry, they were a bit wrinkled. I applied another coat and nothing got better. I was getting that bad feeling yet again as it appears that Mr. Mark Softener was turning into Mr. Mark Wrinkler. Fighting down another panic attack, I switched to Microsol and the problem did not recur.
I then cleaned off any excess solution with a moist rag and thinking that a civil aircraft would have a gloss finish, applied a coat of clear gloss. Whoa! Way too glossy. Looked like the head of a sweating Telly Savalas. A light misting of matte took care of that and left things semi-gloss. The wheels were glued in place as was the exhaust, and then the prop pushed into the slot. I then removed the masking from the canopy, managing to scratch several of the frames.
Grabbing my 3-bristle detail brush, I touched up the errant frames and carefully set the completed model down upon which time one of the landing gear legs broke free. It is always something, isn't it. Not exactly the trials of Job, but there are times.......
Reattaching the gear leg and painting up the glitched area, I then proceeded to photograph it before some other disaster befell it.
| CONCLUSIONS |
Having completed the kit in a bit less than a week, I feverishly
typed out the article, handing it to accomplice-nurse Judy (of the Armenian
Medical Society) to inspect (as she does with everything I hand her). Feeling
that things were going my way, I relaxed
 while waiting
for the final judgment. As I was sitting there, I thought back on how nice a kit
this was and how it was a shame I didn't see more people building these kits.
Huma kits are really quite nice and if they have any drawback, it is that the
majority of detailing is raised panel lines; at least in the early kits.
while waiting
for the final judgment. As I was sitting there, I thought back on how nice a kit
this was and how it was a shame I didn't see more people building these kits.
Huma kits are really quite nice and if they have any drawback, it is that the
majority of detailing is raised panel lines; at least in the early kits.
These kits are a lot more mainstream than short run, and I couldn't think of a better start for those wanting to wean themselves off Tamiya, Hasegawa and new Revell kits, and head out for the adventures that await when doing short run.
Just then, the editor bellowed from the office, "Van Aken, get in here". Nervously walking across the threshold, I could vaguely smell brimstone and awaited my fate. "Excellent job, lad. I like it and am going to reward you with a tougher assignment. I have a 1/32 Merlin Models B-36 I want you to handle........". It was the last thing I heard as I passed out on the floor.
| REFERENCES |
June 2008
Copyright ModelingMadness.com. All rights reserved.
You can
thank me and my sadistic editor for this one. If you would like your product reviewed fairly and fairly quickly, please
contact
the editor
or see other details in the
Note to
Contributors.