Arii 1/32 1957 Daihatsu Midget
| KIT #: | 41007 |
| PRICE: | $7.00 at a swap meet |
| DECALS: | One option |
| REVIEWER: | Scott Van Aken |
| NOTES: |
| HISTORY |
The Daihatsu Midget is a single-seat mini-truck made by Japanese automaker Daihatsu. Several distinct vehicles have borne the Midget name over the years, but all have had in common a single-seat utilitarian design, with an enclosed or semi-enclosed cab.
The original Midget was made from 1957 to 1972. It had three wheels, two in the back, and one in the front. Early versions also had motorcycle-like handlebars in place of a steering wheel. The engine was an air-cooled 2-stroke design of 305 cc which produced 12 hp (9 kW).
The Midget I has also been sold outside Japan as the "Bajaj", "Tri-Mobile", or "Bemo"
| THE KIT |
My interest in this type of vehicle came from watching Hayo Miyazaki's 'My Neighbor Totoro' in which these sorts of vehicles make an appearance. When I found one at a swap meet several years back, I had to grab it. It was only now that I decided to assemble it.
Molded in a lovely green plastic, there are two sprues of fairly well
done parts. A clear sprue with a nice stress crack in the wind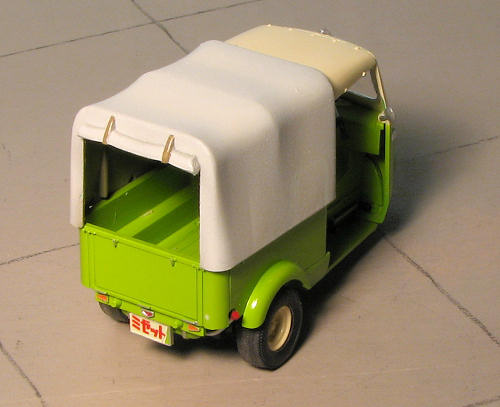 shield is
also given as are four vinyl tires.
shield is
also given as are four vinyl tires.
There is a bit of flash around the transaxle and a tad on the chassis. Ejector pin marks are on some of the parts that will have to be filled in. I also found a rather large sink area on the underside of the chassis. For those who are going to enter this kit into competition, those will have to be removed as they will be rather easily seen.
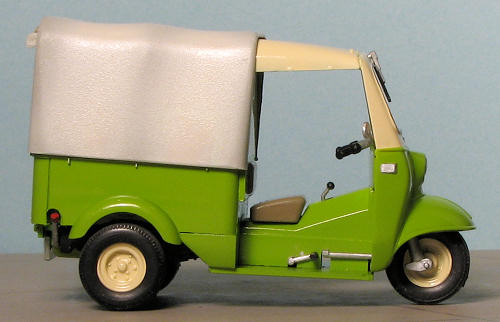
With only about 30 parts, this won't be very trying to build. What may be difficult are finding some of the colors shown on the box art, and trying to get the canvas roof and bed cover to look like canvas. Of course, you can leave the bed cover off if you so desire, though I'm not really sure where you'd find stuff to put in there. The kit is a curbside with no engine detail at all. It is basically a trike.
On one side of the instructions is a listing of all 23 1/32 Japanese cars (wait, one is a Porsche 911 and another is a VW), that are in the series. If you read the preview of the Honda 600 sports car done a bit back, you'll find that one on the list, along with a lot of cars you've never heard of much less seen unless you've lived in Japan during the 60s. The other side of the instructions gives the few construction steps needed. Of course, everything is in Japanese, but at least it seems they use Gunze paint references, so most of us won't have any real trouble in that area. A small decal sheet is provided that has plates and some names for the side of the canvas bed cover.
| CONSTRUCTION |
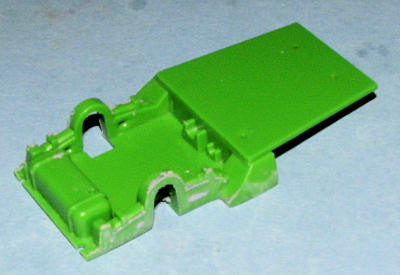 Step one was to remove some of the parts and clean up
the flash. Though not on all of the bits, some of them were rather in need. The
rear suspension section of the lower chassis has some particularly deep sink
areas. I filled and sanded the ones on the outside and left the inner ones as
they were as they won't be visible when it is on its wheels. I
then glued the rear cockpit wall to the front of the rear bed. It was at this
stage that I looked over the parts and realized that I needed to start painting
early. So that is what I did.
Step one was to remove some of the parts and clean up
the flash. Though not on all of the bits, some of them were rather in need. The
rear suspension section of the lower chassis has some particularly deep sink
areas. I filled and sanded the ones on the outside and left the inner ones as
they were as they won't be visible when it is on its wheels. I
then glued the rear cockpit wall to the front of the rear bed. It was at this
stage that I looked over the parts and realized that I needed to start painting
early. So that is what I did.
| COLORS AND MARKINGS |
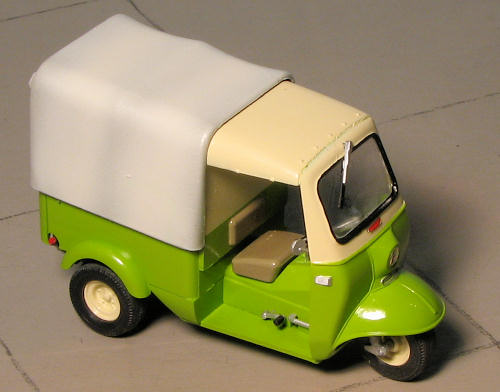
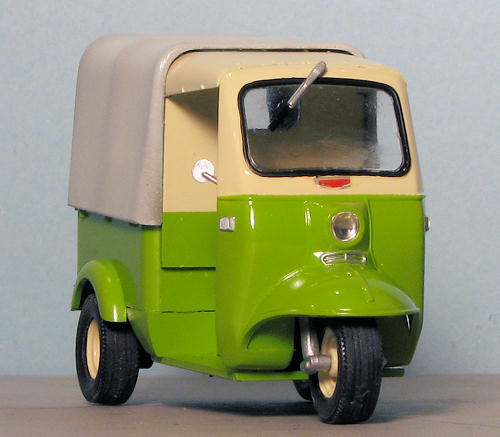 I decided to go with a two tone scheme using
Ivory as the upper color and a green as the lower. For the upper shade,
I used standard Testors ModelMaster Gloss Ivory thinned with lacquer thinner. A
few coats was all it took to look good.
I decided to go with a two tone scheme using
Ivory as the upper color and a green as the lower. For the upper shade,
I used standard Testors ModelMaster Gloss Ivory thinned with lacquer thinner. A
few coats was all it took to look good.
While that was drying, I returned to the box and started painting some of the other bits. The exhaust was painted Tinny Tin from the Vallejo line while the differential was given some black. The main color of the vehicle is a Lime Green, for which I used Humbrol paint. The Ivory was masked and the green sprayed on. The result is quite pleasing and the Humbrol gloss enamel looks very good. Most of the body and chassis parts were painted using this color. The forks, handlbars, gear shift and brake pedal shafts as well as the rear view mirror were painted aluminum, again, using Humbrol enamels. Handles and such were black. I also painted the rear suspension pieces black using Mr.Color lacquers. Wheels were painted Ivory.
When it came to the canvas top that covers the bed, I first sprayed on some Xtracolor Canvas I'd bought for a Japanese army truck. This was really too dark for my tastes, so I took what was left of the Ivory and poured in some of the Canvas. This was then lightly applied to the top section, providing a color that was darker than the Ivory, but not as dark as the original Canvas. I left the inside the darker Canvas color. This Canvas shade was used on the seat and seat back as well.
| MORE CONSTRUCTION |
Now that most of the parts were painted, it was time to start bringing them together. I first cut away the vinyl tires and sanded the mold seam from the tread. These were then simply placed onto the wheels and set aside. The main bed/forward section had the seat glued in place. I put the front wheel into the forks and glued those. This was then snapped into the attachment piece and left to dry.
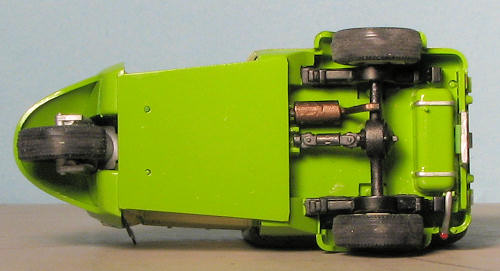 Back on the
underside, I glued the driveshaft/rear end piece to the framework, again,
setting it aside to dry. I'll admit that this kit took quite a while to build as
I wanted to be sure all the pieces were dry before moving to the next part.
Guess I could have used superglue, but I like the better bond one gets with
standard glues. With the rear end in place, the muffler and exhaust was glued
down. In the front, the front fork attachment piece was glued to the tabs
provided and again, left to dry.
Back on the
underside, I glued the driveshaft/rear end piece to the framework, again,
setting it aside to dry. I'll admit that this kit took quite a while to build as
I wanted to be sure all the pieces were dry before moving to the next part.
Guess I could have used superglue, but I like the better bond one gets with
standard glues. With the rear end in place, the muffler and exhaust was glued
down. In the front, the front fork attachment piece was glued to the tabs
provided and again, left to dry.
Once I was sure none of that would be falling off, the lower pan/chassis assembly was glued in place. Once dry, the rear wheels were attached. For this I did use superglue as the attachment points are rather loose. Since it is a three-wheeler, no worries about having one wheel up in the air due to building misalignments.
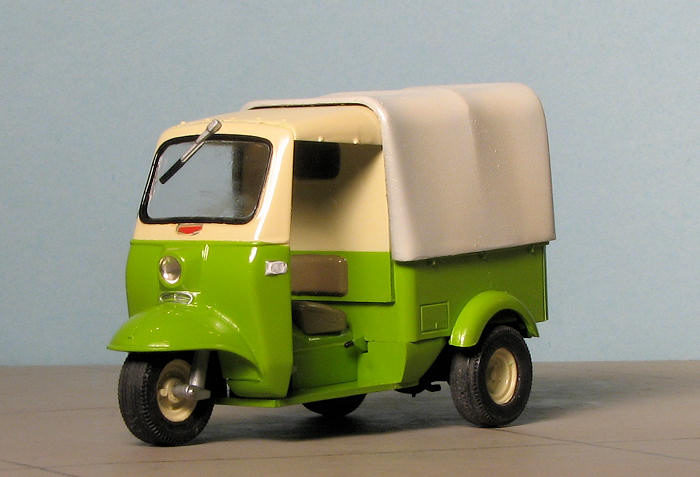
 Probably the
poorest fitting part was the front windshield/fender piece. There is no positive
locator, though there are some flat mating surfaces one can use. Here is another
place that I used super glue to add some strength to it. When dry, I trimmed the
rear and front windows until I got a good fit. These were then glued in with
clear gloss paint. For the front window, I prepainted the surround with black to
simulate the rubber seal. The myriad of shift and brake levers were then
installed. These were all aluminum with black ends to them as was the shift
lever.
Probably the
poorest fitting part was the front windshield/fender piece. There is no positive
locator, though there are some flat mating surfaces one can use. Here is another
place that I used super glue to add some strength to it. When dry, I trimmed the
rear and front windows until I got a good fit. These were then glued in with
clear gloss paint. For the front window, I prepainted the surround with black to
simulate the rubber seal. The myriad of shift and brake levers were then
installed. These were all aluminum with black ends to them as was the shift
lever.
Handlebars were glued into the dash after enlarging the hole to fit. There is a decal for atop the bar and the dash. These fit quite well and succumbed well to setting solutions. The dash with handlebars was then glued in. Somewhere during the process, I was horrified to notice that some glue got on the inside of the windscreen. After running around the house yelling "Doomed! Doomed! Doomed!" I took some of the very thin sanding stick pieces I had bought and used those to eventually remove the stain. Not as clear as what it was, but it is not the mess it was.
| FINAL BITS |
Most of the parts had been installed by now. The last
ones were the fuel filler neck and cap. The neck was aluminum with a red cap. I
also glued in the rear view mirror and after painting the frame alumin um,
the license plate holder was glued in. There is a decal for this as well.
um,
the license plate holder was glued in. There is a decal for this as well.
At the front, I did some light painting of the inlet and two turn signal light with aluminum. I used this to paint the turn signals and brake light in the rear. These were later filled in with transparent red and orange from the Vallejo range. The only part I replaced was the clear headlight. For this, I used an MV Productions lens, #L159. The opening measured 3.7mm with my interior calipers, but when I installed another lens that size, it fell into the hole. The L159 is 4mm and sits atop the opening. Again, clear gloss paint was used to hold it in place. I also used this paint to attach the windscreen wiper.
The Daihatsu logo decal was applied to the front, the top was glued in place and after an overnight dry, the cargo top was grunted into place. It is a very tight fit and while you could easily leave it off, I think it looks better with it on. There are decals to put on the side, but the instructions do not call for them to be used and after getting them translated, they just didn't seem to fit being on a delivery van.
| CONCLUSIONS |
So this is not really your normal, run of the mill kit build. I doubt if many or any of you have interest in things like this. It is the sort of off-beat thing that attracts me and though it took years to build it after purchase, I have to say that the build was not only interesting but trouble free. I have several more of these 1/32 Arii/LS car kits and building this one leaves me more inclined to give one of the others a whirl in the future.
| REFERENCES |
Thanks to me ("thank you") for this one.
If you would like your product reviewed fairly and quickly, please contact the edior or see other details in the Note to Contributors.