Provence Moulage 1/43 Porsche 917 LH
| KIT #: | K 1623 |
| PRICE: | $34.00 when new |
| DECALS: | Three options |
| REVIEWER: | Scott Van Aken |
| NOTES: | Resin kit with metal, vacuform and photo etch parts |
| HISTORY |
The Porsche 917 is a racecar that gave Porsche its first overall wins at the 24 Hours of Le Mans in 1970 and 1971. Powered by the Type 912 flat-12 engine of 4.5, 4.9, or 5 litres, the 917/30 variant was capable of a 0-62 mph (100 km/h) time of 2.3 seconds, 0–124 mph (200 km/h) in 5.3 seconds, and a top speed of over 240 mph (390 km/h).
There are 6 variants of the 917. The least-powerful
version is the 917K (the most successful), which produces around 620 bhp.
There is also a long-tail version (917LH), a "pig" version, modified 917K
with 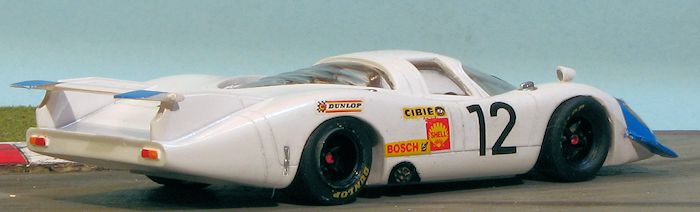 the 908 rear spoilers and the 917/30. In the 1973 Can-Am series, the
turbocharged version Porsche 917/30 developed over 1,100 bhp (820 kW), and
as much as 1,580 bhp (1,180 kW) in qualifying tune.
the 908 rear spoilers and the 917/30. In the 1973 Can-Am series, the
turbocharged version Porsche 917/30 developed over 1,100 bhp (820 kW), and
as much as 1,580 bhp (1,180 kW) in qualifying tune.
The 917 is one of the most iconic sports racing cars of all time, largely for its high speeds and high power outputs, and was made into a movie star by Steve McQueen in his 1971 film Le Mans.
At the 1969 24 Hours of Le Mans, the 917 LHs (the subject of this kit) were quickest in practice. Soon after the start the poor handling of the 917 and the inexperience of one of the drivers resulted in drama: British gentleman-driver John Woolfe crashed his Porsche 917 at Maison Blanche on lap 1, dying as a result. Woolfe was the first privateer to race a 917. The works 917s led the race for hours, but did not make it through the night. At the end, Hans Herrmann's 908 remained as the only Porsche that could challenge for the win, but Jacky Ickx's more powerful Ford won once again, by a mere 120 metres (390 ft). Victory would elude the 917 until the last championship race of 1969 was won by a private entry of Jo Siffert and Kurt Ahrens at the Zeltweg 500km event. The 917s first years of racing was over and not very memorable. The next year would be different.
| THE KIT |
This particular kit from Provence Moulage is for three of the cars entered in the 1969 Le Mans 24 hour event. Two of these are factory entered cars while one is a privateer from John Woolfe Racing.
The kit has the correct balance of photo-etch and resin parts, not
relying heavily on cast metal as do other companies for detail bits. This may
result in a slightly lower level of detail, but I've found most
 cast metal parts
to be not as well molded as I'd like, though it may well be I've chosen older
efforts.
cast metal parts
to be not as well molded as I'd like, though it may well be I've chosen older
efforts.
This kit has a full resin body and lower chassis section with the interior molded in. Other resin parts are provided for the instrument panel, wheel inserts and the wing with its supports. Photo etch is used for the windscreen wiper and a pair of small grilles. The headlight covers and windows are vacuform. The delineation of these parts is rather faint and the plastic rather thin so this will need great care to prepare. For the headlight covers, they simply used a Porsche 917 front end as the master, so you get the covers that way. A rather ingenious way of doing things. Two solid steel axles and four wheels and tires are included. The wheels are turned aluminum while the tires are rubber/vinyl. The headlights are self sticking chrome dots. A straight pin is provided for the gear shift and there is a separate steering wheel.
 The markings are quite extensive and consist of
a large sheet that has all the color bits for the nose and wing as well as the
rest of the markings. It is very nicely printed and even though it is a bit old,
the sheet is still un-yellowed. As mentioned, there are markings for three cars.
The two factory cars with the blue and yellow noses and the privateer entry with
a very nice dark blue and yellow racing stripe. A set of full color instructions
are provided with all the printing on one side of the sheet of paper. The
majority of the space is taken with decal placement and color information. A
small exploded diagram shows general parts placement, though neglects to show
the instrument panel assembly. There are assembly notes
in both French and English scattered around the sheet. I found this to be more
than adequate with the 908 and they should be good enough for this as well. It
is nice to have three options from which to choose as often times, these sorts
of kits provide only one.
The markings are quite extensive and consist of
a large sheet that has all the color bits for the nose and wing as well as the
rest of the markings. It is very nicely printed and even though it is a bit old,
the sheet is still un-yellowed. As mentioned, there are markings for three cars.
The two factory cars with the blue and yellow noses and the privateer entry with
a very nice dark blue and yellow racing stripe. A set of full color instructions
are provided with all the printing on one side of the sheet of paper. The
majority of the space is taken with decal placement and color information. A
small exploded diagram shows general parts placement, though neglects to show
the instrument panel assembly. There are assembly notes
in both French and English scattered around the sheet. I found this to be more
than adequate with the 908 and they should be good enough for this as well. It
is nice to have three options from which to choose as often times, these sorts
of kits provide only one.
| CONSTRUCTION |
As with all kits like this, the first step was to spray the
resin bits with primer so I could more easily see what needed to be fixed. The
body has a lot of small pour stubs on the bottom that were sanded off. It
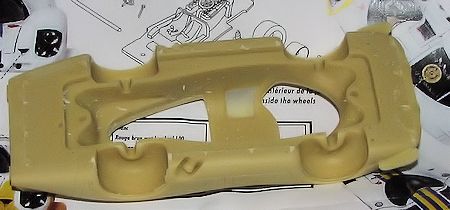 also has air bubbles on the
underside, but since they will not be seen once the model is done, I did nothing
to repair them. Perhaps you can see these in the image of the body prior to
being primed. I then sanded the mold seams and the resin pips, followed by
taking care of any additional flash that I found. The body was then reprimed
with Tamiya extra fine primer and given a coat of Tamiya gloss white.
also has air bubbles on the
underside, but since they will not be seen once the model is done, I did nothing
to repair them. Perhaps you can see these in the image of the body prior to
being primed. I then sanded the mold seams and the resin pips, followed by
taking care of any additional flash that I found. The body was then reprimed
with Tamiya extra fine primer and given a coat of Tamiya gloss white.
The interior was painted matte black as was the instrument panel section. I then painted the seats in Cavalry Brown using Vallejo acrylics. The belts were painted with buff and I used silver for some other bits of the car. The wheel inserts were also painted matte black and then inserted into the wheels. I cut the axles as they were too long, but I overdid it and they are actually a tad too short, but should provide enough stub to attach the wheels. I tried out a couple of the decals for the instrument panel and found them to be very brittle. The entire sheet was then given a coat of Microscale Decal film. I also cut the two vacuformed bits for the windows. I thought it was just a single casting but when they were cut the second one fell out! Test fitting showed that they will fit quite well as these things go.
| COLORS & MARKINGS |
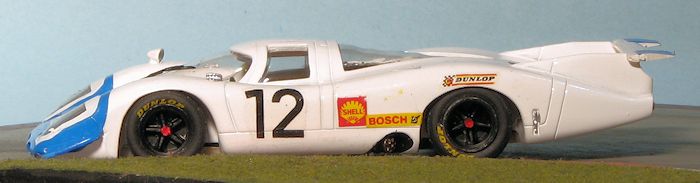
As I mentioned, I had painted the body with Tamiya gloss white. I then painted the headlight areas and the nose intakes with Humbrol matte black. I had some issues with the various small vents as I didn't want to make a mess around the openings with paint. I finally settled on using a Derwent pastel pencil sharpened to a small point and that seemed to have done the trick.
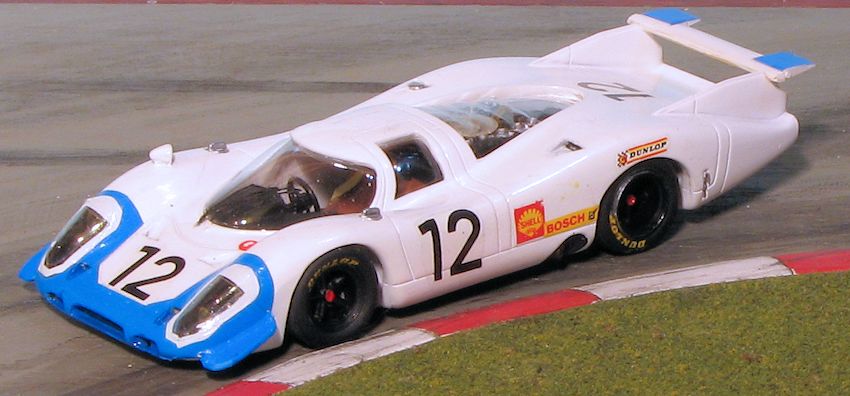
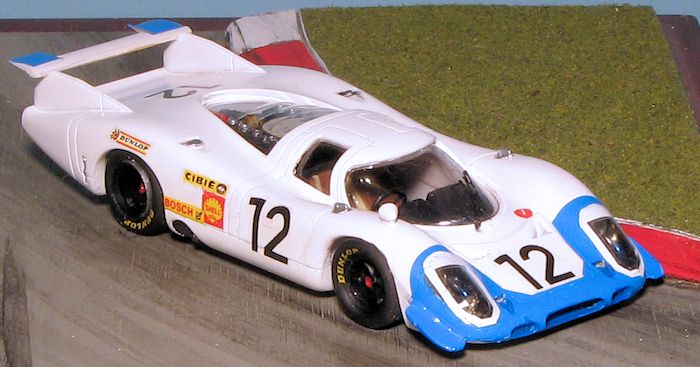 I then went about adding the markings. It was a tough decision
to make as all three schemes are quite nice, but I settled on the #12 car. I
figured that if the decals for that scheme didn't work as planned, I had two
more to fall back on!
I then went about adding the markings. It was a tough decision
to make as all three schemes are quite nice, but I settled on the #12 car. I
figured that if the decals for that scheme didn't work as planned, I had two
more to fall back on!
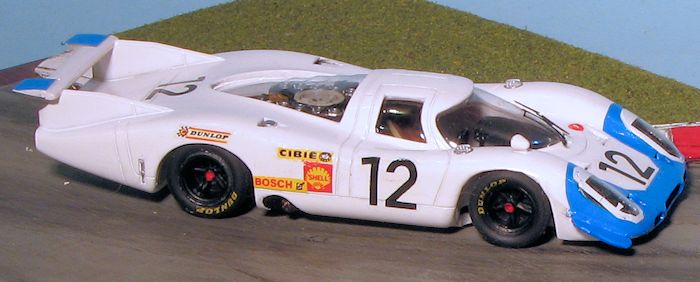
First marking applied was the large nose decal. Though it still broke into a few pieces, it went on more or less successfully. The rest went on without a lot of trauma, though I still had a few glitches, even after coating them with Microscale decal film. With the markings on, I painted the tail lights and gave the body a coat of clear gloss acrylic. I also painted the wheels black after gluing in the inserts.
The headlight interiors and the areas around the exhaust were painted matte black using Citadel paint. The kit comes with headlights that look as if they'd be stick on, but to be sure, I put some clear gloss paint into each area before attaching the bezels. The most difficult part of these sorts of kits is the installation of the headlight covers. These take a LOT of trimming and test fitting. Eventually they were sized down and again, attached with clear, gloss paint.
| FINAL CONSTRUCTION |
 Once the clear covers were on a dried (I also paint around the
edges with the clear gloss to help seal them), I installed the main clear parts.
This was followed by the interior/bottom chassis part. The installation of this
part helped to more properly seat the clear bits. I then installed wheels and
axles. The center hubs were painted red. I then put on the tape decals that went
around the lights. Silver bits were painted as was the exhaust area, the latter
followed by some Vallejo tinny tin on the exhaust pipes. Testors chrome silver
was used for the fuel caps and such with the last item to be added the two piece
p.e. windscreen wiper. There are two other small rectangular p.e. bits that I
did not install as the instructions were very vague as to their placement and I
saw nothing in the side views to help with where they went.
Once the clear covers were on a dried (I also paint around the
edges with the clear gloss to help seal them), I installed the main clear parts.
This was followed by the interior/bottom chassis part. The installation of this
part helped to more properly seat the clear bits. I then installed wheels and
axles. The center hubs were painted red. I then put on the tape decals that went
around the lights. Silver bits were painted as was the exhaust area, the latter
followed by some Vallejo tinny tin on the exhaust pipes. Testors chrome silver
was used for the fuel caps and such with the last item to be added the two piece
p.e. windscreen wiper. There are two other small rectangular p.e. bits that I
did not install as the instructions were very vague as to their placement and I
saw nothing in the side views to help with where they went.
| CONCLUSIONS |
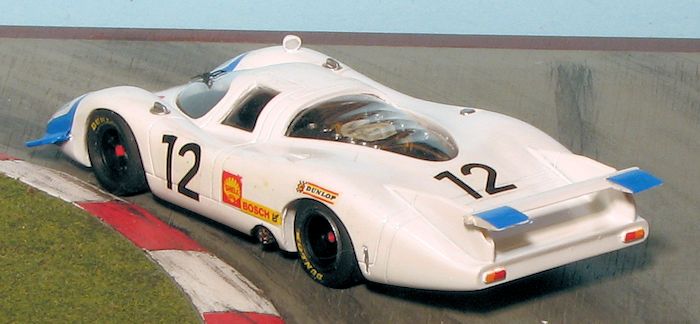
This makes the second 1/43 resin racer I've completed in the last few weeks. They look simple, but take some effort to turn into nice looking models. However, the time is well spent and adds to my growing collection of resin and metal racing car kits. Like most cars in this scale, it measures about 4-5 inches so you can display a lot in a small space. I realize there are few out there who are into these cars (at least judging from the total lack of commentary on the Matra), but if you are a fan of the genre and can find something you like in this scale, I can easily recommend these cars as a change from what you normally build.
Late note: I forgot to install the little rods that hold up the rear wings. Hold your e-mails on that and be assured that I will add them at a later date. ;)
| REFERENCES |
http://en.wikipedia.org/wiki/Porsche_917
January 2014
Thanks to me for the review kit. You can probably find one with a bit of hunting, but it may not be easy.
If you would like your product reviewed fairly and fairly quickly, please contact the editor or see other details in the Note to Contributors.