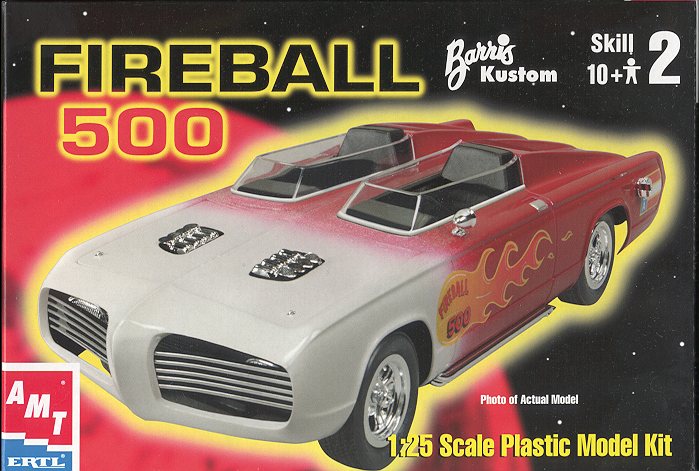
AMT 1/25 "Fireball 500"
|
KIT # |
30260 |
|
PRICE: |
$12.00 |
|
DECALS: |
yes |
|
REVIEW |
|
|
NOTES: |
Reissue from the 60s |
|
HISTORY |
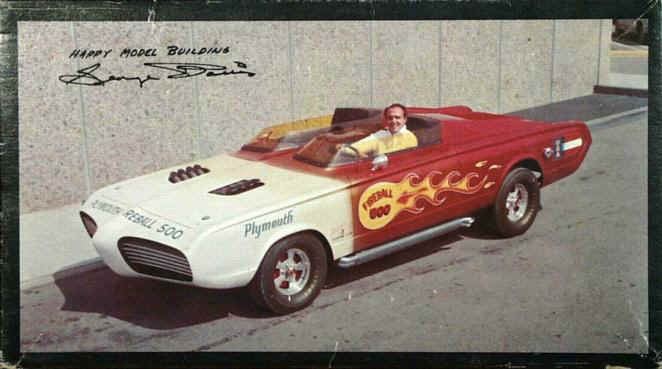
Needless to say, it allowed
people like George Barris to produce some rather neat cars. This particular one
started life as a '65 Barracuda, and you can still see some of the original car
in this one.
|
THE KIT |
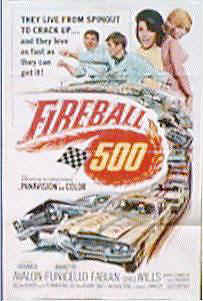
AMT has been doing us all huge favors by reissuing a bunch of neat cars from the late 1960s/early 70s. This is when custom cars, excuse me, Kustom Kars, were king and it seems like any movie that had anything to do with cars had a special built for it. Most of these are old MPC kits as Ertl bought MPC so has all the old molds. However, this kit was initially released by AMT. Frankly, this kit looks very clean and crisp for such an old kit. Obviously the molds were in good shape or well cleaned up.
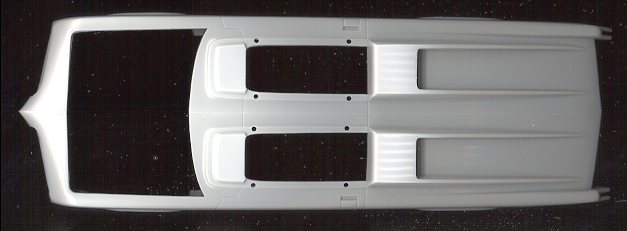
Rather than drag out all the parts to show you, here is a scan of the body of the car. AMT has recently been boxing their kits with the body in its own bag to keep it from getting scratched up. Good idea. The chrome bits are in their own bag as are the clear ones. The red parts are just tossed in the box along with the axles and tires. The rest of the parts are in one bag and held together with a rubber band to keep them from moving too much.
 The tires are
hollow Goodyears and well detailed. Not sure what the real Fireball 500 wore,
but I bet it was Firestones! The chrome parts look just great and are nice a
shiny. There are 6 building steps and all the parts are named. Any bits that
need painted are also called out in the instructions. This kit comes with a
trailer for the car, which is a nice surprise as there is no mention of it on
the box. The tires for it are styrene, and not the same quality as those for the
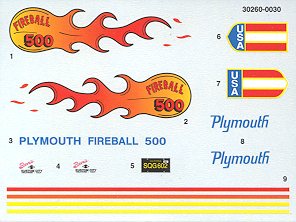
car itself. There is a decal sheet for the logos and flames on the side of the
car. If you take a look at the picture of the real car at the top of the page,
you will notice that there are some real differences with the flames on the
side. Good luck trying to fix it!!
The tires are
hollow Goodyears and well detailed. Not sure what the real Fireball 500 wore,
but I bet it was Firestones! The chrome parts look just great and are nice a
shiny. There are 6 building steps and all the parts are named. Any bits that
need painted are also called out in the instructions. This kit comes with a
trailer for the car, which is a nice surprise as there is no mention of it on
the box. The tires for it are styrene, and not the same quality as those for the
car itself. There is a decal sheet for the logos and flames on the side of the
car. If you take a look at the picture of the real car at the top of the page,
you will notice that there are some real differences with the flames on the
side. Good luck trying to fix it!!
Not being a modern kit, there really are not that many parts. The engine itself is only 17 parts. There is no separate front or rear suspension, all of that being molded in the lower frame. In fact, just about all the car is rather minimalist, despite not being a curbside. However, it is a 30 plus year old model and cannot be measured by today's standards.
I for one am really psyched about this and the other current releases. I'm also happy that this one comes in a real box!!
|
CONSTRUCTION |
First thing one does, is to scope out the parts. Molding is really quite good, but there are some glitches, such as ejector pin marks just about everywhere! I started construction with the trailer. Considering how few parts there are to this kit, it is good that we get this goodie. The wheels and tires are styrene for this one. There is no tread on the tires, nor is there any sidewall detail. I glued the inner hubs to the tires and the springs to the trailer chassis after they had been cleaned up. When you glue the springs in place, you will notice three prominent ejector pin marks on the outside of the springs, but none on the inside! These were sanded off and the springs rescribed.
Then I glued the main block of the engine along with the heads, intake manifold and the front piece. These last two were chromed, so I gave them a coat of Strip A Kit to remove the chrome. These will later be painted a more realistic aluminum after the block is given a coat of orange.
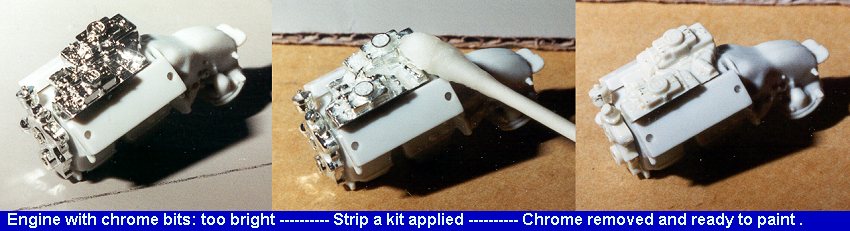
I also used Strip-a-Kit to remove chrome from the wheels, gas cap, valve covers, intake bits and some other smaller pieces. Chrome is nice, but as you can see on the picture of the real car, wasn't used on all these parts. Besides, I was planning on doing a bit of alternative painting for a few of these bits anyway! It is at this stage where a lot of painting started to be done. Unlike aircraft, it seems that car models are in a constant state of being painted.
|
PAINTING |
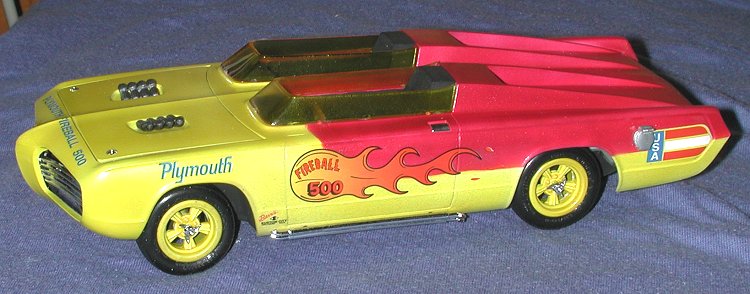
 The body was smoothed out and then painted flat black on the
inside. I also used this color for all the parts of the trailer as well as the
interior. Then the inside of the car body was masked and the exterior was given
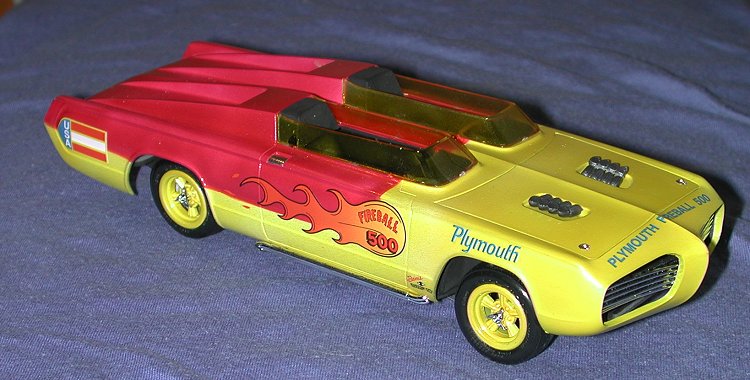
a coat of gloss white using Testors Model Master White. Before that had dried, I
switched to Alumna Yellow, a Colors by Boyd paint. This was then sprayed on the
front and lower sides of the car. I know this area should be white, but I wanted to do an
'updated' Fireball 500. For some reason, when it comes to painting and marking,
I just can't do the stock version!! The rest of the car was painted in a
Pearl Rose, also a Boyd's color. This took several sessions of back and forth as
I made many mistakes!
The body was smoothed out and then painted flat black on the
inside. I also used this color for all the parts of the trailer as well as the
interior. Then the inside of the car body was masked and the exterior was given
a coat of gloss white using Testors Model Master White. Before that had dried, I
switched to Alumna Yellow, a Colors by Boyd paint. This was then sprayed on the
front and lower sides of the car. I know this area should be white, but I wanted to do an
'updated' Fireball 500. For some reason, when it comes to painting and marking,
I just can't do the stock version!! The rest of the car was painted in a
Pearl Rose, also a Boyd's color. This took several sessions of back and forth as
I made many mistakes!
While this first attempt was drying, I painted the trailer and all its attached parts black as well as the trailer's wheels. No need to do anything fancy as it is just a trailer. Once all the bits had dried, the wheel detail was drybrushed and the tire parts were painted using Aeromaster Tire Black enamel. When dry, the trailer was assembled. The axle that is provided is a bit too large for the holes it has to fit into so those were reamed out for a good, tight fit. The plastic axle stubs for the wheels are too small for the wheel attachments so I had to use superglue to get these to fit. The trailer was then set aside in hopes of having a car to put on it!
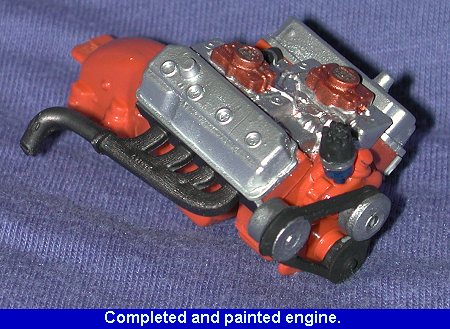 Meanwhile, I cleaned up the stripped ex-chrome bits. The valve
covers were painted aluminum as was the intake manifold on the engine. The carbs
were painted in a copperish color and some detail painting was done on the
intake manifold. The distributor cap was pained flat black and glued in place.
The exhaust manifold was glued to it's attachment base and they were then
painted Burnt Iron. The pulley and belt assembly was painted black and engine
fan aluminum. These bits were all glued onto the block over a several day time
period and it was then ready to install in the chassis. I did zero wiring and
other detailing to the engine as this kit will be built box stock (except for
the paint scheme).
Meanwhile, I cleaned up the stripped ex-chrome bits. The valve
covers were painted aluminum as was the intake manifold on the engine. The carbs
were painted in a copperish color and some detail painting was done on the
intake manifold. The distributor cap was pained flat black and glued in place.
The exhaust manifold was glued to it's attachment base and they were then
painted Burnt Iron. The pulley and belt assembly was painted black and engine
fan aluminum. These bits were all glued onto the block over a several day time
period and it was then ready to install in the chassis. I did zero wiring and
other detailing to the engine as this kit will be built box stock (except for
the paint scheme).
The wheels were painted white and when dry, painted with the same Alumna Yellow as the front of the car. I also had to do a bit of sanding on the car body as some bits of junk had gotten in the paint and needed to be removed. I won't claim to be a good car painter, but want it to look as nice as I can get it.
The other color painted on is Pearl Rose, again by Boyd. I tried a soft demarkation line spraying it freehand, but just didn't get the line I liked. Too much overspray. When dry, I masked off the red and resprayed white over the overspray and then the yellow again. When I removed the mask, the line looked too harsh, so I ran a thin bead of U-knead-it along the line and then masked it off and resprayed the rose color.
The interior is basically complete as one unit. It and the dashboard were painted flat black. The trim in the seat was then painted steel and the center console and dashboard were dry brushed with aluminum. You can't see much of the interior when it is installed in the car anyway, so no need to put a lot of extra work into it (so says the lazy modeler). At this time the dechromed intake thingies were painted Magnesium, just to be different. The backings for the 'tunnel' lights were also dechromed and painted white.
|
CONSTRUCTION CONTINUES |
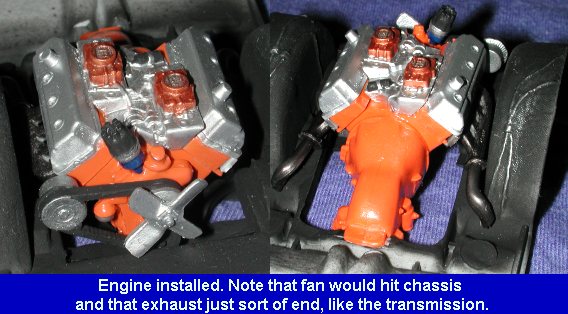 While all that
painting was being done, I managed to finish building the engine and glued it
into the chassis. Not at all like today's kits, this one has the transmission
just sort of stop. Same thing with the exhaust headers. They stop just behind
the wheel wells. I guess that when the firewall is installed (assuming I can get
the paint job to look half way decent), those items will sort of disappear into
the murk. They do look rather odd as it sits!
While all that
painting was being done, I managed to finish building the engine and glued it
into the chassis. Not at all like today's kits, this one has the transmission
just sort of stop. Same thing with the exhaust headers. They stop just behind
the wheel wells. I guess that when the firewall is installed (assuming I can get
the paint job to look half way decent), those items will sort of disappear into
the murk. They do look rather odd as it sits!
I had a terrible time with the wheels and tires. No matter how I tried, I couldn't get the darn things on straight. Superglue was a disaster and I ended up having to clamp the wheels together while drowning the join in liquid cement. Then the tires weren't on straight. I also split the backs of two wheels getting the slightly too large axles to fit. AAUUGGHH! Who was it that said car kits are easy?? To make matters worse, when it came time to installing the axles and wheels on the chassis, the engine blocked the route of the front axle. This meant breaking the glue join on the engine to allow the axle to pass through it.
 Well, one does what one has to in order to get things to fit, I
guess. Despite this setback, work continued. Now I had a pretty complete (such
as it is) chassis and all the rest of the work went into the body. First off, I
finally settled on an OK paint job, though I did file away that I should NEVER
do multi color paint jobs on cars. I suck at it.
Well, one does what one has to in order to get things to fit, I
guess. Despite this setback, work continued. Now I had a pretty complete (such
as it is) chassis and all the rest of the work went into the body. First off, I
finally settled on an OK paint job, though I did file away that I should NEVER
do multi color paint jobs on cars. I suck at it.
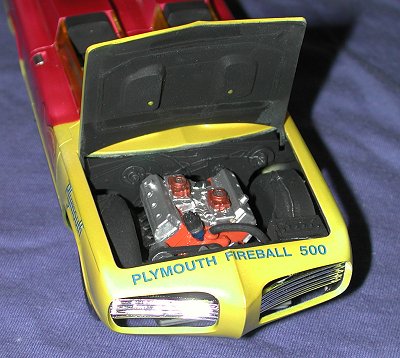
Once the body was properly dried I installed the firewall and the radiator bit. Before installing the radiator, the headlights were glued to that assembly and the front grille was glued in place. The lights and grille are chrome plated so I had to remove the plating on those bits that needed gluing.
The dash panels and head rests on the interior were painted flat black. Then the interior was installed as were the tail lights, rear chrome trim, and brake lights (which go in the 'tunnels'. Now that the interior was installed and dry, the chassis was glued to the interior. The only places where this touches are at the very front and rear. I applied glue to those sections and smothered the bottom of the interior with superglue to ensure a good join. Then I left it to dry. The hood had the little intake thingies attached. Naturally the attachment pin was too far outboard to fit in the hole, so it was cut off and the intakes glued into the recesses.
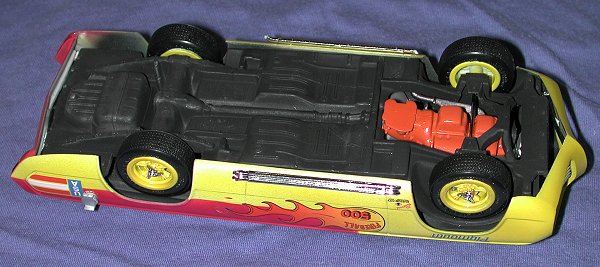 When I came back I was less than thrilled to find that the
chassis had somehow shifted forward about a 1/4 inch. Enough to uncenter the
wheels in the wheel wells. After an attempt to break loose the superglue covered
join (unsuccessfully), I just let it go and hope that I do better on the next
one!
When I came back I was less than thrilled to find that the
chassis had somehow shifted forward about a 1/4 inch. Enough to uncenter the
wheels in the wheel wells. After an attempt to break loose the superglue covered
join (unsuccessfully), I just let it go and hope that I do better on the next
one!
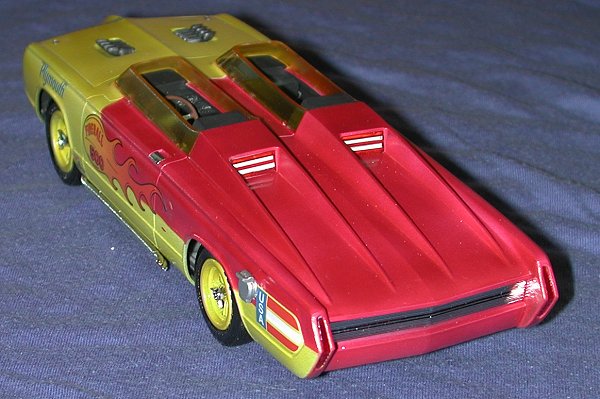
Anyway, the head rests were glued on as was the gas cap. I gave up on the rear view mirror and license plate bracket as a lost cause. The windscreens were sprayed with Tamiya clear yellow, though I think I overdid it. These were then glued in place with a touch of non-fogging superglue. The lake pipes were a press fit, which was nice.
All that was left were the decals. I originally planned not to use them, but they do such a great job of covering some of my errors that I ended up using them. They are a bit thick, but do stick well and I was able to use Solvaset on them without any major trauma. Final bit of work was to put Bare Metal Foil on the door handles and hood latches.
|
CONCLUSIONS |
The end result is a very nice looking car and one that is visually interesting. This one turned out better than my last and really isn't a bad kit, despite its ancient beginnings. It can be pretty easily built by just about any modeler with some experience, so I recommend it to those who are interested in the genre.
October 2000
Copyright ModelingMadness.com. All rights reserved.
Review kit courtesy of me and my wallet!
If you would like your product reviewed fairly and quickly, please contact the editor or see other details in the Note to Contributors.
Back to Reviews Page 2019