Painting a Resin Base
In the last few years there have been a number of manufacturers who have offered resin bases on which we can display our models. For the aircraft buff, these bases have been done in the forms of aircraft carrier decks, Luftwaffe plank hardstands, and PSP (Pierced Steel Plank) or Marston Matting. These have been produced by a number of concerns and show a level of detail that is superb. It also saves those of us who are lazy, from having to do them ourselves. The cost is about the same as a quality kit, running from $15-25 on the average.
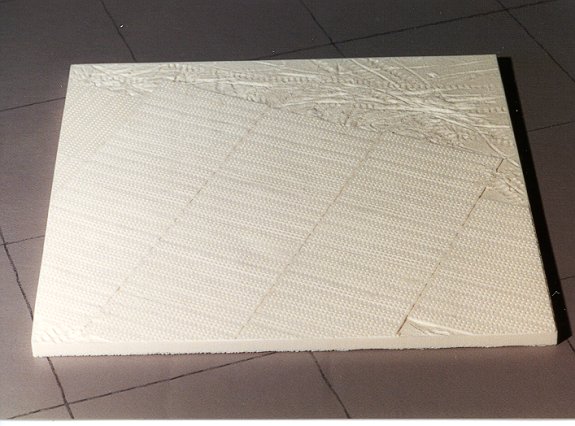
This one is from Cooper Details and is in 1/72. It is a PSP base with sufficient mud and other glop around it. As you can imagine, the PSP was generally used where the surrounding ground was a bit too 'loose' to be able to handle the weight of aircraft on it. This stuff is quite long lasting. As late as the late 1980s, the parking place near my work on a west coast Navy base was PSP that had been laid down during WWII !
The first thing to do, as with any resin, is to give it a thorough cleaning in warm soapy water. This is to remove any oily residue that is left from the mold release. It then gives us a nice clean base on which we can then apply our paints. It is not necessary to give it any primer before adding the first color.
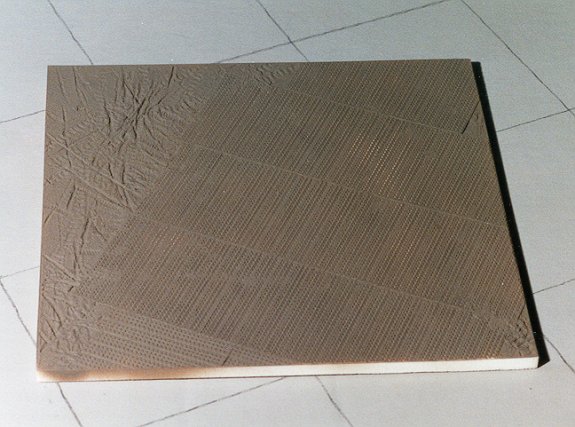
The next step, according to the instructions, is to give it a base coat. In this case it recommended RLM 81 brown-violet. I used Aeromaster's enamel paint for this. This produces a starting place for the rest of the colors.
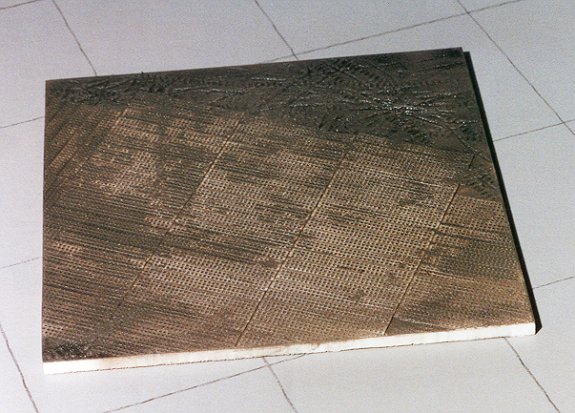
Once a good base coat has been applied and has dried, the next thing to add to it is a good wash. The instructions recommend one using gloss black and that is what I used. I sprayed mine on, but frankly, I think that brushing it on would have been better as spraying it on puts it everywhere, not just in the depressions. Of course, I could not have thinned it enough. What I then did was to wipe a lot of it off the matting area itself. This leaves it only in the various depressions. It also makes the base look really yucky!!
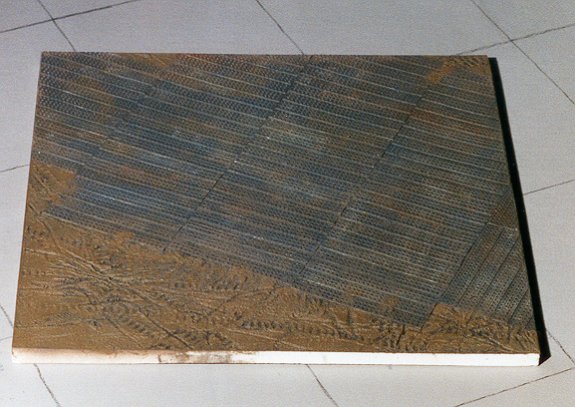
This then provides the main area for the rest of the work. What you then do is to apply a BUNCH of other colors to the board. You do this by drybrushing on various shades that fit the area you are going to do. For a job like this, I recommend a rather wide and stiff brush. If you are modeling it on sand, then you use a lot of tans. If mud, as I did, then you use a number of shades of brown and grey. I initially used RLM 66 dark grey to go over the steel matting area. Then I used various browns and some steel Metallizer for the matting area.
The mud was drybrushed with mostly RAF Dark Earth, as it seemed appropriate. Some lighter browns were again used for the mud area. Don't forget to add some of the 'mud' to the matting area as the base has some 'leaking' into the matting. Then you can spray clears on it to seal it in. If you want the mud to look particularly wet, use a gloss, if you want it to be dried, then a matte finish is what you need. Should you choose the dried mud approach, you need to lighten the colors a bit. as well.
The final result is quite a change from mirrors or other bases. To spruce it up you can add some vegetation or ground support equipment. As you can see, it is really easy to do and lets you practice washes and drybrushing if you are not particularly good at these skills.