Hasegawa 1/48 Bf-109E-3 'Swiss Air Force'
| KIT #: | 09164 (Jt 104) |
| PRICE: | $25.95 MSRP when new in 1995 |
| DECALS: | Two options |
| REVIEWER: | Scott Van Aken |
| NOTES: | Includes small etched fret |
| HISTORY |
For most, the Bf/ME-109E needs little introduction. But
to help fill this section, I should mention a few things. The 109E version was
the first production plane to use the Daimler Benz engine and that produced a
quantitative leap in performance over the Junkers
 powered versions. Though the
A-D variants did well in Spain, the E was just that much better and more up to
handling the aircraft of the major powers when WWII got underway. Though
replaced by the even better 109F in late 1940/early 1941, the 109E versions
continued to soldier on in ground attack units, on secondary fronts, in training
squadrons and as major equipment for axis allies.
powered versions. Though the
A-D variants did well in Spain, the E was just that much better and more up to
handling the aircraft of the major powers when WWII got underway. Though
replaced by the even better 109F in late 1940/early 1941, the 109E versions
continued to soldier on in ground attack units, on secondary fronts, in training
squadrons and as major equipment for axis allies.
One thing that few people realize is that the Bf-109E-1 and E-3 variants were built side by side on the assembly line, with 40% of the production being the full machine gun armed E-1 variant and the other 60% being the E-3 version with the wing guns replaced by cannon. In all other aspects these two were the same. Both were later converted to fighter-bombers, had upgraded canopy/windscreens from the E-4 retrofitted and some even had the additional plumbing installed to allow them to carry drop tanks. Makes fully identifying sub-types difficult if one only has a photo as what looks like an E-7 could easily be an upgraded E-3.
Anyway, enough of that and on to the build.
| THE KIT |
Surprising though it may be to many, the Hasegawa 1/48
Bf-109E series is a quarter century old. Initially released in the J series,
there were some faults in the fuselage that caused Hasegawa to modify the
tooling. This was possible as the fixes required removing material from the
mold. Were it such that material needed to be added (and thus require an entire
new tooing), I doubt it would have happened. Tamiya ran into a very similar
problem when initially tooling their 109E-4 so one has to be wary of older kits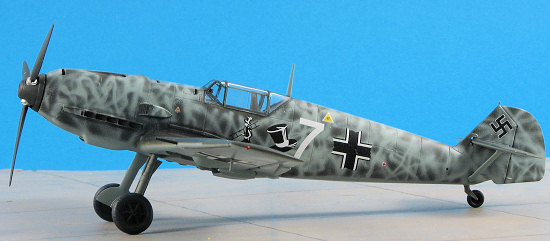 in that regard as the old and modified kit boxes are identical.
For the few of you who have not built one of these kits, it comes with a small etched fret for the canopy armor plating. Not all E-3 variants used them, but by the time of the Battle of Britain in mid 1940, they were pretty well all so equipped. Also on that fret are oil and water coolant radiators. The kit has a three piece canopy so you can show off the interior and has separate extended slats. Flaps are separate as well, though one will have to do some modifications to have them lowered. This kit also includes a centerline drop tank and rack that wasn't used until the E-4 variant, though some E-3s were later equipped. The proper unarmored E-3 windscreen is included. Again, some E-1 and E-3 versions were fitted with the later E-4 canopy at a later time. A bomb used later on the E-7 versions and again fitted to some E-1/3/4 versions to make them 'Jabos', is also included but not used.
The kit is really quite accurate, but can be helped by aftermarket for the interior and wheels. Even the Hobbycraft Bf-109D that I recently reviewed has more and better detailing for the interior side panels and wheels than this Hasegawa kit. Markings in this boxing are for two Swiss Aircraft, but then, I'm not doing a Swiss plane so those won't be needed.
| CONSTRUCTION |
The reason for building this kit (as if I really need a reason to do a 109), is to try out the latest paints from Aerohobby. These are a new line of acrylics that intial testing show as very good. Not only that, they are only $1.50 for a large jar of paint. Much better than forking over $3.00 or more for less.
 Anyway, I started by painting the interior bits, wheel
wells and intakes with RLM 02. RLM 66 did not come into widespread use until
mandated in a November 1941 requirement, though some companies had been using it
a bit before that. One would be safe in painting all 109E interiors with RLM 02
and probably even early F models as well, for Messerschmitt and those that built
their planes were some of the first to use RLM 66.
Anyway, I started by painting the interior bits, wheel
wells and intakes with RLM 02. RLM 66 did not come into widespread use until
mandated in a November 1941 requirement, though some companies had been using it
a bit before that. One would be safe in painting all 109E interiors with RLM 02
and probably even early F models as well, for Messerschmitt and those that built
their planes were some of the first to use RLM 66.
I did not use any aftermarket parts on this build, though the interior sorely needs to be replaced. Fit is good as one would expect. I Assembled the wings at this time, just to have something to do. I also glued in the oil cooler etched screen. There is a splitter plate that goes in this area, but it was not always used so you need to check your references. Generally speaking, the longer the airframe was in service, the more likely this part was not replaced after maintenance.
After detailing the instrument panel and side walls
with some paint, then giving 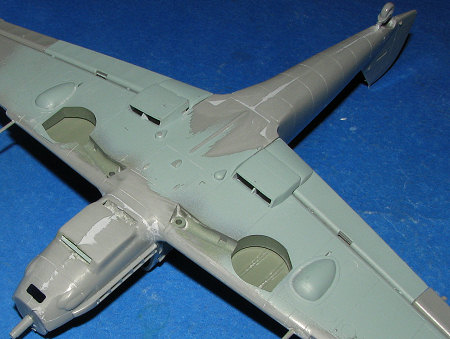 things
a wash using thinned black enamel (base paint is acrylic), I attached the side
walls and glued the instrument panel in place. Next, the fuselage halves were
joined together. I used filler on all the seams, a pretty standard thing for me.
things
a wash using thinned black enamel (base paint is acrylic), I attached the side
walls and glued the instrument panel in place. Next, the fuselage halves were
joined together. I used filler on all the seams, a pretty standard thing for me.
The wings on the Hasegawa kit are notorious for not fitting well in the lower rear section. This is due to the plastic being somewhat thin and so it curves. If one gets the rest in line, then the back has a large sunken area that needs filled. This time. I glued only the very back piece, getting it as flat as I could. The next day, I glued the rest of the wing in place (after trimming the firewall section as it is too long), and only used a small amount of filler when compared to other Hasegawa 109Es I've built.
I then glued on the tail planes, but left the support struts until near the end of the build. The upper cowling was then fitted after I glued the machine guns into it from the underside. Fit is fairly good. I forgot to attach the supercharger intake at this stage and it caused some delay in completion when I did it later and had to do a minor repaint.
Speaking of which, I masked off the clear bits and covered the cockpit with tape in preparations for painting.
| COLORS & MARKINGS |
Since the main purpose of this build was to test out
the new Aerohobby acrylic paints, I needed to find an appropriate scheme of RLM
70/71/65. Well, finding a 109E-3 with these colors isn't as easy as I'd thought.
I eventually did locate one, though it was a bit
 different from the standard.
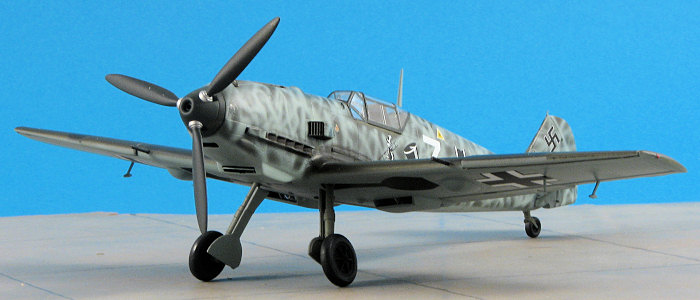
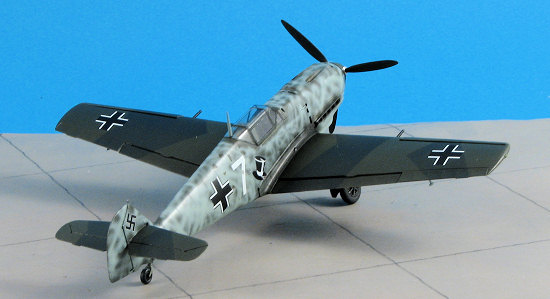
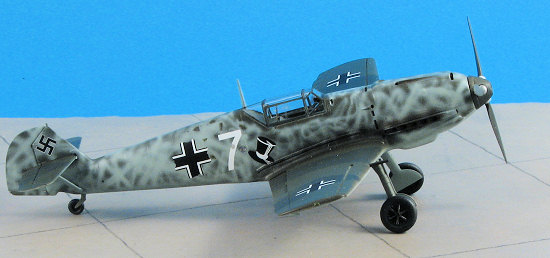
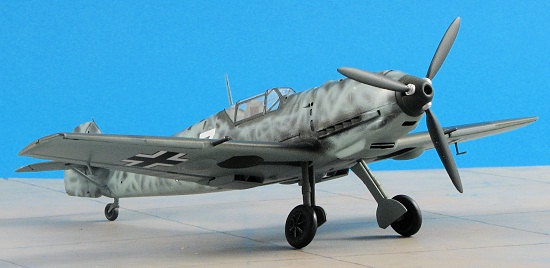
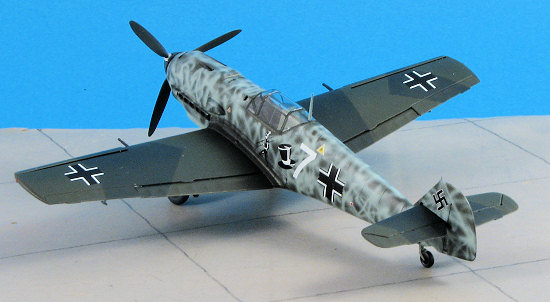
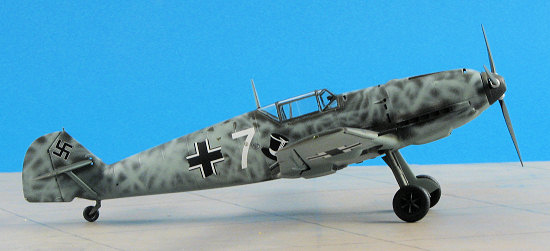
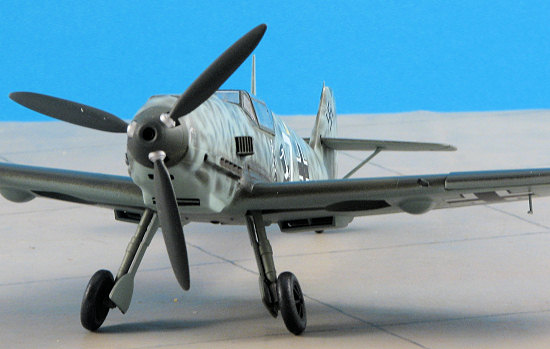
It was the aircraft of Reinhard Seiler, Staffelkaptain of 1./JG 54 based in Germany during April 1940. The entire fuselage was oversprayed in a very random pattern of RLM 65. Wings and tail plane were apparently untouched as was the case with the canopy frame. I used a favorite sheet, Aeromaster 48-249 "Marauding Emils part IV", a sheet I'd used previously on another 109E build several years ago.
The Aerohobby paints are very good and gave me no trouble when it came time to spray. They are pre-mixed as ready to go, though if you want, you can thin them. I found that they work best when sprayed over an undercoat, though they can be sprayed onto clean, bare plastic with no real problem.
I first painted everything with RLM 65 and then masked
the undersides of the tailplanes. The paint dries rather quickly and is quite
matte. I then gave all the upper surfaces a coat of RLM 71. This was masked with
Tamiya tape and then the RLM 70 was sprayed on. Aerohobby has made the RLM 71 a
bit lighter than what the official color chips call for and to my eye, it
produces a more pleasing effect. If you recall from the recent 109D paint, I
used Agama paints for that and their RLM 71 is exactly as called for in the
official chips. The result, however, is that it is nearly the same shade as the
RLM 70, so unless the light hits it just right, it looks to
 be a single, solid color. This
caused many photos of early war aircraft to be deciphered by profilers as being
a single color as opposed to being in a splinter pattern. Anyway, I approve of
the lighter shade as it allows all that masking work to be properly appreciated!
be a single, solid color. This
caused many photos of early war aircraft to be deciphered by profilers as being
a single color as opposed to being in a splinter pattern. Anyway, I approve of
the lighter shade as it allows all that masking work to be properly appreciated!
Once all the main colors were in place, I went over the fuselage with RLM 65, nearly obliterating all that nice splinter camo. I also painted the canopy bits separately with RLM 70. The Tamiya tape is perfect for this paint and did not pull up any of it, a problem I have had with some other acrylics.
The model was then given a couple of coats of clear gloss acrylic (Future) and then the decals were applied. This 1997 sheet is printed by Microscale, so the decals were not a problem. As the plane had been over-sprayed, I only applied minimal data markings, and it is possible that none were reapplied but you never know.
| FINAL CONSTRUCTION |
 The
rest of the build was pretty well standard, though as it usually seems, the last
10 percent seems to take 25 percent of the time! This included attaching the
landing gear and doors, gluing on the aileron mass balances and pitot tube. I
then sprayed the entire airframe with a clear semi-matte as I felt that perhaps
a staffelkaptain's plane would have been kept clean or perhaps waxed for extra
speed.
The
rest of the build was pretty well standard, though as it usually seems, the last
10 percent seems to take 25 percent of the time! This included attaching the
landing gear and doors, gluing on the aileron mass balances and pitot tube. I
then sprayed the entire airframe with a clear semi-matte as I felt that perhaps
a staffelkaptain's plane would have been kept clean or perhaps waxed for extra
speed.
The canopy and windscreen were glued in place. I had a terrible time getting the etched armor plate piece to fit properly. It is well designed, but I had problems. Once that was attached and the canopy glued in place, the prop was glued on and some of Marmro's Magic Dust was used for light exhaust staining. I glued on the leading edge slats and installed the radio mast. There was the inevitable touch up painting done (thankfully, the Aerohobby paint dries the same shade whether airbrushed or hand brushed).
| CONCLUSIONS |
 It
was nice to build a Hasegawa 109E again. It has been a long time since I did one
of these and I've got to say I'm glad I did as it is a very nice kit. Though the
cockpit could use some additional detail (resin or photo etch) and the wheels
would also benefit from a resin replacement, the kit has stood the test of time
quite well. I am also quite pleased by the Aerohobby paints and can recommend
them to you if you are looking for a good acrylic and want to get the best bang
for your buck (you get about 50% more paint for considerably less money than
other acrylics).
It
was nice to build a Hasegawa 109E again. It has been a long time since I did one
of these and I've got to say I'm glad I did as it is a very nice kit. Though the
cockpit could use some additional detail (resin or photo etch) and the wheels
would also benefit from a resin replacement, the kit has stood the test of time
quite well. I am also quite pleased by the Aerohobby paints and can recommend
them to you if you are looking for a good acrylic and want to get the best bang
for your buck (you get about 50% more paint for considerably less money than
other acrylics).
October 2007
#1491 in a series.
My thanks to www.aerohobbypaints.com for providing the paint used in this review. Check them out and order a batch. You'll like them.
If you would like your product reviewed fairly and fairly quickly, please contact the editor or see other details in the Note to Contributors.