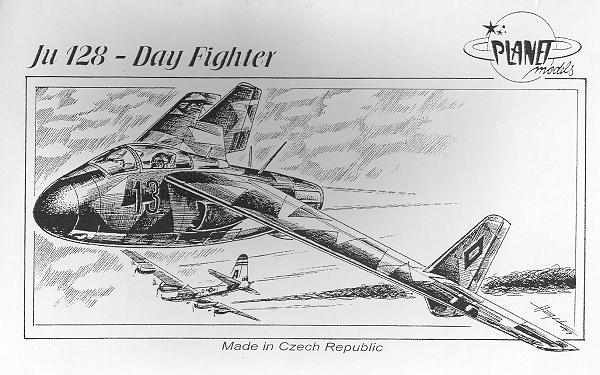
Planet Models 1/72 Junkers EF.128
|
KIT # |
54 |
|
PRICE: |
$39.95 |
|
DECALS: |
One version, Red 13 |
|
REVIEW BY: |
|
|
NOTES: |
|
HISTORY |
It is a foggy morning in July 1947 at the forward base of Bhiwandi, just north and east of Bombay in western India. Ltn. Heinrich Dole awakes from his sleep to the sound of sirens. "It is the British again", he thinks. "Why can't they just give us a little rest?" He pulls on his flight suit and shoes, and rushes out of the door to hop into the waiting truck. Once all the pilots are in, the little truck screeches off and careens down the dirt road to the revetment area to drop off pilots by their aircraft. The ground crews have already gotten the aircraft hooked up and the engine turning over at idle.
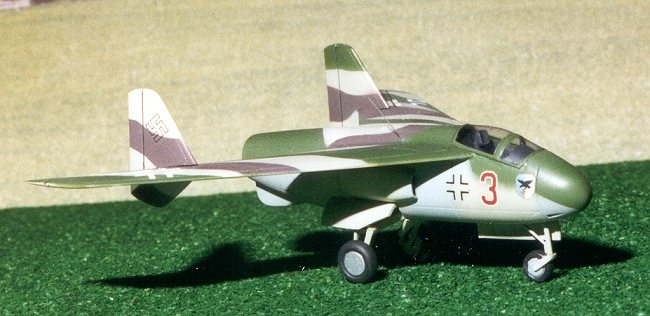
Ltn. Dole gets the thumbs up from his crew chief and starts putting on his parachute and leather helmet. Next to him is his aircraft, Red 3. A Junkers Ju-128, painted in a sort of brown and green camouflage that is perfect for this area of the world. Already it is getting warmer and the fog is starting to lift. Fully kitted, he climbs the ladder to the cockpit and straps himself in. It is good to be in a familiar location. He quickly looks over the gauges and notices all operating normally. He tells the tower he is ready and gets instructions to taxi out and take off to the northwest.
Increasing the throttle, his turbojet throws up a cloud of dust in the revetment, but he is soon bumping over the rather rough taxiway on the way to the takeoff area. After a long takeoff roll, he and his comrades are soon airborne. Radar vectors him to the south and east. His group quickly climbs to nearly 12,000 meters to await the incoming British aircraft.
He hopes for another chance to go after the British heavies. His staffel has been equipped with the latest unguided rockets; and improved R4M with a bit longer range and larger warheads. With 12 under each wing Dole figures that by firing 3 from each wing, that will give him four chances to bring down an aircraft. He sets the selector switch for the rocket firing pattern and gives his instruments another check.
A call from the radar operator vectors his aircraft to 145 degrees to meet the oncoming bombers. He can now see the contrails from them and as he gets closer, he notices that they are Lincoln bombers. These should be pretty easy targets, unlike the larger Boeing Superfortresses. As he gets nearer, he notices that there are escort fighters as well. It appears that the British have been able to increase the range of their Meteors and Vampires. These appear to be Meteors as he doesn't see the twin booms. Still, easy pickings for upper cover, who are supposed to take care of the bomber's escorts. The Meteor is fast, but not as nimble as the Vampire or the 128.
Dole and his wingman pull up and around the formation hoping to come at them from out of the sun. Meteors to the left! The other 128s swoop in to engage them and the R4M equipped aircraft head toward the bomber formations. "Steady now", Dole thinks. "Line up the last bomber in the group and…..Fire!" 6 rockets streak toward the droning bomber. The target Lincoln sees them and starts to curve away to the left. A miss!!
"Next time, I'll fire from a closer range. That way they cannot escape!" Ltn. Dole and his wingman streak up and around for another pass. Fire from the bombers is heavy, but his aircraft is still unscathed. Aiming at another bomber, this time the R4Ms and cannon fire from Dole's fighter manage to set the wing on fire. As the bomber falls out of the formation, the crew starts to bail out and float to the jungle below.
Dole feels elation at having knocked down one of the heavies and he still has half of his rockets! That elation is short lived as he feels the 'thump-thump' of rounds hitting his aircraft. Peering into the mirror he sees a Meteor bearing down on him, cannon flashing. Where is his wingman?? Looking around he sees a smoking128 headed for the ground and a single parachute floating in the sky. Dole pulls back on the stick, but the remaining rockets make the handling of the little fighter more sluggish than usual. Despite many minutes of violent maneuvering, Dole is unable to shake his attacker. Things are not looking good. Despite frantic calls for assistance, he finds himself alone in the sky with no help from his friends. Running away isn't an option as the Meteor is faster in a dive.
What to do??? He gets a wild idea. Putting the little aircraft into a dive, Heinrich believes he can hear the enemy gloating at an easy kill. Both dive toward the ground with the Meteor rapidly gaining ground. Dole pulls back on the stick as hard as he can. The little aircraft shudders, nose high in the air. It then stalls and starts to fall on its tail. As it does so, he ripple fires his remaining rockets. Unable to slow down, the Meteor screams past and right into the path of the R4Ms fired from Dole's 128. A rocket take off the tail of the Meteor and send it spinning to the earth below. Having regained control of his aircraft, Dole looks for a parachute and sees one open up many meters below.
Sweating profusely, he checks over the instrument panel looking for damage. Amazingly, and despite holes everywhere, everything looks OK! Calling base on the radio, he finally gets a vector to return home. After an uneventful return flight, Ltn. Dole lands his little fighter back at Bhiwandi and taxis back to his revetment. Many of the bombers had gotten through to drop their weapons on Bombay, but damage was not as bad as it could have been. He later learns that he had shot down the Meteor of British Ace Johnny Johnson. No wonder he had so much trouble shaking him off. Not bad for a kid from Regensburg!
Meanwhile, back at reality……
One of several designs by the Junkers factory, the EF.128 was a design requested in the Fall of 1944. By December of that year, the design EF.128 was accepted for production, with construction jigs being manufactured starting in March of 1945. Needless to say, the war in Europe ended before any prototypes flew.
The design was basically a metal fuselage with wooden wing structure. It was designed around the HeS 011 turbojet and was expected to achieve a maximum speed of nearly 1,000 kph. Armament was to be two 30mm Mk 108 cannon located in the fuselage. A small and compact design, the aircraft would have been quite an adversary.
|
THE KIT |
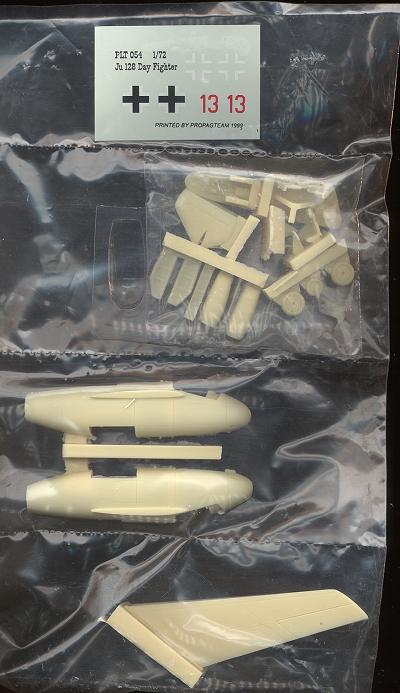
Typical of Planet Models kits, this resin model comes very well packaged with the parts segregated in a clear bag to prevent loss or damage. Decals are by Propagteam and are of excellent quality. Missing are swastikas.
There are 25 resin and one vacuform part. Again, there is only one canopy, so one cannot afford any errors when cutting it. Landing gear legs are also resin which may cause some problems a few years after building the kit as the resin deforms under the weight of the kit. When that happens, you can do as I have done and replace the gear with plastic or metal. The resin is finely engraved and appears to be free of any surface air bubbles. There is a small amount of flash on some of the parts, but nothing to cause concern. The wings are molded side by side on a single block. The same arrangement is done for the tail fins. Just looking through the packing, it appears these items are a bit warped toward the wing. Probably from packing. Running very hot (but not boiling) water over them for a few minutes should enable you to carefully bend them back straight with no problems. The instructions are both sides of a single sheet. One side has a brief history in English and Czech along with a three-view and camouflage scheme. The other side has an exploded diagram showing parts locations. Completely adequate for this type of kit.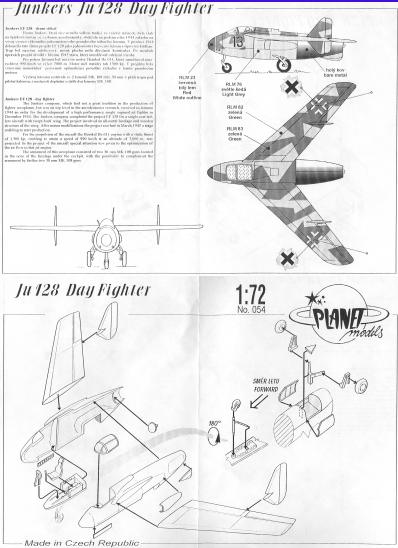
|
CONSTRUCTION |
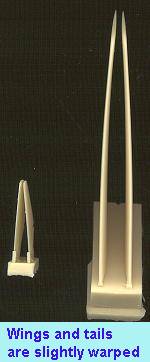
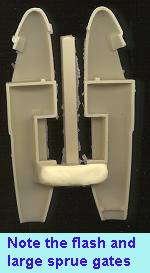 The first step with all resin kits is to remove the parts from the resin plugs. For this, I used a razor saw for the big pieces and scribing with a hobby knife blade for the small, thinner bits. Some of the resin plugs (such as with the fuselage halves {left}) are really big ones and care has to be taken when cutting them off. You also need to be very careful when sanding down these items as you may (as I did on one bit) sand away too much. One of the supports for the nose gear was broken on my kit in addition to the slight warping problems mentioned earlier {right}. A dunk in hot (not boiling) water was all that was needed to cure the warp. Most of the parts had some flash on them, but this is quite common with resin kits and not a major problem. I did do quite a bit of test fitting while cleaning up the bits. One thing I noticed is that the supplied canopy is wider than the cockpit area. Still not sure if I will widen the fuselage or just trim down the canopy to get a good fit.
Once all the pieces have been cleaned up and stored safely away in a zip lock bag, it was time to start on the interior. You are given a very nice one with raised detail on the side consoles and floor as well as the instrument panel. A seat, stick and instrument panel are all that is supplied and it is sufficient for this type of kit. The underside of the cockpit floor is the roof of the nose gear well. It is also nicely detailed.
The seat and stick were superglued in place and when dry, the cockpit was test fitted into the nose section. The instructions are not exactly crystal clear on whether the cockpit fits on top of the ledge or butts up to it. To see which was the best way, I trapped the cockpit between the two fuselage halves and taped the fuselage. It seems to only fit in one position, and that is sort of a combination of the two. If you build the kit you'll see what I mean. While it was firmly trapped, superglue was applied to one fuselage side to keep the cockpit in place. This seems like the best way to install it.
|
|
|
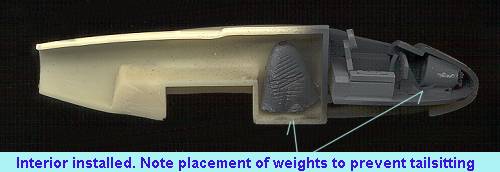
Once that was completed, the cockpit was painted RLM 66 dark grey and the details drybrushed with a lighter grey. Next, several fishing weights were squished and fit into various places forward of the wheel well. At this time the side intakes were also glued into place. Once all this was done the fuselage halves were glued together. Fit is pretty good, but use of an accelerator is highly recommended to speed curing time.
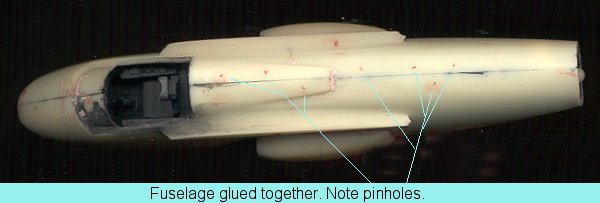 Next a large ridge that is prominent around the fuselage was sanded down. Unfortunately, this revealed a lot of small air bubbles as the resin was removed. To fill these, I used Bondo body filler. It is a very thin filler and fills these holes quite well. You can also use Mr. Surfacer on the smaller holes. After several applications to this and where the intakes meet the body, it was on to the landing gear.
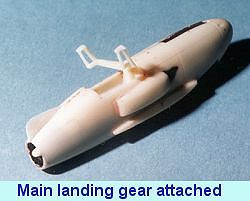
The main gear is a 'Y' shaped assembly onto which the wheel attachment bits are glued. First thing I did was glue the 'Y' strut in. Then the end pieces were glued into place. Not the easiest thing to do and without accelerator, I would have been truly screwed. At this time the tail bumper was also installed.
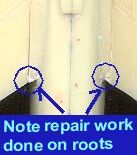
 Attachment of the wings is subsequent step. First, however, they had to be 'dewarped'. This was accomplished by heating water to near boiling and then immersing the wing into it. The warp was gently bent out of it and the wing then cold water was run over it to fix it's new position. This step was repeated several times before I got it right. Then a hole was drilled into the wing root to accept a section of paper clip. One of the wings had a chunk taken out of the trailing edge so this was filled using super glue. Then the wings and wing roots were drilled to accept a small section of paper clip to get a more positive connection. Once the wings were superglued in place, the bits broken on the aft section of the wing roots were repaired in the same way as the wing with bits of plastic and superglue.
Once those were completed, the rudders were place in between the ailerons and the flaps. My tails needed a bit of extra resin removed to fit in far enough. There is a discrepancy between the instructions and the box art as to how far these fit into the wing. I placed mine to where the front of them was almost even with the hinge line of the ailerons and flaps. Then the aircraft was turned upside down and the nose gear leg was installed. This is a very flimsy construct even after bracing. It will be interesting to see how long it lasts. Finally, the small forward main gear door was glued in place. The nose wheel was left off until after preliminary painting.
|
PAINT & DECALS |
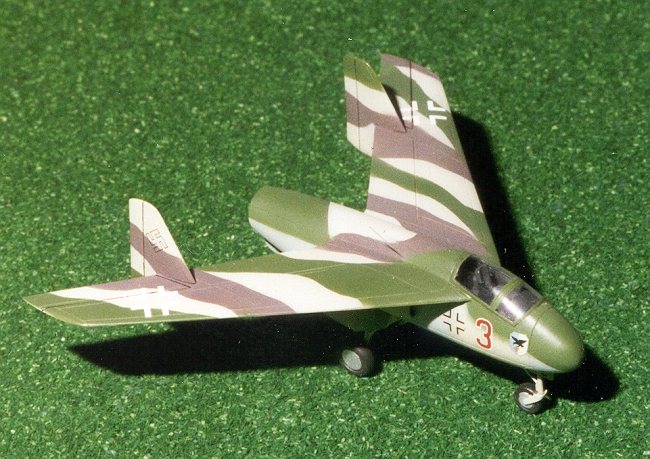
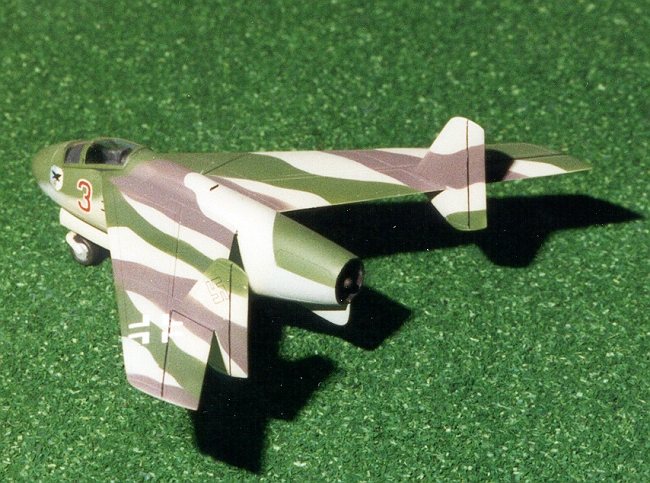
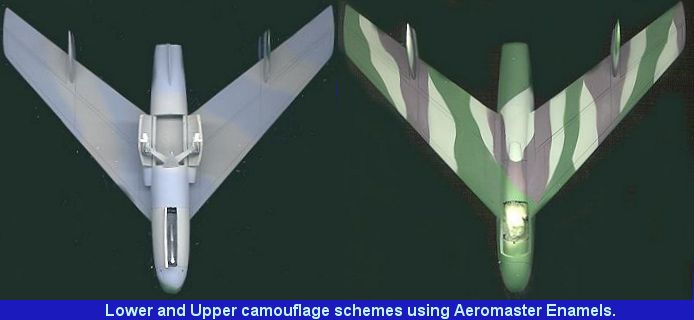
With the airframe basically complete, it was time to start painting. The airframe was given a nice overall coat of 'RLM 84' sky green to act as a primer. In my alternate world, this color was also used as a primer instead of the previous RLM 02 green-grey, because it made the inside areas like wheel wells brighter and easier to work in, much for the same reasons modern aircraft have these areas painted white today. Once that was completed the underside was sprayed with bands of RLM 76. Next the upperside. This was a rather complicated scheme using the underlying RLM 84 along with hard masked bands of RLM 81 Brown-Violet and RLM 83 Light green. The tailplanes were also painted with the upper scheme. Actually, it doesn't look that bad when done!
Once that was done, the aircraft was sprayed with Future acrylic gloss in anticipation of the decals. Planet Models' decals are done by Propagteam. Mine were slightly off register so the underwing crosses needed to be trimmed. You get a set of numbers, upper and lower wing crosses. That's it. Swastikas for the tail came from Xtradecal, and the fuselage side cross from a Microscale sheet of fighter insignia. The unit badge was gleaned from an old ESCI Ju-88 sheet that has a bunch of spare badges for various Bf-109 and 110 units.
Once the decals were dry, the wheels were put on and the kit then oversprayed with clear matte to seal the decals. Any touchup painting was done at this time. Final steps include installing radio antenna (stretched sprue) and the vacuform canopy. This kit's example was too wide for the cockpit opening. After much fussing and fuming about it, I finally managed to fudge it enough to fit, but am not really pleased with the result.
|
CONCLUSIONS |
Overall a nice kit, though one that does require some experience in resin construction, especially dealing with pinholes and vacuform canopies. Must confess that those two areas are reason that I don't build more resin kits. I am pleased with the results and have received a number of positive comments on the kit from fellow modelers.
|
REFERENCES |
German Jet Genesis
, by David Masters, 1982Jet Planes of the Third Reich; Secret Projects Vol 1 by Manfred Griehl , 1999
Luftwaffe Project Aircraft : #1 Junkers EF.128 by Dan Johnson and Daniele Sabatini, 1999
Many thanks to Dan Johnson of Luft '46 and to Planet Models for a chance to build this kit.
Copyright ModelingMadness.com. All rights reserved. No reproduction in part or in whole without express permission from the editor.
Back to Reviews Page 2023